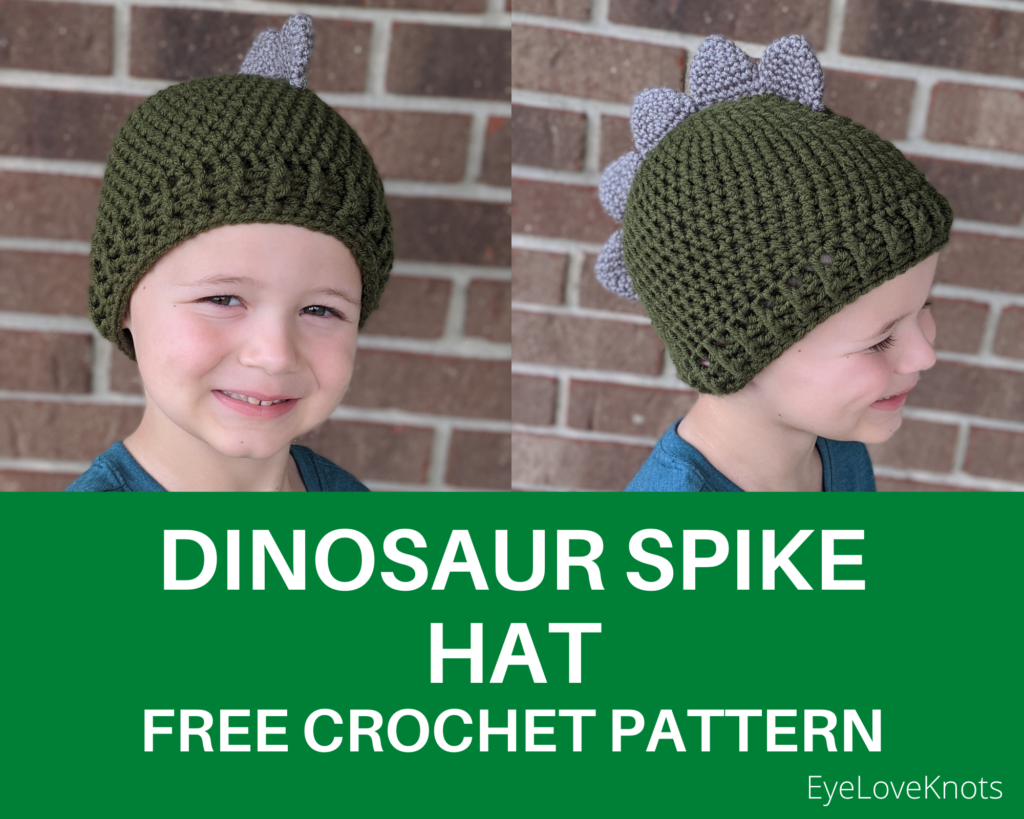
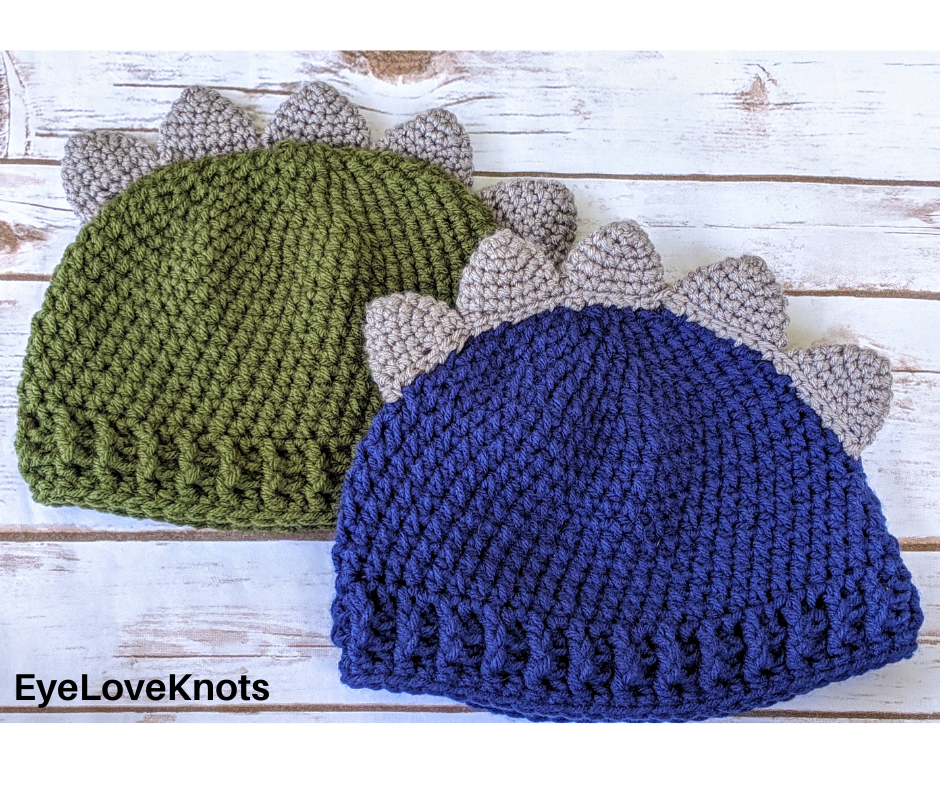
Free crochet pattern for how-to crochet the Dinosaur Spike Hat by Double Knotted Crochet.
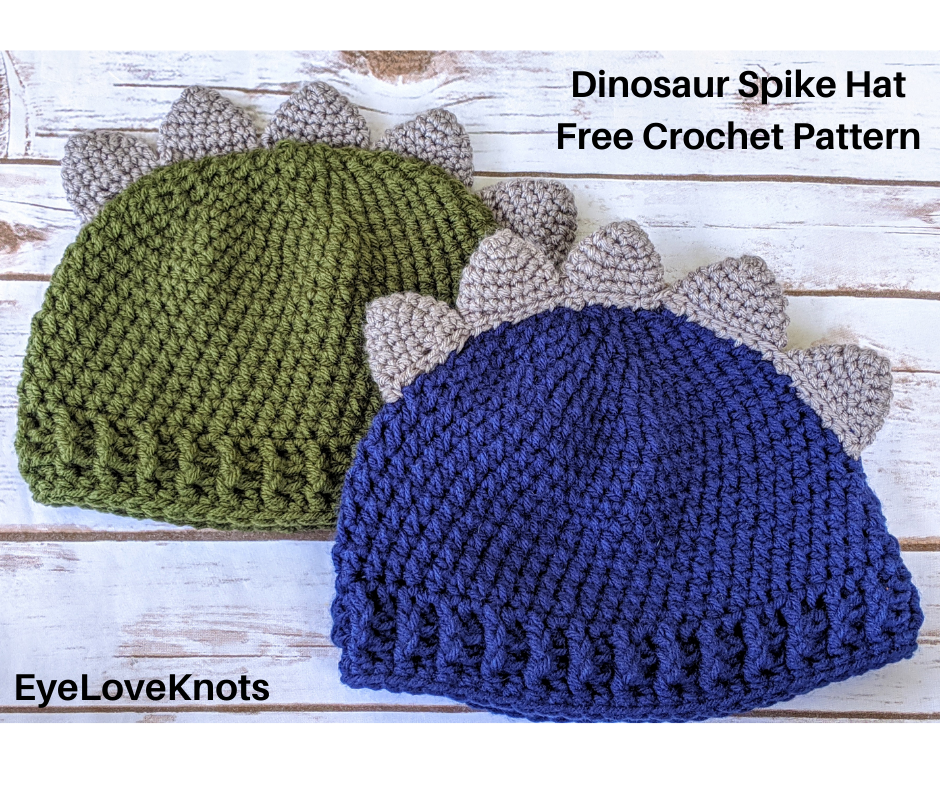
Shawna here, of Double Knotted Crochet back to share a free crochet hat for you!
I know, I know – there are a million and one crochet dinosaur hats out there. Why do we need another one?
Well, because this one is faster, easier, and so stinking cute! I got the idea for how to lay the stitches from Kayte of KayteDids, an amazing crochet designer on both Etsy and Instagram. I purchased her unicorn purse pattern and in that pattern, she explains that she does her HDC in the “big space” (in between the stitches) rather than through the top of the stitch. In doing so, the ability to see the rows is drastically reduced and it creates an amazing textile. So I reached out to Kayte and told her she gave me all the inspiration and I set out to create my own dinosaur hat for preschoolers.
While this pattern is only for Toddler up to age 5, the basics of the hat follow a very simple increase pattern and would be simple enough to scale either smaller or larger to fit another age group. I will include diameter sizes in the pattern notes section.
If you would like a PDF version of this post, you may get one through my Double Knotted Crochet Etsy Shop for a small fee. This fee is to compensate for the views lost when you no longer need to return to the blog to for the information, as you will have your own copy. Plus! It helps fund supplies for new projects to share with you!
Double Knotted Crochet Etsy Shop: Dinosaur Spike Hat
Materials:
- Two colors of weight 4, worsted weight yarn – I used Hobby Lobby’s I Love This Yarn in Dark Olive and Greybeard
- H8/5mm crochet hook
- Stitch Marker
- Sewing needle for sewing in ends
- Scissors
Yarn Alternatives:
Red Heart’s With Love, Berroco’s Vintage
Time Spent:
About an hour and a half from start to fully constructed.
Measurements:
Pattern is for Toddler up to 5 years, and measures 7 1/4 inches from crown to bottom of brim, and 18″ in circumference to fit a head size of 18 – 20″.
Gauge:
13 DC by 7 rows = 4″
Abbreviations:
- SC: Single Crochet
- HDC: Half Double Crochet
- DC: Double Crochet
- FPDC: Front Post Double Crochet
- BPDC: Back post double crochet
Pattern Notes:
An alternative to the magic ring is to chain 3, then slip stitch join to form a ring, and work the half double crochet’s into the center of the ring.
For the body of the hat (beginning through Round 17), you will crochet into the space that is in between the stitches (where the posts are) as opposed to the top of the half double crochet.
The body of the hat and spikes are worked in spiral, meaning no slip stitch join at the end of each round. Use stitch marker to note first stitch of each round.
For help measuring your crown, and hat length, check out the photo tutorial here on the EyeLoveKnots blog for the Women’s Basic Beanie.
To make other sizes, work more or less increases until your crown is the following diameter (which fits this head circumference):
- Newborn: 4.25″ (13″ – 14″)
- 3 – 6 Months: 4.75″ (15″ – 16″)
- 6 – 12 Months: 5.5″ (17″ – 19″)
- Child/Adult Small: 6.25″ (20″ – 22″)
- Adult Large: 6.75″ (22″ – 23″)
Then work the hat in pattern until it measures the following length, then pick up in pattern at Round 18 through the end (which will end up this final length):
- Newborn: 4″ (5.25″)
- 3 – 6 Months: 4.25″ (5.5″)
- 6 – 12 Months: 4.75″ (6″)
- Child: 6″ (7.25″)
- Adult Small: 7.25″ (8.5″)
- Adult Large: 7.25″ (8.5″) – 8.25″ (9.5″)
Hat: (Toddler Up to 5 Years):
In Main Color, and a Magic Ring, HDC 8. (8 HDC)
R2: 2 HDC into each space around. (16 HDC)
R3: (HDC into the next space, 2 HDC into the next space) 8x. (24 HDC)
R4: HDC into the next 2 spaces, 2 HDC into the next space) 8x. (32 HDC)
R5: HDC into the next 3 spaces, 2 HDC into the next space) 8x. (40 HDC)
R6: HDC into the next 4 spaces, 2 HDC into the next space) 8x. (48 HDC)
R7: HDC into the next 5 spaces, 2 HDC into the next space) 8x. (56 HDC)
*Checkpoint: Measure the diameter of your crown now to ensure it measures 5.75″.
R8 – 17: HDC into each space around. (56 HDC)
*Checkpoint: Measure hat to ensure it measures 6″ from crown to bottom of last row before moving on. If needed, work more repeats until it reaches this length.
R18: Slip stitch join into the actual stitch of the next HDC, chain 3, DC into the next 55 HDC. Slip stitch join to the 3rd chain of the beginning chain 3.
R19: Chain 2. FPDC around the chain 3 from the previous round, BPDC around the next stitch, (FPDC around the next stitch, BPDC around the next stitch) 27x. Slip stitch join to the 1st FPDC.
R20: Chain 2. FPDC around the FPDC that is just below the beginning chain 2, BPDC around the next stitch, (FPDC around the next stitch, BPDC around the next stitch) 27x. Slip stitch join to the 1st FPDC.
R21: Chain 1. SC into the same stitch, and into each stitch around. Slip stitch join to the 1st SC. (56 SC)
Fasten off, and weave in ends.
Spikes: Make 5, do not fasten off on 5th spike
In Coordinating Color & Magic Ring, SC 6. (6 SC)
R2: (SC into the next space, 2 SC into the next space) 3x. (9 SC)
R3: (SC into the next 2 spaces, 2 SC into the next space) 3x. (12 SC)
R4: (SC into the next 3 spaces, 2 SC into the next space) 3x. (15 SC)
R5 – 6: SC into each space around. (15 SC)
At the end of Round 6, fasten off all but the last spike, and tuck the ends inside the spike.
At the completion of the 5th spike, chain 1, SC across the base of this spike, and continue adding spikes on end as you go. Leave a long tail for sewing.
Assembly:
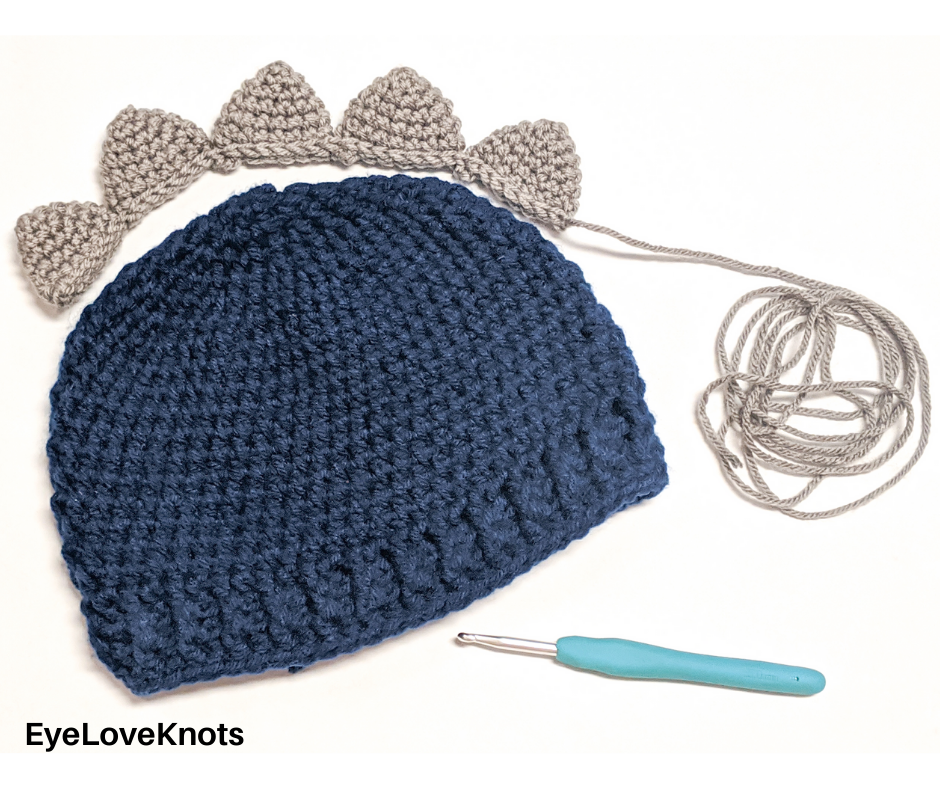
Line up spikes across top of hat and sew onto top of hat, positioning back spike about 4 rows above the hat’s ribbed brim. Weave in ends.
Please feel free to make and sell your own Dinosaur Spike Hat using this pattern, but please DO NOT claim this pattern as your own nor should you sell my pattern, and DO NOT re-publish my photos as your own. DO NOT copy and paste my pattern anywhere, link to it instead.
Don’t forget to check me out on Instagram @doubleknottedcrochet for all kinds of awesome crochet makes and inspiration!
Join the EyeLoveKnots Crafting Community on Facebook to share your creations, and see what others are up to!
Linked Up To…
Craft Schooling Sunday – Creative Jewish Mom
Happiness is Homemade Link Party #322 – Design Morsels
Ginx Woolly Linx Party May – Ginx Craft
Handmade Monday #175 – Sum of their Stories
Craftastic Monday Link Party – Sew Can Do
Little Cottage Link Party #51 – Love my Little Cottage
547th Inspire Me Tuesday – A Stroll Thru Life
Fabulous Party #319 – Lou Lou Girls
Hookin’ on Hump Day #214 – Moogly
Linky Ladies Party #184 – The Purple Poncho
{Wow Me} Wednesday #454 – Ginger Snap Crafts
Your Whims Wednesday #459 – My Girlish Whims
The Wednesday Link Party #347 – The Stitchin’ Mommy
To Grandma’s House We Go Link Party 192 – Chas’ Crazy Creations
Scrappy Stitchers Link Party #63 – Stitches n Scraps
Thursday Favorite Things #439 – An Artful Mom
Creatively Crafty Link Party #223 – Life Beyond the Kitchen
Creative Compulsions Linky Party #59 – My Bijou Life
Pin Party #368 – The Pin Junkie
May 2020 Best of the Month – Calypso in the Country
Create, Bake, Grow & Gather Party #419 – Shabby Art Boutique
Home Matters Linky Party #282 – Modern on Monticello
Traffic Jam Weekend Linky Party #233 – My Bijou Life
Handmade & Otherwise Weekly Link Up Week 49 – Petals, Pies and Otherwise
Snickerdoodle Create Bake Make Link Party 335 – EyeLoveKnots
Unlimited Monthly Link Party 13 – Grammy’s Grid
This is absolutely adorable! Pinning!
Michelle
https://mybijoulifeonline.com
Pin away! I’m happy you enjoyed!
Looks great! I love it! =)
Thank you very much!
So cute! My son used to love dinosaurs when he was little.
Carrie
curlycraftymom.com
My son is 4 and adores them!
You’re right, totally stinking cute!!
Well, thank you so much!!
So very adorable! You did a great job on creating this. Thanks for sharing at #HomeMattersParty
Thank you very much!
What a super idea. He is a bit old now, but my son would have loved on of these hats about 10 years ago. Thanks for sharing at Ginx Woolly Linx Party
My son is 4 and definitely has fun in his!
this looks like an easy pattern that will be a lot of joy to some kids. thanks
One of my favorite things is making things for little kids. Brings me so much joy to see them enjoying it.
You are most welcome! Share a photo with us if you make one, we’d love to see!
I’m on row 18 and it fits my head so I’m worried it won’t fit my 2 year old grandson. Any advice? It just seems awful wide. I measured at each checkpoint and I was exactly as it says.
With the hat laying flat, how wide is it measuring across the bottom?
6 3/4”
And btw, I am “hooked” on your patterns! I have already made 6 different patterns and they been so easy and clear and turned out amazing!
That makes me so happy to hear!
WOW thanks so much for the spike pinning solution,i struggle alot with it,and have to cut the spikes and start all over,thanks sooooooo much
Yay! So glad it helped you!
Hi,
Not the best at crochet, is each spike crocheted separately and then all spikes sewn together and then sewn atop hat?
Thanks
Liz
Hi Liz! For the spikes, you fasten off each one except the last one, then you’ll single crochet along the bottom of each one to join them together into a long strip, then sewn onto the hat.