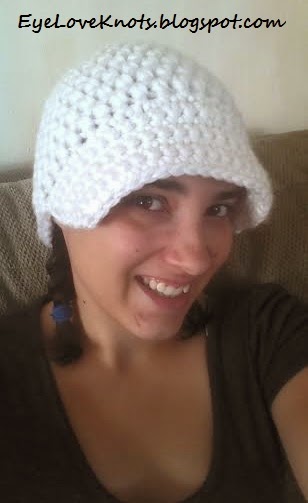
I had three balls of the Hometown USA Yarn – Fort Worth Blue, Cincinnati Red, and New York White – sitting around from the 4th of July. I was working on some Mini Blankets for my sister-in-laws photography stuff – Briana Lugo Photography – and had an idea in mind to make an American Flag blanket. I did start it, but I didn’t like how the blanket was working up. The yarn is VERY thick. It worked great for this hat though!
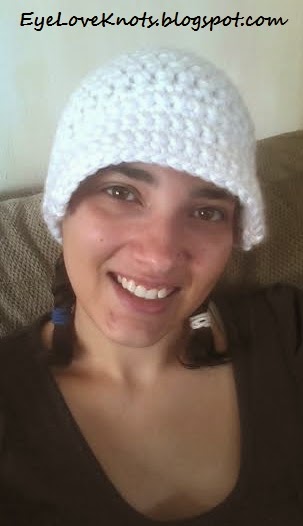
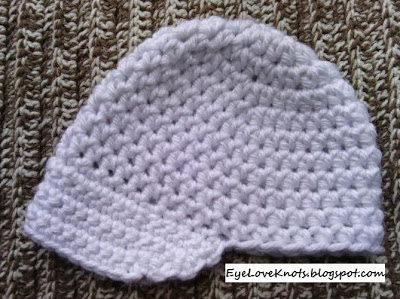
When I started this hat, my idea was to make it into a baseball cap-like for my friend, Keef, but I couldn’t get the bill to come out just right. So… after a while, I changed plans and decided to go with a brim I knew I already loved – and it became a new hat for my collection!
While I did use Super Bulky yarn for this hat, I wore it around all day yesterday (with a high of 92 degrees Fahrenheit!) and I was comfortable. I’m not sure if it was because the hat was of white color but I’m not complaining – very happy camper here.
It would also definitely make a GREAT hat for the upcoming Fall and Winter Seasons!
Materials:
– Small Hook (such as a D3/3.25mm) to weave in your ends
– K10.5/6.5mm Hook
– N15/10mm Hook
-1 (2) Balls of Super Bulky Yarn (6) – I used Hometown USA in New York White
Material Notes:
Yarn Alternatives: Homespun Thick & Quick, Wool Ease Thick & Quick, or 2-3 Strands of Regular Wool Ease Held Together
Time Spent:
Each hat took about an hour to work up.
Measurements:
18″ (23″)
The 18″ has a flat crown diameter of 5.5″, and the 23″ has a flat crown diameter of 7.25″.
These hats will almost reach down to the bottom of your ear but not quite! If you want it to completely cover your ear, just add an extra row or 2 to the bottom of the hat.
My head measures 21.25″ in circumference and the 18″ fits comfortably! It even fits my boyfriend, Chad, and his brother, Lucas. If I were going to make them a hat though, I would follow the instructions for the 23″ pattern just to make sure they are extra comfortable (even though they both said they were fine in mine!)
Abbreviations:
CH – Chain
HDC – Half Double Crochet
ST – Stitch
Sl St – Slip Stitch
Notes for Pattern:
Beanie’s are worked in continuous rounds so no joining or chaining 1 in between rounds.
You absolutely can join and chain 1 at the end of each round if you’re more comfortable with that. If you do, there will be a visible seam and the beanie will work up just a tad bit bigger.
Weaving in ends will be done with the smallest crochet hook – since weaving the thick yarn with an embroidery needle is difficult. You will have the same result and it will be easier than trying to fight with the needle and yarn.
If you’re more comfortable using a needle for weaving in your ends, feel free to do so instead!
Pattern:
CH 5. Join to form ring. CH 1, 10 HDC in ring. Join.
Row 2: 2 HDC in ea ST around (20 HDC)
Row 3: 2 HDC in 1st ST, 1 HDC in next ST, (2 HDC in next ST, 1 HDC in next ST) around. (30 HDC)
Row 4: 2 HDC in 1st ST, 1 HDC in next 2 STS, (2 HDC in next ST, 1 HDC in next 2 STS) around. (40 HDC)
(23″ Only – Row 5): 2 HDC in 1st ST, 1 HDC in next 7 STS, (2 HDC in next ST, 1 HDC in next 7 STS) around. (45 HDC)
Row 5 – 11 (6 – 12): HDC in ea ST around.
If you want just a plain, chunky beanie, simply leave off the brim and you’re done!
Otherwise, continue on with the Brim. DO NOT FASTEN OFF.
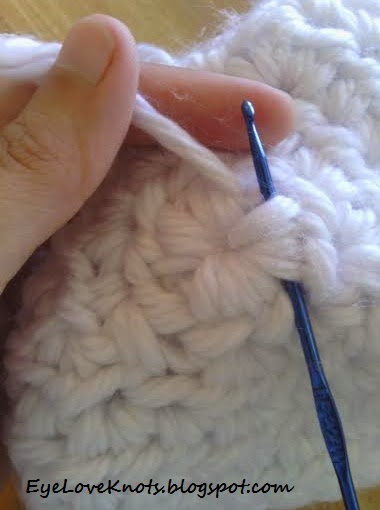
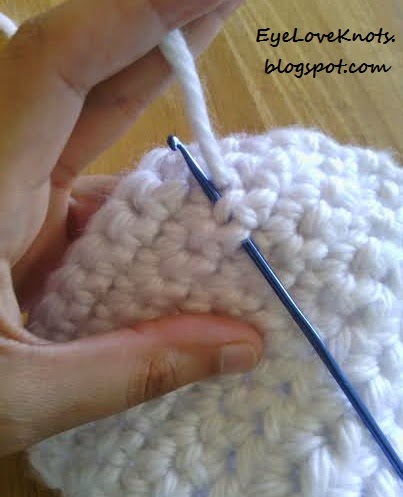
To Make the Brim: Switch to a K10.5/6.5mm.
Sl St into the next ST, chain 1, SC into the 1st 3 stitches, (2 SC into the next stitch, SC into each of the next 2 stitches) 4x.
R2 – 3: Chain 1. SC2tog, SC across to the last two stitches, SC2tog
Fasten off.
Please feel free to make and sell this beanie, but please DO NOT claim this pattern as your own nor should you sell my pattern, and DO NOT re-publish my photos as your own. DO NOT copy and paste my pattern anywhere, link to it instead.
With so many size, yarn type and color options, I would love to see them! Join the EyeLoveKnots Crafting Community to share your creations, and see what other’s are up to!
Check out the EyeLoveKnots Ravelry page to keep track of all your EyeLoveKnots favorites in your que, and share your WIPS and finished projects!
Don’t miss out on new crochet patterns, reviews, jewelry tutorials and more! Subscribe to EyeLoveKnots by using the box on the right side toolbar, or follow me via Bloglovin! You can also find me sharing on the EyeLoveKnots Facebook page, and @EyeLoveKnots on Twitter!
Linking Up To:
The Creative Collection Link Party – The Cards We Drew
Hookin’ On Hump Day #75 – Moogly Blog
6 Pallet Projects & Inspiration Monday Party – Scattered Thoughts of a Crafty Mom
Summer Creativity_Im Lovin It #217 – Tidy Mom
Show & Tell Saturday – Be Different Act Normal
Nifty Thrifty Sunday #165 – Nifty Thrifty Things
Think Pink Sunday #174 – Flamingo Toes
Craft Schooling Sunday – Creative Jewish Mom
Sharing Time Week 2 – Raising Memories
Serenity You #142 – Serenity You
Craft Showcase Link Party – Bowdabra Blog
Finding Peace Share Your Creativity Party #121 – Its Overflowing
I attempted to crochet a hat like this a few years back, I could not figure out the brim! Maybe I'll give it a go.
The first hat I tried with the brim didn't really work out as I expected but since having more experience making my own hats, I'm glad I tried the first one because I used the brim of it for this hat! Perfect! Maybe the second time will be the charm for you too!