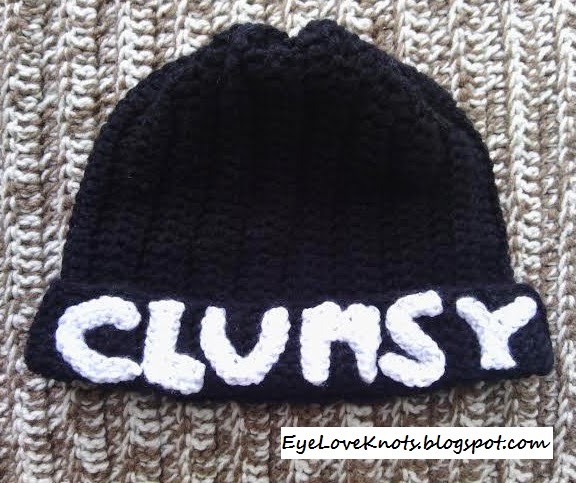
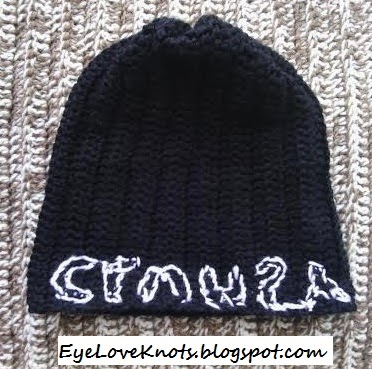
This beanie was a custom order from a friend – thanks for the challenge Aaron and Areonna! The request was a black beanie with white letters to spell “Clumsy”. Below, you’ll find my response.
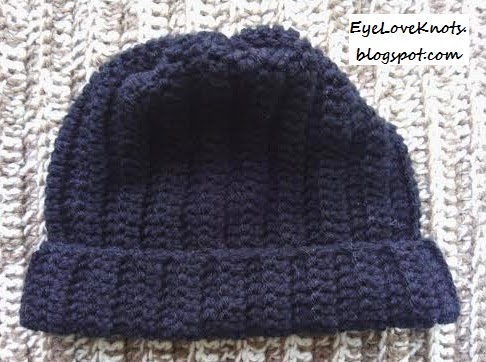 I used my Ribbing Beanie pattern. I’ve personally worn this beanie and knew it would fit well with the rolled up end.
*This beanie measures approximately 10.5″ in length which would give me a 2″ rolled up brim. If you want your hat to be longer, simply add more chains to the beginning of the hat pattern.
As is, this hat measures 18″ in circumference but will stretch to fit a range of sizes INCLUDING the average man and woman’s head.
I did some experimenting with letters. It wasn’t as easy as I thought it would be.
 First, I tried to use small wood letters from Hobby Lobby to trace onto felt and then sew the felt letters on. – FAIL.
Second, I tried to use the holes in the hat as a grid for cross stitching letters but the gaps in between were too large so it didn’t look right. – FAIL.
Lastly, I sat down and crocheted up some small letters. You can find my patterns below. I tried my best to get them to be less than 2″ in length since that’s all that I allowed for in the beanie sizing. I envisioned my letters going across the rolled up brim but you could put the letters anywhere you want or make them in any size.
Materials:
– Worsted Weight Yarn – I used Hobby Lobby’s I Love This Yarn in Black and Vanna’s Choice Yarn in White
*I used about half a ball of the black yarn, and a tad bit of the white yarn.
– 5.5mm and 4mm Hook
– Needle for sewing letters on and weaving in ends
– Sewing Pins (optional) to pin letters in place
Time Spent:
This beanie is a little involved. The beanie itself took about an hour and a half to complete. The letters took an additional hour and a half to crochet and sew onto the hat.
Abbreviations:
CH – Chain
SL ST – Slip Stitch
SC – Single Crochet
ea – Each
SC2TOG – Single Crochet Two Stitches Together = Decrease
Measurements:
I made this hat to fit an adult woman but it will also fit a man.
Hat: 18″ x 10.25″.
The brim is rolled up 2″.
The letters average 1.5″ tall x 1.5″ wide.
Notes for Pattern:
Beanie Pattern – Crochet Adult Ribbing Beanie
This is where you will need the main color yarn and 5.5mm hook.
For the letters you will use your coordinating color and 4mm hook.
Patterns:
Letter C & U
CH 11. Turn to work on the backside of the CH. 2 SC in 2nd CH, 2 SC in next CH, SC in next CH, SC in next CH, 2 SC in next CH, 2 SC in next CH, SC in next CH, SC in next CH, 2 SC in next CH, 2 SC in next CH.
Fasten off with long tail for sewing.
Letter L
CH 8. Turn to work on the backside of the CH. SC in 2nd CH and across. (7 SC)
Row 2: CH 1, turn. SL ST in ea ST across.
Row 3-5: CH 1, turn. SC in 1st ST and 2nd ST.
Fasten off with long tail for sewing.
Letter M
CH 8. Turn to work on the backside of the CH. SC in 2nd CH and across. (7 SC)
Row 2: CH 1, turn. SC2TOG, SC in next SC.
Row 3: CH 1, turn. 2 SC in 1st ST, SC in next SC.
Row 4: CH 1, turn. 2 SC in 1st ST, SC in next SC. CH 4.
Row 5: Turn to work on backside of CH 4, SC in 2nd CH and next 2 CHs then adjust to work into the prev row of SC. SC in next 3 STs.
Fasten off with long tail for sewing.
Letter S
CH 17. SC in 2nd and across.
Fasten off with long tail for sewing – You will sew into shape.
Letter Y
CH 8. SC in 2nd CH and next 3 CHs. CH 4. Turn to work on the backside of the CHs, SC in 2nd, 3rd and 4th CHs, SC in side of previous SC, SC in next 3 CHs.
Fasten off with long tail for sewing.
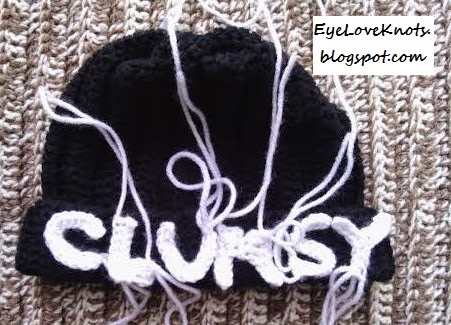 At this point, you can using your sewing pins to pin your letters in place or you can just sew as you go (like I did). I didn’t measure placement out, I just eye-balled it.
You will notice on each letter, you have the long tail you cut when you fastened off the letter and the shorter one from when you began crocheting your letter. You do not need to weave in this shorter tail as you can hide it under neath your letter as you sew it down, but feel free to weave it in if you want.
My letters are only sewn onto the rolled up brim so the backside of the letters is sandwiched making it not visible. The brim will stayed rolled up by itself – it doesn’t flop – but you can certainly take a few stitches to it to attach it to the rest of the beanie making sure it doesn’t unfold. I didn’t.
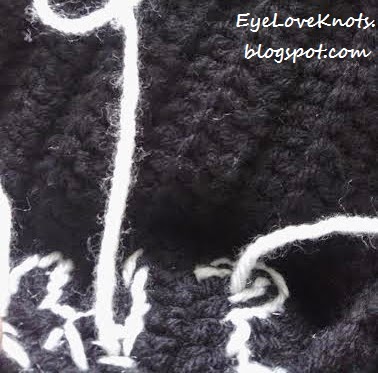
I used my long tail to sew through the chains along the outside of the letters. I like to sew them on this way so no ends are available to be pulled up. As this beanie is machine washable, although hand washing is recommended, sewing all of the edges of the letters will prevent them from pulling up after being washed as well as from lots of wear.
 After you’ve sewn around your letters, just weave your remaining tail piece into the back of the work and cut.
After all the letters are sewn on, I found that the “C” and the “Y” rested on my temples. This beanie is not something you could read all of the letters at first glance. The less letters – the better you can read them. For example, the initials of your school would be good – I plan on making one of these. Another example is a shorter word (or name) – ie “Alex”, “Yeah”, “June”, etc…
WARNING: If you look at yourself in the mirror, your phrase/letters will appear backwards. Don’t worry! That means you did it right.
Please feel free to make and sell this hat, but please DO NOT claim this pattern as your own nor should you sell my pattern, and DO NOT re-publish my photos as your own. DO NOT copy and paste my pattern anywhere, rather you should link to it. Thanks!
**If you want to see another tutorial with another word/letters on it, message me and I will do my best to put it together for you!
With so many size, yarn type and color options, I would love to see them! Join the EyeLoveKnots Crafting Community to share your creations, and see what other’s are up to!
Check out the EyeLoveKnots Ravelry page to keep track of all your EyeLoveKnots favorites in your que, and share your WIPS and finished projects!
Don’t miss out on new crochet patterns, reviews, jewelry tutorials and more! Subscribe to EyeLoveKnots by using the box on the right side toolbar, or follow me via Bloglovin! You can also find me sharing on the EyeLoveKnots Facebook page, and @EyeLoveKnots on Twitter!
Linked Up To:
Hookin’ On Hump Day #75 – Moogly Blog
6 Pallet Projects & Inspiration Monday Party – Scattered Thoughts of a Crafty Mom
Summer Creativity_Im Lovin It #217 – Tidy Mom
Show & Tell Saturday – Be Different Act Normal
Nifty Thrifty Sunday #165 – Nifty Thrifty Things
Think Pink Sunday #174 – Flamingo Toes
Craft Schooling Sunday – Creative Jewish Mom
Sharing Time Week 2 – Raising Memories
Serenity You #142 – Serenity You
Craft Showcase Link Party – Bowdabra Blog
Finding Peace Share Your Creativity Party #121 – Its Overflowing
Once again, well done! I don't think I could have figured out how to get the letters on there and have it still be readable!
It was quite a challenge and it took a few attempts but in the end, it's very rewarding when you figure it out and it works.