My mom loves to crochet edgings around receiving blankets to give as gifts. She keeps telling me how easy it is and that I should try it too but I’m stubborn and kept putting it off.
Last week, I received an email from Joann’s saying Fleece was on sale so I decided to visit Joann’s to pick some up. We’ll talk about this tomorrow.
I also did a Google search for a “perforating blade”. One of the first items I found for perforating blade was the Skip-Stitch Perforating Rotary Blade Facebook page. I followed the link to the Skip Stitch site and decided to order the Blade #1. It states that it is “perfect for perforating fleece and similar fabrics…”
While at Joann’s, I also purchased the 45mm Fiskar’s Rotary Cutter (with my coupon!).
This following post is on changing the blade out from the straight edge one it comes with to the perforating blade.
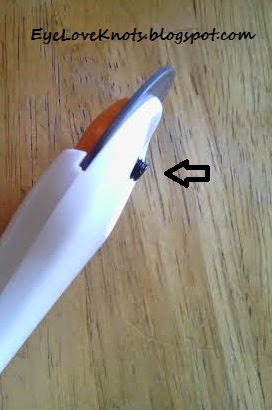
CAUTION: USE CAUTION!! VERY SHARP!
 |
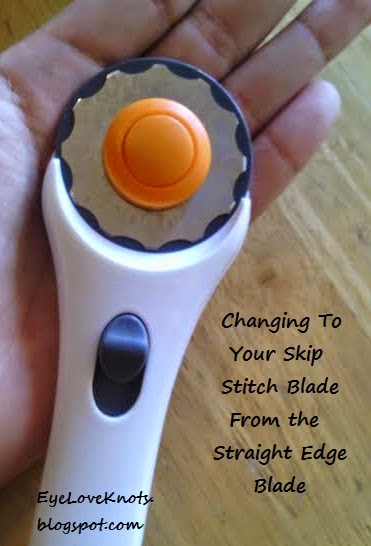
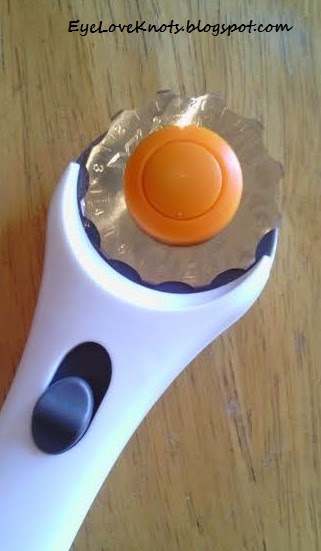
| This is the view of the front. |
 |
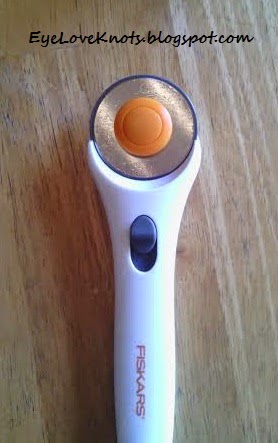
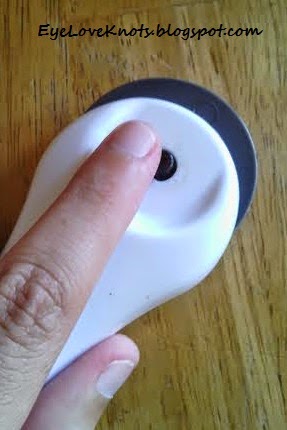
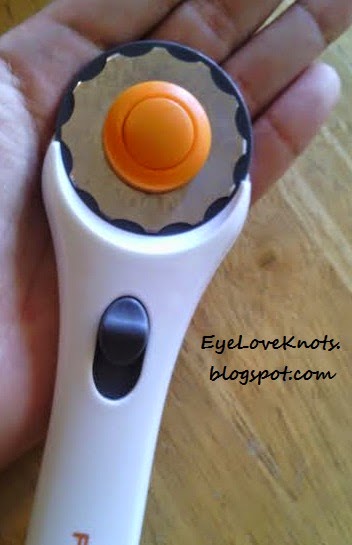
| This is the view of the back. The dark gray crescent moon piece on the top that you see is the a protecting cover. The button you see in the first image is what you use to bring the blade out and back in. |
 |
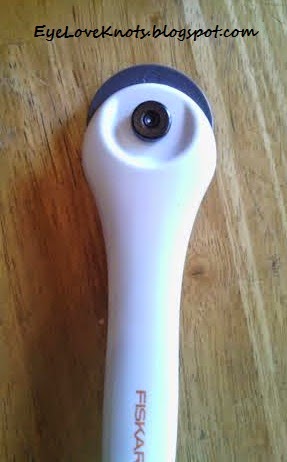
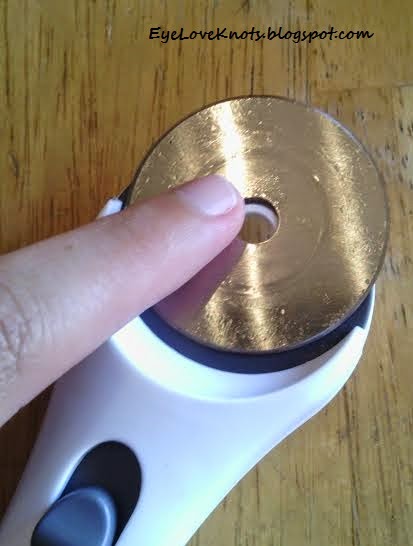
| First, you’ll need to remove the nut on the. Use your index finger to hold the big orange piece so it doesn’t move (after you loose the nut). |
 |
| Next, unscrew the nute. |
 |
| To remove the screw, I faced the blade side down and used my index finger to push down on the screw. |
 |
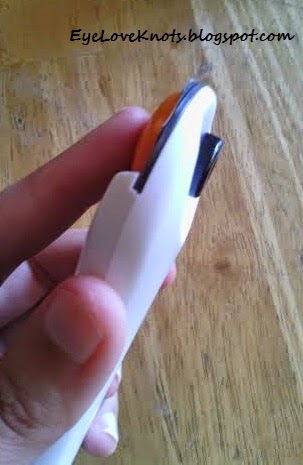
| I CAREFULLY slide off the blade onto a folded piece of card stock. I’m sure there is a pair of pliers you could use for this, but I didn’t have any around. I was just extra careful as I was sliding off the blade. I also kept my finger on the shiny, flat part and used light pressure so as not to slip. |
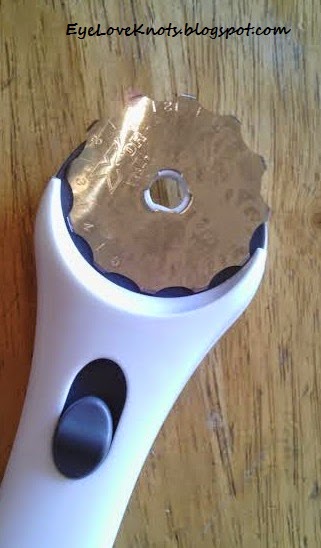 |
| To place on the skip stitch blade, I CAREFULLY slid it off a piece of folded card stock and onto the rotary cutter. Then I CAREFULLY moved it into place using my finger tip on the shiny, flat part of the blade. CAUTION: The pokey parts that are used to do the perforating are SHARP! |
 |
| Replace the screw, place index finger on the orange piece and tilt to replace the nut on the reverse side. IF you don’t hold the orange piece, the screw will keep turning around. |
 |
| Tada! Use the button to retract the blade until ready to use. |
Here’s a preview of what’s to come tomorrow! Make sure to check back then!!
It will include a free pattern and fabric review.

Linked Up To…
10 Simple DIY Projects, I’m Lovin It – Tidy Mom
Kitchen Fun and Craft Friday #28 – Kitchen Fun with My 3 Sons
Wonderful Blog Hop #5 – A Mother’s Shadow
Yarn Fanatic Party #4 – The Philosopher’s Wife
Sharing Time Week 5 – Raising Memories
Creative Collection Link Party – Blooming Homestead / The Cards We Drew
Best DIY Projects and Recipes #19 – The 36th Avenue
Serenity Saturday #148 – Serenity You
Craft Schooling Sunday – Creative Jewish Mom
Easy Weeknight Dinner Ideas, Inspiration Monday – Scattered Thoughts of a Crafty Mom
Grateful Heart Linky Party – It’s Overflowing
Think Pink Sunday No. 180 – Flamingo Toes
The Sunday Showcase No. 257 – By Stephanie Lynn
Leave a Reply