I recently moved all of my stuff from one room in my house to another room in my house. You would not believe all of the plastic shopping bags I pulled out of my closest! I would need like five or more plastic bag bag holders to house my collection – Yikes! It doesn’t help that I can’t just put them out in my recycling bin, as it is not recyclable in this manner.
I decided to try my hand at making plarn, and a handbag.
This process does take quite a long time as you must cut up all of the bags and then loop them all together and roll into a ball (if you feel like it in the end). So you may want to put together a small bowl of fruit, grab a cup of coffee, put on your favorite show/movie or whatever you would like by your side to help pass the time.
It took me approximately 3 minutes to cut up on bag and loop all the pieces together.
First things, first. I sorted my plastic bags into piles of the stores they came from. I wanted my handbag to have a consistent coloring to it.
I concluded I had the most bags from Winn Dixie (White and Black), and the most amount of colored bags from Walmart (Gray).
I pulled out 40 Winn Dixie Bags and 10 Walmart Bags and got to work.
Below you will find the tutorial for creating plarn so you can make your own! Free handbag pattern to follow!
11.22.14 UPDATE: Today, I received an email notification for a new post from Jenny of Crochet is the Way – How to Make Delicate Thread Weight Plarn. It is a great tutorial showing you how to use a rotary cutter and the spiral method of making plarn. It’s a great alternative to this way.
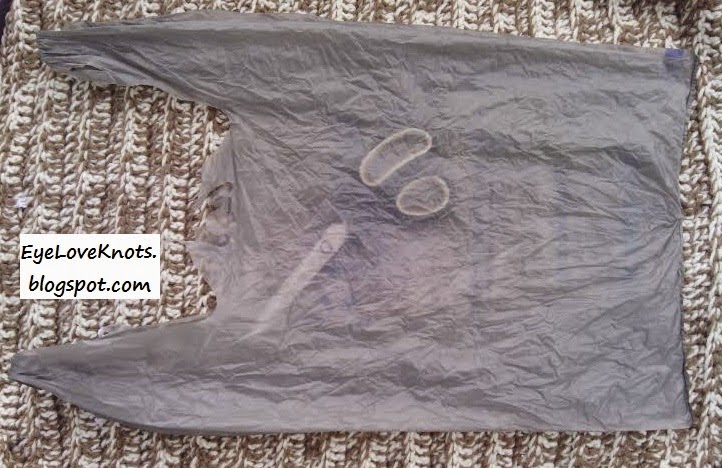 |
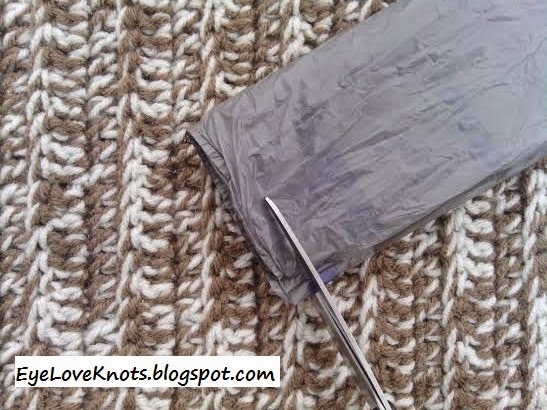
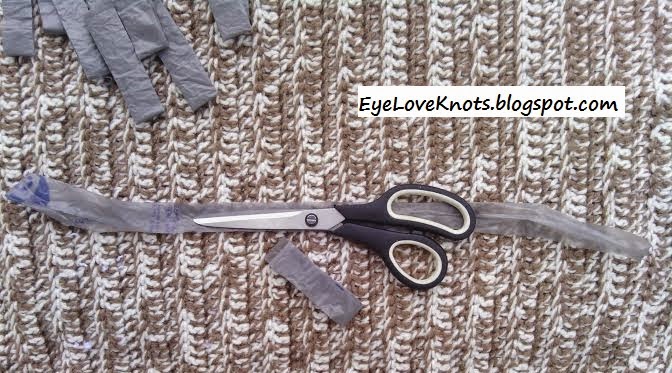
| Lay your plastic bag down flat. It doesn’t have to be perfect, just relatively close. Otherwise you’ll go crazy once you figure in all those other bags! Don’t mind the scissors – it was windy out. |
 |
| Fold your bag in half once. |
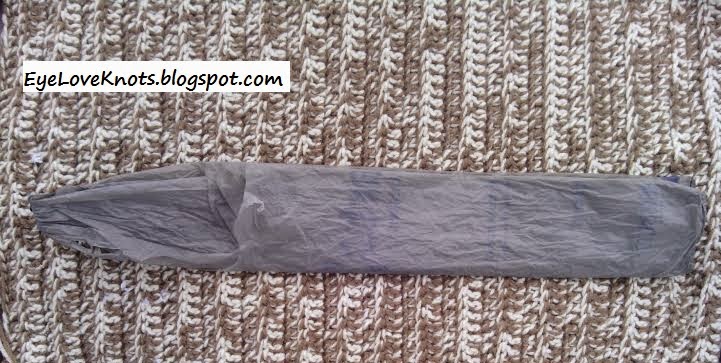 |
| Fold you bag in half again. *If you’re using a larger bag, or a more stretched out bag, then you may need to fold your bag again. It’s up to you. |
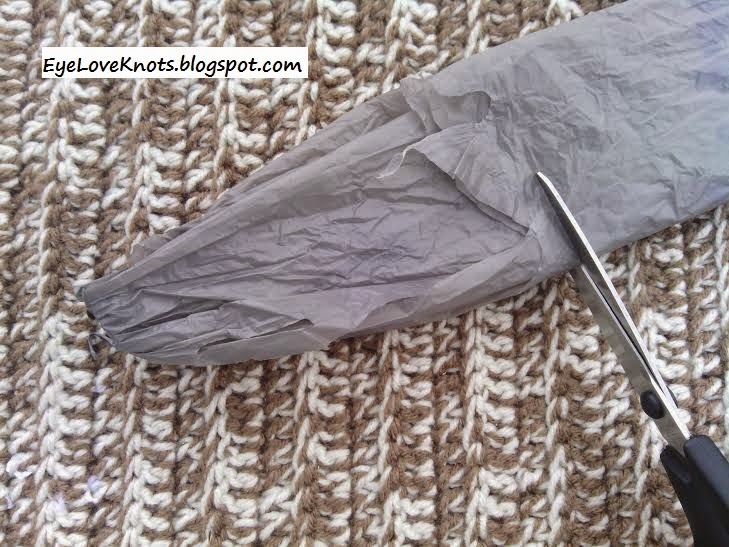 |
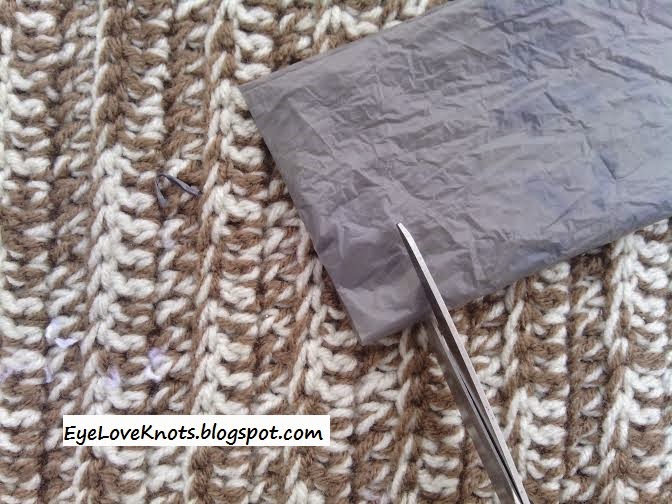
| Cut off the handles. Make sure you cut down far enough to get the piece from where the bag was attached to the rack. |
 |
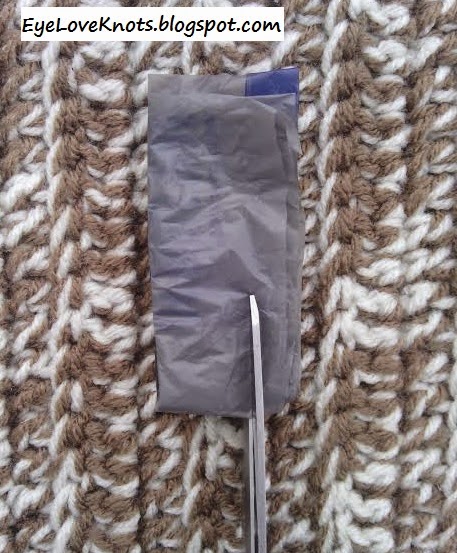
| Cut off the bottom binding piece of the bag. |
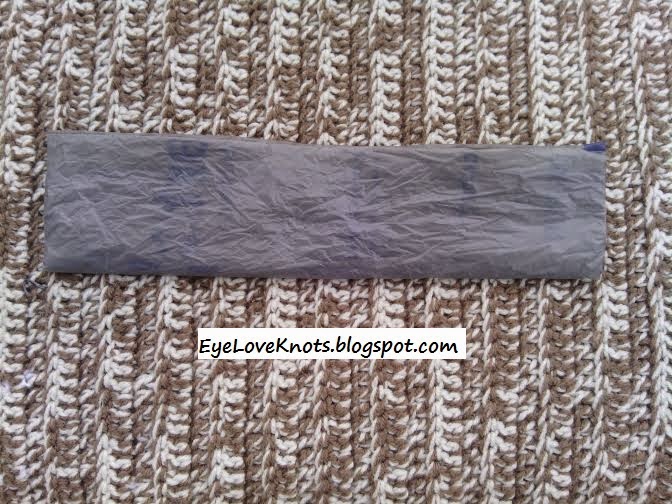 |
| This is what your handle-less and bottom-less bag will look like. |
 |
| Begin cutting strips. I cut 1″ strips. I did not outright measure, just eyeballed it. I found that anything smaller made the strips too thin making it easy to break in the connecting process. |
 |
| This is the last strip. Just because it is the last one, do not just put it with the rest. Cut it down to match the size of your other strips. |
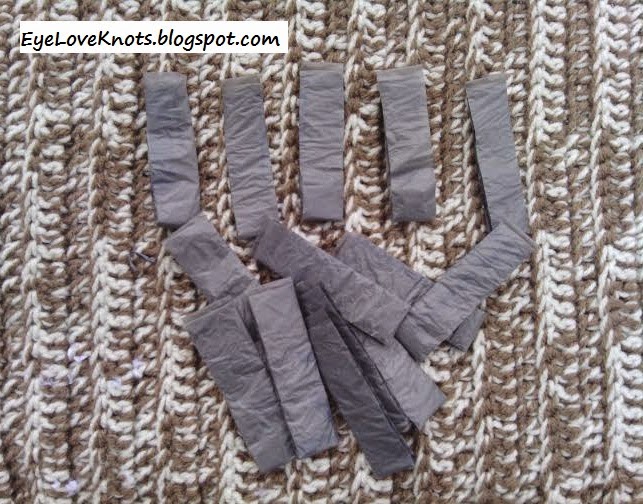 |
| Here are your cut strips. Mine measure 3.5″ long by 1″ wide, and I was able to cut about 14 strips from 1 Walmart bag, and 11 strips from 1 Winn Dixie bag. |
 |
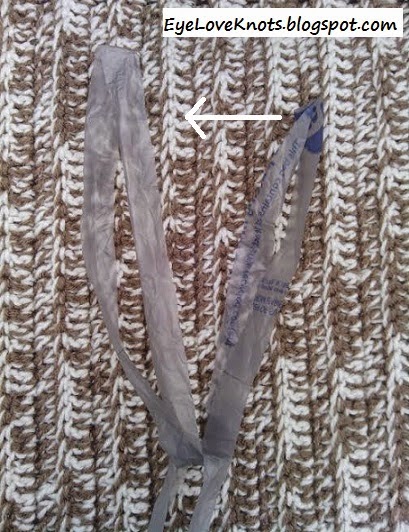
| Here is one strip unfolded, compared to a folded strip. Unfolded, it measures about 19″ long. |
 |
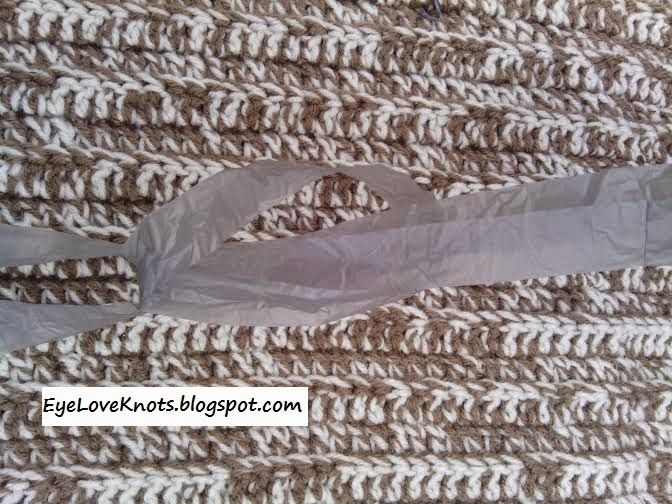
| When you open your strips up, you will see these loops on both ends. You will begin the looping process here. |
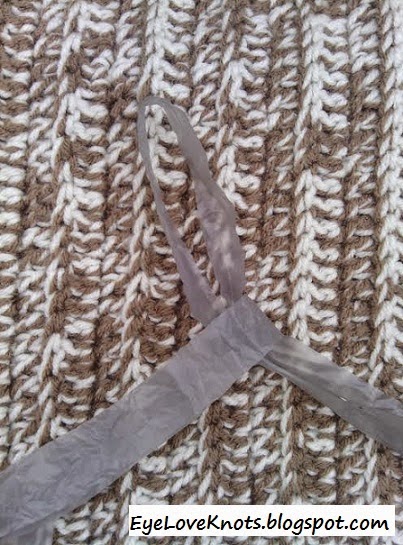 |
| Insert one loop into the other. |
 |
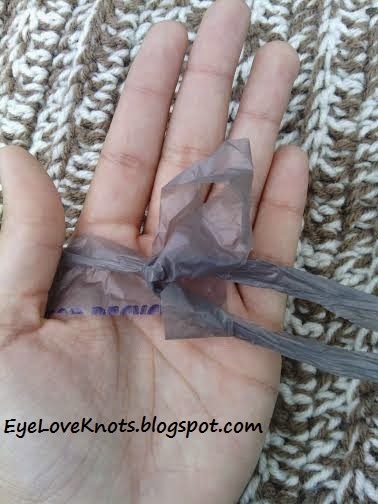
| You want to create a “U” shape with the piece that you inserted into the other. You’ll take the right-side piece and move in to the left through the loop on the other side. |
 |
| Then pull to tighten the knot. Don’t pull too tight or fast because if it gets caught on itself, you will break/rip the plastic piece. |
 |
| If your piece does get caught on itself, hold one with one hand (see where my thumb is), and pull the top and bottom pieces on the other side one at a time. |
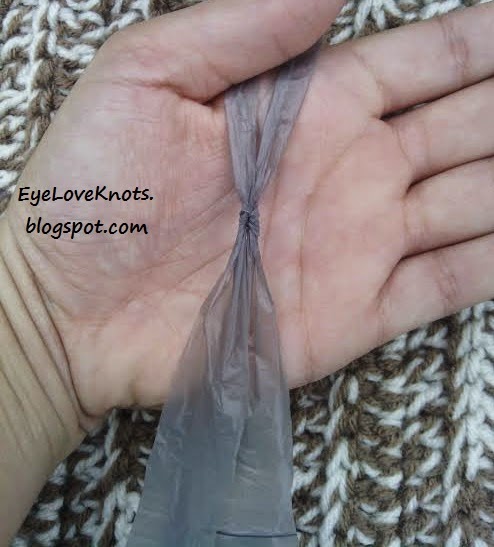 |
| Yay! You’ve got two pieces connected! And you are on your way to having your own plarn to work up a project with. Two of my pieces connected measure about 37.5″ in length. 1 Winn Dixie bag all looped together measured about 180″ in length. |
Enjoy making your own plarn!
Since the plastic bags are waterproof, this is a good thing to use to make cosmetic bags and soap dishes out of (to name a few), and also durable enough to make tote/market bags out of. You could also make baskets for organizing in your home, especially in the laundry room or garage area.
*If you would like a PDF version of this post, you may get one through my Etsy shop for a small fee. This fee is to compensate for the view/s lost once you no longer need to return to the blog for the information, as you will have your own copy.
Shop EyeLoveKnots – DIY How To Make Plarn.
Linked Up To…
5 Fall Gift Ideas and Recipes + Monday Funday – Club Chica Circle
The Sunday Showcase No. 266 – By Stephanie Lynn
Make it Monday! – Etcetorize
Count Your Many Blessings, Share Your Creativity Party No. 137 – It’s Overflowing
Think Pink Sunday No 190 – Flamingo Toes
Craft Schooling Sunday – Creative Jewish Mom
November 2014 Sharing Time Week 1 – Raising Memories
Kitchen Fun and Crafty Link Party #139 – Kitchen Fun with my 3 Sons
Inspiration Monday #80 – Scattered Thoughts of a Crafty Mom
Lou Lou Girls Fabulous Link Party #32 – Lou Lou Girls
242nd Inspire Me Tuesday – A Stroll Thru Life
Tutorials & Tips Link Party {183} – Home Stories A to Z
Take a Look Tuesday – Sugar Bee Crafts
Handmade Hangout #22 – Too Much Time on My Hands
Thanksgiving Table Inspiration / I’m Lovin’ It – TidyMom
Best DIY Projects and Recipe Party – the 36th Avenue
The Creative Collection Link Party – The Cards We Drew / Blooming Homestead
Your Whims Wednesday #188 – My Girlish Whims
Cute upcycling idea for all those bags hiding out around the house. Thanks for sharing it at Make It Monday.
Thank you for visiting EyeLoveKnots! I will have the free pattern for the handbag up on next weeks Make It Monday.
Thank you for the instructions, but why do you waste the handle section? – If you cut far enough down you can make one big loop out of that as well.
Bag handles contain seams and a lot of added plastic folded up. I don’t use them.
This is so clever!!
Thanks 🙂 Now I don't have to worry about all of my shopping bags at home. Sometimes I can't believe how many I accumulate but they are very useful for things around the house.
Thank you! Your way off linking the loops together makes this so much easier and faster.
Glad I could make the process easier! It is quite tedious.
Hello cute lady! So cool. Pinned. We really appreciate you taking the time to stop by our party. It wouldn’t be a party without you. Please join us on Monday at 7 pm. Happy Monday! Lou Lou Girls
I shall make my way over soon! Thanks for the invite.
Alexandra, thanks for the link! *Here's a tip for what else you can make with plarn: A plastic bag holder! Great tutorial.
Jenny
crochetistheway.blogspot.com
Very true. Good idea.
I have a huge old Toys R Us bag stuffed as much as possible with plastic bags that I need to do this for. Then I’ll probably make a couple of mats but I fear they may slippery.
I don’t think they’ll be slippery, unless maybe if on tile or wood, but then you could either sew on a shelf liner to the bottom or try one of the techniques for making slippers slip resistant, like puffy paint. They are kind of thick, which I might be concerned about with tripping over maybe. I’ve been wanting to make some rugs from my home too. I think it’s a great way to use up the plastic bags.
Plarn is cool! I’ve bookmarked this. I love all ideas that help me stay on top of the plastic bags mess.
I used to rummage around in the cupboard under the sink for bags which seemed to unfold all on their own, so I came up with a plastic bag holder from fabric https://hellosewing.com/diy-plastic-bag-holder-pattern/ – it helps a ton, but I really need to upcycle at least some of them
Have a wonderful week ahead
xo,
Helen
This is so great! I have a couple bag holders that I crocheted. You’re so right – so much better than bags just being everywhere! What I do for Plarn bags is I check the bags for holes. The ones without holes go in a holder in the kitchen to be used, and the ones with holes go into a holder in the laundry room to be turned into Plarn.
This is great! You come up with a great Idea how to save our bags in no time.
Thanks! I love being able to recyle the ones with holes that might otherwise end up in the trash.