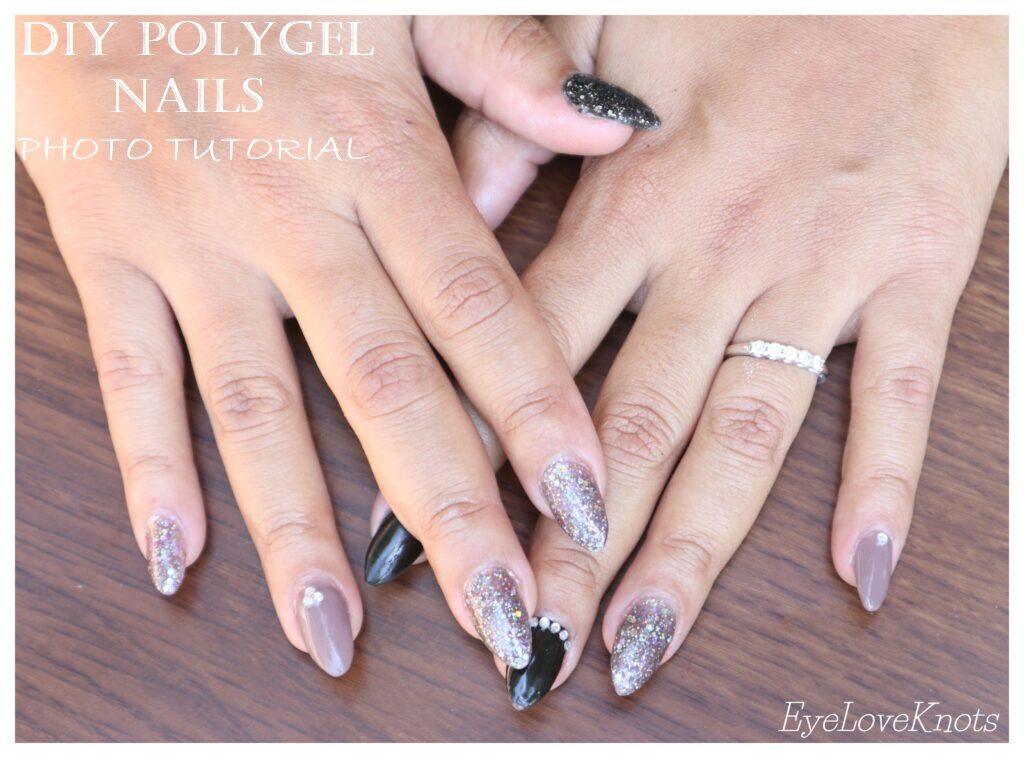
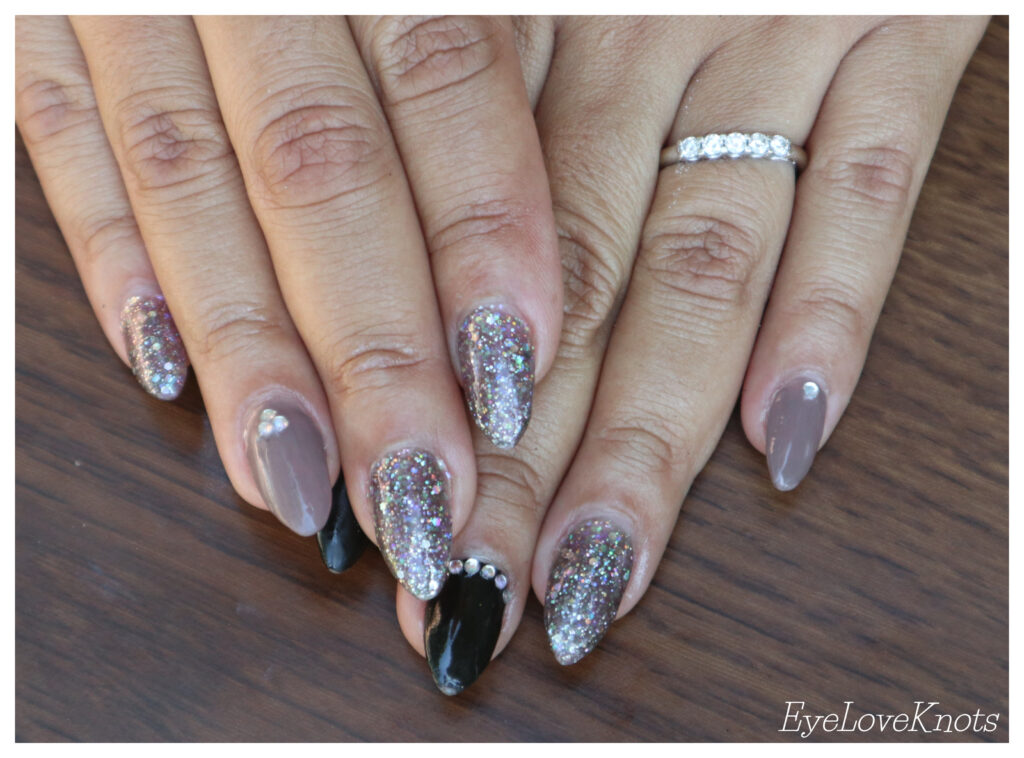
Easy DIY for your Nails to add that final touch to your outfits
Hello Everyone: I’m Vee, Alexandra’s Sister-in-law
I’ve always wanted to do my own nails but either never had the time
or the money to get a manicure at a Nail Salon.
Thanks to Amazon & A bit of Research I’m able to easily do
my nails at home and the possibilities are endless.
Follow along this simple Tutorial On how to Achieve the look.
All products used will be listed at the end of this tutorial
Disclaimer: This post contains affiliate links for Amazon. If you make a purchase by clicking on them, I make a small commission at no extra cost to you. Thanks for your support!
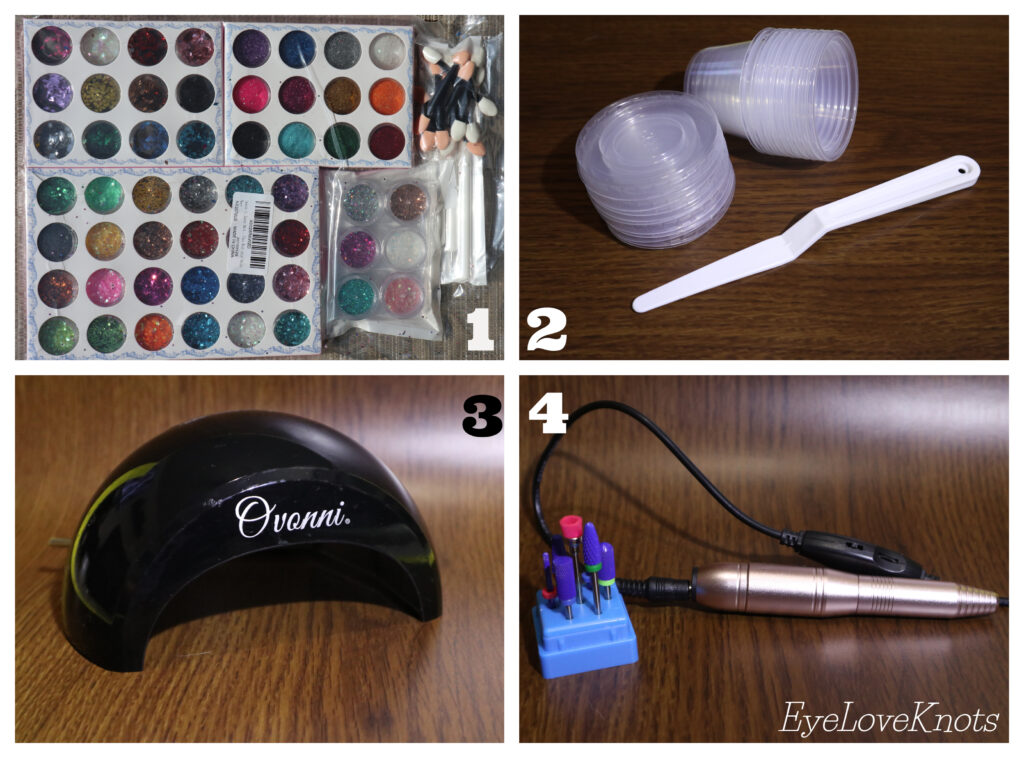
2:Plastic Portion cups w/ lid (To Store Unused Polygel mixed with Glitter)
3:Ovoni Uv Lamp(old Version Pictured)
4:Ceramic nail drill bit 7pc set , Electric nail drill
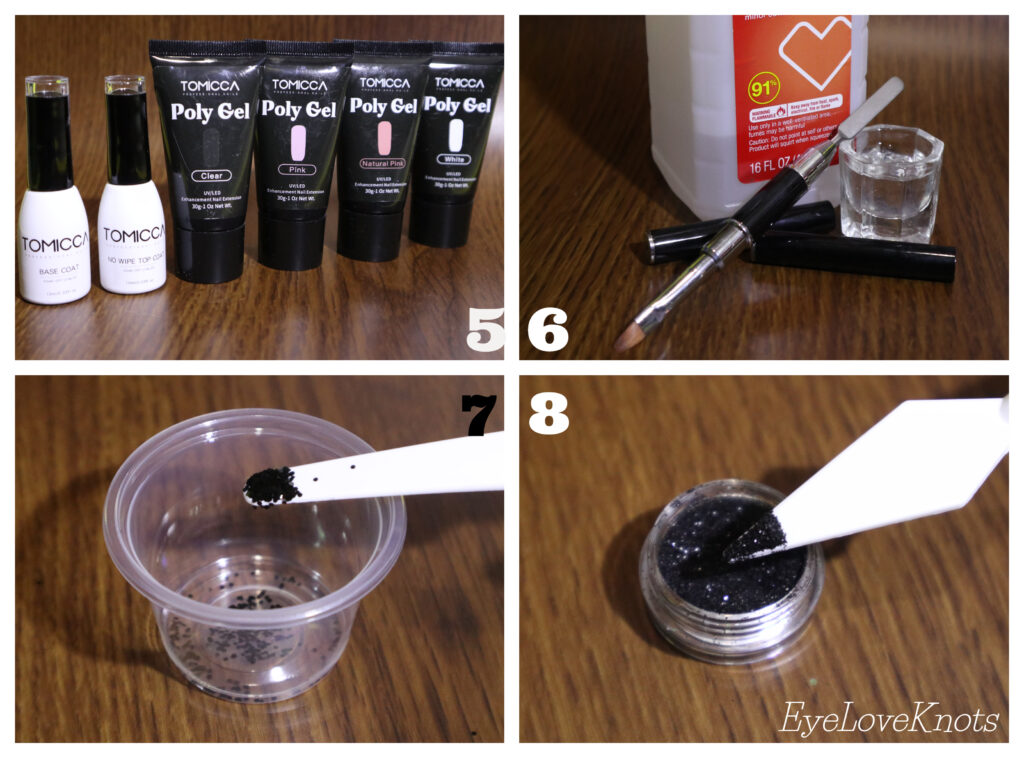
6: 90% or higher Isopropyl alcohol as slip solution for polygel,
Brush with Cutoff tool & Crystal cup for nail art
7,8: Chunky & Fine glitters add to Plastic Cup
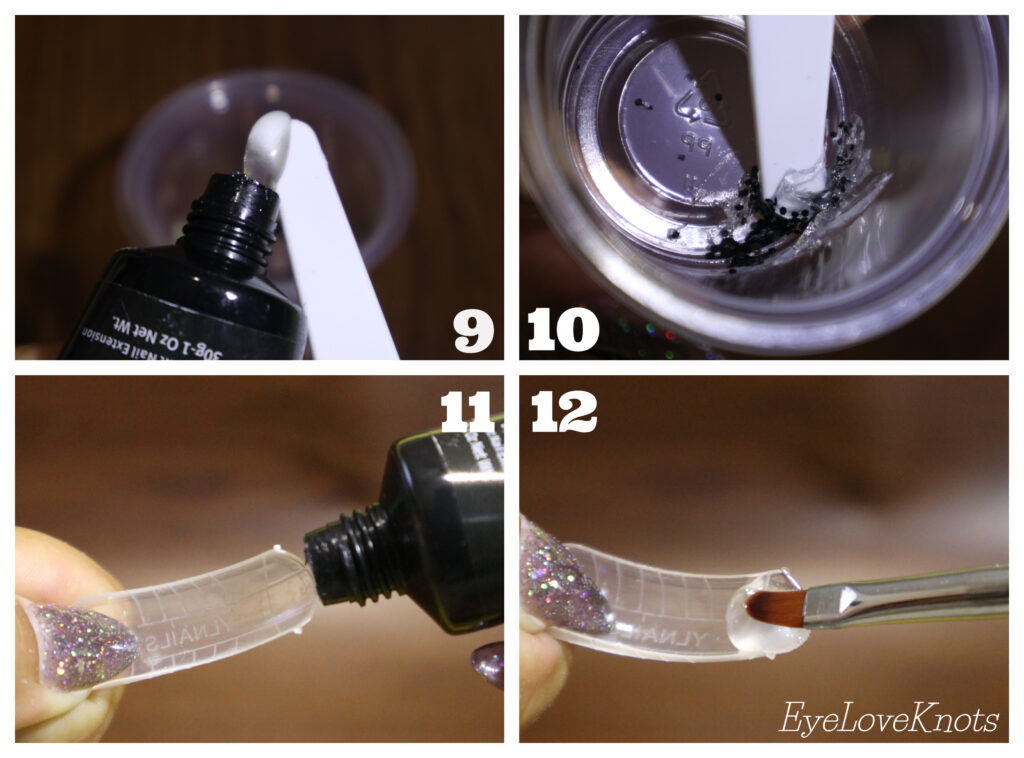
10:Add to Plastic cup and mix thoroughly add as much glitter as desired (the consistency should be like wet sticky sand)
11:Add a small dot of clear Polygel to fitted nail form
(The nail form should be as close to the size of your nail or a tad bigger,smaller will make the nail form deform and look too small after curing)
12:Lightly moisten Brush with slip solution & Spread Polygel to the length desired.
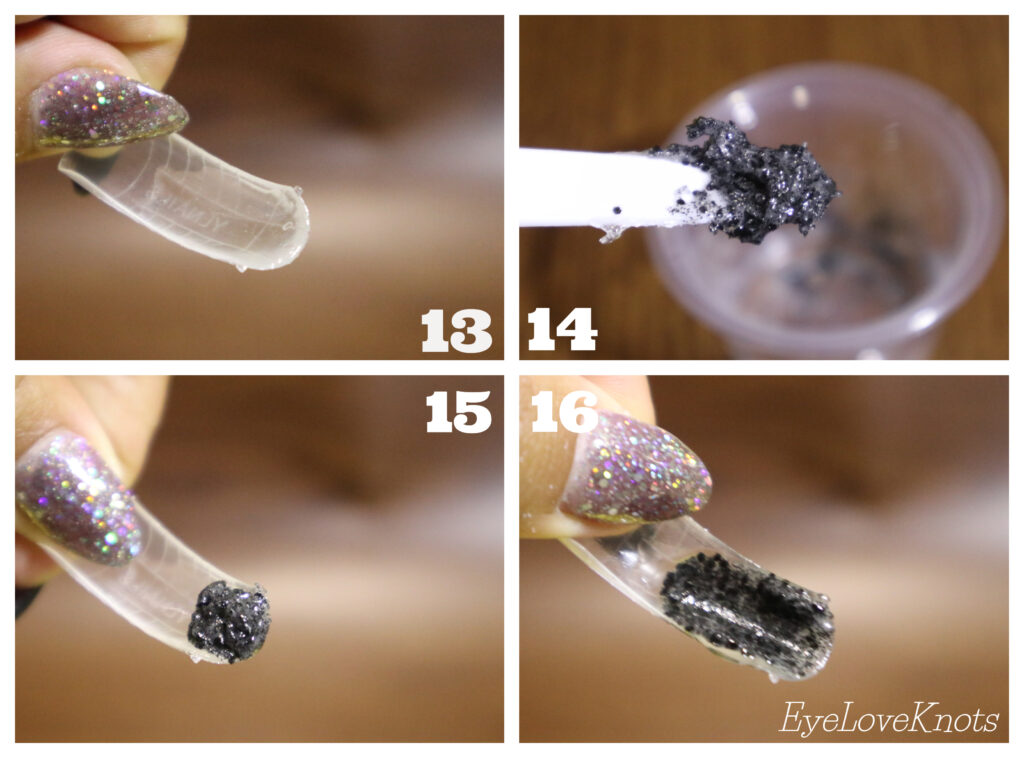
14:Grab your mixed glitter with plastic spatula
(you can also do this with pink or more clear Polygel if you don’t want to use glitter)
15: Add your mixed glitters to nail form
16:Fully spread glitter layer on top of the clear with slip solution and brush.
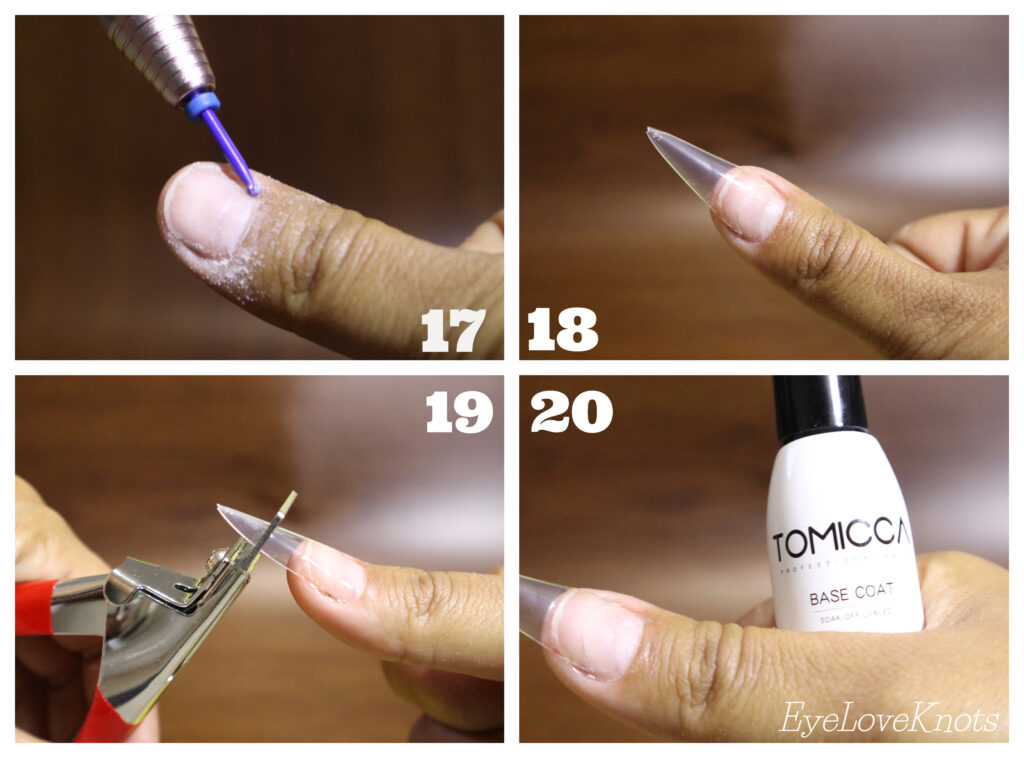
Clean Nail with Alcohol to remove dust
18:Add fitted nail tip (my Preference is Stiletto)
19:Trim Nail to desired length
20:Add base coat,this Polygel kit includes it and it helps the Polygel adhere to the natural nail.
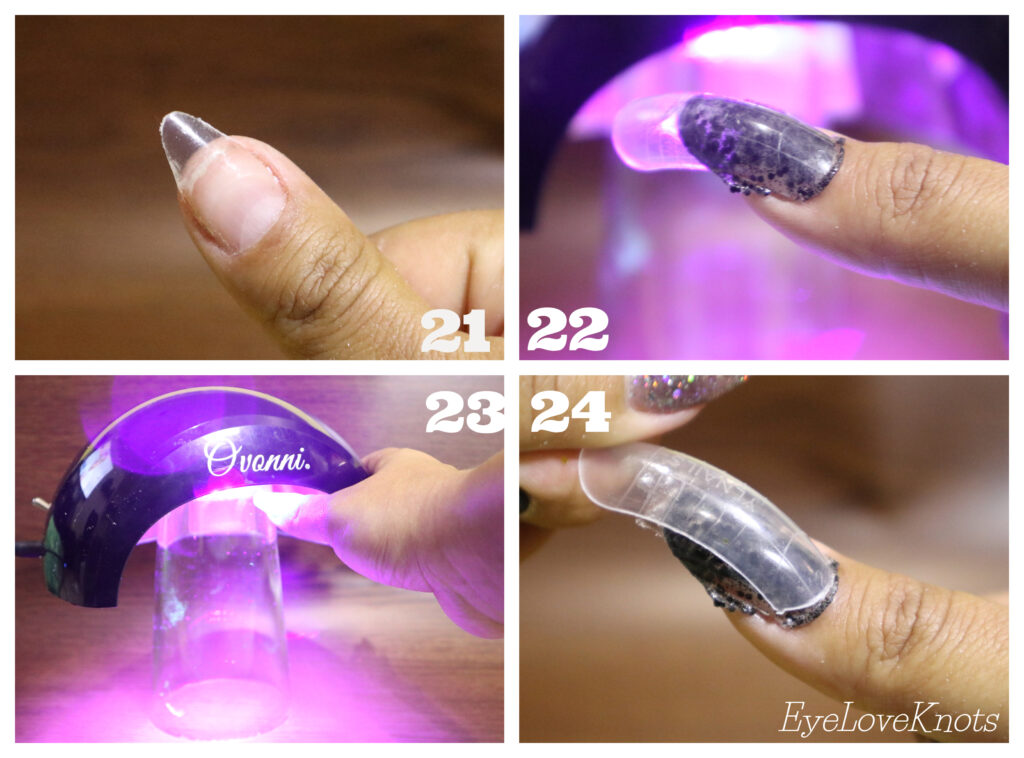
22:Add nail form from cuticle to tip pushing out any air bubbles.
23:I used a Glass pint cup to raise the uv lamp so i can hold the nail form for 30 Seconds underneath the lamp ,let go of it and fully cure for a total of 2 minutes.
24:After curing you can remove the nail form by grasping it ,squeezing and moving it side to side. it should pop off with ease.
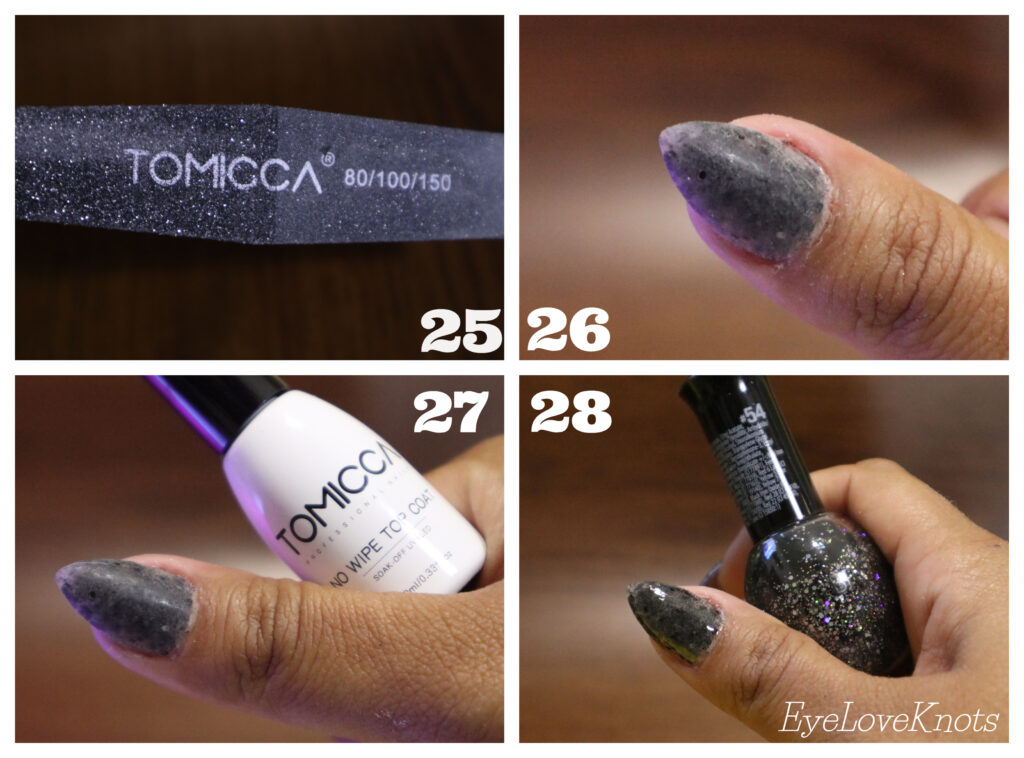
26: Nail should look smooth rounded and centered
27:Add top coat after shaping and cure for 30 seconds
28:To finalize you can use nail polish or a glitter top coat like i did myself.
(After all nails are completed you can also add some Rhinestones with nail glue and a glossy topcoat)
All Products Used HERE.
Also Follow My Instagram
Sunday and Wednesday Posts
Join the EyeLoveKnots Crafting Community on Facebook to share your creations, and see what others are up to!
Linked Up To…
The Weekly Link Up – Claire Justine
Handmade Monday #145 – Sum of their Stories
The Really Crafty Link Party #187 – Keeping it Real
The Craftastic Monday Link Party – Sew Can Do
Craft Schooling Sunday – Creative Jewish Mom
Weekday Wear Linkup – Away from the Blue
Little Cottage Link Party #21 – Love my Little Cottage
518th Inspire Me Tuesday – A Stroll Thru Life
Fabulous Party #287 – Lou Lou Girls
Turning Heads Tuesday – Elegantly Dressed and Stylish
Confident Twosday Linkup – I do deClaire
Projects Inspire{d} Link Party #343 – The How-to Home
Talk of the Town 194 – My Repurposed Life
Tuesday Turn About #19 – My Wee Abode
{Wow Me} Wednesday #323 – Ginger Snap Crafts
Your Whims Wednesday #267 – My Girlish Whims
The Wednesday Link Party #315 – The Stitchin’ Mommy
To Grandma’s House We Go Link Party 160 – Chas’ Crazy Creations
Waste Not Wednesday Link Party 175 – Faeries and Fauna
Style Six Linkup – The Queen in Between
Thursday Favorite Things #409 – An Artful Mom
Thursday Fashion Files Link Up #230 – Curly Crafty Mom
Trendy Thursday LinkUp – Thirty Minus One
Pin Party #336 – The Pin Junkie
Best of the Weekend – Calypso in the Country
Home Matters #253 – Modern on Monticello
Handmade & Otherwise Weekly Link Up Week 19 – Petals, Pies and Otherwise
Link Up – Lizzie in Lace
Link Your Stuff – Annemarie’s Haakblog
Snickerdoodle Create Bake Make Link Party 304 – EyeLoveKnots
So, so pretty!!! I am really good at doing my own nails with just regular polish, but I’ve never done anything as fancy as this… I’d probably need a professional! It is fun to glam up the nails like this for a special event or occasionally! LOVE them!
Carrie
curlycraftymom.com
I feel like every time I see Vee, she has her nails done up a new fancy way, and I am always in awe of them! I am a terrible nail painter (now, didn’t used to be, hehe), so I would definitely need a professional. I am thinking of trying Color Street nail polish strips.
Thank you Carrie,I really do change them up quite often and working with nail polish is pretty tricky .
The secret is a clean up tool,a Synthetic angled brush one for eyeliner works perfect with a bit of acetone to clean the cuticle area and always wash your hands ,use lotion or cuticle oil to keep your hands/fingers hydrated gives it that professional touch.
I love gel polishes they are very forgiving they do give you a LOT of work time to make sure your cuticles don’t get flooded and it doesn’t dry until you cure it with the UV lamp.
Hi all. My name is Alyssa. I have a question for anyone that can answer. I got a huge Venalisa polish kit for Mother’s day. I have been doing my own nails for over a year. In the kit, there is a bottle of peel off base coat. When I use polygel I apply a thin coat of base before applying the polygel. What I’m wondering is, would the peel off base work or would it make the nails come off?
I don’t have any experience with a peel off base coat, although reading about it makes me want to try! Says it makes taking off glitters a breeze, which would be nice.
I did find one PolyGel testimonial: “Used Hit the Bottle peel off base coat on last mani, with polygel nails. I didn’t think it would peel since it had been on for about 10 days but it came right off except around the tips – but that popped off using an orange.”
Ok thanks. I will have to try it and see how it goes.
Welcome Vee, you do a fabulous job with your nails! They are lovely and I like the design. Have you thought of going professional>
Thank you Sheri,On average it takes me about 2 hours on myself because I try to be as meticulous and thorough with them specially with the Polygel.
I would definitely need some extensive training and time management to be able to do it professionally.
It would be a lot of fun though, letting my creativity take over and express it through nail art does sound fun.
Great tutorial, that’s for sharing.
Enjoy 🙂
Your nails look great. I’m not sure I could do all this myself, but I kind of like the idea. Thank you for sharing at The Really Crafty Link Party this week!
Wow, they look great! I love the different style nails. It looks a bit complicated, like I would make a mess, but they did turn out nicely. I love trying new colors and styles for Fall.
thanks for linking!
jess xx
http://www.elegantlydressedandstylish.com
Your nails look so great and I love the sparkles! they turned out perfectly! 🙂
Thank you so much for joining the #weekdayWearLinkUp 🙂
She did a lovely job! Glitter has become my favorite thing right now to wear on my nails, so I am really loving this combination.
My nails are always a disaster but I could probably pull this off. Thanks for sharing at #HomeMattersParty
We would love your feedback on this tutorial if you get a chance to try it 🙂