Part 4 of the crochet-a-long for how to crochet the Tessellated Triangles Sweater is on the sleeves.
This post contains affiliate links for LoveCrafts. If you make a purchase by clicking on them, I make a small commission at no extra cost to you. Thanks for your support!
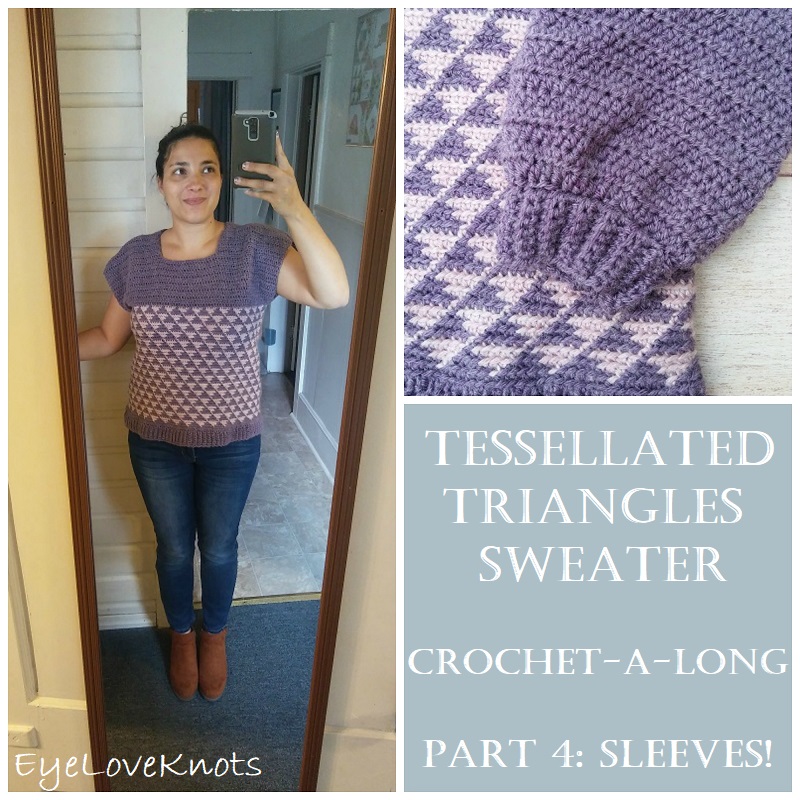
This week, we are working on either 3/4 or full length sleeves, and then sadly, this crochet-a-long comes to an end, and you will have an awesome brand new sweater to wear just in time for Fall!
If you would like a PDF version of this post, you may get one through either my EyeLoveKnots Etsy Shop, Ravelry or LoveCrafts Shop for a small fee. This fee is to compensate for the views lost when you no longer need to return to the blog to for the information, as you will have your own copy. Plus! It helps fund supplies for new projects to share with you!
Shop EyeLoveKnots Etsy: Tessellated Triangles Sweater.
Shop EyeLoveKnots LoveCrafts: Tessellated Triangles Sweater.
Are you a Raveler? Share your version of this project on Ravelry – Tessellated Triangles Sweater.
Abbreviations:
- HDC2tog – Half Double Crochet Two Stitches Together to Decrease
- HDC – Half Double crochet
- RS – Right Side of Work
- WS – Wrong Side of Work
- SC – Single Crochet
- BLO – Back Loop Only
- SC3tog – Single Crochet Three Stitches Together to Decrease
Pattern Notes:
The yarns I have used in this sample is Lion Brand’s Touch of Alpaca (Pink and Purple version). If you follow me on Instagram or Facebook, you have seen a Gray and Red version I am making, that one is in Hobby Lobby’s I Love This Yarn.
Instructions for size XS given with S, M, L, XL, 2X, 3X in parenthesis.
To match the top front and back panels, the sleeves are worked in the same half double crochet stitch pattern, and in turned rows.
For the sleeves, when evenly hdc’ing into the sides of the top front and back, you should have 3 hdc per 2 rows.
Slip stitch join to the first half double crochet, not beginning chain.
Beginning chain 1 does not count as a stitch.
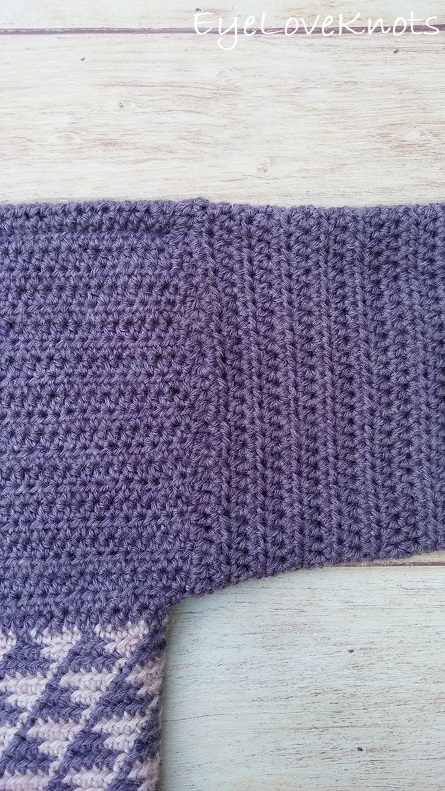
Sleeves – Make 2:
From the RS, join yarn under the arm (at bottom center point so the seam is hidden), and chain 1, then…
XS, L, XL, 2X, 3X ONLY: 2 HDC into the 1st HDC, evenly HDC around. Join. [60 (72, 78, 80, 84) HDC]
S ONLY: evenly HDC around. Join.(65 HDC)
M ONLY: 2 HDC into the 1st HDC, HDC next 32, 2 HDC into the next, HDC next 33. Join. (69 HDC)
Round 2 for XS, L: Chain 1, turn. (HDC2tog, HDC next 2) 15x (18x). Join. [45 (54 HDC)
Round 2 for S, M: Chain 1, turn. HDC 1st, (HDC2tog, HDC next 2) 16x (17x). Join. [49 (52) HDC]
Round 2 for XL: Chain 1, turn. (HDC2tog, HDC next 4) 13x. Join. (65 HDC)
Round 2 for 2X: Chain 1, turn. (HDC2tog, HDC next 8) 8x. Join. (72 HDC)
Round 2 for 3X: Chain 1, turn. (HDC2tog, HDC next 10) 7x. Join. (77 HDC)
For ¾ Length Sleeves:
Rounds 3 – 20 (21, 21, 21, 21, 22, 22): Chain 1, turn. HDC into the 1st HDC, and each across. Join.
Ribbing – Make 2
Chain 8. SC into the 2nd chain, and across. (7 SC)
Rows 2 – 44 (48, 51, 53, 64, 71, 76): Chain 1, turn. SC into the 1st SC, in BLO: SC next 5, in both loops: SC last SC. (7 SC)
Rows 45 (49, 52, 54, 65, 72, 77): Chain 1, turn. Fold the strip in half laying the WS together. Slip stitch across through both layers.
Attach ribbing to sleeve bottoms
Turn sweater to the WS, and ribbing to the RS, then place the ribbing inside the sleeve so both RS are facing each other, lining up center seam of ribbing with seam of sleeve. Evenly slip stitch through both layers. Fasten off.
*Take a moment to try on the sweater to make sure this is the sleeve length you like. The ribbing should end just past your elbow, or 7.38″ (7.89”, 7.89”, 7.89”, 7.89”, 8.25”, 8.25”) from the underarm.
If you want the sleeve to be longer or shorter, remove the ribbed edge, and add or subtract rounds to the sleeve, then add the ribbing back, keeping in mind that it adds 0.75” to the length, OR omit the ribbing if you don’t like it.
Now that you’ve adjusted as needed, if you don’t like the ridge seam of the slip stitch join, you may take it out, and use the whipstitch or mattress stitch joining methods, otherwise, leave it as is for weaving.
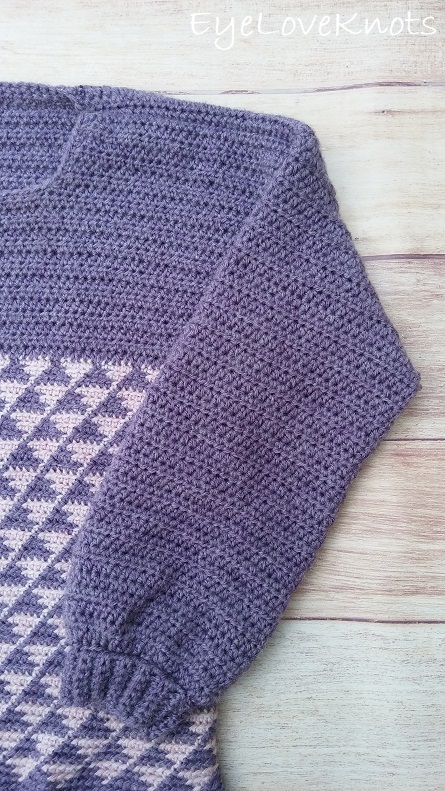
For Full Length Sleeves – Fasten Off after last round of size:
XS Rounds 3 – 41: Chain 1, turn. HDC into the 1st HDC, and each across. Join.
XS Round 42: Chain 1, turn. (HDC2tog, HDC next) 15x. Join. (30 HDC)
S Rounds 3 – 42: Chain 1, turn. HDC into the 1st HDC, and each across. Join.
S Round 43: Chain 1, turn. HDC 1st, (HDC2tog, HDC next 2) 12x. Join. (37 HDC)
M Rounds 3 – 42: Chain 1, turn. HDC into the 1st HDC, and each across. Join.
M Round 43: Chain 1, turn. (HDC2tog, hdc next 2) 13x. Join. (39 HDC)
L Rounds 3 – 43: Chain 1, turn. HDC into the 1st HDC, and each across. Join.
L Round 44: Chain 1, turn. (HDC2tog, HDC next) 18x. Join. (36 HDC)
XL Rounds 3 – 42: Chain 1, turn. HDC into the 1st HDC, and each across. Join.
XL Round 43: Chain 1, turn. HDC into 1st HDC, (HDC2tog, HDC next 2) 16x. Join. (49 HDC)
XL Round 44: Chain 1, turn. HDC into 1st HDC, (HDC2tog, hdc next 2) 12x. Join. (37 HDC)
2X Rounds 3 – 43: Chain 1, turn. HDC into the 1st HDC, and each across. Join.
2X Round 44: Chain 1, turn. (HDC2tog, HDC next 2) 18x. Join. (54 HDC)
2X Round 45: Chain 1, turn. (HDC2tog, HDC next) 18x. Join. (36 HDC)
3X Rounds 3 – 42: Chain 1, turn. HDC into the 1st HDC, and each across. Join.
3X Round 43: Chain 1, turn. HDC into the 1st HDC, (HDC2tog, HDC next 2) 19x. Join. (58 HDC)
3X Round 44: Chain 1, turn. 2 HDC, (HDC2tog, HDC next 2) 14x. Join. (44 HDC)
3X Round 45: Chain 1, turn. 5 HDC, (HDC2tog, HDC next) 13x. Join. (31 HDC)
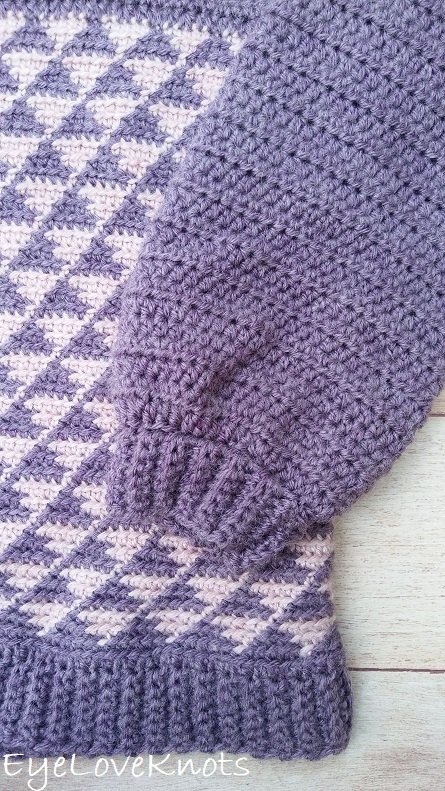
Wrist Sleeve Ribbing – Make 2:
*The average wrist size is 7” in circumference, but wrist sizes vary so I am providing instructions for small 6” (average 7”, and large 8”).
Chain 8. SC into the 2nd chain, and across. (7 SC)
SMALL, Rows 2 – 24: Chain 1, turn. SC into the 1st SC, in BLO: SC next 5, in both loops: SC last SC. (7 SC)
AVERAGE, Rows 2 – 30: Chain 1, turn. SC into the 1st SC, in BLO: SC next 5, in both loops: SC last SC. (7 SC)
LARGE, Rows 2 – 32: Chain 1, turn. SC into the 1st SC, in BLO: SC next 5, in both loops: SC last SC. (7 SC)
Next Row: Chain 1, turn. Fold the strip in half laying the WS together. Slip stitch across through both layers.
Turn sweater to the WS, and ribbing to the RS, then place the ribbing inside the sleeve so both RS are facing each other, lining up center seam of ribbing with seam of sleeve. Evenly slip stitch through both layers. Fasten off.
*Take a moment to try on the sweater to make sure this is the sleeve length you like. The ribbing should end at your wrist, or 15.13” (15.5”, 15.5”, 16”, 16”, 16.5”, 16.5”) from the underarm.
If you want the sleeve to be longer or shorter, remove the ribbed edge, and add or subtract rounds to the sleeve, then add the ribbing back, keeping in mind that it adds 0.75” to the length, OR omit the ribbing if you don’t like it.
Now that you’ve adjusted as needed, if you don’t like the ridge seam of the slip stitch join, you may take it out, and use the whipstitch or mattress stitch joining methods, otherwise, leave it as is for weaving.
Neck Edging – Optional, but gives a clean, finished edge, and helps keep shape of neckhole
From the RS, join yarn in a center shoulder seam. Chain 1, HDC in this stitch, loosely SC to corner, SC3tog over stitch before corner + corner + next stitch, loosely SC to next corner and work the same way, loosely SC to next shoulder seam and work a HDC in this one, then loosely SC to next corner and work decrease, loosely SC to next corner and work decrease, loosely SC back to 1st stitch, and slip stitch join together. Fasten off.
Weave in all ends, and sweater is finished!
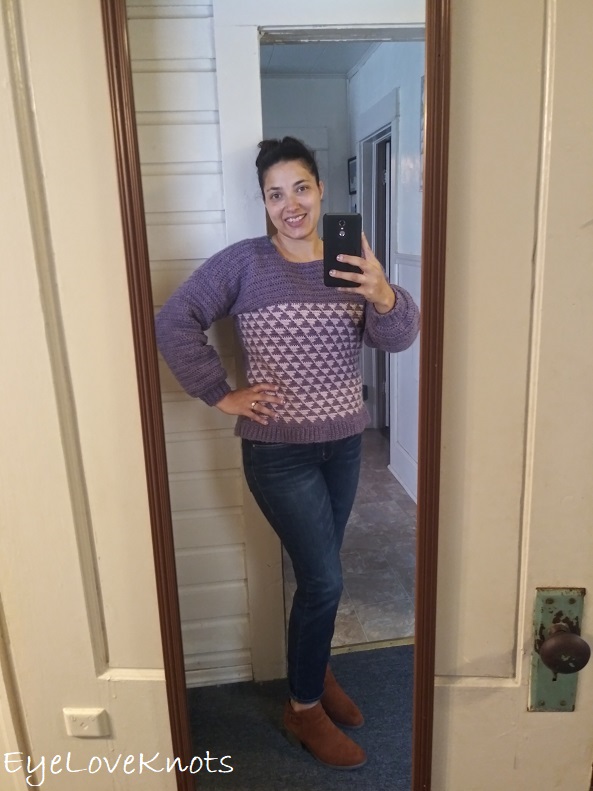
Can’t wait to see your projects! Tag @eyeloveknots and/or #tessellatedtrianglesweater on Instagram!
Join the EyeLoveKnots Crafting Community on Facebook to share your creations, and see what others are up to!
Linked Up To…
The Weekly Link Up – Claire Justine
Handmade Monday #145 – Sum of their Stories
The Really Crafty Link Party #187 – Keeping it Real
The Craftastic Monday Link Party – Sew Can Do
Craft Schooling Sunday – Creative Jewish Mom
Weekday Wear Linkup – Away from the Blue
In Stitches Link Party #46 – Maria’s Blue Crayon
Little Cottage Link Party #21 – Love my Little Cottage
All About Home Link Party #8 – Common Ground
518th Inspire Me Tuesday – A Stroll Thru Life
Fabulous Party #287 – Lou Lou Girls
Turning Heads Tuesday – Elegantly Dressed and Stylish
Confident Twosday Linkup – I do deClaire
Projects Inspire{d} Link Party #343 – The How-to Home
The Linky Ladies Party #168 – The Purple Poncho
One More Row – Free Pattern Link Party #11 – Loops and Love Crochet
Talk of the Town 194 – My Repurposed Life
Tuesday Turn About #19 – My Wee Abode
{Wow Me} Wednesday #323 – Ginger Snap Crafts
Your Whims Wednesday #267 – My Girlish Whims
The Wednesday Link Party #315 – The Stitchin’ Mommy
To Grandma’s House We Go Link Party 160 – Chas’ Crazy Creations
Waste Not Wednesday Link Party 175 – Faeries and Fauna
Style Six Linkup – The Queen in Between
Hookin’ on Hump Day #200 – Moogly Blog
Crochet Patterns and Anything Crochet Link Party #16 – Joy of Motion
Thursday Favorite Things #409 – An Artful Mom
Thursday Fashion Files Link Up #230 – Curly Crafty Mom
Trendy Thursday LinkUp – Thirty Minus One
Pin Party #336 – The Pin Junkie
Best of the Weekend – Calypso in the Country
Home Matters #253 – Modern on Monticello
Handmade & Otherwise Weekly Link Up Week 19 – Petals, Pies and Otherwise
Link Up – Lizzie in Lace
Link Your Stuff – Annemarie’s Haakblog
Snickerdoodle Create Bake Make Link Party 304 – EyeLoveKnots
The truly makes me wish I could crochet, knit and sew! I want all the skills. So let’s add weave as well. Seriously! Anyway, love the color of your sweater. Have a wonderful week and thank you for linking up with the Style Six! 🙂
Chrissy
Granola & Grace
Thanks, Chrissy! Never too late to learn 😉 I will add though that I too wish I could knit, sew and weave, hehe.
Gorgeous sweater and such a cute model! thanks so much for sharing on craft schooling Sunday!
Thank you, Sara!
It’s a beautiful sweater. Thank you for sharing at The Really Crafty Link Party. Pinned.
Thank you, Teresa!
I love this design. Super stylish!! Definitely adding to my “to make” list!
So glad you like it! Would love your feedback if you get a change to make it.
This is adorable!! Good job! I made a sweater last year and now I want to make another one. So rewarding.
Lisa
It is, and I love that I can wear my creations out. Thanks for stopping by!