EyeLoveKnots

  • Home
  • Crochet
    • Free Crochet Patterns
    • Crochet Pattern Reviews
    • Crochet 101
  • Knitting
  • Crafting
    • Plastic Canvas DIYs
    • Jewelry DIYs
    • Sewing
    • Cross Stitching
    • Upcycling
    • Other DIYs
  • Seasonal DIYs
    • 4th of July DIYs
    • Back to School DIYs
    • Christmas DIYs
    • Easter DIYs
    • Fall DIYs
    • Halloween DIYs
    • Spring DIYs
    • St. Patrick’s Day DIYs
    • Summer DIYs
    • Thanksgiving DIYs
  • Holidays/Seasonal
    • Valentine’s Day
    • St. Patrick’s Day
    • Spring
    • Easter
    • Summer
    • 4th of July
    • Fall
    • Halloween
    • Thanksgiving
    • Christmas
    • Winter
  • Home DIY & Decor
    • In the Bathroom
    • In the Bedroom
    • In the Dining Room
    • In the Kitchen
    • In the Living Room
    • Kids Room
  • Fashion
    • Nail Art
  • Recipes
  • Living the Dream
  • Fun Finds Around the Web
  • Linking Up To…
  • Latest News & Links
  • Privacy and Sharing Policies
  • About Our GREAT Team!
  • Latest News & Links

Tammy’s Granny Square Lapghan – Free Crochet Pattern

February 1, 2015

About a month ago, I posted a free crochet pattern on How to Crochet a Solid Granny Square. It has been my most popular post yet, gaining over 500 views in the first month! WOW!

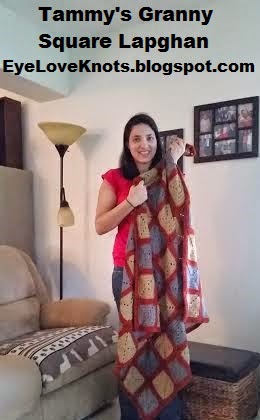
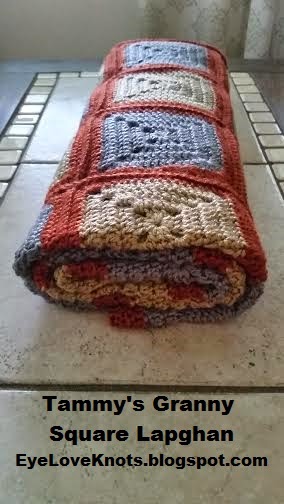
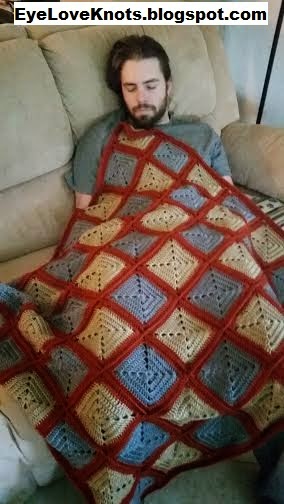
Today, I am back to share with you the rest of the lapghan I made for my boyfriend, Chad’s, mom, Tammy for Christmas.

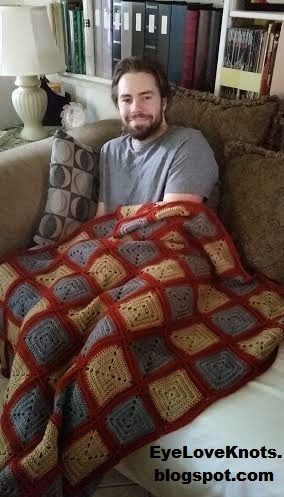
I really wanted to make her a bigger throw blanket, but it took longer than I predicted to work up, and I was short on time. I made sure this lapghan was big enough to cover her lap while sitting, or to wrap across her shoulders.

*Before I move on, tomorrow (February 1st) starts my 14 Days of Valentine’s Day Inspired Crafts. I will be releasing [at least] one Valentine’s Day Inspired Craft a day for 14 days. Make sure to subscribe, or follow me on Bloglovin’ so you don’t miss a post!

**I am also hosting a Valentine’s Inspired Linky Party! It begins tomorrow (February 1st) at 3:00pm. It will last two weeks! Please come back to link up your Valentine’s Day inspired projects, DIY’s, recipes, party plans and more!

Materials:
     – 1650 yards of a light weight Worsted Weight Yarn – I used roughly 1.5 Skeins each of Yarn Bee‘s Soft Secret in Mushroom, Smoke & 2.25 Skeins of the Bitter Sweet colorway.
     – H8/5mm Hook
     – Tapestry Needle for Weaving in Ends – I like to use a #18, or 20
     – How to Crochet a Solid Granny Square, Free Crochet Pattern

Material Notes:
     This pattern will really work with any size yarn, the size will just vary. The Soft Secret yarn is a light weight worsted weight yarn. 

Alternate yarns: Caron’s Simply Soft, Lion Brand’s Vanna’s Choice Yarn, Deborah Norville’s Everyday Soft, Lion Brand’s Wool Ease, Lion Brand’s Cotton Ease, Hobby Lobby’s I Love This Cotton Yarn.

Using a heavier worsted weight yarn, such as Lily Sugar n Cream, Red Heart’s With Love, Red Heart’s Super Saver, Caron’s One Pound, Bernat’s Super Value Yarn or Hobby Lobby’s I Love This Yarn will result in a slightly larger blanket.

Time Spent:
     Each square works up in about 15 minutes for a total of 14.5 hours spent working up the granny squares, plus an 1.5 hours for the joining of the squares, plus 2.75 hours working the border. Total time spent was just about 18.5 hours.

Suggested Daily Crochet Plan found in Pattern Notes section below.

Measurements:
     40″ Wide by 45.5″ in Length with Border – this is a good size for a toddler/child size afghan, and a little smaller than the standard throw blanket size; (38.5″ x 44″ before the border)

Abbreviations:
HDC – Half Double Crochet
SC – Single Crochet

Pattern Notes:
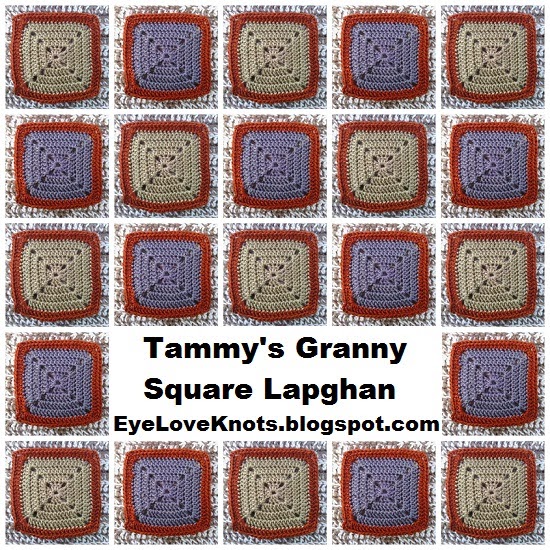
     You will need to make 28 squares in Mushroom, and 28 in Smoke.

     When working the border, don’t begin in the corner as there is a lot of pressure and weight from the first stitches. The corners aren’t as strong as the rest of the stitches.

Suggested Maximum Daily Crochet Plan for this Afghan:
Day 1 – Crochet 6 Granny Squares in Mushroom & Weave in Ends (60 mins)
Day 2 – Crochet 6 Granny Squares in Mushroom & Weave in Ends
Day 3 – Crochet 6 Granny Squares in Mushroom & Weave in Ends
Day 4 – Crochet 6 Granny Squares in Mushroom & Weave in Ends
Day 5 – Crochet 4 Granny Squares in Mushroom & Weave in Ends (40 mins)

Day 6 – Crochet 6 Granny Squares in Smoke & Weave in Ends (60 mins)
Day 7 – Crochet 6 Granny Squares in Smoke & Weave in Ends
Day 8 – Crochet 6 Granny Squares in Smoke & Weave in Ends
Day 9 – Crochet 6 Granny Squares in Smoke & Weave in Ends
Day 10 – Crochet 4 Granny Squares in Smoke & Weave in Ends (40 mins)

Day 11 – 
Crochet Row 5 on 12 Granny Squares & Weave in Ends (60 mins)
Day 12 – Crochet Row 5 (Bitter Sweet) on 12 Granny Squares & Weave in Ends
Day 13 – Crochet Row 5 (Bitter Sweet) on 12 Granny Squares & Weave in Ends
Day 14 – Crochet Row 5 (Bitter Sweet) on 12 Granny Squares & Weave in Ends
Day 15 – Crochet Row 5 (Bitter Sweet) on 12 Granny Squares & Weave in Ends

Day 16 – Join Squares in one direction (75 mins)
Day 17 – Join Squares in other direction

Day 18 – Crochet One Round of the Border (45 mins)
Day 19 – Crochet Second Round of the Border (60 mins)
Day 20 – Crochet Third Round of the Border (60 mins)

Since I like to crochet non-stop, I had to limit myself to give myself a break and so I wouldn’t get bored so I came up with this Maximum Daily Crochet Plan. 
If you don’t have as much time as I do (4 hours-ish a day), but do have about an hour and a half-ish a day, then you will be finished in about 20 days if following the same plan. Sounds crazy long, but blankets take lots of time, especially granny’s.

Layout:

Now that you have all of your squares finished,
lay them out exactly how you would like them to look once assembled.


For my lapghan, I began with a Mushroom colored square, and alternated Mushroom colored and Smoke colored squares. I made my lapghan 7 squares wide by 8 squares tall.

Joining Granny Squares – Using the Single Crochet Method:

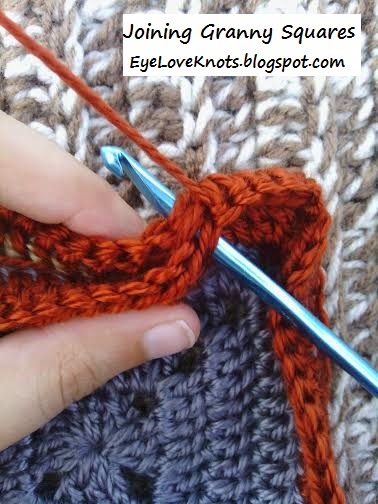
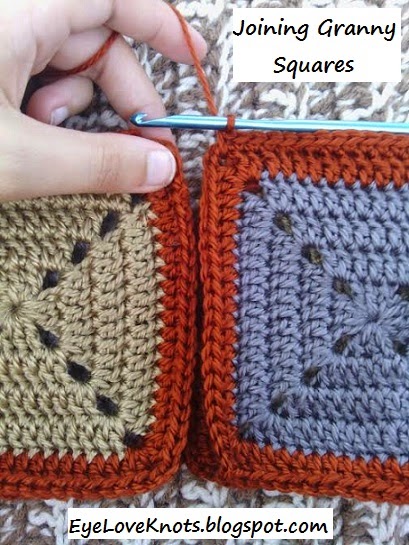
Lay two squares together, wrong sides facing each other.
You will be working into both layers of the squares.
Attach your yarn in the chain space on the far right, chain one and work two single crochets into the chain space.

Then single crochet in each stitch up to the next chain space.
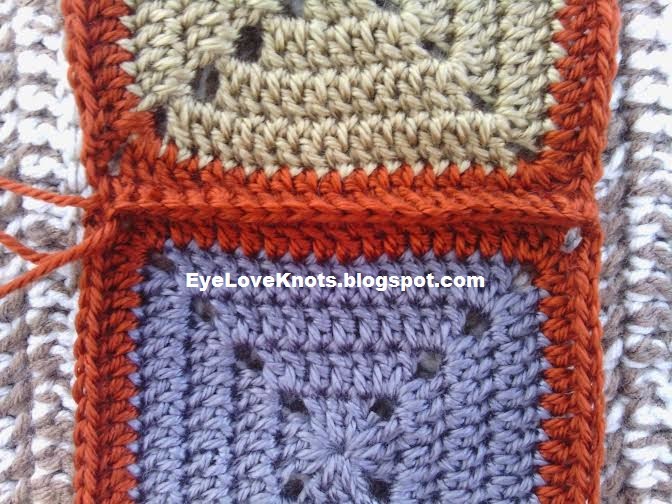
The single crochet join will create a ridge.
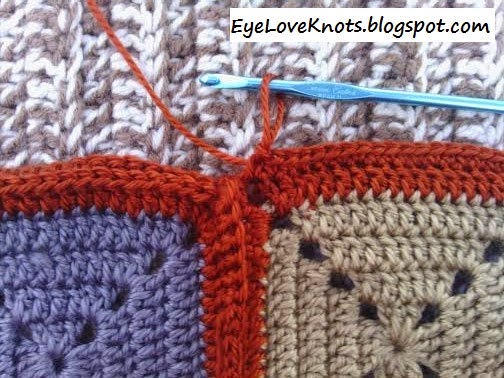
You will crochet one single crochet into the chain space, and the first half of a single crochet decrease. 
Grab your next set of squares – in this case, it is opposite to the first – and work the remaining half of the single crochet decrease followed by a single crochet into the chain space of the next square.


Make sure your squares have the Wrong Sides facing each other, 
and work the single crochet into both layers.
You will have a small gap in the center, but that is okay because when we work the join going in the other direction, the gap will disappear. 
Continue working the single crochet join across. 
For this particular blanket, I worked 7 squares across.
This image shows two sets of square connected horizontally.

Once you have worked to the end of your row, fasten off your yarn. No need to weave the end as your border will hide them.

Go back to the beginning of your join, and move up to the next square. 
Reattach your yarn into the far right chain space and begin again.
Once you’ve finished your join across, turn your piece, attach your yarn and work in the same manner across as you did before. This time though, you will only work one single crochet at the beginning of each row.

When you approach the chain space, you will work one single crochet into the chain space to the right of the ridge, and one single crochet into the chain space to the left of the ridge. This should sandwich the existing central join.


You can then continue on with the single crochet join.
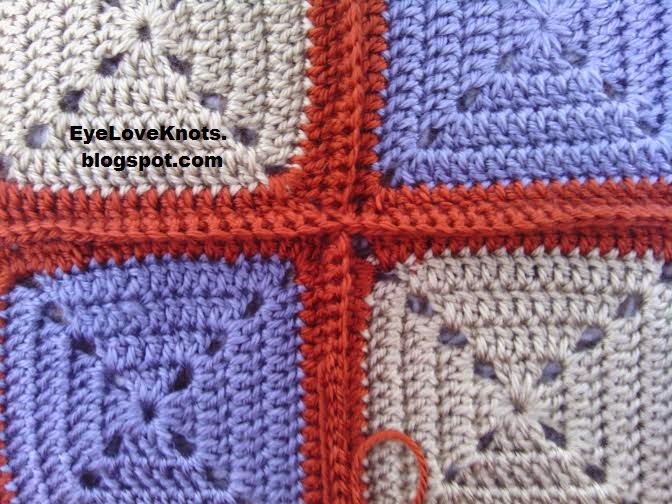
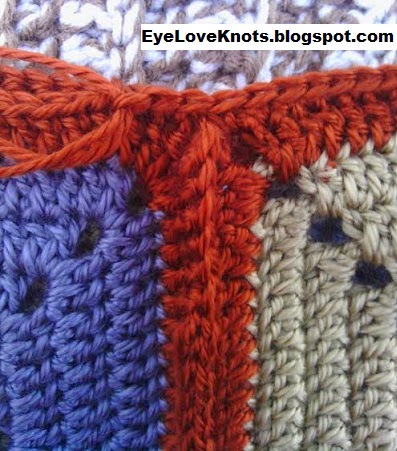
Here is a closer look at the intersection of four squares.

Border – also worked in Bitter Sweet:

At the end of joining your final row, don’t fasten off. You will just turn your piece and begin working around the blanket to complete your blanket. 
 
To do so, after the final single crochet into the chain space, work a single crochet into the same chain space but only into the top layer and around the outer part of the square.
 
R1: Work 2 SC into the immediate chain space and in each of the next 15 stitches, [5 SC into the next chain space – to form a corner – (SC in the next 15 stitches, 2 SC in the next chain space, 2 SC in the next chain space – over the tail ends – ) 7-8 times, SC in the next 15 stitches] 3 times. 5 SC into the next chain space – the corner – (SC in the next 15 stitches, 2 SC in the next chain space, 2 SC into the next chain space) 4 times. SC in the next 15 stitches, 2 SC in the next chain space. Join go the first SC.
 
R2: Chain 1, HDC into the same stitch and in each of the next 18 stitches, (HDC into the center of the previous SC 5 – the corner – HDC in the next 133-152 stitches) 3 times. 5 HDC into the center of the previous SC 5 – the corner – HDC in the next 115-135 stitches. Join to the first HDC. 
 
R3: Chain 1. Work in the same manner as R2. Join to the first HDC.
 

Fasten Off. Weave in Ends. 

Enjoy Your New Lapghan!
Please feel free to make and sell your own Granny Square Lapghan using this pattern, but please DO NOT claim this pattern as your own nor should you sell my pattern, and DO NOT re-publish my photos as your own. DO NOT copy and paste my pattern anywhere, link to it instead.


Join the EyeLoveKnots Crafting Community to share your creations, and see what other’s are up to! 

Don’t miss out on new crochet patterns, reviews, jewelry tutorials and more! Subscribe to EyeLoveKnots by using the box on the right side toolbar, or follow me via Bloglovin! You can also find me sharing on the EyeLoveKnots Facebook page, and @EyeLoveKnots on Twitter!

Linked Up To…
February 2015 Sharing Time Week 1 – Raising Memories
Link Your Stuff! – Annemaries Haakblog
Best DIY Projects & Recipes Party – The 36th Avenue
The Party Bunch – The Idea Room / Thirty Handmade Days
Friday Finds Link Party 1.30.15 – Craftaholics Anonymous
Think Pink Sunday No. 202 – Flamingo Toes
Best of the Weekend Party – Little Miss Celebration
Craft Schooling Sunday – Creative Jewish Mom
Crafting Along #76 – Maz Kwok’s Be a Crafter XD
Inspiration Monday #82 – Scattered Thoughts of a Crafty Mom
The Handmade Hangout #33 – Too Much Time on my Hands
Motivational Monday – Burlap and Babies
Inspire Me Monday – Week 162 – Create With Joy
Link Up Party #33 – So Much at Home
Tutorials & Tips Link Party {195} – Home Stories A to Z
Submarine Sunday #110 – Navy Wifey Peters Aboard the USS Crafty
Hit Me With Your Best Shot #55 – One Krieger Chick
From Dream to Reality #154 – The DIY Dreamer
Worthwhile Wednesdays #55 – Crafty Allie
Love You More, Share Your Creativity Link Party No 149 – It’s Overflowing
255th Inspire Me Tuesday – A Stroll Thru Life
Be.You.Tiful Link Party #57 – Fry Sauce and Grits
Your Whims Wednesday #200 – My Girlish Whims
{Wow Me} Wednesday #192 – Ginger Snap Crafts
Pin Junkie Pin Party #104 – The Pin Junkie
On Display Thursday Link Party (No. 30) – Average but Inspired
The Sunday Showcase No 274 – By Stephanie Lynn
Create Link Inspire {64} – Kleinworth & Co
Made by You Monday – Skip to my Lou

Filed Under: Free Crochet Patterns Tagged With: 5/H8, Blanket, Blogging Tips and Tricks, Child Size Afghan, Copper, Crochet Technique, Free Crochet Pattern, Granny Square, Gray, Half Double Crochet, Hobby Lobby, Lapghan, Red, Scarlet, Single Crochet, Soft Secret, Tan, Throw Blanket, Toddler Size Afghan, Yarn Bee

❮ PREVIOUS POST

Yarn Fanatic Linky Party #21

NEXT POST ❯

Spring Has Sprung Scarf – Valentine Inspired – Crochet Pattern Review

Comments

  1. Carrie says

    February 8, 2015 at 5:30 am

    This is a beautiful blanket and I love the colors you chose for it!

    Reply
    • knots1prime says

      February 9, 2015 at 11:05 pm

      Thanks Carrie! My boyfriend's mom (Tammy) really loved it too! 🙂

      Reply
  2. Oui Crochet says

    February 11, 2015 at 5:29 am

    Very nice! I love those colors together!

    Reply
    • knots1prime says

      February 11, 2015 at 5:29 pm

      Thank you 🙂 I loved the colors so much, it was a little tough to give up hehe

      Reply
  3. Laura says

    February 21, 2015 at 4:27 pm

    Great job on your lapghan! I also crochet and I'd love for you to stop by my blog and take a look at my projects. I'm following you on Bloglovin. Over The Apple Tree

    Reply
    • knots1prime says

      February 22, 2015 at 1:26 pm

      What a neat blog full of such beautiful projects! I am also following you via Bloglovin, and a new fan on Facebook 🙂

      Reply

Leave a Reply Cancel reply

Your email address will not be published. Required fields are marked *

This site uses Akismet to reduce spam. Learn how your comment data is processed.

Welcome!

Welcome!

Hey! I'm Alexandra, the blogger and creator behind EyeLoveKnots and On Rockwood Lane! My passion is being creative. My favorite thing to do is crochet, and you will almost always find me having a cup of coffee and working on a new crochet project, but when I'm not doing that, you might find me out at a local park rollerblading, baking some fresh cookies, picking veggies in the garden or re-decorating for a new season or holiday. My two cats are great supervisors for all my adventures (minus the being outside because they think it's too hot in Florida to be anywhere but inside), and make sure I take plenty of breaks.

Meet the Team!

Meet the Team!

On the left, Abby is the maker behind A Stitch Shy of Normal, and on the right Jessica is the maker behind Nice and Knotty and Candace is the maker behind TandC Crafters.

Together, they help me bring awesome crochet projects to you! Click the image to learn more about them, and get their Instagram links, where they are constantly sharing tons of crochet inspiration.

Don’t Miss Out

Crochet! Magazine Spring 2023

Crochet! Magazine Spring 2023

(Affiliate Link) Click this image to get this issue now. These 22 designs are the perfect way to welcome in Spring with easy to wear layers, sweet styles amplified with striking stitch patterns, and some fun whimsical projects too.

Crochet World April 2023

Crochet World April 2023

(Affiliate Link) Click this image to get this issue now. These 21 designs are the perfect way to welcome in Spring with fun pops of color, sweet crochet thread projects, and fresh takes on the classic granny stitch pattern.

Gnome Caddy Pattern

Gnome Caddy Pattern

(Affiliate Link) Click this image to get a copy of this pattern! This adorable little Spring Gnome Caddy has a place for all of your crochet supplies. It's worked in a lightweight #3 yarn, but work in a worsted weight #4 yarn for even more space!

Archives

Copyright © 2023 EyeLoveKnots · Custom site by Moonsteam Design