One of my favorite things to do is paint my nails! I find it very relaxing and entertaining. I am not very good at waiting for them to dry before starting something else, but I try my best.
I have been having issues growing my nails out. If it hasn’t been one thing, it’s been another. What you see here has been coming for more than 6 months but I am so happy to have them long and strong again.
I figured, it was high time I painted them for the beautiful Spring season we are immersed in.
Supplies I Used:
– Double Duty Strengthening Base and Top Coat by Sally Hansen
– Nail Polish in the San Francisco color by Sinful Colors (Walgreens)
– Nail Polish Pens in Orange, White, Pink and Yellow by Migi Nail Art
Supply Notes:
I really LOVE the Double Duty Strengthening Base and Top Coat by Sally Hansen. I have experienced in the past – dry-like, brittle, peeling nails after polish has been removed but with using this clear coat as a base, I NEVER have any issues! And – it helps prevent the staining of the nails from the polish.
On top, it prevents the polish from chipping.
If you don’t have polish pens, you could also use a toothpick, round end of a sewing pin or bobby pin, or dotting tools to make the designs in this tutorial, and some regular nail polish in your choice of colors.
* I know when I first started working designs on my nails, I used a toothpick for it all. It is a little difficult but you can still accomplish a lot with time and patience! My recommendation? Splurge a little and get some of these handy polish pens, or order some dotting tools online.
Time Spent:
Less than an hour! Depends greatly on your tools at hand.
Tutorial Notes:
This tutorial is good for long or short nails. The number of flowers can go down to one each finger, or as many as you can fit.
With a larger dotting tool, your flowers can also vary in size. Mine are fairly small, but a nice, full flower would also look really nice!
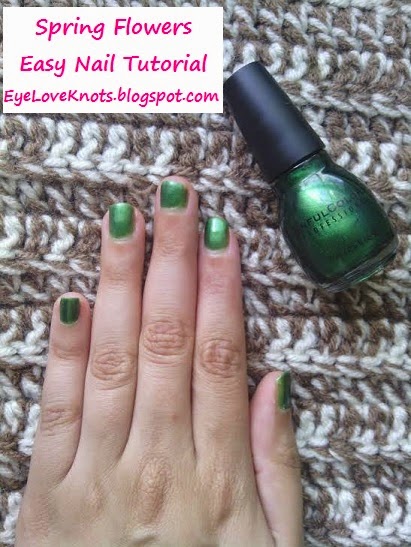
First thing, I applied a clear coat to protect my nails.
Then, I pulled out my San Francisco nail polish and applied three coats.
Usually I don’t apply that many coats, but this particular color is a little light – I could see the white part of my nail through it so I went with a little extra.
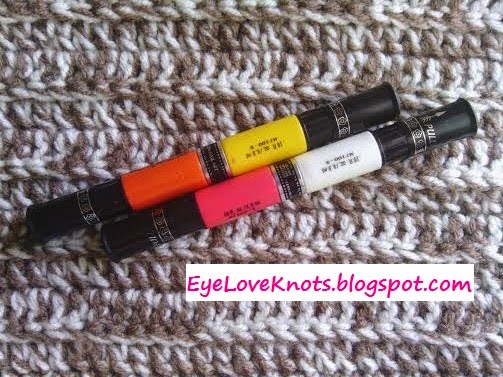
Once the green was dry, I pulled out two of my nail polish pens.
These things are AWESOME! They have a brush on one side, so you could just paint with the color, and a tip on the other side, so you can use it to draw on your nails with. These particular polish pens were bought through a mail in catalog, but they now also sell a similar set at Walmart.
AND! They are refillable! Yes please.
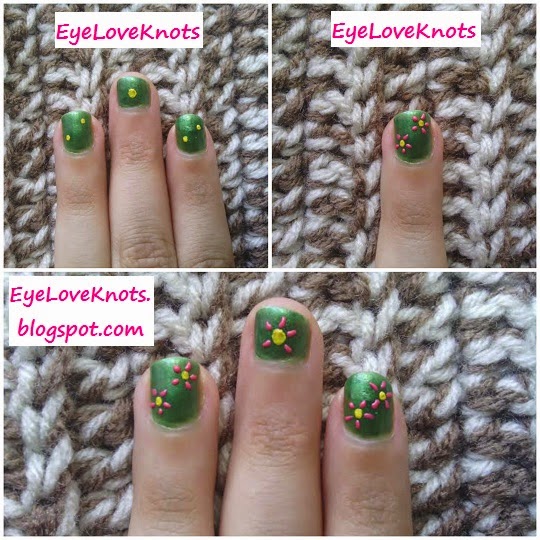
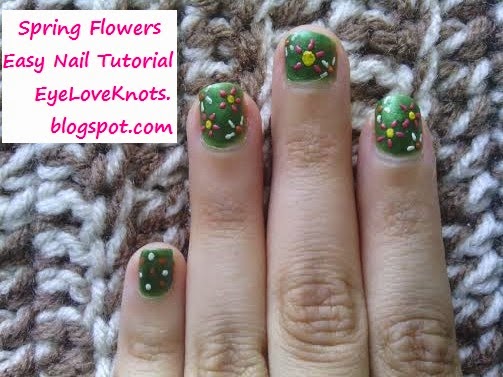
I started off by placing two yellow dots diagonally from each other on my index and ring fingers.
This is where I was going to stop with the embellishments at first, but I then I thought, why not place a central one on my middle finger too? And so I did.
Once those were dry, I began my petals by placing five pink dots evenly spaced around the yellow dots.
I am not a big fan of how the middle finger did turn out. If I did this over, I would add three to the center – one at the center bottom, and two diagonal from it on both sides.

I went ahead and added two orange dots at a diagonal on my index, middle and ring fingers – shown by the white arrows.
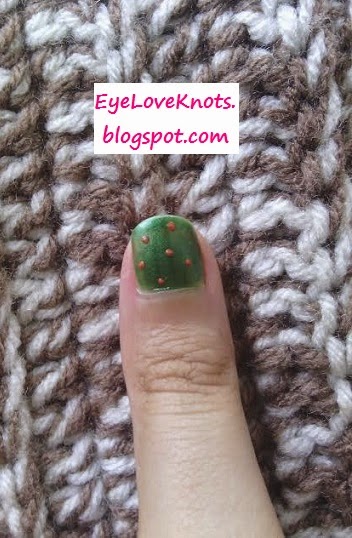
And I added orange dots randomly placed on my pinkie finger and thumb.
I finished up by adding white petals to the orange dots on the middle three fingers, and randomly place white dots on my pinkie finger and thumb.
For the petals, I only placed three on each as it was on the corner.
Now, it looks like the pattern is a continuation.
Apply another clear coat to protect your hard work;
And that’s it! Really easy, pretty, colorful and fun!
*If you’ve been inspired to make some Spring Flowers of your own, please share them on my EyeLoveKnots Facebook page!
Linked Up To…
I love your spring nails!
Thanks Julie 🙂