How to crochet a flat circle with a straight seam the easy way!
I have been using this technique for years, and so glad I discovered it because traveling seams really used to stress me out.
This technique works anytime working projects in the round in which you are joining at the end of your rounds and chaining to begin the next round.
This technique will not eliminate your seam, but it will keep it straight, which definitely helps to hide it if you are able to keep it out of view on the side or back of a project.
For this tutorial, I am using Red Heart Super Saver in Buff and an I9/5.5mm crochet hook, and my nails are Color Street Bloody Gorgeous.
Video Tutorial Showing How to Crochet a Flat Circle in Double Crochet:
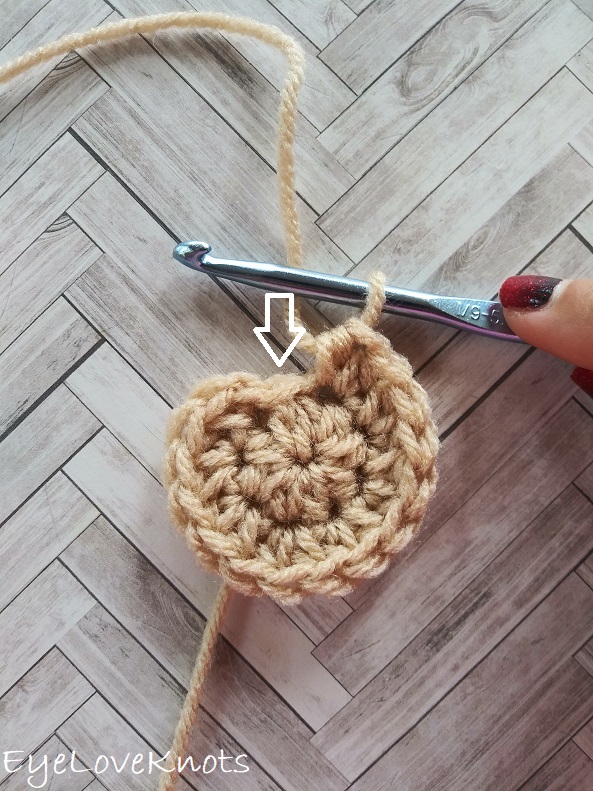
Step 1 – Cupping

This photo shows what cupping looks like. It’s usually from not having enough stitches in each round, but sometimes, we can’t always add more stitches to the round and still reach the measurements we are looking for, so one way to counter balance this, is to begin with a chain, and work into the first chain in place of making a ring to work into.
I usually always use this technique when I am doing 8 or 9 stitches in the first round, and find that 10 – 12 stitches are the best to lay flat.
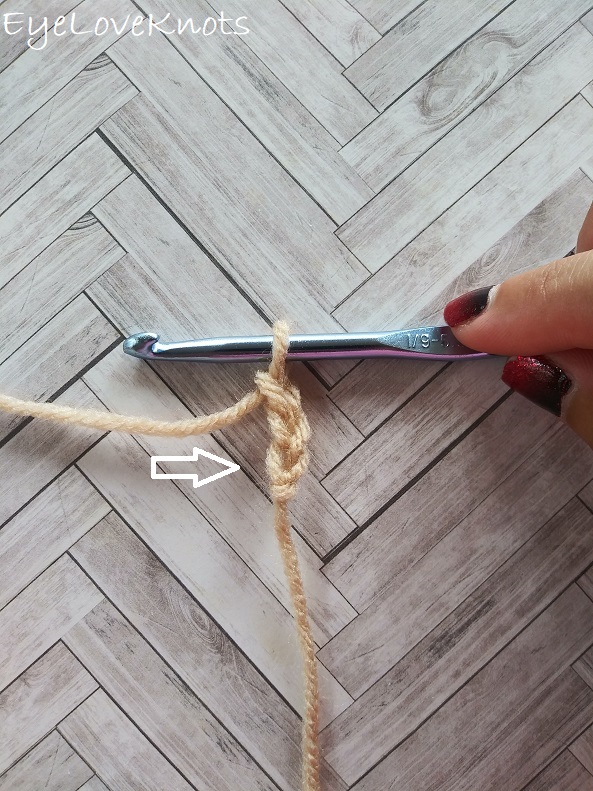
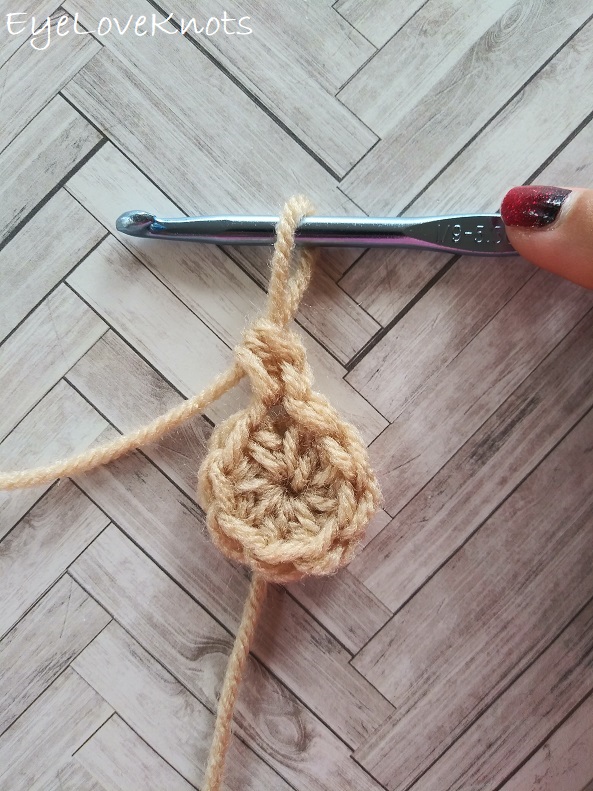
In this case, I am working in half double crochet so I will chain 3 – the skipped chains do not count as a stitch. If I were working in single crochet, I would chain 2, and if working in double crochet, I would chain 4 and still not count the beginning chain in the final stitch count (I don’t count chains when increasing a circle).
Make sure to start with a longer than normal tail because the added stitches will take away from the length.
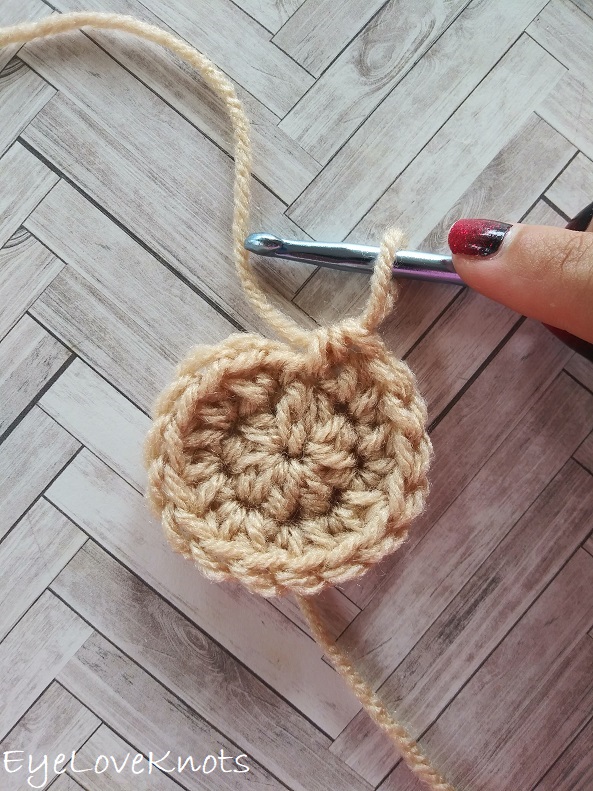
You will slip stitch join to the first stitch of the round as usual. If you are unsure of which stitch this is, count backwards from where your last stitch is counting it as one. In this example, I have 8 stitches.
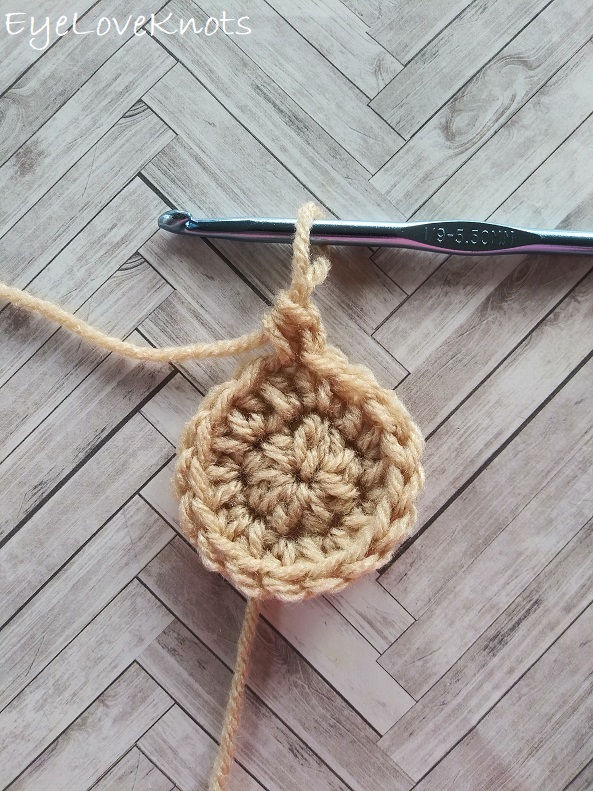
Round 2
Chain 1. If working in single crochet, chain 1 as well; chain 2 if using double crochets.
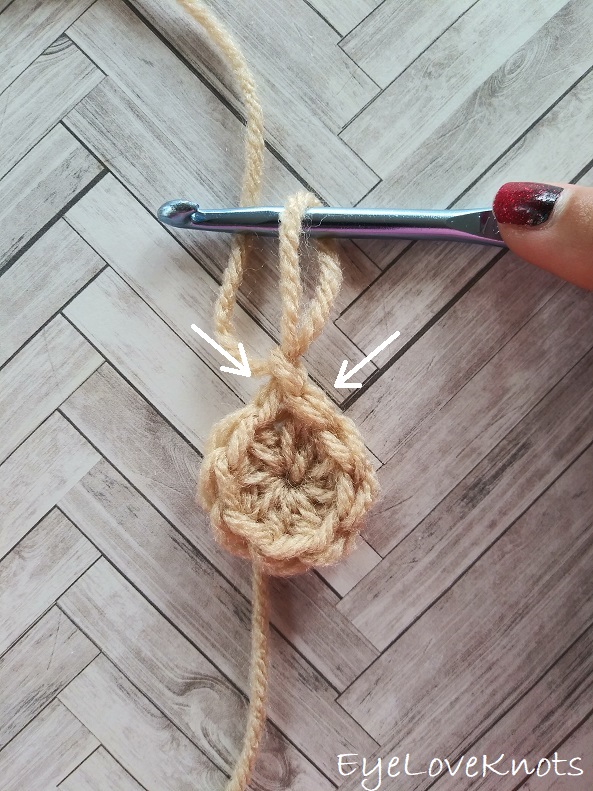
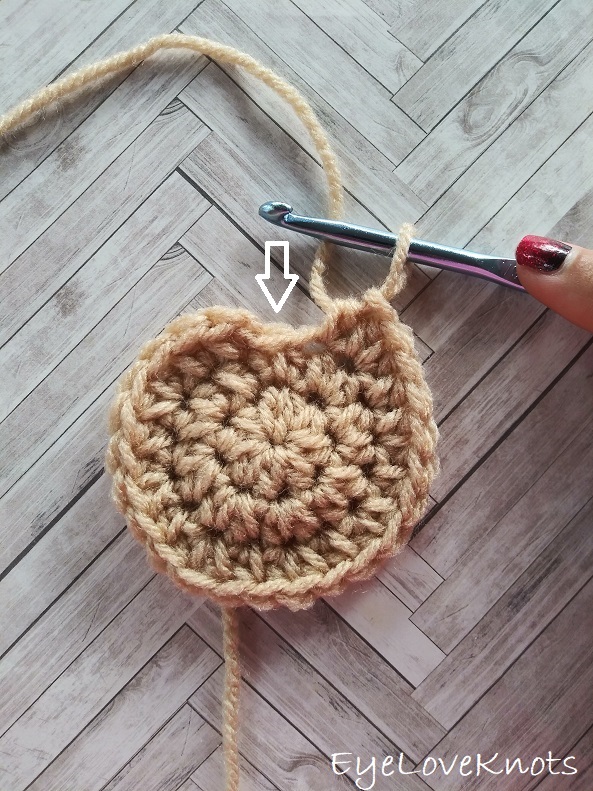
When increasing, you would normally work this round with two stitches into each stitch around. To keep your seam straight, the secret is to split the beginning increase on either side of the beginning chain, as noted by the arrows.
Continuing with the 8 half double crochets I previously mentioned, this looks like: “HDC into the first stitch, 2 HDC into each of the next 7 HDC…”
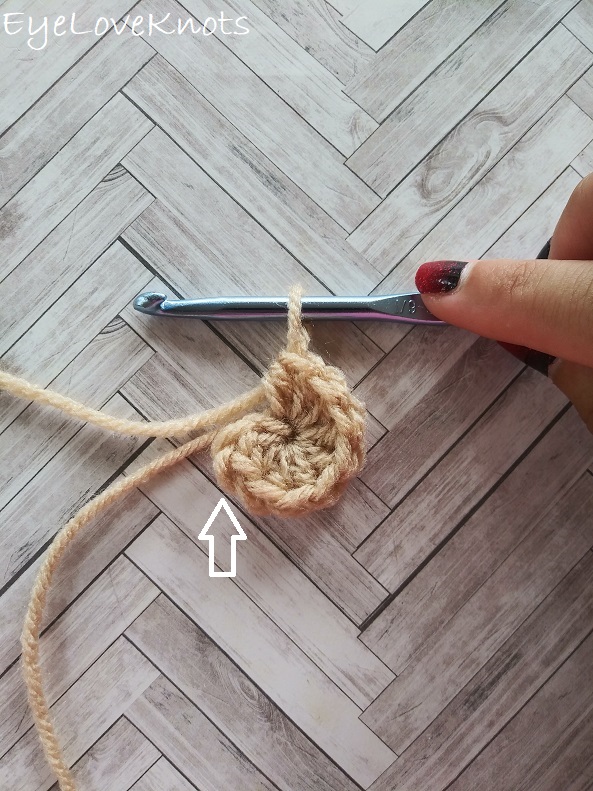
Here we have 15 stitches, and we just need to add the last stitch to complete the first set of increases, and that goes into the first stitch just to the right of the beginning chain.
And here is what it looks like with the last stitch. Slip stitch as normal to the first stitch.
Round 3
We work in the same manner for however long we are increasing. For Round 3, you typically work a repeat of either (2 stitches, 1 stitch) or (1 stitch, 2 stitches). Here, we will work the first way but with the first increase split, so it looks like: “HDC into the first stitch, HDC into the next stitch, (2 HDC into the next stitch, HDC into the next stitch) 7x…”
Here we have 23 stitches, and we just need to add the last stitch to complete the first set of increases, and that goes into the first stitch just to the right of the beginning chain, noted by the arrow.
Remaining Rounds
All the remaining increasing rounds are worked in the same manner, so the next two would look like this:
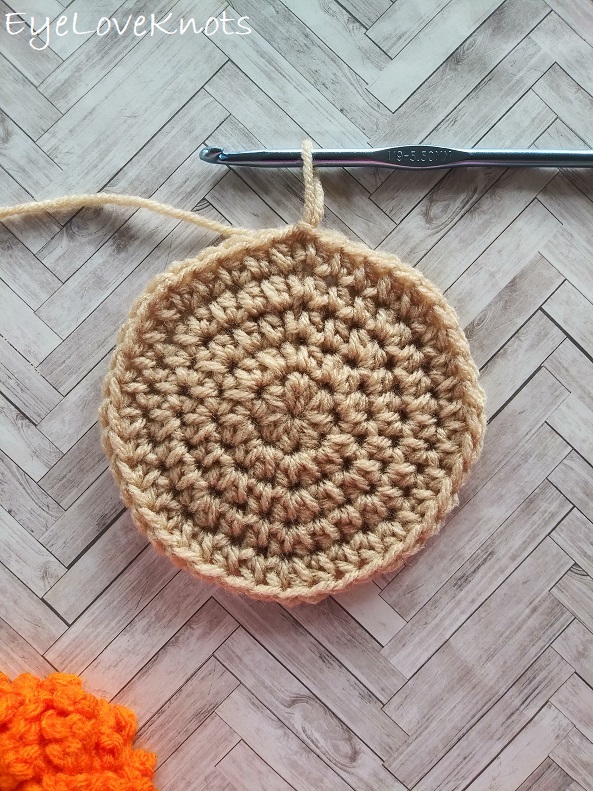
Round 4: Chain 1. HDC into the 1st 3 stitches, (2 HDC into the next stitch, HDC into each of the next 2 stitches) 7x, HDC into the 1st stitch. Join. (32 HDC)
Round 5: Chain 1. HDC into the 1st 4 stitches, (2 HDC into the next stitch, HDC into each of the next 3 stitches) 7x, HDC into the 1st stitch. Join. (40 HDC)
Please DO NOT claim this tutorial as your own nor should you sell my tutorial, and DO NOT re-publish my photos as your own. DO NOT copy and paste my tutorial anywhere, link to it instead
Join the EyeLoveKnots Crochet & DIY Community on Facebook to share your creations, and see what others are up to!
You May Also Be Interested In…
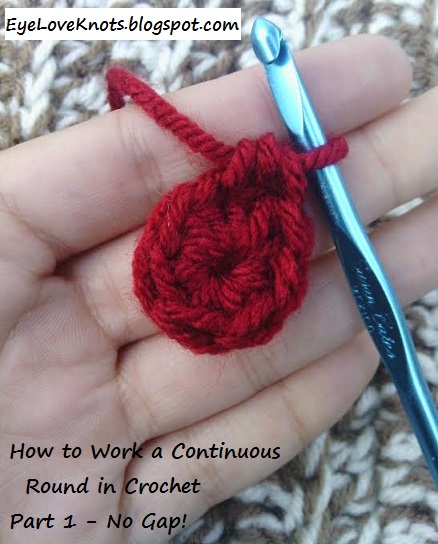
How to Work a Continuous Round in Crochet with No Gap (Photo Tutorial)
Linked Up To…
Craft Schooling Sunday – Creative Jewish Mom
Unlimited Monthly Link Party 17 – Grammy’s Grid
Hearth and Soul Link Party – April, 21st Century Housewife
Handmade Monday #197 – Sum of their Stories
The Really Crafty Link Party #236 – Keeping it Real
Ginx Woolly Linx Party October – Ginx Craft
Craftastic Monday Link Party – Sew Can Do
562nd Inspire Me Tuesday – A Stroll Thru Life
Fabulous Party #341 – Lou Lou Girls
Linky Ladies Party #195 – The Purple Poncho
You’re the Star October Blog Hop – B4 and Afters
Little Cottage Link Party #72 – Love my Little Cottage
Party in Your PJs #330 – The Apple Street Cottage
{Wow Me} Wednesday #476 – Ginger Snap Crafts
Your Whims Wednesday #480 – My Girlish Whims
Waste Not Wednesday 227 – Pretty DIY Home
Hookin’ on Hump Day #224 – Moogly Blog
Thursday Favorite Things #461 – An Artful Mom
Creatively Crafty Link Party #245 – Life Beyond the Kitchen
Artsy-Fartsy Party #314 – Artsy-Fartsy Mama
Creative Compulsions Linky Party #81 – My Bijou Life
Traffic Jam Weekend Linky Party #254 – My Bijou Life
Pin Party #390 – The Pin Junkie
Friday Favorites – Busy Being Jennifer
Link Your Stuff – Annemarie’s Haakblog
Scraptastic Saturday Party 310 – Scraplity
A Morning Cup of Joe Linky Party – The Cottage Market
Snickerdoodle Create Bake Make Link Party 357 – EyeLoveKnots
Charming Homes & Gardens Week 29 – White Arrows Home
Tuesday Turn About #70 – My Wee Abode
Encouraging Hearts & Home Blog Hop – Apron Strings and Other Things
Create, Bake, Grow & Gather Party #441 – Shabby Art Boutique
Embracing Home and Family Link Party #12 – The Everyday Farmhouse
Thanks for sharing this great tutorial.
Thank YOU Julie!
This tutorial is easy to follow even for someone like me with very minimal crochet skills!
Absolutely! And I’m here to help if you need anything.
I am pinning this for future reference. Thanks for sharing with Creative Compulsions!
Michelle
https://mybijoulifeonline.com
Great tips! I need to brush up on my crochet skills! Thank you for sharing with us at Embracing Home and Family!
I may well be using this tutorial. My daughter wants a bucket hat, and I think crochet is going to be the way to go for the top.
Hi!
Thank you so much for this helpfull tutorial!
Does it work also with changing colours?
Absolutely! My trick to getting a seamless color change is to slip stitch join as normal, then pull the new color through the loop on your hook, and then pull the original color tight (it will disappear). Then I chain, and begin the round.
do you have a video of this? I need the lightbulb moment lol! thx
I am working on my first video actually! But it isn’t for this tutorial – I will add it to my list. Any particular part I can help explain further right now?