Before I begin, I must confess… I have had my laptop for over 5 years and have never figured out how to use the Print Screen button until today! I seriously have thought it was defective this whole time… Hehe. But I am so happy to have figured it out because now that opens lots more doors for me (and you)!
I have taken the initiative and planned out some of my projects for 2016. The plan includes Crochet and Needlepoint on Plastic Canvas. I am sure many others will sneak in and the plan will be rearranged, but I am feeling accomplished and can focus more now that I have a general idea of my coming weeks.
I usually sketch out my plastic canvas projects on graph paper, and then redo the sketch on a clean piece but as I was sketching out some designs, I was running into some issues of not being able to really see what I was envisioning. I could of course used colored pencils, but then you can erase.
I decided to search around on the web to see if anyone had a simple solution to my dilemma. I found several neat resources, but not exactly what I wanted plus I don’t have any programs on my computer such as Word or Excel – I rely on my Google Drive, and have been very happy with my experience so far. The discovery of the ease of using Google Sheets was no exception.
I have a fun group of projects coming your way, so stay tuned!
Click on any photo to see a larger version. I had to do a lot of tinkering to get them to appear as they do and cannot get them any larger.
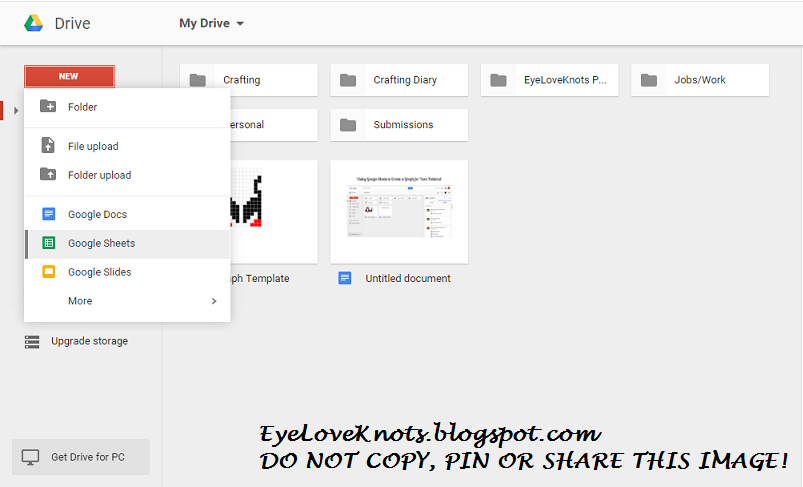
Once in the Google Drive:
Click big red “New” button located on the left side of the screen.
Select “Google Sheets” from the drop down.
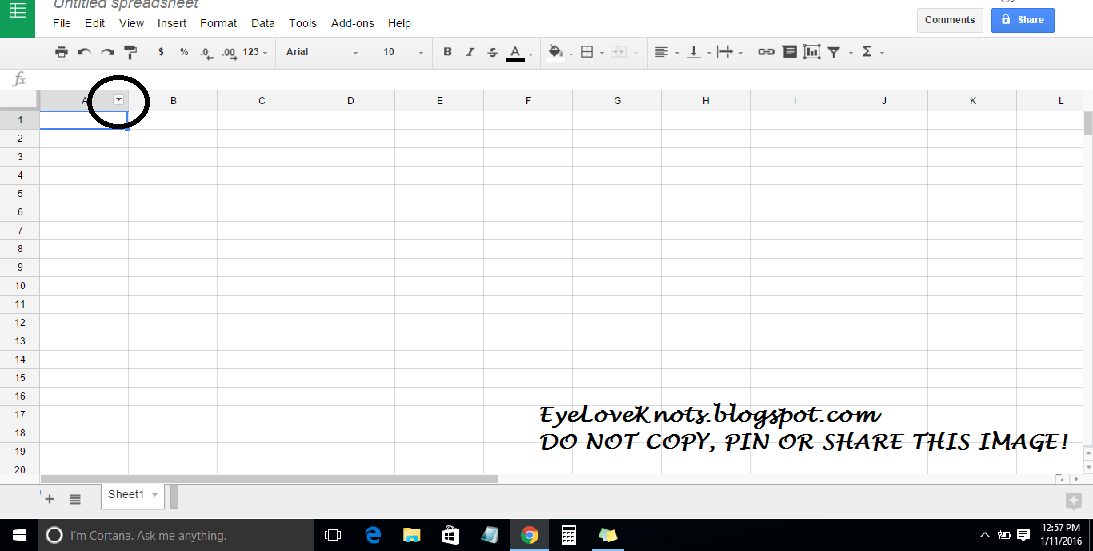
First, you’ll need to resize your blocks. You’ll only be editing the columns – Lettered tabs.
I tried to highlight several column to edit but was unsuccessful. I did each one one-by-one.
To Edit the Column Width: Scroll up to the right hand corner of a letter tab. You will notice a small arrow. Click it.
01.13.16 UPDATE: You can highlight multiple columns and resize at once. Click on and Highlight the lettered tabs, not the actual grid. Then, right click and select “Resize Columns X – X …”
01.13.16 UPDATE: You can highlight multiple columns and resize at once. Click on and Highlight the lettered tabs, not the actual grid. Then, right click and select “Resize Columns X – X …”

Select “Resize Column” from the drop down.
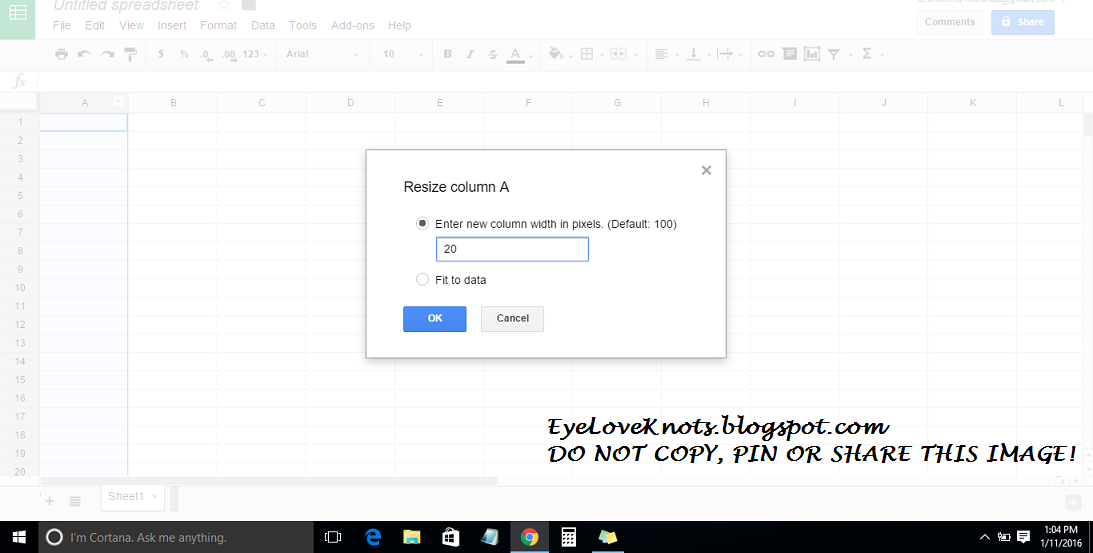
A little box will pop up that will have the dot placed next to the first option, “Enter new column width in pixels…”. Change the default 100 to 20. Click “OK”.

Do this across the screen. Do not adjust the numbered side of the chart.
Don’t worry about being limited to 26 blocks across. You can add more as you see I have here.

Highlight the squares you want to color by holding down the “Ctrl” button on your keyboard and clicking the individual squares.
*If you mess up (as I have above), you can’t unclick squares here. Just go with it, and uncolor them afterwards by using the same method.
You can also highlight a large portion and color as well.
As you can see here, I changed words after I realized I was going to have to adjust and add more columns. Hehe.
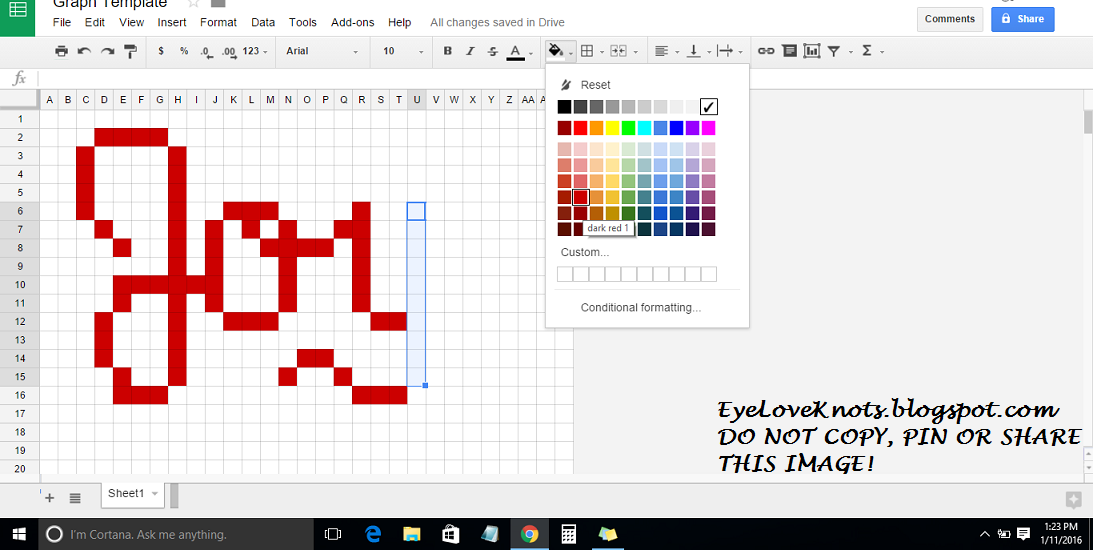
To color, select the “Fill Color” icon – the little paint can. I used “dark red 1” here.

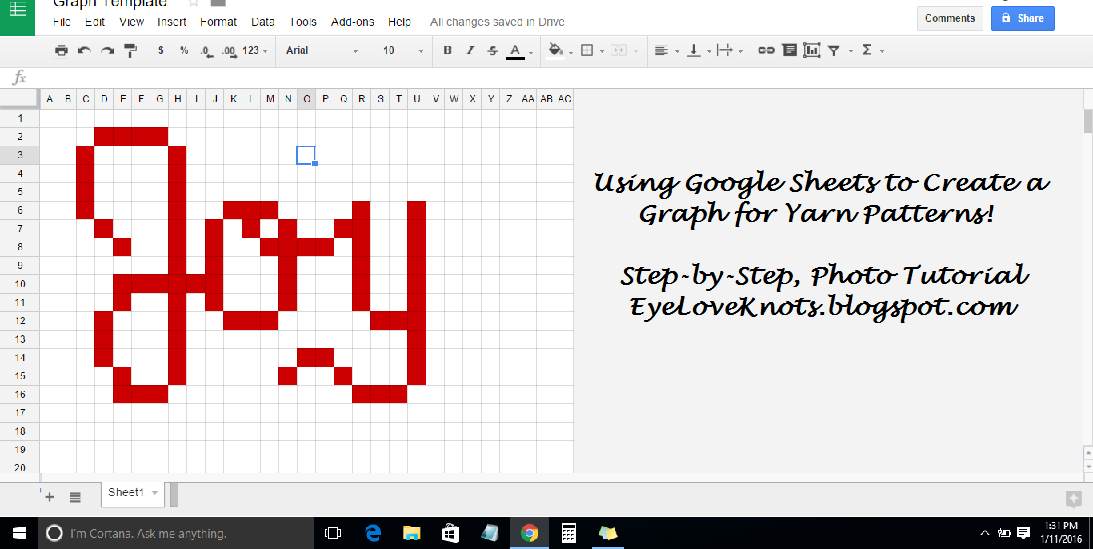
And there you have it! Now you can use this graph to work a cross stitch, plastic canvas or crochet project – to name a few!
Copyright 2016 – All EyeLoveKnots Patterns, Photos and PDF’s are protected under copyright. They are not to be copied, distributed or sold – doing so is copyright infringement and stealing! Link directly to this blog page. DO NOT PIN ANY OF THESE PHOTOS, except the first one (title)! The option has intentionally been disabled. Feel free to use this information to make and sell your own items.
Your tips and feedback are much appreciated!
Don’t miss out on new crochet patterns, reviews, jewelry tutorials and more! Subscribe to EyeLoveKnots by using the box on the right side toolbar, or follow me via Bloglovin!
Love this! Thank you!
🙂 Glad to hear
Thank you so much for this. I've bookmarked it for future reference. 🙂
Would love your feedback on the process once you give it a try.
Smart idea! I may try this for quilting blocks as well.
Is there a way to scan a coloring book page on the graph and make it a stamped cross stitch pattern?
You can scan it and save to your computer, and then upload to a program (site actually) like Stitch Fiddle, which has the option for graphs in different crafts. You can use Stitch Fiddle for free, but have to pay to download your graph.