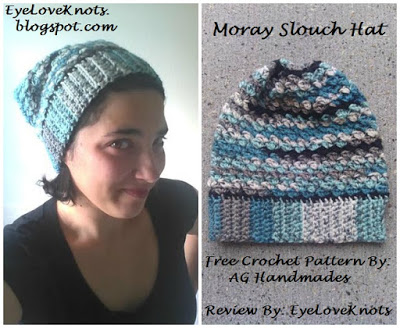
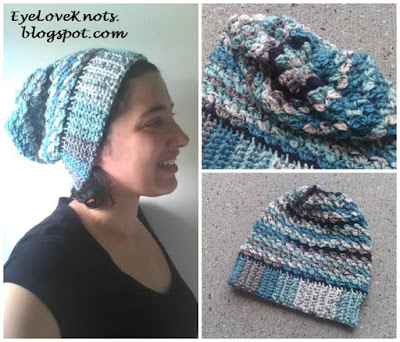
I have had this on my list of things to do since it was first posted back in September. Though it wasn’t high on my list, the fact that it had been repinned practically a thousand times made me decide to move everything else aside and work one up for myself.
Once I began, I realized the stitch pattern is similar to one of my favorites – the Slanted Shell – but a modified version. It’s funny because just last night I was reading a crochet magazine that had a piece on this stitch pattern, and I made a note of it so I could use in a future project – it’s called the Kroller Stitch. I really like it because it is similar to the Slanted Shell Stitch but also because it has more flexibility and works up a little quicker.
I plan on trying out the matching Moray Cowl to go along with my set, but will be putting that on hold since I have been trying really hard to use up yarn in my stash and don’t have any of the Agean Stripes left.
Materials:
– 428 Yards of Worsted Weight Yarn – I used almost a full skein of Hobby Lobby’s I Love This Yarn in the Agean Stripes colorway – a variegated yarn
– I9/5.5mm Crochet Hook (as suggested)
– #18 Tapestry Needle
– Moray Slouchy Hat, Free Crochet Pattern from AG Handmades
Material Notes:
Stylecraft Special Aran used by AG Handmades. Red Heart’s With Love is also a great alternative.
Time Spent:
I had this Slouchy Hat completed in just under 3 hours, including closing up the back of the hat and weaving in my ends.
Measurements:
My hat measures 19″ in circumference to stretch to fit my 21.5″ head, and my boyfriend’s 24″ head by 10.5″ in length.
I would suggest if working for a man, add at least two more rows to the length to slouch better.
Gauge:
With I Love This Yarn and an I9/5.5mm Hook = 4″ x 4″
Chain 16, DC in the 4th stitch, and in each stitch across. (14 DC)
R2 – R8: Chain 2, turn. DC in the 2nd stitch, and each stitch across.
Fasten Off.
Pattern Notes:
At 55 rows, I found my band to be too tight measuring only 12.5″. I ended up adding 20 more rows to the band to give me 75 rows. The hat can be made smaller or larger by adding in multiples of 3 (not 5 as mentioned in the original pattern), since 3 stitches make 1 cluster. Each row adds about 1 1/8″ to width.
I really like how this hat is worked in a continuous round. It made it easy to focus on the stitches, and not on a forming and shifting seam.
The pattern states to work until the hat measures 11″, but I didn’t want my hat to be that long and have an awkward stiff slouch as I have experienced with thicker yarn before so I worked 22 rows of clusters until the lower side of the hat measured 10″ – the higher side measured 10.5″ at this point.
The closing of the hat was very neat to me. It’s a great way to close up for anyone who hates sewing, but after I worked it as written, I took it out and closed up in the manner I am most comfortable with. I have a photo tutorial of this in my Slanted Shell Slouchie Hat Pattern, but basically I fasten off with a longer tail, thread my needle, turn the hat inside out and weave the needle in and out of stitches creating a drawstring. Once to the beginning, I pull the ring closed and sew to secure.
With so many yarn type and color options, I would love to see them! Please share your photos on my EyeLoveKnots Facebook page!
Don’t miss out on new crochet patterns, reviews, jewelry tutorials and more! Subscribe to EyeLoveKnots by using the box on the right side toolbar, or follow me via Bloglovin!


Leave a Reply