If you’d like to make some cute little hair clips for yourself or little one, or to give as a gift, part of it includes a partially lined hair clip.
If you’re unsure of how to partially line a double prong clip, simply follow my photos and steps below.
*Why do we partially line hair clips?
A. To better hold in the hair. You can definitely fully line the clip if you want to.
**This tutorial and photos were put together two years ago! I do things a little differently now, but it’s all still good stuff 🙂
Materials:
– At least 4.5″ per clip of 3/8″ Grosgrain Ribbon
– Double Prong Hair Clip (you could substitute for alligator clip, barrette, etc)
– Lighter for Sealing
– Hot Glue Gun & Glue Sticks
Material Notes:
If you are in a pinch, felt will also work and does not fray meaning no need to seal edges.
I would recommend purchasing some clips that are CPSIA Compliant, meaning they are safe for children 12 and under because they do not have harmful levels of lead – ESPECIALLY if you plan on selling the hair clips. In this example, I am using Double Prong Alligator Clips from Hobby Lobby. They do not specify whether or not they are CPSIA Compliant – but I am carefully with the jewelry charms and such that I buy from Hobby Lobby because they list on the back that they may contain lead.
I have been looking to make a purchase of the Double Prong Clips from the Ribbon Retreat. They are sturdy, CPSIA Compliant, and fairly priced.
Time Spent:
You can have a whole set ready in just a matter of minutes.
Tutorial:
First things, first. You will need to measure and cut your ribbon. You will need 4.5″ for each double prong clip.

Secondly, you will need to seal the edges of your ribbon so they don’t fray. I was a little intimidated at first too but it’s easy! I use a birthday candle to get the flame from a regular candle and quickly ran my ribbon across it.
I do know that the picture below does not have a flame. I just didn’t have enough hands for that one, plus safety first 😉
*If you are using felt, DO NOT heat seal!
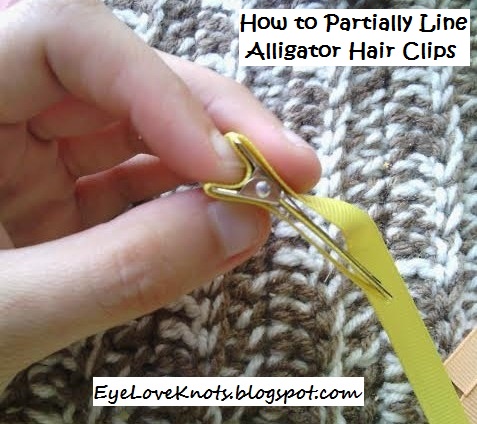
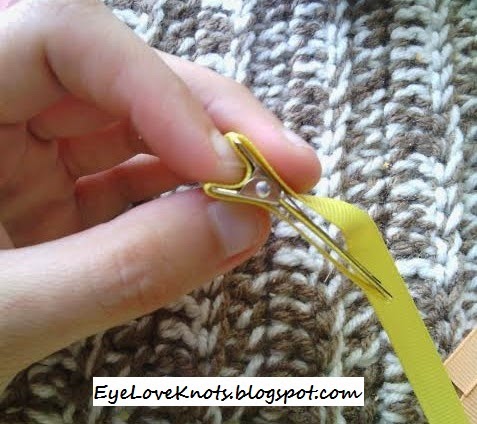
For the lining, I like to first measure out how far to place my hot glue.
Then you’ll need to remove the clip, put hot glue along that measured part of the ribbon and then I simply placed my clip the same way it was when I took the measurement. The hot glue will be facing you at this time.

I press my finger along the ribbon into the hot glue.
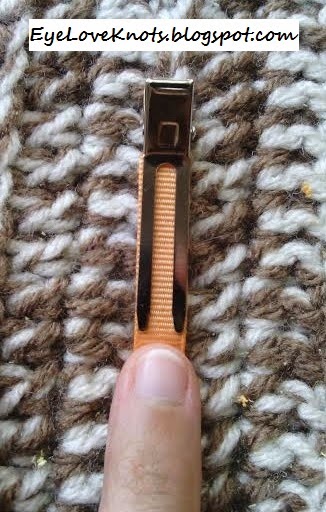
Once you get to the pincher part, add some more hot glue and press the ribbon down some more.
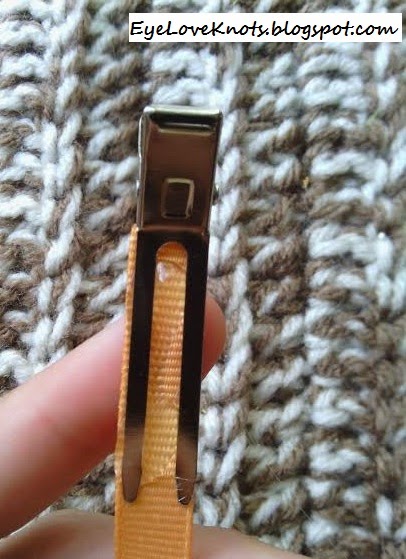
Turn the clip so you see the springs. Place some hot glue on each side on the inside NOT PUTTING ANY ON THE SPRINGS, and press down your hot glue into it.
All that is left is that tiny piece of the pincher on the other side. Put some hot glue on it and press down the remaining piece of your ribbon and you’re all done!

Make them in different colors to match your hair embellishment.
Please feel free to make and sell your own Partially Lined Clips using this tutorial, but please DO NOT claim this tutorial as your own nor should you sell my tutorial, and DO NOT re-publish my photos as your own. DO NOT copy and paste my tutorial anywhere, link to it instead.
With so many size, ribbon types and color options, I would love to see them! Please share your photos on my EyeLoveKnots Facebook page.
Don’t miss out on new crochet patterns, reviews, jewelry tutorials and more! Subscribe to EyeLoveKnots by using the box on the right side toolbar, or follow me via Bloglovin!
Leave a Reply