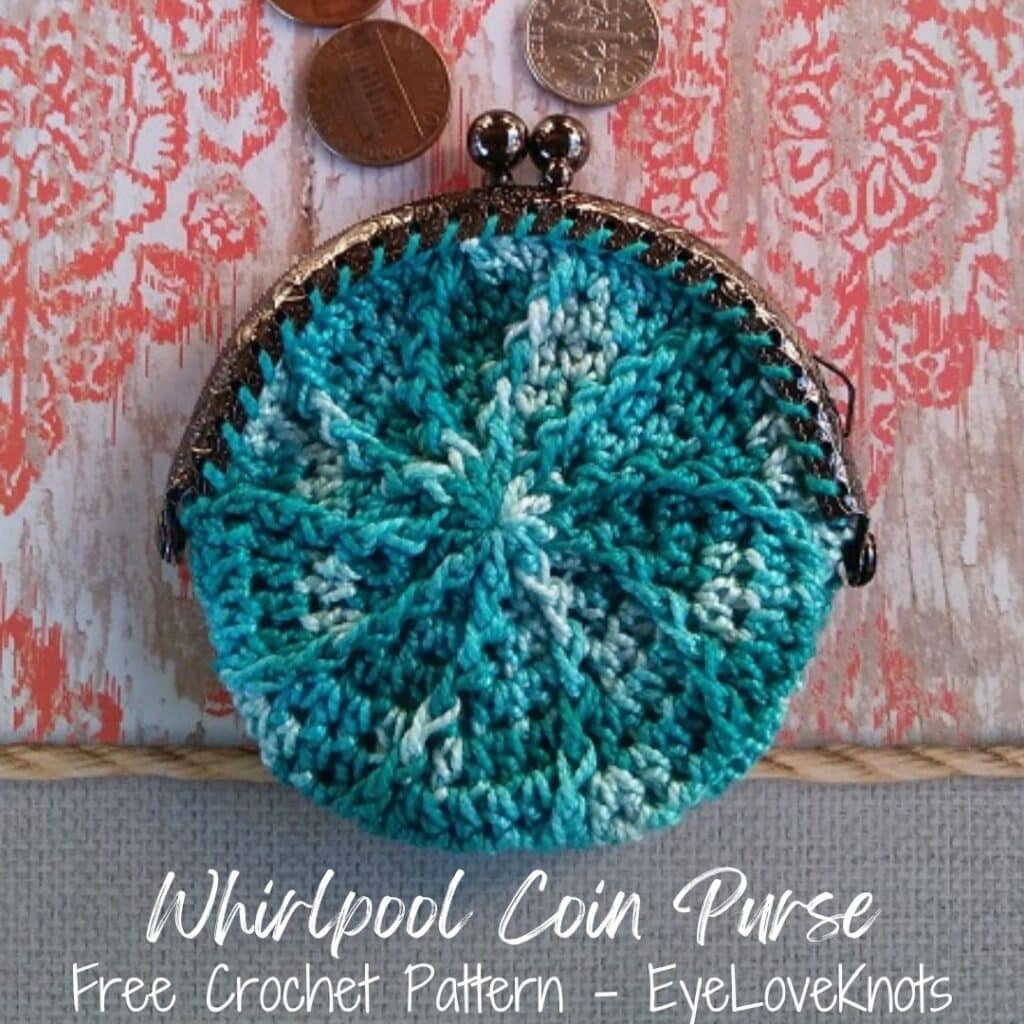
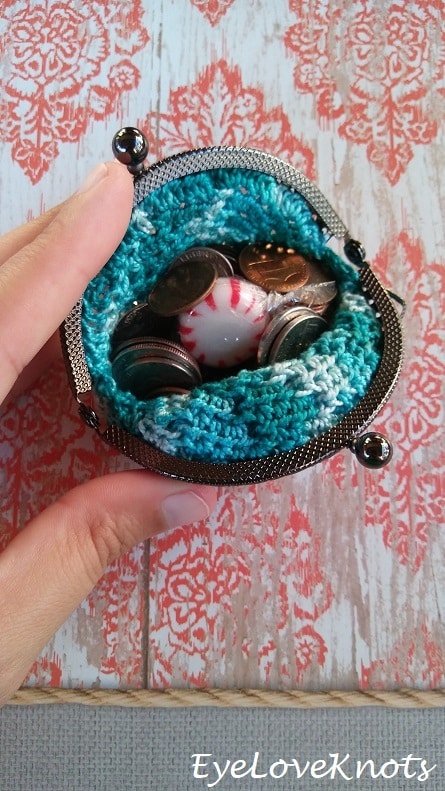
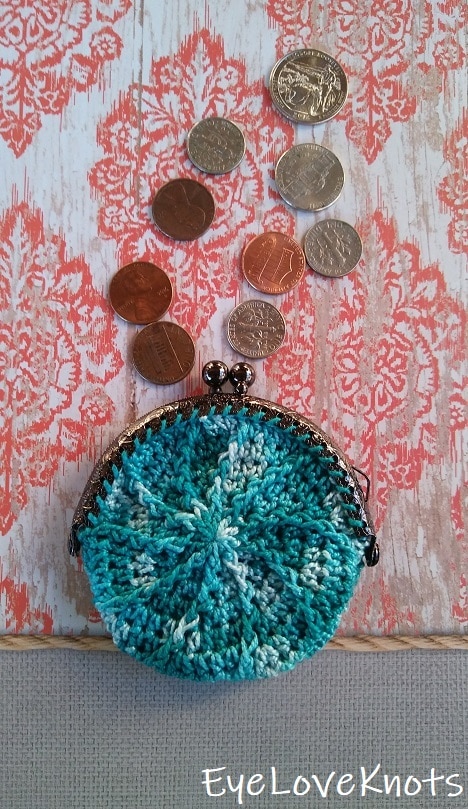
Crochet an adorable coin purse with a beautifully textured, swirl pattern using front post stitches. This is a great crochet project to feature some gorgeous #5 embroidery floss you may have been holding onto, or scraps of fingering weight yarn.
This post contains affiliate links. If you make a purchase by clicking on them, I make a small commission at no extra cost to you. I only recommend products I love and hope you’ll love them too! Click here to find out about the different affiliate programs I am apart of. This post also contains shop links to my yarn shop and craft store, Yarn Crafts & Coffee. You can shop online or in person in Melbourne, Florida.
Find the free crochet pattern instructions below, or purchase a printer-friendly, ad-free PDF on Ravelry by clicking here.
In a hurry? Pin this for later when you have more time.
Back in February of 2018, this adorable little coin purse was published in Issue 41 of the Pattern Pack Pro, which used to be a monthly digital magazine that was published from January of 2017 to October of 2022. It focused specifically on a type of project to help build your repertoire, like coin purses in this case. I shared my favorites from this issue.
When I designed this coin purse, I was looking forward to the challenge of working up a coin purse, as I had been wanting to make one (or ten), but the idea of sewing to a purse frame really intimidated me. If you are intimidated too, let me tell you, it is so easy!
For this coin purse, I used a fun stitch pattern using front post stitches that I had been playing with for a while, but didn’t know just what to do with. I had been toying with the idea of a hat, but when the call for this issue was announced, I knew it would be perfect for a purse!
The name came to me when I saw the swirl of the pattern in combination with the name of the thread colorway, “Cool Waters”. I did not buy the thread with the thought that it would work out this way, but it was definitely a win – win!
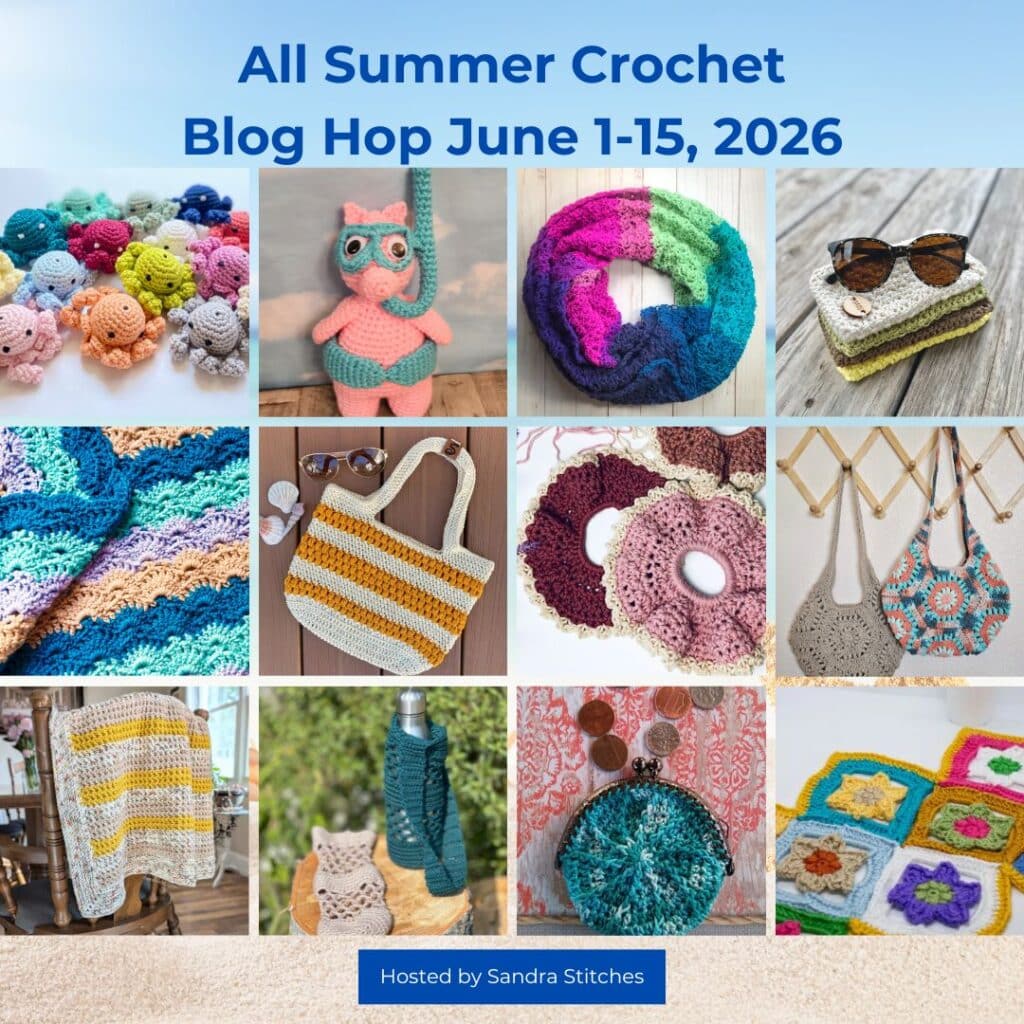
This coin purse is a part of the All Summer Blog Hop 2026 hosted by Sandra Stitches.
Ad-Free, Printer Friendly PDF:

EyeLoveKnots newsletter subscribers get access to Exclusive Subscriber Content, like the free PDF of this pattern via the Free File Library – you’ll find the tab on the top menu. The library is password protected so sign up for my newsletter and you’ll receive a Welcome email containing this month’s password, or if you are already a blog subscriber, reference your latest newsletter for this month’s password. From the library, you’ll be able to access the PDFs via Google Drive – you do not need to have a Google Drive account to view and download the PDF.

Through 06/12/26 at 11:59pm EST, you can grab a free copy of the PDF for the Whirlpool Coin Purse on Ravelry using code SUMMERFUN26. I earn my income from the number of pageviews my blog sees, so please do not share the code, but instead share the link to this post so others can find it. Thank you!
After 06/12/26 or for non-subscribers, if you would like a PDF version of this post, you may get one through either my Etsy Shop or Ravelry Shop for a small fee. This fee is to compensate for the views lost when you no longer need to return to the blog to for the information, as you will have your own copy. In a hurry? Pin this for later when you have more time!
Materials:
- 45 Yards of #5 Cotton Pearl Thread
- D3/3mm Crochet Hook
- Tapestry Needle
- Scissors
- 3.35″ (8.5 cm) Coin Purse Frame – I used the Yarnology’s Gold Ornate Purse Frame
- Soft Tape Measure
- Stitch Markers
Yarn Talk:
I used 3 Skeins of a floss from Hobby Lobby called Artiste’s Cotton Pearl #5 in the Cool Waters colorway. Sadly, this #5 cotton pearl thread has been discontinued, but that’s okay because DMC Color Variations #5 Pearl Cotton Thread is a great replacement with water inspired colorways as well, like Crystal Water and Caribbean Bay, among so many more beautiful colorways and the bonus is you only need 2 skeins compared to the original 3. You can also easily sub that out for the DMC #5 Pearl Cotton Thread that comes in solid colors or regular 6 strand embroidery floss, but the best deal is going to be using Fingering Weight #1 Yarn or Sportweight #2 Yarn, especially if you have just a small amount left from a previous project.
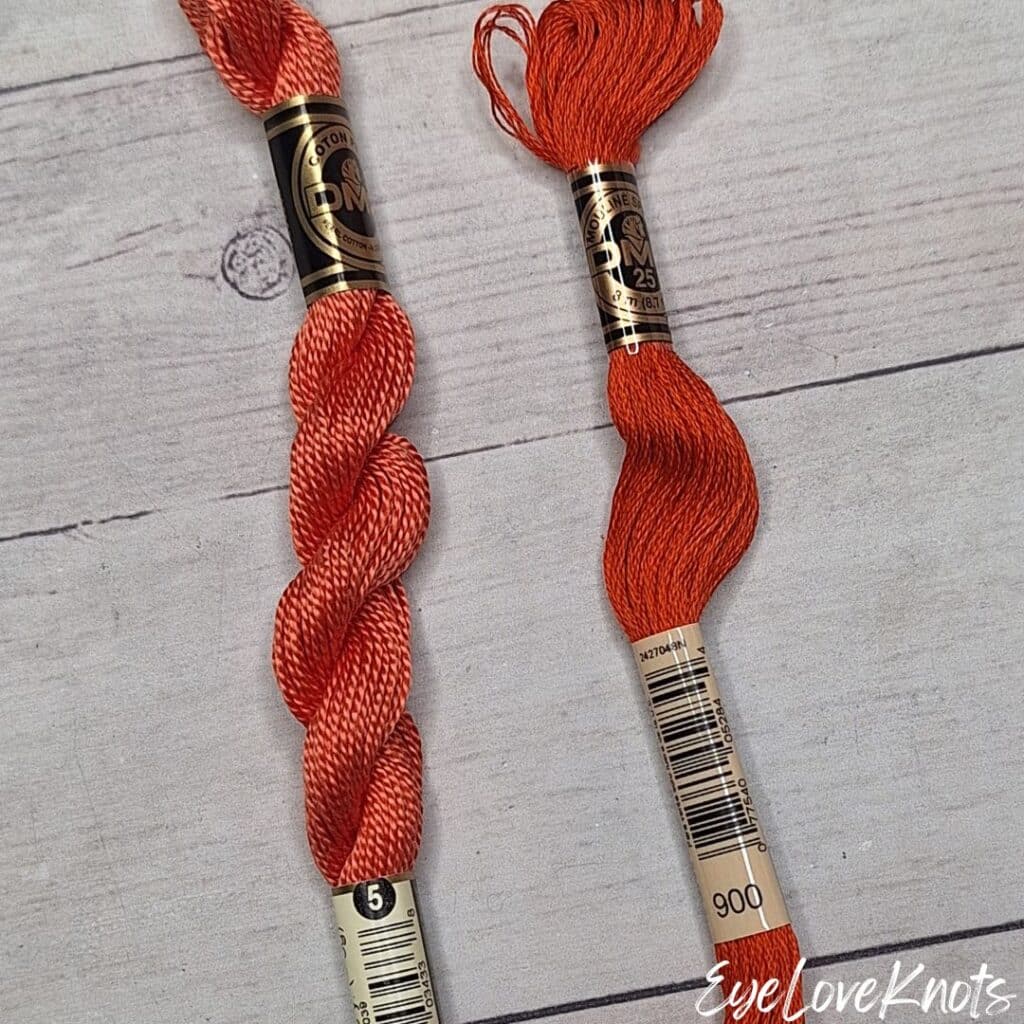
Here is an comparison of #5 Pearl Cotton Thread on the left and 6 Strand Embroidery Floss on the right. The Pearl Cotton Thread is one indivisible strand whereas the 6 Strand Embroidery Floss can be separated. The floss is a hair thicker than the thread.
Tools & Notions:
We have lots of great crochet hooks in our Yarn Crafts and Coffee Yarn Shop. The most popular, and preferred by Candace and Emily, are the Clover Amour Crochet Hooks with the soft handles and smooth metal hook. Alexandra prefers metal crochet hooks with large, ergonomic clay handles and just loves the fun designs from SiennasBowtique and BronzeShepherdStudio! If your preference is wood, the LYKKE brand are lovely, smooth and sturdy.
Scissors are an essential tool. When I’m working on the go, I like to carry a pair of folding scissors as they fit perfectly in even the tiniest of bags. When I am working at home or have more space in my bag for a larger notions pouch, I like to use a pair of lightweight, all-purpose scissors as they are so versatile and great for a variety of things from cutting plastic canvas mesh to trimming yarn ends after weaving in to cutting out a care card to include with a handmade gift.
Tapestry Needles with the blunt, round end are essential for sewing and finishing on a number of yarn crafts, including crocheting, knitting as well as needlepointing on fabric and plastic canvas. The blunt, rounded end allows the needle to pass easily through the fabric created by yarn and holes on canvas without snagging (or getting your fingers) in the process. More specifically for crocheting and knitting, a Bent Tip Tapestry Needle makes weaving, grafting and sewing so much easier on the hands. The long oval eye makes threading strands of yarn easier, though you may still want to use a needle threader.
The important thing about the tapestry needle for this project is making sure the eye fits through the holes on the coin purse frame.
I found my round coin purse frame at Hobby Lobby in the yarn crafting aisle where all of the tools and notions are. When I originally made this coin purse in 2018, I found the coin purse frame to be quite flimsy and I actually ended up getting rid of the original coin purse I made because I didn’t feel confident that the kiss closure would stay closed when in use. In 2026, I purchased another coin purse frame from Hobby Lobby. The sku number has changed leading me to believe they’ve changed the product, and in exploring the new frame, I’ve found it has a matte finish compared to the original shiny finish as well as a much stronger closure and the metal actually feels nicer, of a more premium quality. The dimensions haven’t changed so regardless of which version you might have in your stash, they both work well for this project.
A tape measure is an essential tool in a multitude of crafts, including crocheting, knitting and needlepoint to name a few, especially if you are cutting material to finish a project or trying to meet gauge.
I won’t say gauge is essential for this project, but it’s certainly helpful! Keep your tape measure handy to check the diameter of your circle as you go.
Stitch markers are optional for this project, but if you’re experimenting with threads and yarns and not able to meet gauge (or don’t want to check gauge, I hear ya!), you can use stitch markers to mark the first and last stitch of where you want the stitches to be in the final round.
Stitch Markers are really helpful to use when it comes to marking the first stitch of the round so you can easily find it when it comes time to join, especially when working in a continuous round, as well as marking where to add increases in making top down garments or where change the stitch pattern within a pattern, which is more common in knitting, but they’re also really helpful when it comes to holding the layers of your fabric together, such as what you would use sewing pins for with fabric, so you can try garments and accessories on as you go or to keep all the rows and stitches lined up when you are ready to seam. You’ll find there are a variety of Stitch Markers available depending on what you’ll use them for, but plastic Locking Stitch Markers are among the most popular as they come in kits and are the cheaper option to grab off the shelf at the craft store, but my favorite are Lever Back Stitch Markers. Scrap yarn, paper clips and safety pins work too!
Time Spent:
I worked up my purse in about an hour and a half.
Measurements:
Just over 3 1/2″
Gauge:
In Pattern: 3″ Diameter after Round 6
or for easy reference, 24 SC by 28 Rows = 4″
I won’t say gauge is essential for this coin purse, but I will say you do need to at least check your circle against the coin purse frame you choose. In this example, I am using sport weight yarn, and my circle is measuring 3″ across, even though I’m only at Round 5, and that’s okay! I will have to adjust the next round of increasing for the bottom of the bag, but in lining up the stitches on my circle with the holes of the round coin purse frame, I can use stitch markers to mark the beginning and end of where I need to add stitches so if you want to experiment with different threads and yarns, I encourage it! But please do make sure you measure your gauge or at least check it against your coin purse frame.
Abbreviations (US Terms):
- SC – Single Crochet (Photo Tutorial)
- DC – Double Crochet (Photo Tutorial)
- HDC – Half Double Crochet (Photo Tutorial | Video Tutorial)
Special Stitch:
FPDC – Front Post Double Crochet
Post stitches are worked around the post of the previous rounds stitch rather than into the top of the stitch. The post is found directly underneath the top of the stitch.
It’s very easy to add stitches in post stitch rounds because sometimes it’s hard to determine where to work the next stitch after the post stitch since the top of the post stitch you just finished will appear unworked. In the first round of the ribbed pattern, it’s easiest to reference the posts of the double crochets from the previous row. See where your last post stitch was worked, then move to the post of the stitch to the left, follow it up and you’ll find the top of the stitch directly above it.
To Front Post Double Crochet (worked from the front of the fabric): Yarn over, then swoop your hook downward and towards the front so your hook stays on the front side of the fabric. From the front to the back, insert your hook into the space in between the stitches so that your hook comes out just to the right of the desired stitch. Wrap the crochet hook around the back of the desired stitch. From the back to the front, insert your hook into the space in between the stitches so that your hook comes out just to the left of the desired stitch. At this point, the desired stitch will appear raised on the front of the fabric. Yarn over and pull directly through (3 loops on your hook). (Yarn over and pull through 2 loops) 2x.
Pattern Notes:
Beginning chain 2 does not count as a stitch, but the beginning chain 1 does.
Join to the first stitch, not the beginning chain.
How to Customize the Coin Purse to fit Your Thread or Yarn:
I’ve noticed over the years, makers have used different weight yarns from #10 cotton thread up to sport weight yarn to crochet this coin purse, with only a couple using the original size 5 thread I designed it in, so I wanted to touch base on how to approach the last couple of rounds if you’re using a different option.
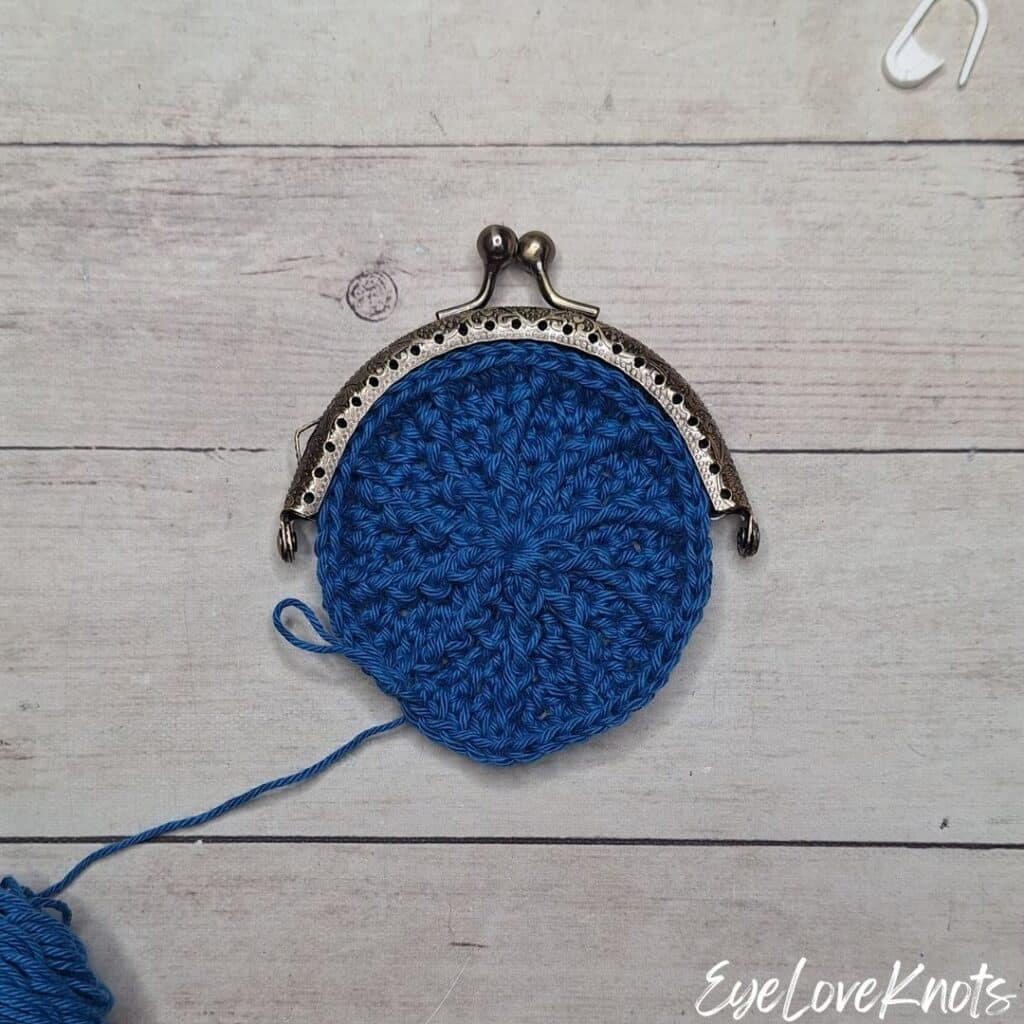
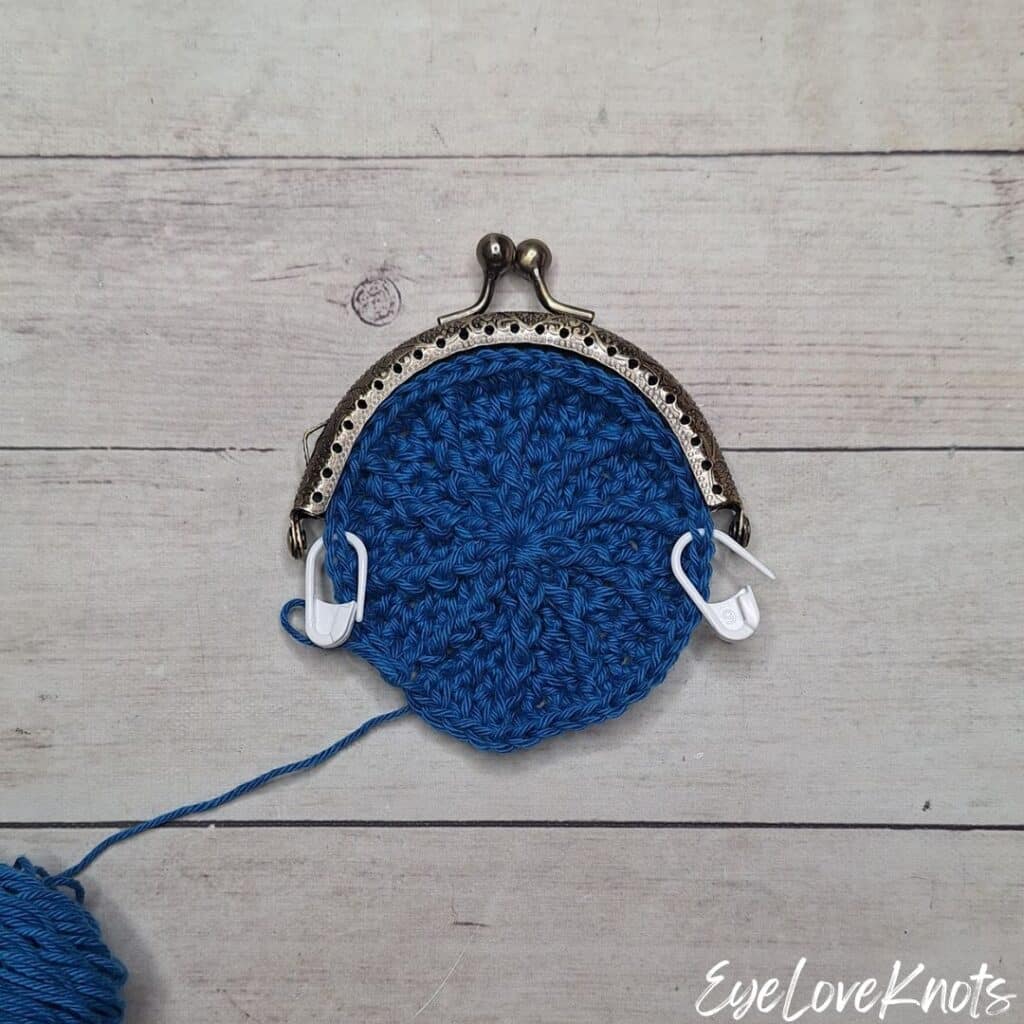
If you are experimenting with thread and yarn options and/or have not met gauge, check your circle against the coin purse frame to check the fit. I tested a sample in a sport weight yarn and my circle diameter was measuring 3″ after working Round 5. In this case, I would omit Round 6 of increasing and modify Round 7.
I lined up the center stitches with the holes from the coin purse and then used stitch markers to mark the first and last stitches that I need to work into for the next round.
The next round will be different than the pattern that’s written and looking something like this: Chain 1. HDC into the 1st 4 stitches, FPDC around the next post, (2 HDC into the next stitch, HDC into each of the next 3 stitches, FPDC around the next post) until I’ve come to the last stitch marker. It’s okay if I can’t complete a repeat at the end. Slip stitch join just the stitches of the last round.
If you’re working with a thinner thread or yarn, continue increasing your circle the same way you would a beanie until you get the circle to the correct size, then check the circle against your coin purse frame and mark the appropriate stitches the same way I showed. Work one more increasing round from one stitch marker to the next. It’s okay if you can’t complete a repeat at the end. Slip stitch join just the stitches of the last round.
Purse Base Pattern – Make 2:
Chain 4. Join to form a ring. Chain 2. Work 10 DC into the ring. Join. (10 DC)
R2: Chain 1. FPDC around the next post, (HDC into the next stitch, FPDC around the next post) 9x. Join. (20 stitches)
R3: Chain 1. HDC into the 1st stitch, FPDC around the next post, (2 HDC into the next stitch, FPDC around the next post) 9x. Join. (30 stitches)
R4: Chain 1. HDC into the 1st 2 stitches, FPDC around the next post, (2 HDC into the next stitch, HDC into the next stitch, FPDC around the next post) 9x. Join. (40 stitches)
R5: Chain 1. HDC into the 1st 3 stitches, FPDC around the next post, (2 HDC into the next stitch, HDC into each of the next 2 stitches, FPDC around the next stitch) 9x. Join. (50 stitches)
R6: Chain 1. HDC into the 1st 4 stitches, FPDC around the next post, (2 HDC into the next stitch, HDC into each of the next 3 stitches, FPDC around the next post) 9x. Join. (60 stitches)
Gauge check: 3″ in Diameter
R7: Chain 1. HDC into the 1st 5 stitches, FPDC around the next post, (2 HDC into the next stitch, HDC into each of the next 4 stitches, FPDC around the next post) 4x, 2 HDC into the next stitch, HDC into the next stitch. Leave remaining stitches unworked.
Fasten off the first piece, but do not fasten off for the second piece.
Join Pieces:
After working the second piece, chain 1 and turn. Place the right sides together, and slip stitch into both layers of the first 36 stitches. Fasten off with a long tail for sewing the frame on.
Add Frame:
Thread the needle, and turn the fabric to the right side. Working into the stitches left unworked by the slip stitch join, evenly sew into a stitch from the right side working just under both loops, then up and out of the corresponding hole on frame across. At the end of the first side, weave the needle through stitches under the slip stitch seam (to hide), and evenly work in the same manner across the other side to attach the second side of the frame.
Turn the purse to the wrong side, and weave in the final end.
Please feel free to make and sell your own items made using this pattern, but keep in mind, this written pattern and my photos are protected by copyright. Please DO NOT claim this pattern as your own nor should you sell my pattern. DO NOT re-publish my photos as your own. DO NOT copy and paste my pattern anywhere, link to it instead so other’s can visit. Making videos providing instructions how to make my projects on any social media platform is also not permitted.
Linked Up To…
Inspiration Monday – I Should Be Mopping the Floors
Handmade Monday #77 – Sum of their Stories
Merry Monday Link Party #206 – A Wonderful Thought
The Really Crafty Link Party #121 – Keeping It Real
From Dream to Reality #311 – The DIY Dreamer
The Linky Ladies Party #133 – The Purple Poncho
The Style File Link Up – Lady in Violet
Turning Heads Link Up – Elegantly Dressed and Stylish
You’re the Star Linky Party – Gods Growing Garden
{wow me} wednesday #353 – Ginger Snap Crafts
Your Whims Wednesday #357 – My Girlish Whims
The Wednesday Link Party 247 – The Stitchin’ Mommy
The Blended Blog Link Up – Living on Cloud Nine
Lizzie in Lace Link Up – Lizzie in Lace
Link Your Stuff – Annemarie’s Haakblog
Sundays at Home #208 – Celebrating Everyday Life
This is cute!. I like the round shape. Many are half shape so hold less.
Thanks! Since this was my first coin purse (ever), I was a little unsure of the shaping, and how it affected the purse frame, so it was an experiment, but a good one, and I am quite proud of it. Can’t wait to get some more threads, and play with other colorways.
This is so cute! I love the way it turned out too! I don’t crochet, but I do knit occasionally and love making handmade gifts!
Handmade gifts are the best! I am working on my knitting skills. It is a slow adventure for me.
Oh, this is lovely. I have a purse frame knocking about somewhere, I’ll have to see if I can find it. Thanks.
Welcome! There is a needlepoint boutique about 20 minutes away, and they have some of the most beautiful threads. I am looking forward to going there to get some, and see other versions of this coin purse (or maybe new coin purse designs).
That’s just lovely. I have a frame very similar to the one you used, maybe I should try to make something similar.
Thank you for sharing at The Really Crafty Link Party. Pinned.
Before I worked this coin purse, I was intimidated by the idea of sewing into a purse frame (something I am sure you are not), but it was really easy, and it makes for an instantly gratifying project perfect for spoiling yourself, or gifting. Look forward to seeing what you work up.
That is darling! I love the blue tones and style. It has a vintage vibe to it as well.
thanks for linking!
jess xx
http://www.elegantlydressedandstylish.com
I hadn’t thought of it as vintage, but you are the fashion professional. I am looking forward to picking up some new threads, and I think this would be really pretty in a rosy pink with pearls. Vintage vibe for real. Thanks for stopping by 🙂
I would make a Summer Poncho with this beautiful yarn.
Thank you for taking time to visit and comment (and I know this one is about the Folio yarn), but please try to keep comments relevant to the page you are visiting. I do appreciate your support, and wish you lots of luck! The Super Simple Summer Poncho (free crochet pattern) from CrochetN’Crafts might be a good one – https://crochetncrafts.com/simple-summer-poncho/.
I love how this crochet pattern combines a stylish design with practicality – I can’t wait to try making this Whirlpool Coin Purse!
So glad you like it! I’ve been dreaming of other coin purses ever since!