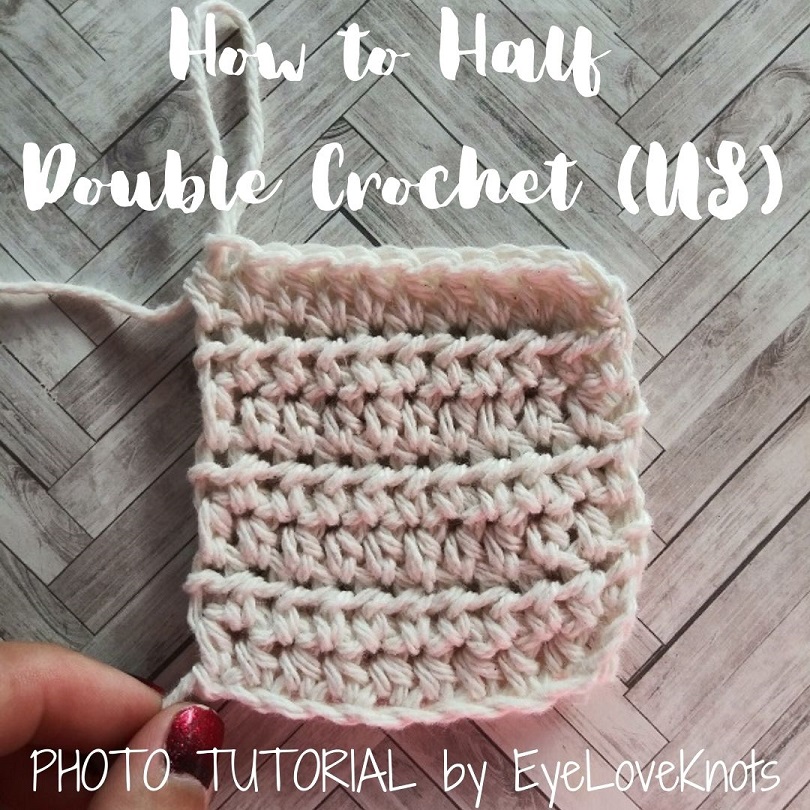
This beginner friendly crochet tutorial will show you how to half double crochet stitch step by step with a photo of each step along the way! The half double crochet stitch is a very easy, beginner friendly crochet stitch pattern that is so versatile and can can be used for so many crochet projects!
This post contains affiliate links for Amazon and Etsy. If you make a purchase by clicking on them, I make a small commission at no extra cost to you. Thanks for your support!
Find the photo tutorial instructions below, or purchase a printer-friendly, ad-free PDF on Etsy by clicking here.
In a hurry? Pin this for later when you have more time.
I remember when I was learning to crochet. Most of the patterns I tried used single crochet, and many of the rest used double crochet. There weren’t that many that used half double crochet, but I think it’s a wonderful stitch pattern, and easy to do. I have a great love for the texture that half double crochet creates in it’s fabric. It has better flexibility like double crochet, but has better coverage like single crochet. It’s one of my favorites, and so versatile!
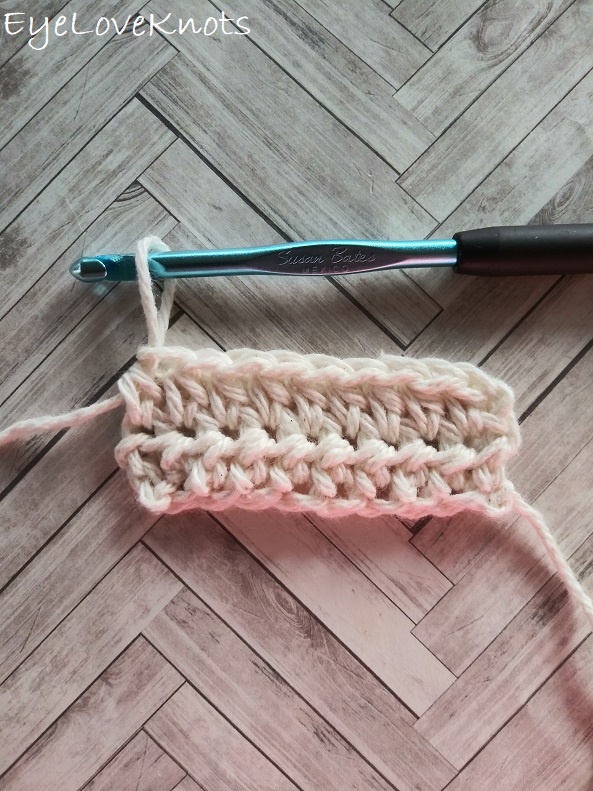
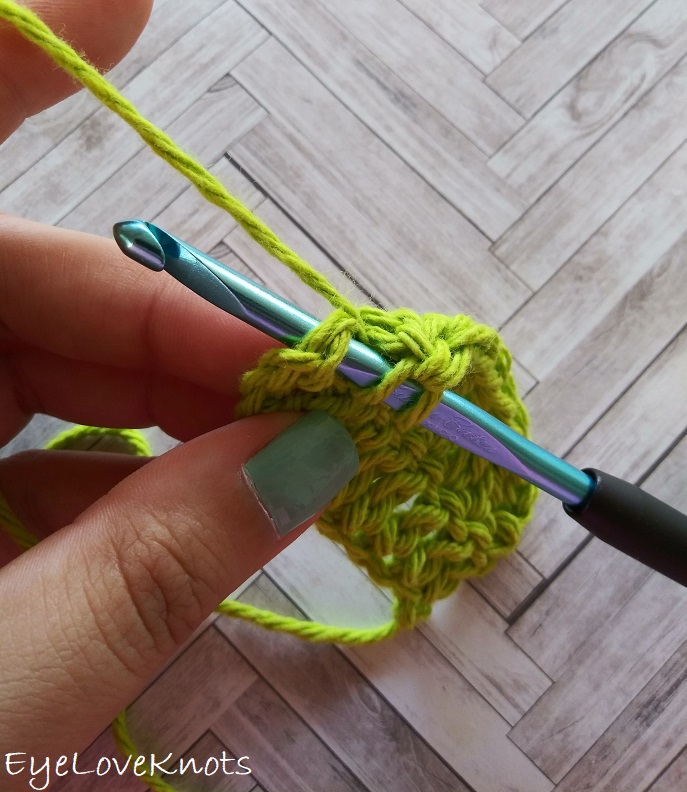
For this tutorial, I am using Lily Sugar n Cream in Ecru, and a H8/5mm hook.
I am not creating anything new here, but I did take the time to take the photos, edit them, and put this tutorial together, so please respect my work. Do not pin or share any of the tutorial images – just the main photo. Provide the link for others to find my page (help out me and my blog with the traffic). Do not copy and paste my work anywhere. Thank you!
What is a Half Double Crochet?
A half double crochet (abbreviated as HDC) is a simple crochet stitch that involves an initial yarn over, and a two step process of “pulling through”. It is a little bit taller than a single crochet stitch, but not as tall as a double crochet stitch. I think half double crochet produces a beautiful, unique texture and fabric, and is one of my favorite stitches to use.
I also want to add that this half double crochet tutorial is in US terms. What does that mean? There is also a half double crochet in UK terms, which is a different stitch! Usually, the patterns specify which one it is – my blog is in all US terms.
How Many Stitches to Chain for Half Double Crochet?
One of the great things about working in half double crochets is that there is no stitch multiple, meaning there is no set number of stitches needed to complete a set of repeats so you can crochet as many half double crochets as you would like for your project.
When starting a chain for half double crochet, you will finish with a total number of stitches that is 1 less than the number of chains you start with, and that is because we start working into the 3rd chain from the hook so we’re taking some of those chains away there, and then those skipped stitches count as a stitch.
Examples:
- If you start with a chain of 10, then you will subtract 1 from that and finish with 9 half double crochet stitches.
- If you wanted to have 15 half double crochets, then you would add 1 to that and start with a chain of 16.
Do You Chain 1 or 2 for Half Double Crochet?
When we start talking about Row 2 in a few minutes, you’re going to see that I will start my row with a chain 1. In half double crochet patterns, the traditional way to start is to start with a chain 2, but for me, a chain 2 always comes out too tall to match the rest of my half double crochet stitches, and creates gaps between the turning chain and my fabric so I do opt for a chain 1.
I encourage you to try both ways, and see what works the best for your tension. If ever you see a chain 2 written in pattern instructions, but you know that a chain 1 works the best for you, then simply change that out as you go along, and vice versa.
What is the Right Side and Wrong Side of Half Double Crochet?
The right side is the front side of the fabric, which may look prettier than the wrong side, and the wrong side is the back of the fabric. I think they’re both pretty, but after you turn your work to begin on Row 3, you will see the difference in appearance from Row 1 and Row 2. Row 1 is considered the right side, and Row 2 is considered the wrong side.
In the photo above, we have just finished working across Row 2, and about to turn and work Row 3. Do you notice the difference between the look of Row 1 and Row 2?
Does it Matter if I’m on the Right Side or Wrong Side in Half Double Crochet?
In this half double crochet stitch tutorial, we’re working in turned rows, meaning that at the end of the row, you will crochet a turning chain and then turn your work to work in the opposite direction back into the stitches created in the previous row. While there is a difference between the right side and the wrong side of the half double crochet fabric, as you build your half double crochet rows, the front and back will look about the same so feel free to finish on either side and have either side facing up in the finished half double crochet project.
What Can I Make with a Half Double Crochet?
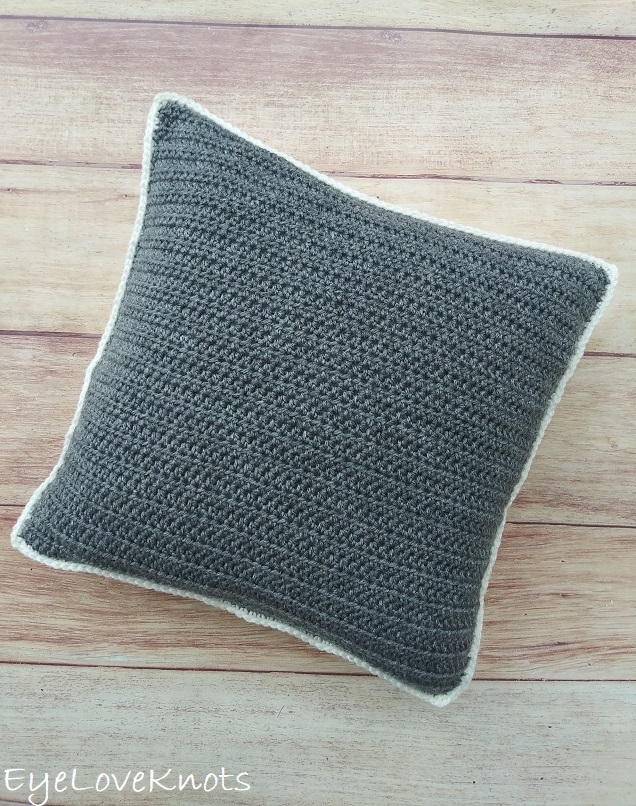
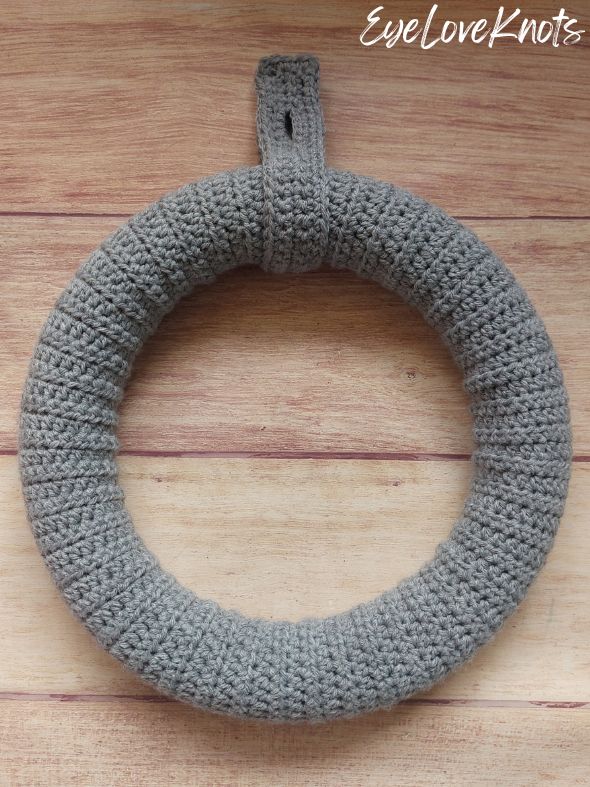
Half Double Crochets are one of the fundamental stitches in crochet, and can be used to create beautiful projects by itself, like washcloths, scarves and blankets, or in combination with other stitches and techniques, like when working with post stitches and cables.
Beginner friendly half double crochet patterns are going to be worked in rows (how this tutorial is shown). Once you’re comfortable with your tension and working half double crochet stitches, then you can venture into working half double crochet patterns worked in the round, like beanie hats, tote bags and sweaters.
I will share some of my free crochet patterns that use half double crochet stitches alone and are worked in rows from my Haylee series. If you would like to see a specific pattern, please drop me a line to let me know.

Half Double Crochet Ear Warmer in Lightweight Yarn | in Worsted Weight Yarn like a Tube | in Worsted Weight Yarn with Mobius Join | in Chunky Weight Yarn
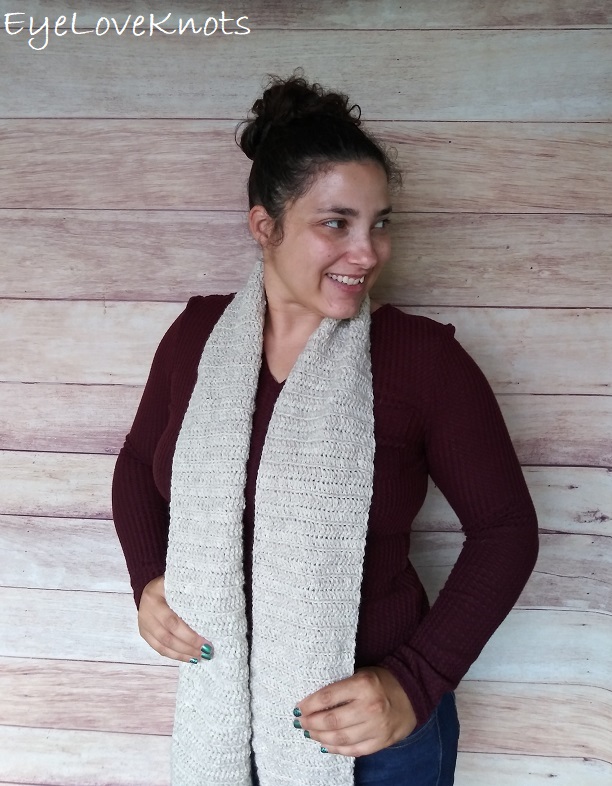

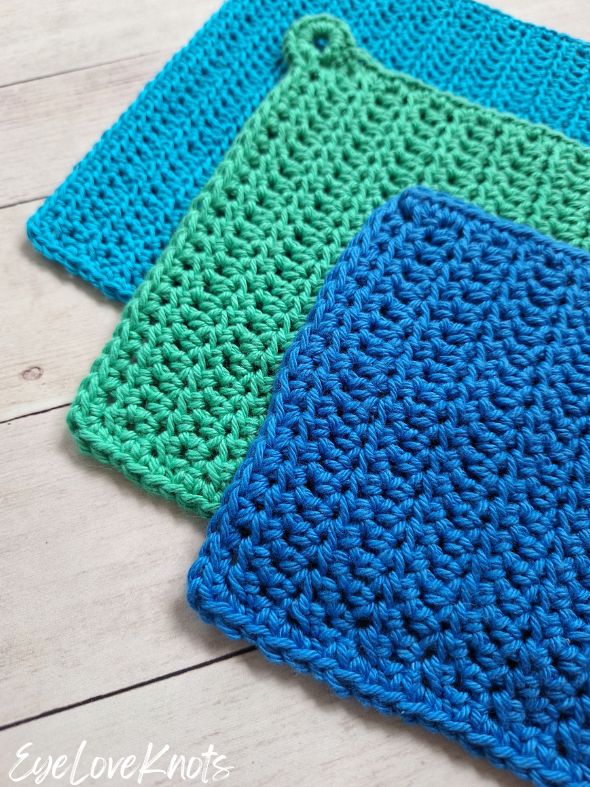
Half Double Crochet Washcloth in Sport Weight Yarn | in Worsted Weight Yarn
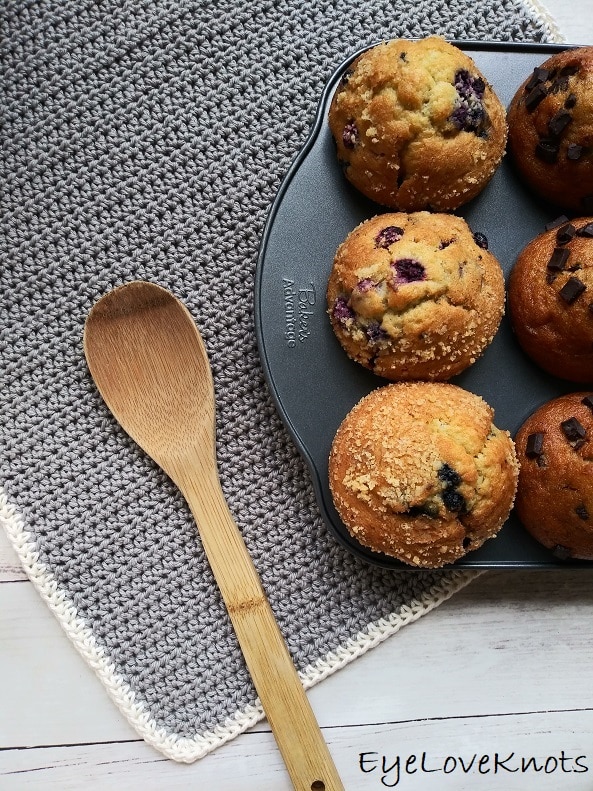
Half Double Crochet Hand Towel

Ready to try half double crochet stitches in the round? Here are a few free crochet patterns from my Haylee series:
- Half Double Crochet Beanie (Shown)
- Men’s Quick and Easy Slipper Socks
- Kids Quick and Easy Slipper Socks
- Women’s Quick and Easy Slipper Socks
- Round Half Double Crochet Facial Scrubbies
- Square Half Double Crochet Facial Scrubbies
- Plarn Ear Saver
- Round Half Double Crochet Coasters
Ad-Free, Printer Friendly PDF:

EyeLoveKnots newsletter subscribers get access to Exclusive Subscriber Content, like the free PDF of this pattern via the Free File Library – you’ll find the tab on the top menu. The library is password protected so sign up for my newsletter and you’ll receive a Welcome email containing this month’s password, or if you are already a blog subscriber, reference your latest newsletter for this month’s password. From the library, you’ll be able to access the PDFs via Google Drive – you do not need to have a Google Drive account to view and download the PDF.
If you wish not to subscribe, but would still like to get a PDF version of this post, you may get one through my Etsy Shop for a small fee. This fee is to compensate for the views lost when you no longer need to return to the blog to for the information, as you will have your own copy. In a hurry? Pin this for later when you have more time.


Video Tutorial: Everything You Need to Know about How to Half Double Crochet in Rows:
How To Half Double Crochet Row 1 in the Chain
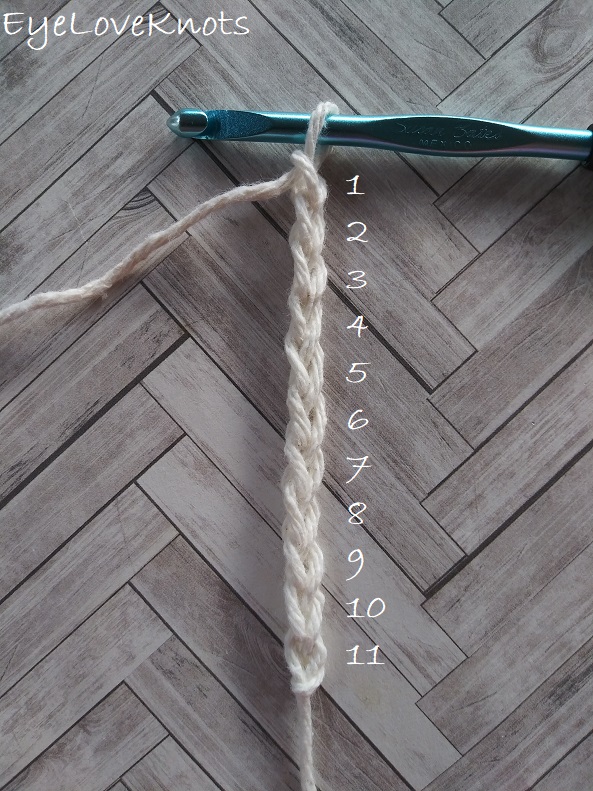
If you haven’t yet, make a slip knot (photo tutorial), then work a foundation chain (photo tutorial) of 11.
If this was an actual pattern, you would see it written like this: “Chain 11” OR “Ch 11”
It most likely will not tell you to make the slip knot, but you always start with one.
Next, we will half double crochet across the chain. Together, this will read in one of these ways:
- Chain 11, HDC into the 3rd chain from the hook, and each chain across.
- Ch 11, HDC into the 3rd ch from the hk, and ea ch across.
- Ch 11, HDC into the 3rd ch, and across.
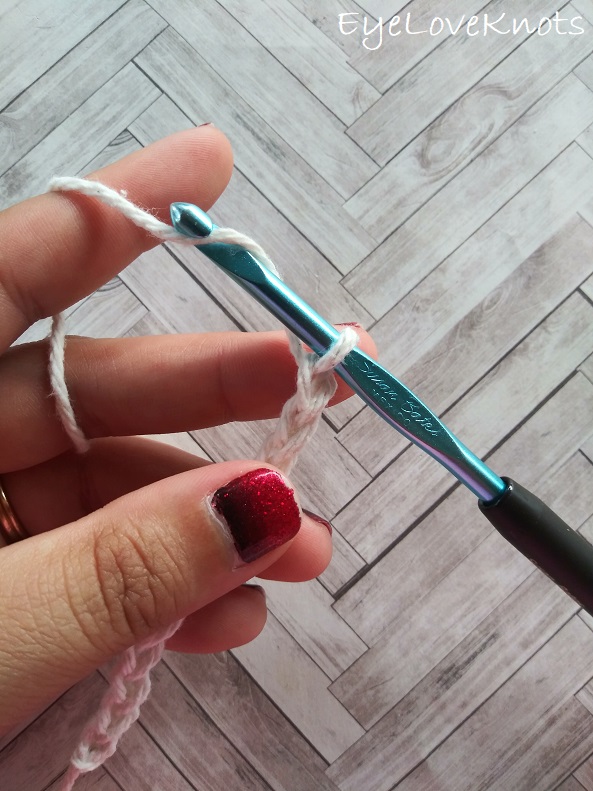
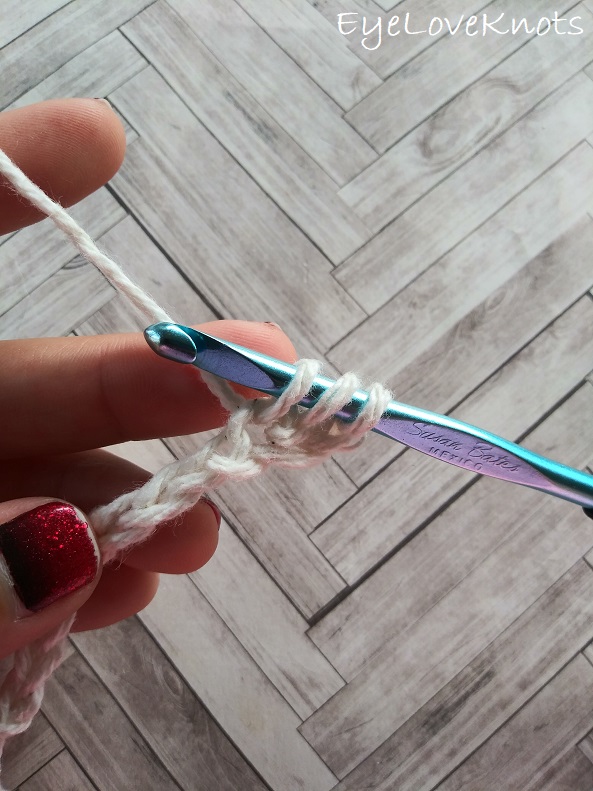
Yarn over.
Skip the first two chains on your hook, insert your hook into the third chain.
This is standard. Any time you are working in half double crochet across a chain, you will always skip the first two chains, and work into the third. The skipped chains count as a stitch in your final stitch count for the row.
*In case you needed a refresher on How to Work into the Foundation Chain (Photo Tutorial).
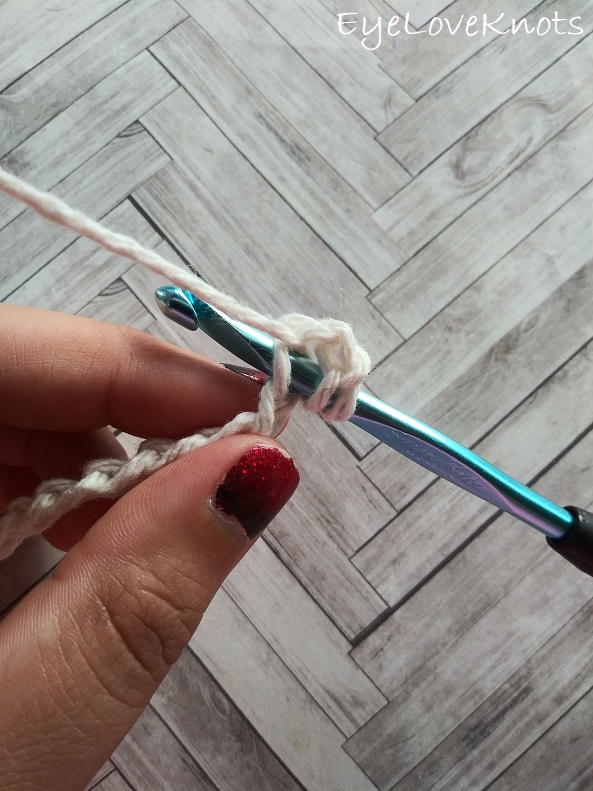
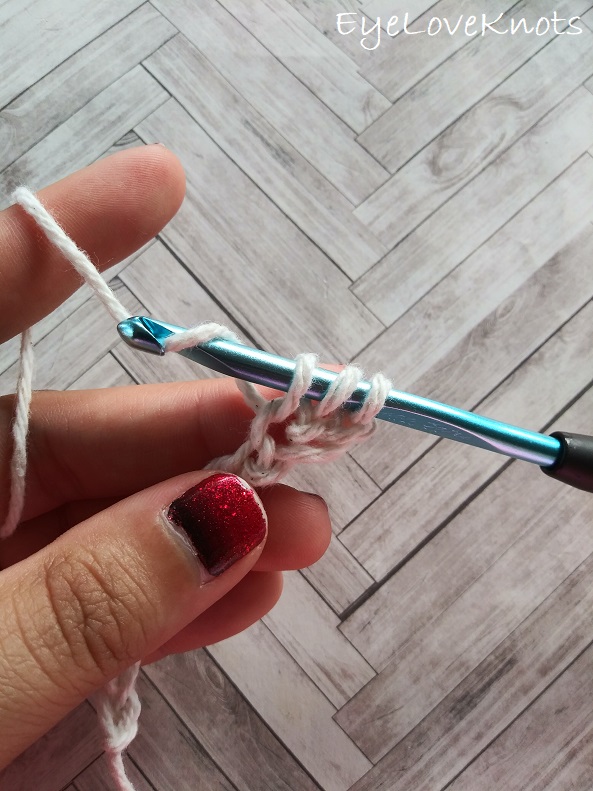
Yarn over again…
…and pull your hook through the foundation chain.
You now have three loops on your hook.
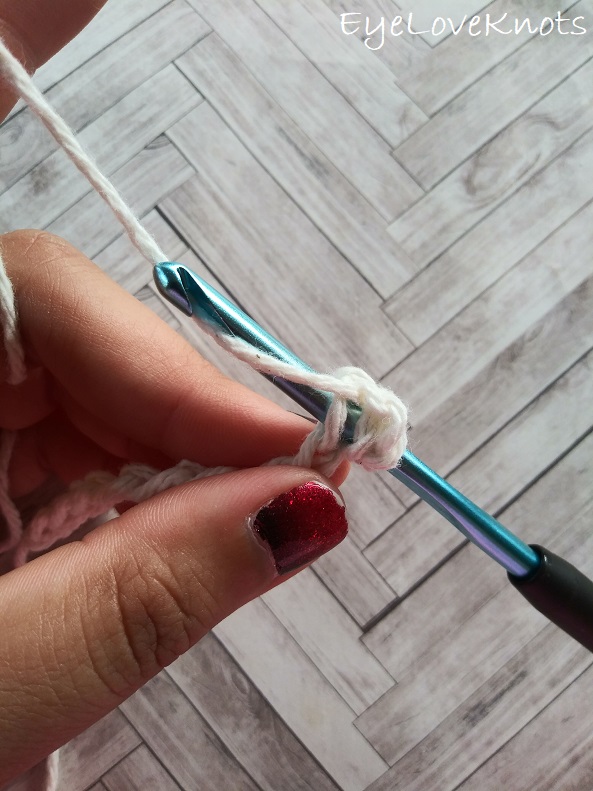
Yarn over…
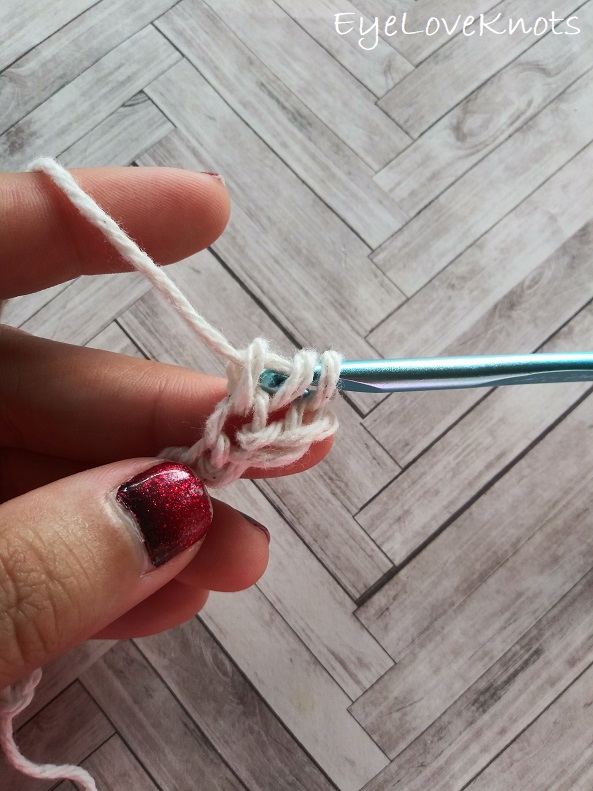
…and pull through all three loops on your hook.
You have completed one half double crochet!
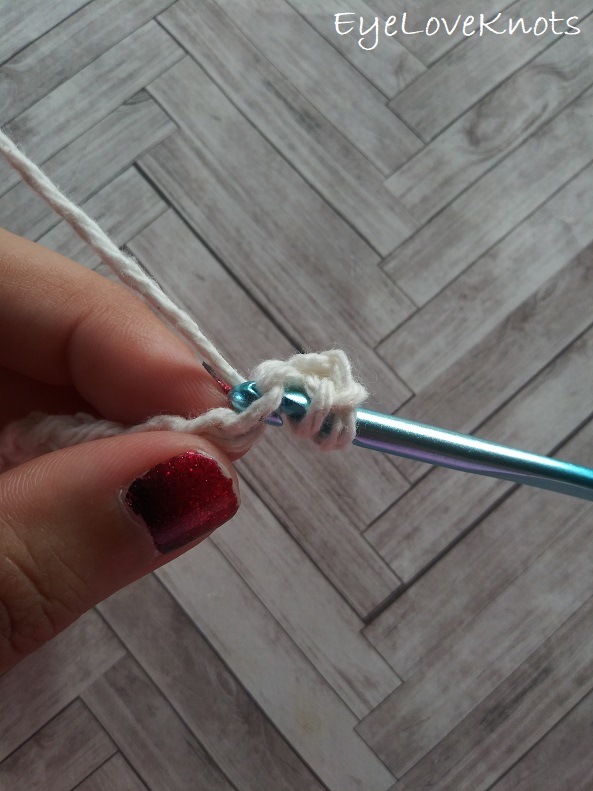
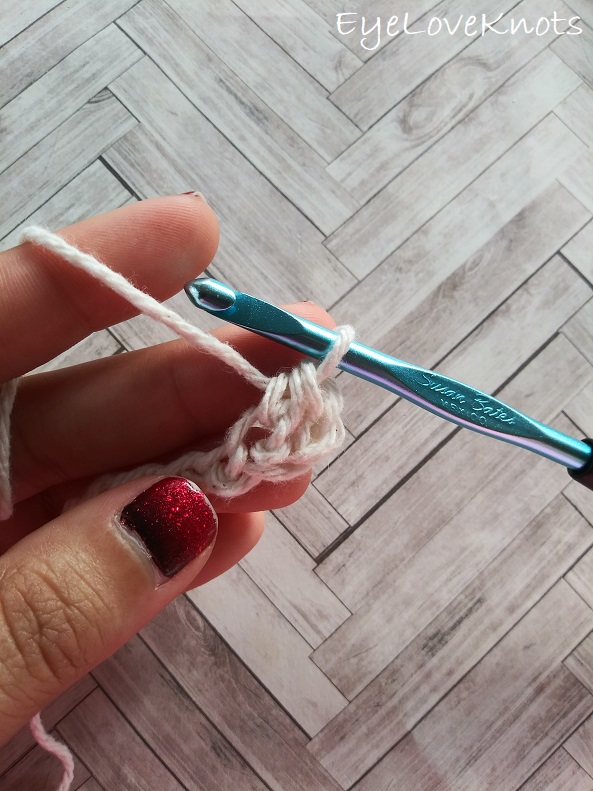
For the next half double crochet, yarn over, insert hook into the next chain. Yarn over, pull through (3 loops on hook), yarn over, pull through all three loops on hook.
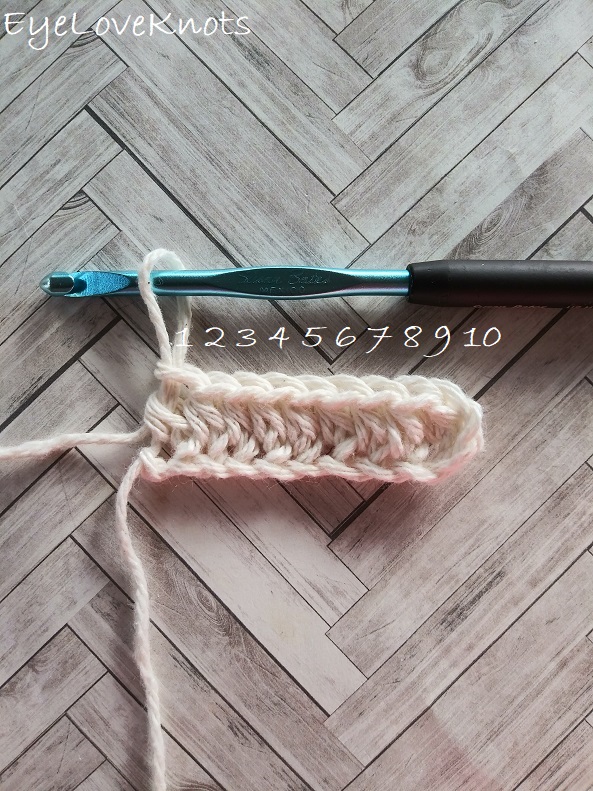
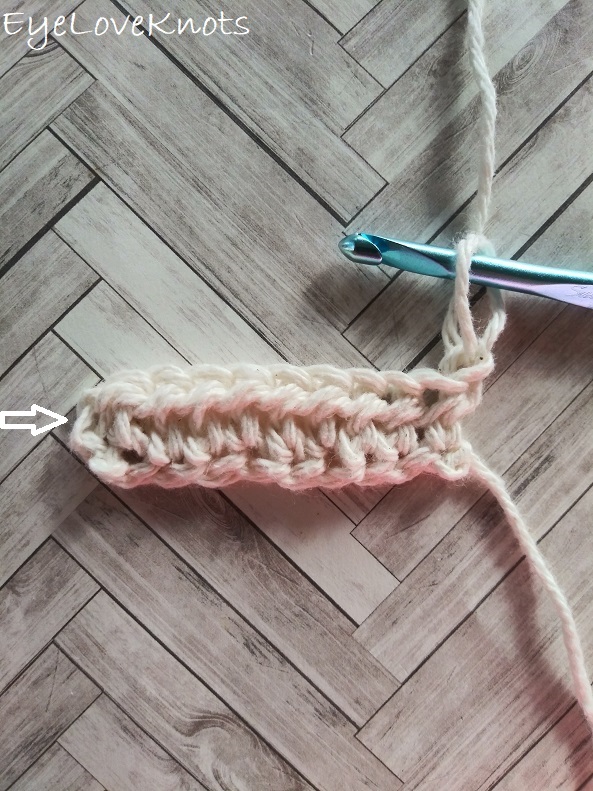
Continue working in this manner all the way to the end, and it will look like this. In total, we have 10 half double crochets – that’s 9 that you worked + the skipped chains from the very beginning.
How to Half Double Crochet Row 2 & Remaining Rows
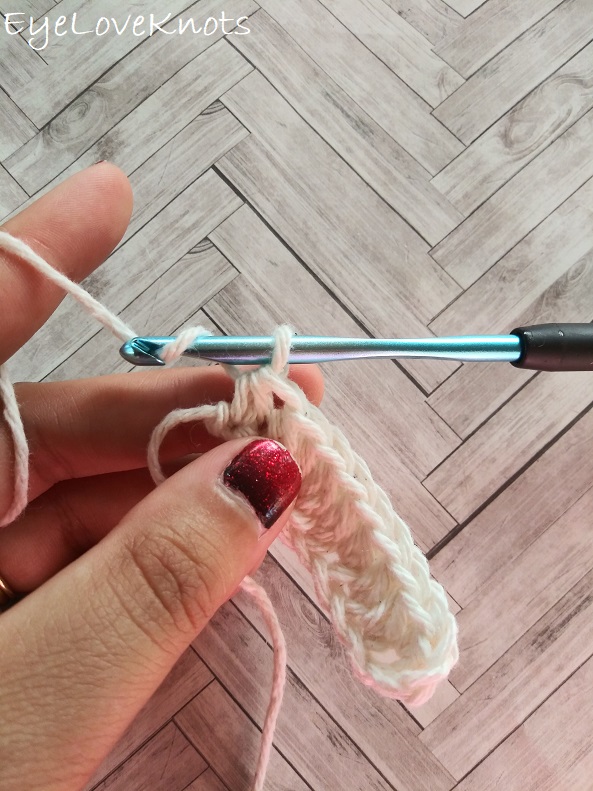
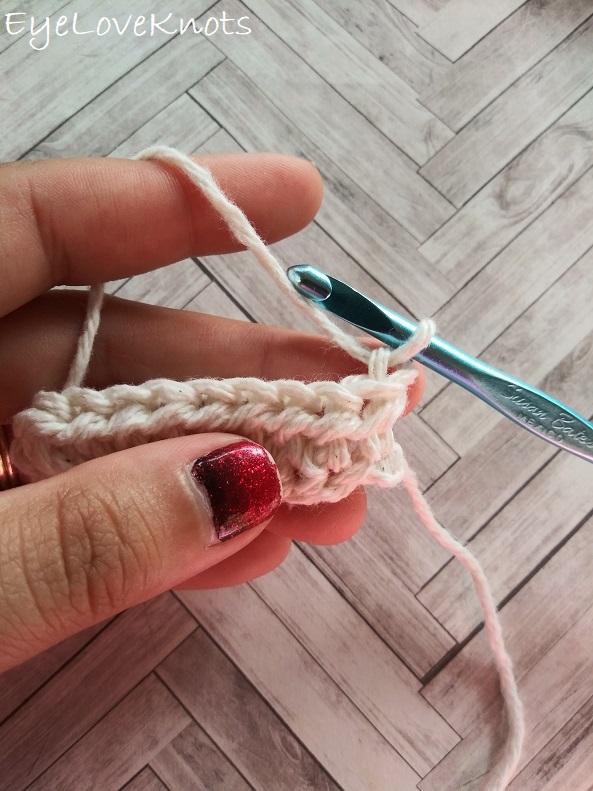
To begin each new row of half double crochet, we will yarn over…
…and complete one chain – this is what is called a turning chain, and with half double crochet, we do not count this as a stitch in the row’s final stitch count, it just gives us the flexibility to begin the next row.
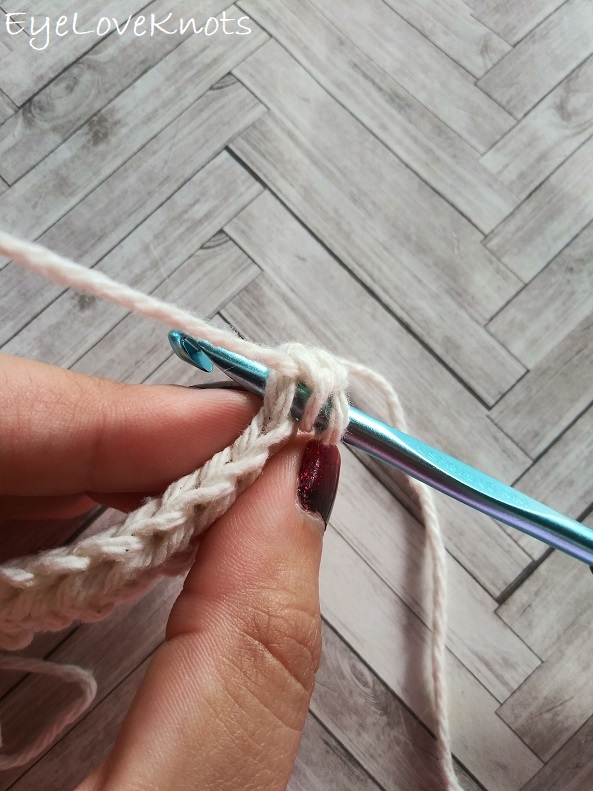
Begin turning the work towards you…
…and completely around so it’s mirrored.
For rows 2 and above, it’s written as one of these (all mean the same):
- Chain 1, turn. HDC into the 1st stitch, and each stitch across.
- Ch 1, turn. HDC in 1st st, and ea st across.
- Ch 1, turn. HDC across.
Now, we’re going to work across the row including the final stitch that was created by the skipped chains from the beginning.
Yarn over, insert hook into the first stitch under both loops of the stitch, yarn over and pull through (you now have 3 loops on your hook), yarn over and pull through all 3 loops. Half double crochet complete!
Continue working half double crochets in the same manner across the row.
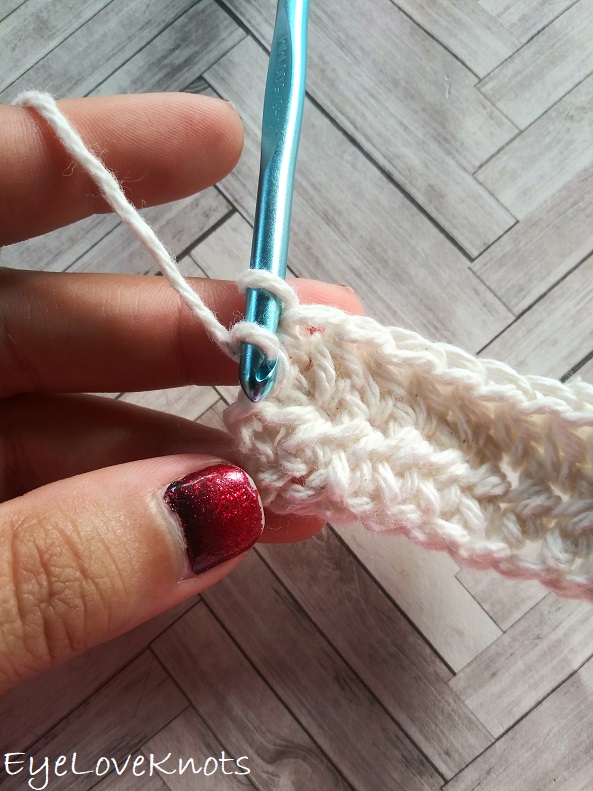
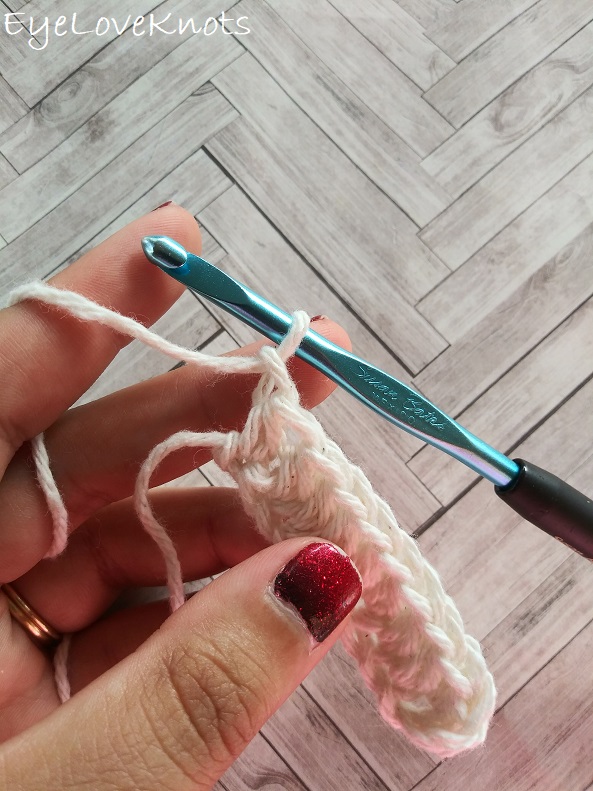
When you get to the end, we can’t forget this last one.
What we’re actually working into here is the skipped chains from the very beginning. In rows 3 and above, you’ll be working into what we called the “turning chain”, but it looks a lot like this.
Yarn over as normal, insert into the stitch under both of the top loops (as shown), then complete the last half double crochet the same as the rest.

And now you have two finished half double crochet rows! In this sample, we have 10 half double crochets (the same as what we counted at the end of Row 1). In future rows, it’s good practice to periodically check your stitch count to make sure you haven’t missed one.
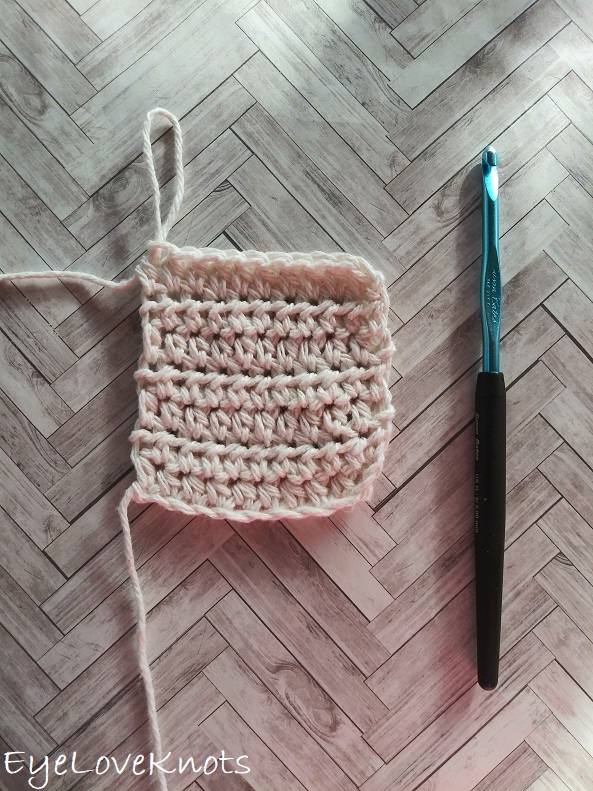
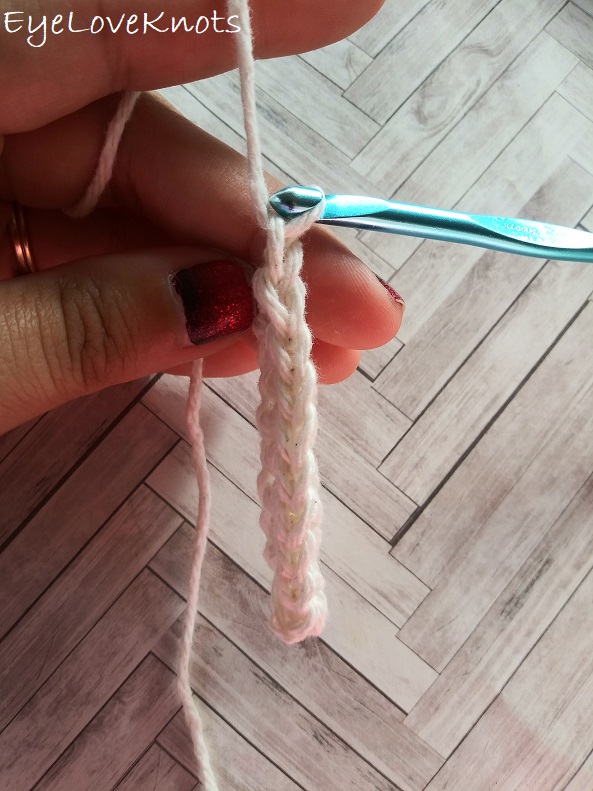
Here we have 7 rows complete. The easiest way to count them is to look for the textured side, which is the wrong side of the fabric, and then count by two’s.
Join one of our awesome Facebook groups to share your creations, and see what others are up to!
– Yarn Crafts & Coffee Community
– DIY Home On Rockwood Lane
– Alexandra Lane Lifestyle
Linked Up To…
Craft Schooling Sunday – Creative Jewish Mom
Ginx Woolly Linx Party February – Ginx Craft
Craftastic Monday Link Party – Sew Can Do
Tuesday Turn About #85 – My Wee Abode
{Wow Me} Wednesday #490 – Ginger Snap Crafts
The Wednesday Link Party 384 – Oombawka Design Crochet
The Really Crafty Link Party #252 – Keeping it Real
All About Home #77 – Common Ground
Charming Homes & Gardens Week 45 – White Arrows Home
Creatively Crafty Link Party #261 – Life Beyond the Kitchen
Artsy-Fartsy Link Party #240 – Artsy-Fartsy Mama
Home Matters Linky Party #317 – Modern on Monticello
Create, Bake, Grow & Gather Party #456 – Shabby Art Boutique
Link Your Stuff – Annemarie’s Haakblog
Decor Craft Design – Happiness is Homemade Link Party 360
Hearth and Soul Link Party – April, the 21st Century Housewife
Decor Craft Design – You’re the Star
Your Whims Wednesday #496 – My Girlish Whims
Thursday Favorite Things #475 – An Artful Mom
Encouraging Hearts & Home Blog Hop – Apron Strings & Other Things
Friday Favorites – Busy Being Jennifer
A Morning Cup of Joe – The Cottage Market
Snickerdoodle Create Bake Make Link Party 371 – EyeLoveKnots
This is a great resource for anyone learning to crochet! thanks so much for taking the time to share this 🙂
Hope that your week is going well 🙂
I’m happy to share 🙂 I think my best to have something for every level.
Hello Alexandra. Thanks so much for taking the time to do these tutorials. I’m hoping you can help me because I’m totally confused by the stitch at the end of row two where you’re working into the turning chain of the row before (row 1). I understand the technique but what I don’t understand is do I do this at both ends going forward or is it done only at this end of every row and why? I can grasp the concept of it being done at both ends but not if it’s only done at this end of every row. I noticed this is also done for the double crochet so I will assume whatever answer you give will be applicable to the DC (I haven’t gotten beyond DC but I assume the same for Half Treble/Triple and Treble/Triple).
Thank you.
Karen
Hi Karen! Working into the turning chain is only done at the end of row 2 because that turning chain is from the skipped chains from after you finish chaining and work the first half double crochet into the 3rd chain. All of the remaining rows do not have a turning chain to work into because we don’t count the chain 1 that starts the round or row as a stitch so you just evenly work into half double crochet stitches.
When it comes to double crochet and beyond, we start with a taller chain to equal the height of the stitches we’re working, and that chain counts as one of the stitches. For example: Chain 2 then DC into the 2nd stitch and each stitch across — the chain 2 counts as the DC for the 1st stitch. In treble crochet, we start with a chain 3, and it counts as the first stitch. Working in these stitches, you will begin each row or round with a chain, then work across and have the very last stitch worked into the turning chain from the previous row or round.
What a wonderful and very clear tutorial! I always get mixed up when working into the chain…do I skip a stitch or two…then I have the same moments of panic when I switch stitches. I need to check out your post on that and have a cheat sheet!
I used to get mixed up too! A cheat sheet is an excellent idea. I touch on it in my How to Crochet into the Foundation Chain post, but now I’m thinking about creating this cheat sheet for makers – excellent idea!
Thank you for linking. I love a good photo tutorial.
Thanks so much, Ginny! Glad you like it!