This post contains affiliate links for LoveCrochet. If you make a purchase by clicking on them, I make a small commission at no extra cost to you. Thanks for your support!
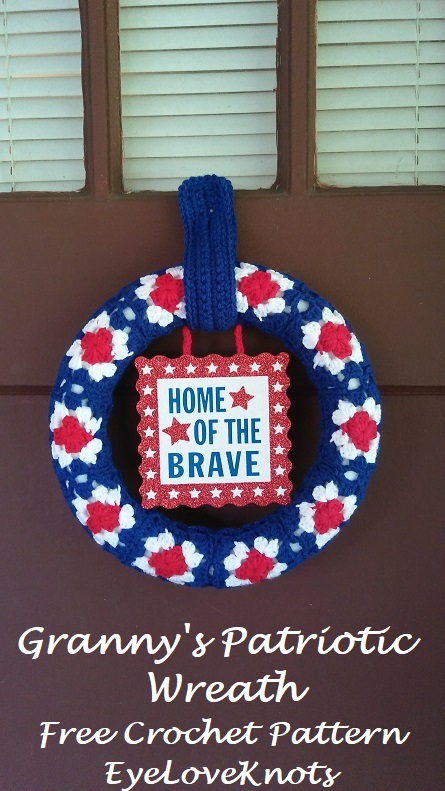
A few weeks ago, I worked up a granny square coaster in red, white and blue, and then another in red, green and white. I submitted the second one to a magazine for consideration to a holiday issue, and while the editor loved it, she decided not to accept it as the magazine was getting out of crochet, and doing strictly knitting. No hard feelings!
From this coaster, I decided to go back to my original patriotic theme, and started working up squares for a matching placemat. The placemat has taken a whole lot longer than I thought it would, and so I decided to start a different patriotic project – this wreath. This will probably be the only patriotic project I share this year as 4th of July is coming quick. I might save the other ideas for Christmas time.
I am so proud of this wreath, and now the juices are flowing with more wreath ideas. If you have a special request, or suggestion, feel free to drop me a line below or an email!
If you would like a PDF version of this post, you may get one through either my EyeLoveKnots Etsy Shop or EyeLoveKnots Craftsy Shop for a small fee. This fee is to compensate for the views lost when you no longer need to return to the blog to for the information, as you will have your own copy. Plus! It helps fund supplies for new projects to share with you!
Shop EyeLoveKnots Etsy: Granny’s Patriotic Wreath.
Shop EyeLoveKnots LoveCrochet: Granny’s Patriotic Wreath.
Are you a Raveler? Share your version of this project on Ravelry – Granny’s Patriotic Wreath.
Save this to your Favorites on: AllFreeCrochet, AllFreeHolidayCrafts, FaveCrafts, Cheap Thrifty Living
Materials:
– Small Amount of Worsted Weight Yarn – I used Red Heart’s Super Saver in Cherry Red, Royal [Blue] and White
– G6/4.25mm Crochet Hook
– H8/5mm Crochet Hook (for Hanger only)
– #18 Tapestry Needle for Weaving and Sewing
– Hot Glue Gun and Sticks
– Signage – I got mine from my local Dollar Tree, and it measures 5.75″ (square)
– 12″ Extruded Styrofoam Wreath Form – I used a white Floracraft brand found at my local JoAnn’s
– Optional, Jewelry Pliers for help Weaving – See Pattern Notes
Material Notes:
Yarn Alternatives: Caron’s One Pound, Bernat’s Super Value.
I did not weigh this project to determine how much yarn was used, but it wasn’t much. On my Basic 12″ Wreath Form Cover, I used 185 yards of worsted weight yarn, just as reference.
The wreath form WILL be visible through the holes in the granny squares, so keep that in mind when purchasing your wreath form – I wouldn’t recommend the green one for a patriotic theme.
Time Spent:
I worked my wreath up in about three days, for a total of about just under 7 hours.
Measurements:
12″ Wreath
Gauge:
First square is 3″.
Abbreviations:
– HDC – Half Double Crochet
– SC – Single Crochet
Pattern Notes:
Chain 2 of beginning of each square counts as a half double crochet.
Chain 2 at the end of each square’s first round is intentional to give a better shape.
Join to the 1st HDC, not beginning chain.
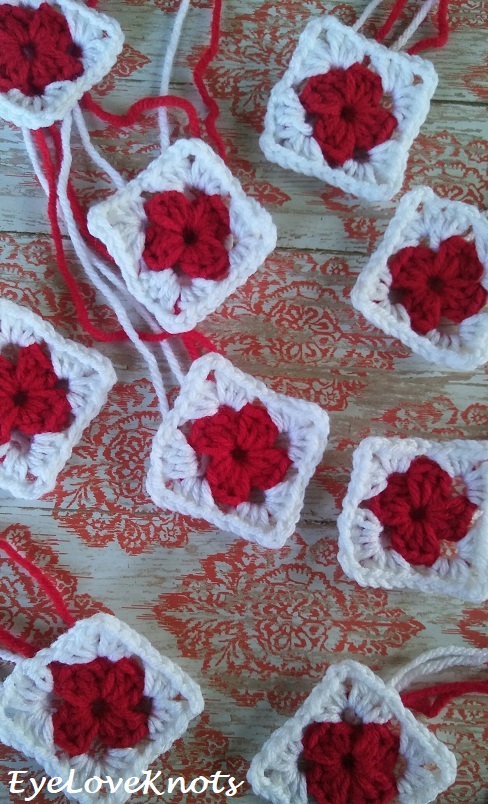
I highly recommend weaving in your ends as you go, otherwise, the ends will quickly add up. I worked up the first two rounds of my squares, and weaved the ends in, then I was ready to worked the final round of each, with less to weave in at the end.
After my first square, the rest of the squares are worked using the Join-As-You-Go method. I do have a photo tutorial showing how to work this technique – Join-As-You-Go Granny Squares.
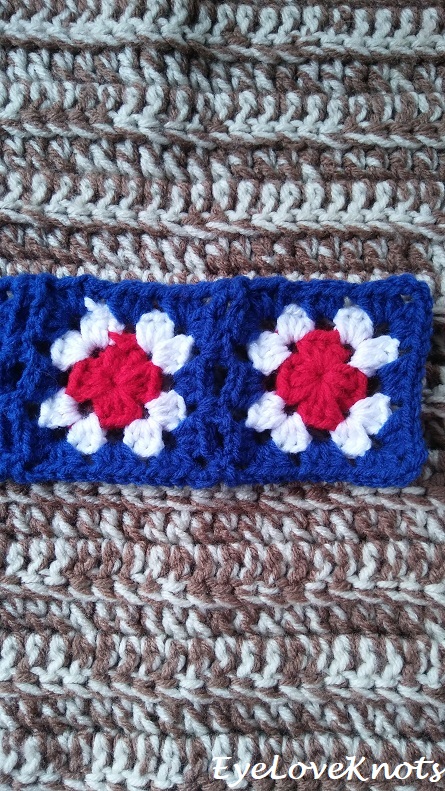
I worked my squares by fastening off one color right after joining, and rejoined the new color into the next chain space. The square on the right shows how this method looks. An alternative to this would be to slip stitch over to the chain space, insert hook into the chain space, and pull through with the new color. I used this alternative method at first, but then I realized that it just wasn’t sitting right at the color change – this is most noticeable from the red to the white, shown on the square on the left. The choice is up to you!
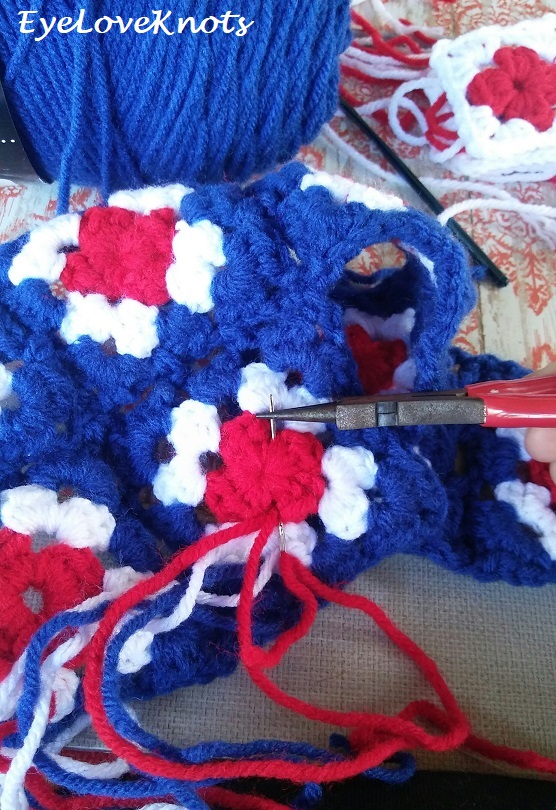
I like to use a pair of jewelry pliers to help me weave in my ends sometimes, usually when using cotton, but I found the weaving to be a little tough with this project, so I turned to my handy dandy pliers. It’s a great tool to have, just be careful not to pull too hard as you can break your needle if it is stuck. I find it helpful to turn the needle to the eye is facing up, like you see in the photo above.
Pattern:
1st Square:
With Red, chain 5. Join ring. Chain 2. 2 HDC into the ring, chain 3, (3 HDC into the ring, chain 3) 2x, 3 HDC into the ring, chain 2. Join, and Fasten Off.
R2: Join White to the next chain space. Chain 2. 2 HDC into the 1st chain space, chain 3, 3 HDC into the same chain space, chain 1, [(3 HDC, chain 3, 3 HDC) into the next chain space, chain 1] 3x. Join, and Fasten Off.
R3: Join Blue to the next chain space. Chain 2. 2 HDC into the 1st chain space, chain 3, 3 HDC into the same chain space, chain 1, 3 HDC into the next chain space, chain 1, [(3 HDC, chain 3, 3 HDC) into the next chain space, chain 1, 3 HDC into the next chain space, chain 1) 3x. Join, and Fasten Off.
2nd – 10th Squares:
With Red, chain 5. Join ring. Chain 2. 2 HDC into the ring, chain 3, (3 HDC into the ring, chain 3) 2x, 3 HDC into the ring, chain 2. Join, and Fasten Off.
R2: Join White to the next chain space. Chain 2. 2 HDC into the 1st chain space, chain 3, 3 HDC into the same chain space, chain 1, [(3 HDC, chain 3, 3 HDC) into the next chain space, chain 1] 3x. Join, and Fasten Off.
R3: Join Blue to the next chain space. Chain 2. 2 HDC into the 1st chain space, chain 1, from behind into Previous Square: SC into the chain 3 space, chain 1, in Current Square: 3 HDC into the same chain space, from behind into Previous Square: SC into the next chain 1 space, in Current Square: 3 HDC into the next chain 1 space, from behind into Previous Square: SC into the next chain 1 space, in Current Square: 3 HDC into the next chain 3 space, from behind into Previous Square: SC into the chain 3 space,
Rest worked in Current Square: chain 1, 3 HDC into the same chain 3 space, chain 1, 3 HDC into the next chain 1 space, (3 HDC, chain 3, 3 HDC) into the next chain 3 space, chain 1, 3 HDC into the next chain 1 space, chain 1. Join, and Fasten Off.
2nd Row of Squares
1st Square – 1 Join:
With Red, chain 5. Join ring. Chain 2. 2 HDC into the ring, chain 3, (3 HDC into the ring, chain 3) 2x, 3 HDC into the ring, chain 2. Join, and Fasten Off.
R2: Join White to the next chain space. Chain 2. 2 HDC into the 1st chain space, chain 3, 3 HDC into the same chain space, chain 1, [(3 HDC, chain 3, 3 HDC) into the next chain space, chain 1] 3x. Join, and Fasten Off.
R3: Join Blue to the next chain space. Chain 2. 2 HDC into the 1st chain space, chain 1, from behind into Previous Square: SC into the chain 3 space, chain 1, in Current Square: 3 HDC into the same chain space, from behind into Previous Square: SC into the next chain 1 space, in Current Square: 3 HDC into the next chain 1 space, from behind into Previous Square: SC into the next chain 1 space, in Current Square: 3 HDC into the next chain 3 space, from behind into Previous Square: SC into the center join of the previous rows squares,
Rest worked in Current Square: chain 1, 3 HDC into the same chain 3 space, chain 1, 3 HDC into the next chain 1 space, (3 HDC, chain 3, 3 HDC) into the next chain 3 space, chain 1, 3 HDC into the next chain 1 space, chain 1. Join, and Fasten Off.
2nd – 10th Squares – 2 Joins Each:
With Red, chain 5. Join ring. Chain 2. 2 HDC into the ring, chain 3, (3 HDC into the ring, chain 3) 2x, 3 HDC into the ring, chain 2. Join, and Fasten Off.
R2: Join White to the next chain space. Chain 2. 2 HDC into the 1st chain space, chain 3, 3 HDC into the same chain space, chain 1, [(3 HDC, chain 3, 3 HDC) into the next chain space, chain 1] 3x. Join, and Fasten Off.
R3: Join Blue to the next chain space. Chain 2. 2 HDC into the 1st chain space, chain 1, from behind into Previous Square: SC into the chain 3 space, chain 1, in Current Square: 3 HDC into the same chain space, from behind into Previous Square: SC into the next chain 1 space, in Current Square: 3 HDC into the next chain 1 space, from behind into Previous Square: SC into the next chain 1 space, in Current Square: 3 HDC into the next chain 3 space, from behind into Previous Square: SC into the center join of the previous square from this row and of the previous rows squares, chain 1, in Current Square: 3 HDC into the same chain 3 space,
chain 1, from behind in Previous Rows Square: SC into the next chain 1 space, chain 1, in Current Square: 3 HDC into the next chain 1 space, chain 1, from behind in Previous Rows Square: SC into the next chain 1 space, chain 1, in Current Square: 3 HDC into the next chain 3 space, from behind in Previous Rows Square: SC into the center join of previous rows squares,
Rest in Current Square: chain 1, 3 HDC into the same chain 3 space, chain 1, 3 HDC into the next chain 1 space, chain 1, (3 HDC, chain 1, 3 HDC) into the next chain 3 space, chain 1, 3 HDC into the next chain 1 space, chain 1. Join, and Fasten Off.
At this point, weave in any remaining ends.
Finishing
Cut a long strand of blue yarn for sewing.
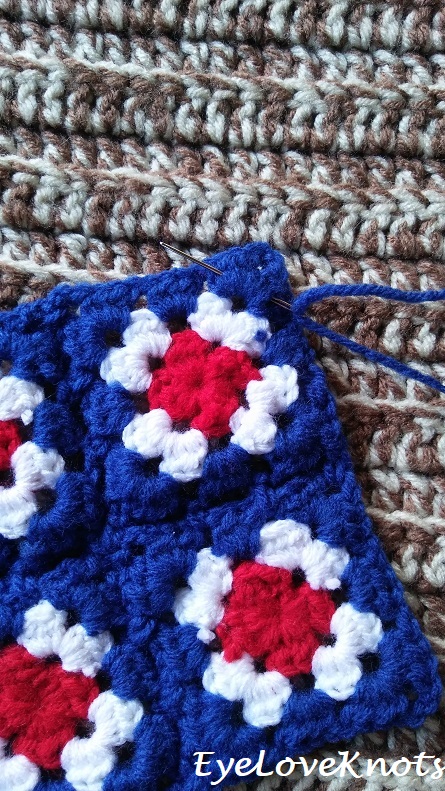
Lay rectangle as shown. Working from the wrong side, weave in yarn tail to secure – I worked three passes.
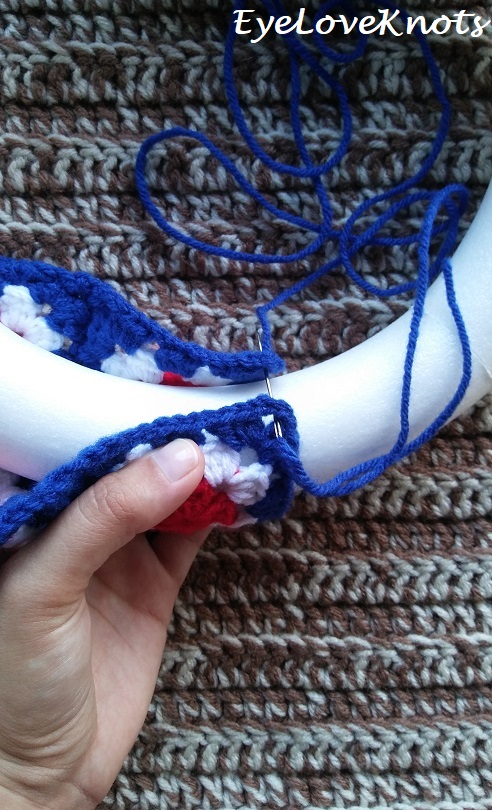
Placing styrofoam wreath in the center of the two rows, wrap the piece around the form lining up the ends, and begin whipstitching together.
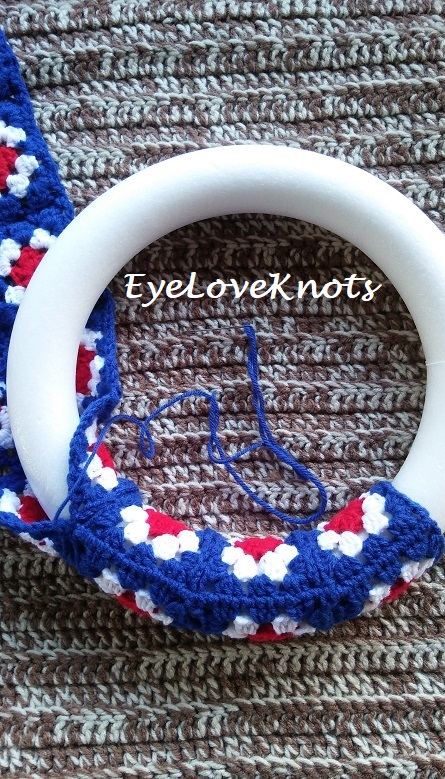
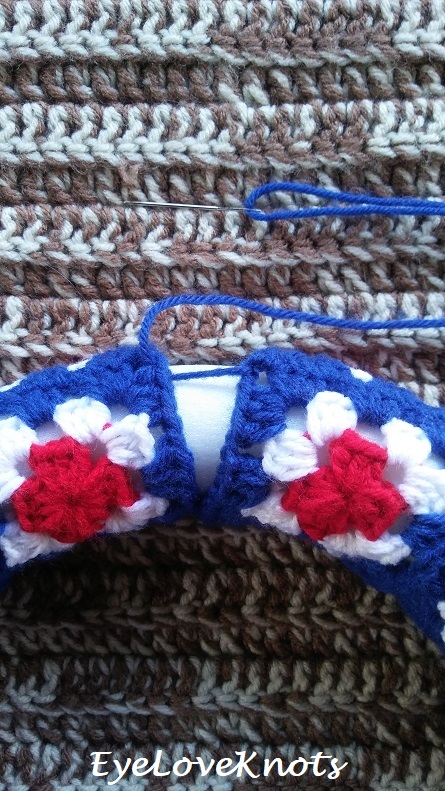
When you get to the end, stretch the ends together, line up the stitches, and whipstitch closed.
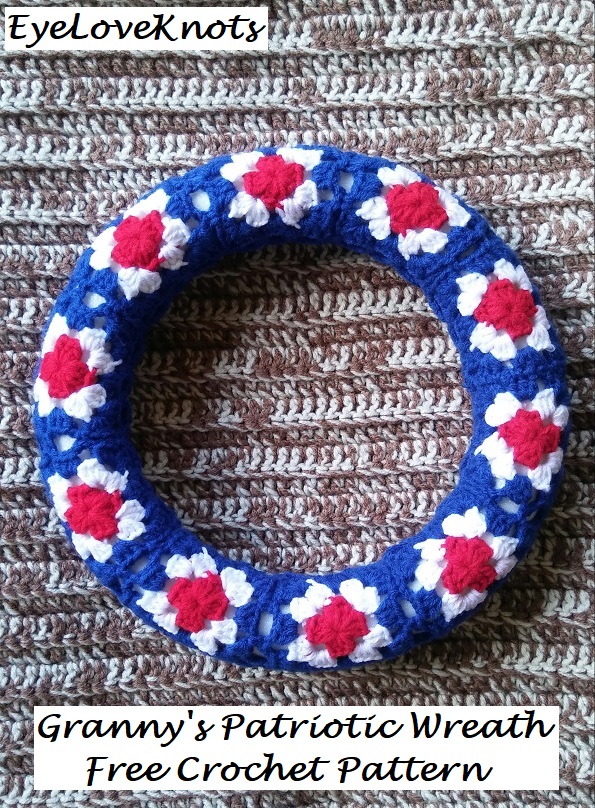
Weave in your final ends, and you have a beautiful granny square wreath finished, but wait! You can take it one step further by embellishing.
Embellishment
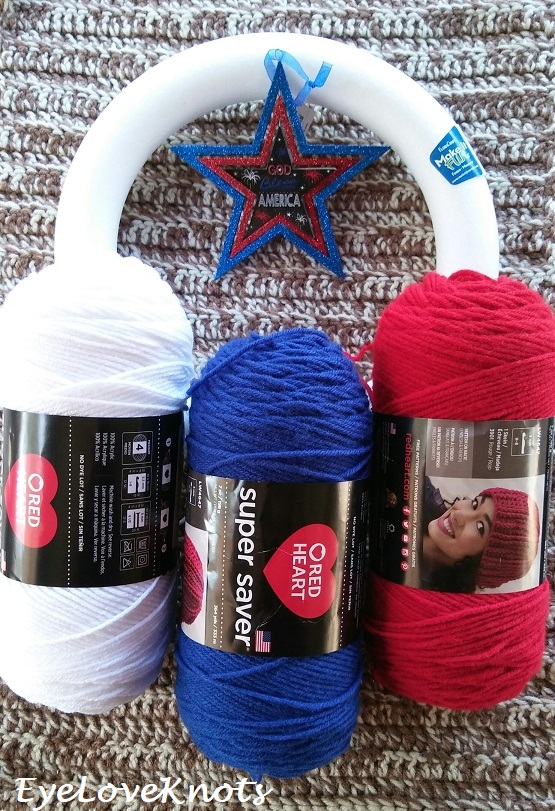
Originally, I purchased the hanging star you see above my yarn, and I envisioned it on the bottom, off to the right, but I felt like it was a little too much blue. I wish the star would have been solid black, with the fireworks, or similar, but I didn’t have any luck finding such a thing.
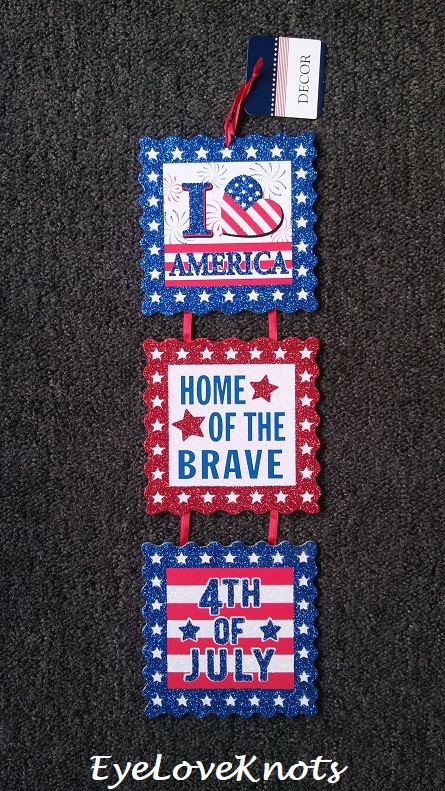
I did find this wall hanging at my local Dollar Store. I knew the red border would make this the perfect embellishment for my sign.
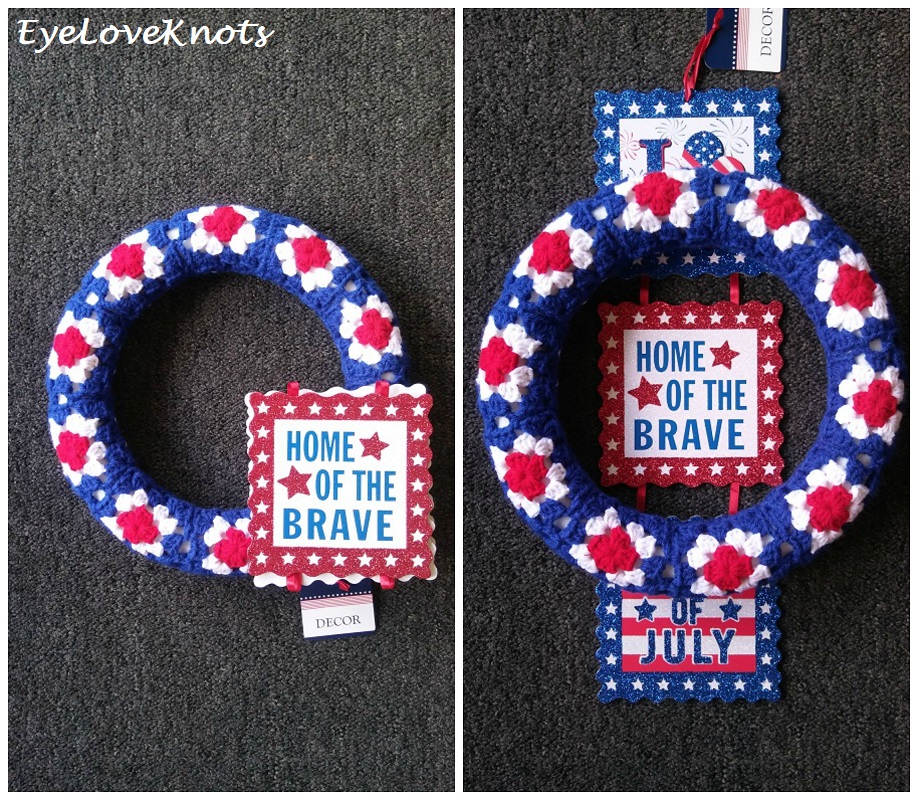
Now, where to put it? My go to spot to put wreath embellishments is off to the bottom right side, as seen in the photo on the left, but I was talking to my friend, Vee, about it, and she suggested putting it in the center, as seen in the photo on the right. It hadn’t crossed my mind, but yeah! Why not?
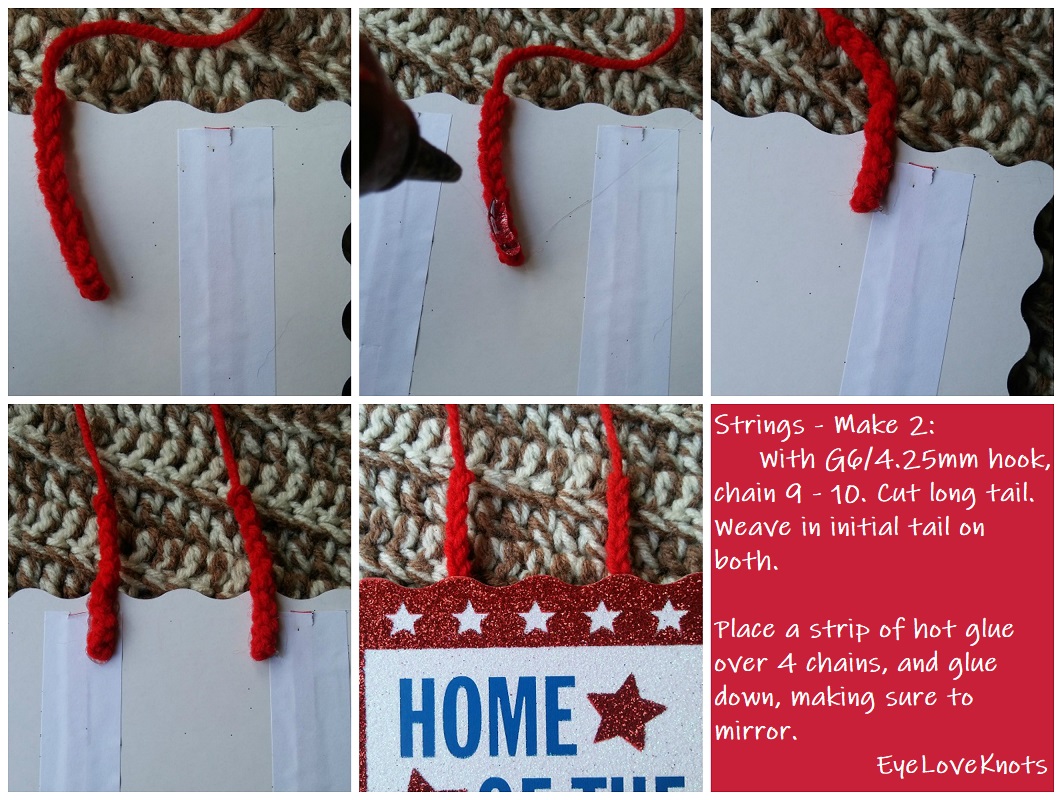
I used some crocheted chains to secure my sign. To make these “strings”:
With a G6/4.25mm hook, chain 9 – 10. Cut long tail. Weave in initial tail on both piece. Place a strip of hot glue over 4 chains, and glue down, making sure to mirror. I chained 10, and my bottom ends are laying in granny square spaces, which works out good because it is holding the sign in place, but if you wanted your sign to suspend a little more, try chaining just 9. These will of course vary on the size of your sign, mine is 5.75″ (square).
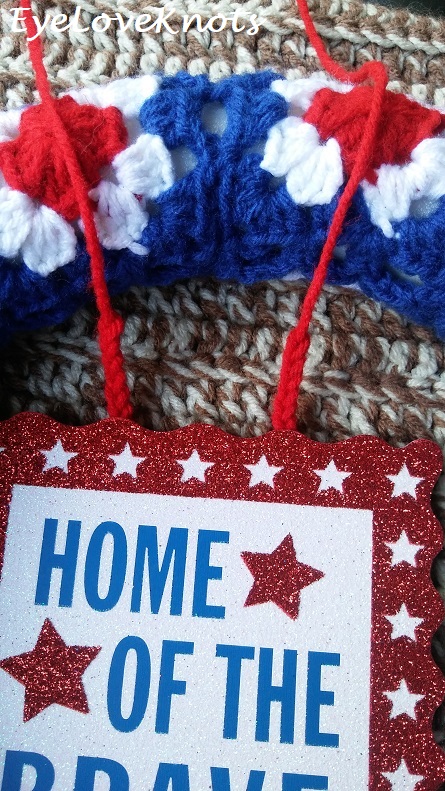
Visualize where the sign will hang from. I’ve lined mine up to hang from the center of the top two granny squares.
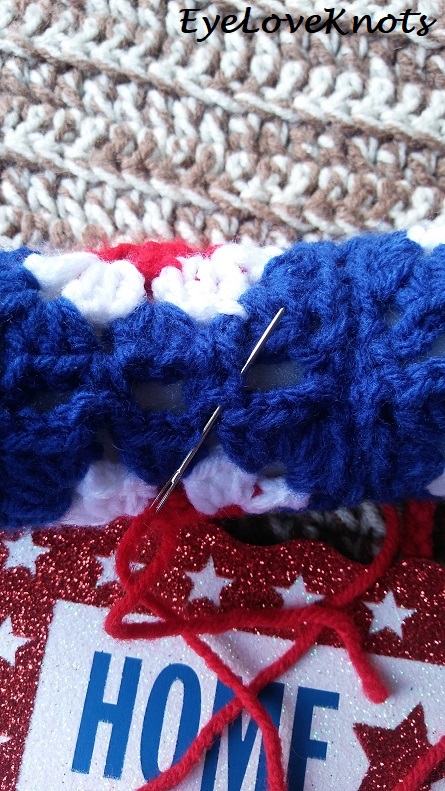
And weave to secure – I did so right in a single crochet stitch, and weave back and forth about four passes, or until you are comfortable.
Hanger
With H8/5mm crochet hook, chain 43. SC into the 2nd chain, and each chain across. (42 SC)
R2: Chain 1, turn. SC into the 1st 4 SCs, chain 4, skip the next 4 SC, SC into the next 26 SC, chain 4, skip the next 4 SC, SC into the last 4 SC. (34 SC)
R3: Chain 1, turn. SC into the 1st 4 SCs, work 4 SC into the chain space, SC into the next 26 SC, work 4 SC into the next chain space, SC into the last 4 SC. (42 SC)
R4: Chain 1, turn. SC into each SC across. (42 SC)
Border: Chain 1, but don’t turn. SC 3 down the side, work 3 SC into the next stitch – corner, working into the opposite side of the foundation chain, SC into the next 40 stitches, work 3 SC into the next stitch – corner, SC 3 into the next side, work 3 SC into the next stitch – corner, SC across into the next 40 stitches, work 3 SC into the next stitch – corner. Join to the first SC. (90 SC)
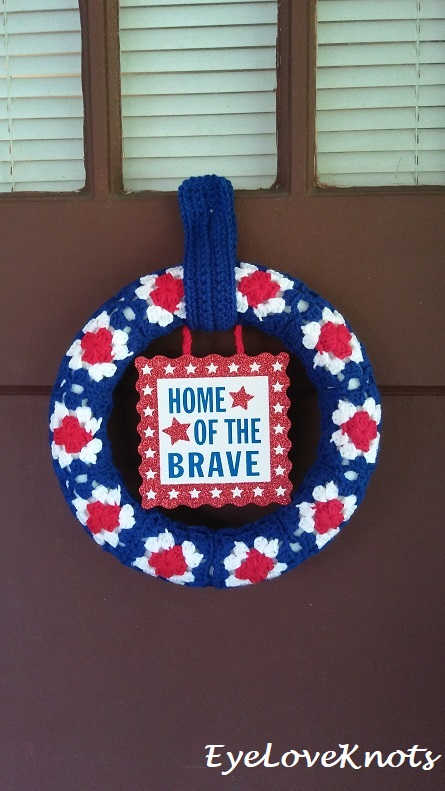
Weave in ends. This wreath hanger is used to hang on a wreath hanger, or in my case, a nail on my door. The open ends will be at the top, and the slit is where the loop of the wreath hanger (or nail) will be placed through.
Please feel free to make and sell your own Granny’s Patriotic Wreath using this pattern, but please DO NOT claim this pattern as your own nor should you sell my pattern, and DO NOT re-publish my photos as your own. DO NOT copy and paste my pattern anywhere, link to it instead.
Join the EyeLoveKnots Crafting Community on Facebook to share your creations, and see what others are up to!
Linked Up To…
Granny-Spiration Link-Up Party #6 – Atelier Marie-Lucienne
Craft Schooling Sunday – Creative Jewish Mom
Nifty Thrifty Sunday #337 – Meet Our Life
Inspiration Monday – Scattered Thoughts of a Crafty Mom
Creative Mondays Blog Hop – Claire Justine
Handmade Monday #78 – Sum of their Stories
Merry Monday Link Party #207 – A Wonderful Life
The Really Crafty Link Party #122 – Keeping it Real
Ginx Woolly Linx Party June – Ginx Craft
You’re the Star Linky Party Week 8 – Let it Shine
The Scoop Link Party #329 – Worthing Court
Dagmar’s Home Link Up #213 – Dagmar’s Home
426th Inspire Me Tuesday – A Stroll Thru Life
Lou Lou Girls Fabulous Party #218 – Lou Lou Girls
The Linky Ladies Party #134 – The Purple Poncho
Talk of the Town 126 – My Repurposed Life
{wow me} wednesday #354 – Ginger Snap Crafts
Your Girlish Whims Wednesday #358 – My Girlish Whims
Wednesday Link Party #248 – The Stitchin’ Mommy
Hookin’ on Hump Day #168 – Petals to Picots
Sew It Cook It Crafty It Link Party #57 – Sew Historically
Scrappy Stitchers Link Party #42 – Stitches ‘N’ Scraps
Pin Junkie Pin Party #268 – The Pin Junkie
Crafty Love Link Party #34 – Jessie at Home
Link Your Stuff – Annemarie’s Haakblog
Best of the Weekend – Hello Little Home
Funtastic Friday 182 Link Party – Olives n Okra
Sweet Inspiration Link Party #110 – The Boondocks Blog
Home Matters Linky Party #187 – Domestic Deadline
Friday Frenzy Link Party – 06/08/18 – Kelly Lynn’s Sweets and Treats
Sundays at Home #209 – Celebrating Everyday Life
Snickerdoodle Create Bake Make Party #235 – Across the Boulevard
Dollar Store Craft Link Party – Across the Boulevard
Hi, Alexandra: I just love the Patriotic Granny Square Wreathe. I have more than enough yarn to make wreathes like this in colors for all the holidays in a year. I will join you online to discuss Crochet, & other crafts such as those you do. I also am a cat lover, as is my husband, & I make cards, as well. I have been crocheting since I was in my early 20s. I am now 67 years old. Thanx for the pattern. I would never say someone else’s pattern was my own. I give credit where it is due.
Thank you for the lovely comment, Lisa! I am also envisioning wreaths of all seasons and holidays worked similarly to this one – I am looking forward to seeing your version/s.
Best wishes to you, and your husband 🙂
For future giveaways I would like yarn, I love yarn!
Thank you for letting me know – the feedback helps a ton.
I also really love when you take time to leave me a comment, but in the future, please comment on the respective post.
This wreath is beautiful and so creative 🙂 Thanks for sharing at Creative Mondays.
Thanks, Claire!
So cute! Lovely way to create wreaths. Thank you for sharing at The Really Crafty Link Party. Pinned.
And so fun! Thank you so much for stopping by, Teresa!
I can’t remember how to crochet but I love how this wreath looks! Very fun and patriotic. Visiting from Really Crafty party.
No worries, it happens! Thanks so much for stopping by 🙂
What a lovely patriotic wreath! I’m always so impressed by those of you who can crochet so beautifully. Thanks for sharing at Snickerdoodle Party. Pinning to my Patriotic decor board.
Thanks, Beverly! I really enjoy crocheting. Looking forward to the next party tomorrow 🙂
Anything patriotic is good for me, thx for the awesome pattern!
Very welcome! Enjoy 🙂
I can already re-imagine this for football season, holidays, birthdays – fantastically versatile idea. thanks!
Definitely! Endless possibilities. I am working on another version myself.
Looks really nice! Thanks so much for linking up with me at #AThemedLinkup 20 for All Things American (red, white, and blue), open June 27 to July 25. All party entries shared if social media buttons installed.