Photo tutorial & video tutorial showing how to change yarn colors in crochet.
This post contains affiliate links for Etsy and WeCrochet. If you make a purchase by clicking on them, I make a small commission at no extra cost to you. Thanks for your support!
Find the free photo tutorial instructions below, or purchase a printer-friendly, ad-free PDF on Etsy by clicking here.
In a hurry? Pin this for later when you have more time.
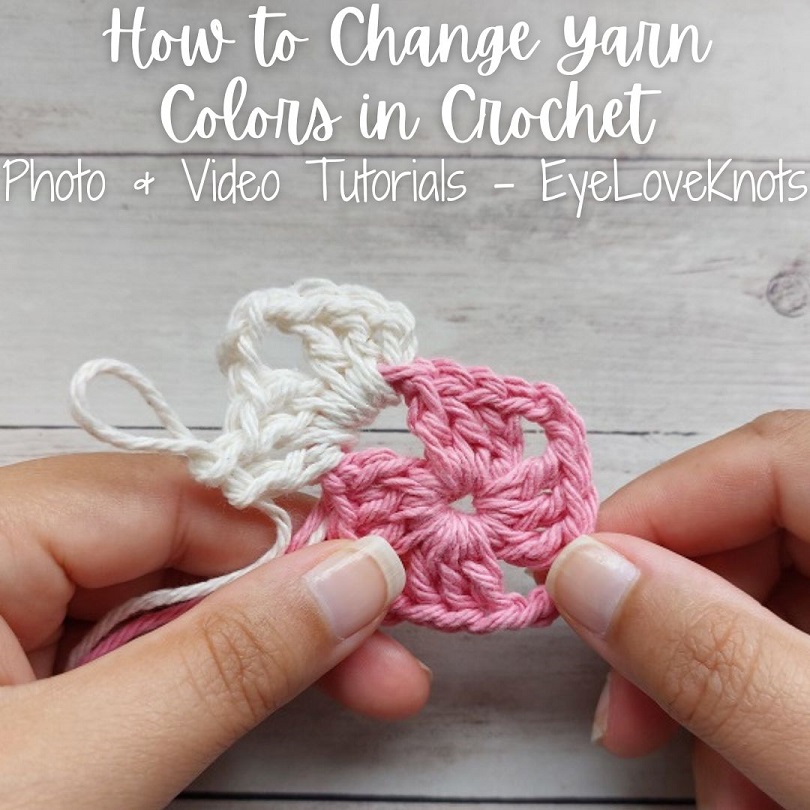
So you’re crocheting away, and it’s time to change yarn colors, whether it’s in the middle of a project or at the end of a row or round. Let me show you how to change yarn colors in crochet so you can continue crocheting away.
There are several ways you can join yarn together, including the Magic Knot, the Russian Join and felting for wools and wool blends. So many ways to join yarn depending on your preference and even the project you’re working on. I am going to show you my go-to ways, but keep in mind that these are not the only ways to change yarn colors.
I’ll show photo and video tutorials for changing yarn colors multiple ways depending on the stitch pattern. The same concept applies with any stitch pattern. As I do different projects, I’ll update this post with photo & video tutorials. All tutorials are given in US terms.
I am not creating anything new here, but I did take the time to take the photos, edit them, and put this tutorial together, so please respect my work. Do not pin or share any of the tutorial images – just the main photo. Provide the link for others to find my page (help out me and my blog with the traffic). Do not copy and paste my work anywhere. Thank you!
Video Tutorial Showing How to Change Yarn Colors in Crochet (Shown on Single Crochet Fabric):
Photo Tutorial Showing How to Change Yarn Colors in Crochet (Shown on Single Crochet Fabric):
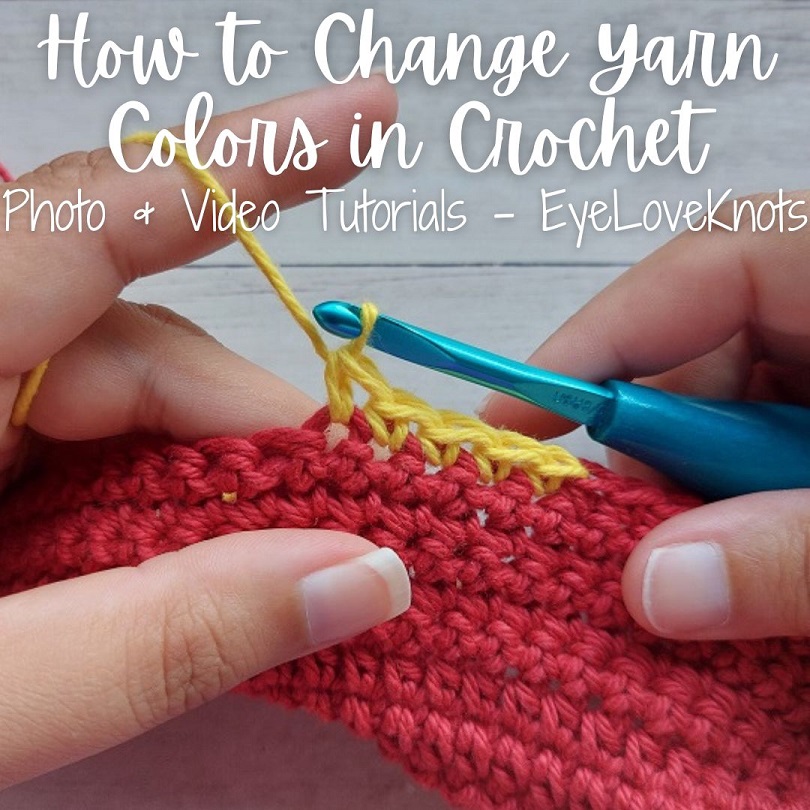
This technique works in the middle of your row or round as well as at the end of your row or round – it works anywhere you need to change your yarn at! This technique involves changing your yarn color during the last part of working your stitch. Changing yarn colors this way will produce a nice, clean color change in your work.
Yarn is WeCrochet Dishie in the Fiesta Red, Bumblebee and Black colorways, and I’m using an H8/5mm crochet hook – I love this Koi Fish Ergonomic Clay I bought on Etsy.
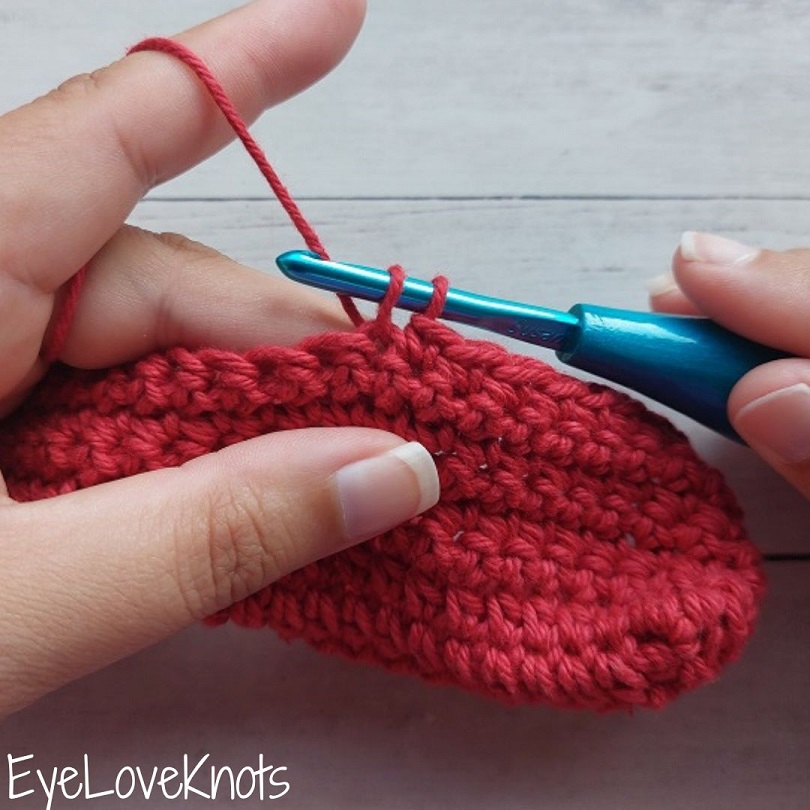
The yarn change will take place in the last yarn over of the previous stitch so work up to this point. In the case of single crochet: yarn over, insert your hook into the stitch, yarn over and pull through – there are 2 loops on your hook. Pause here.
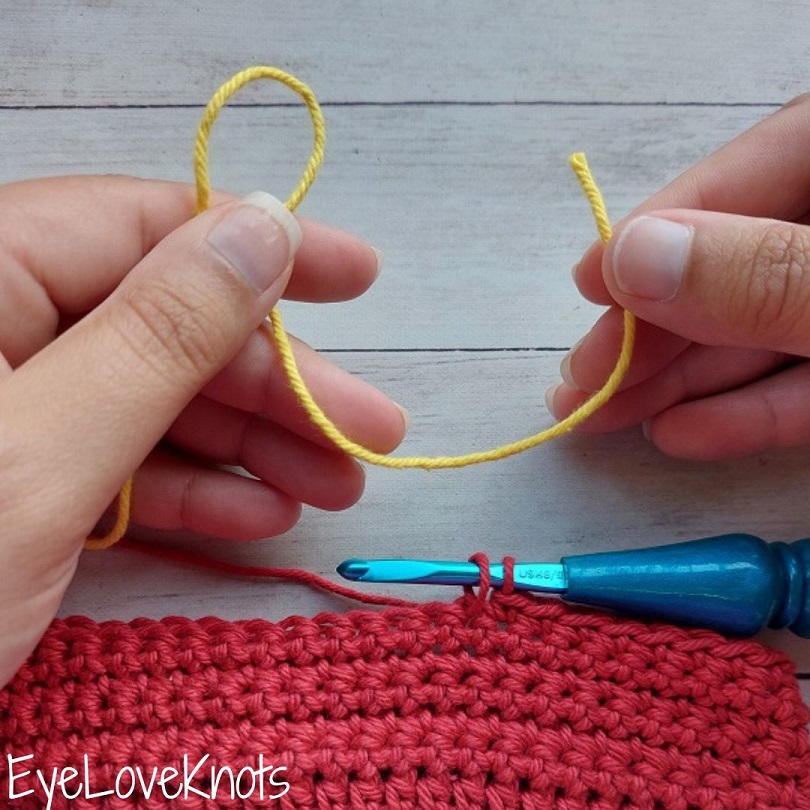
Grab the new color. Form a loop leaving a tail end long enough to comfortably weave in later, approximately 4-6″.
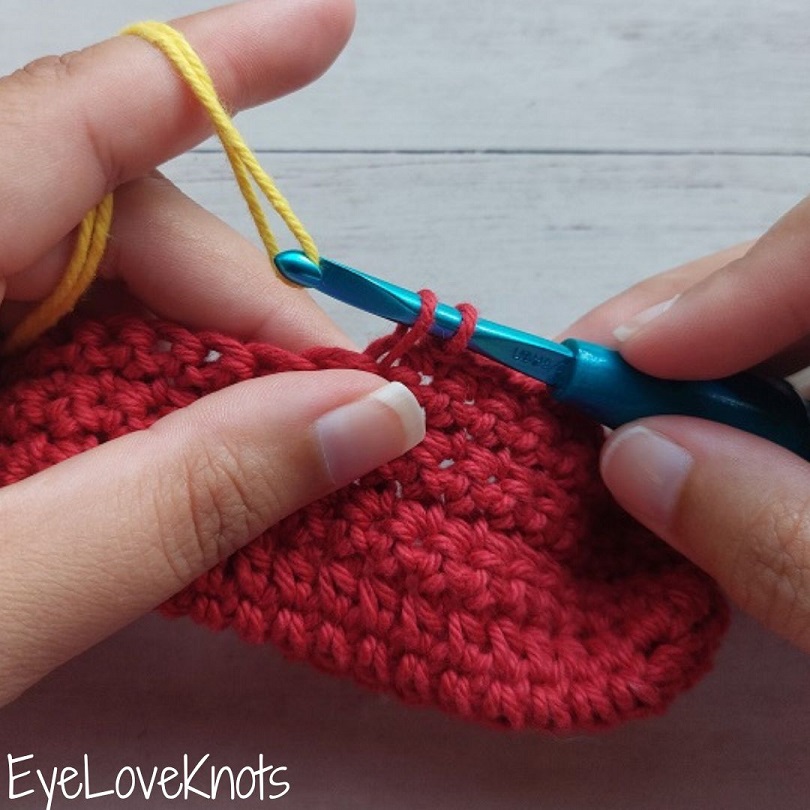
Hold tension on the tail end of the previous color. Put the loop from the new color onto your crochet hook. It will count as the last yarn over.
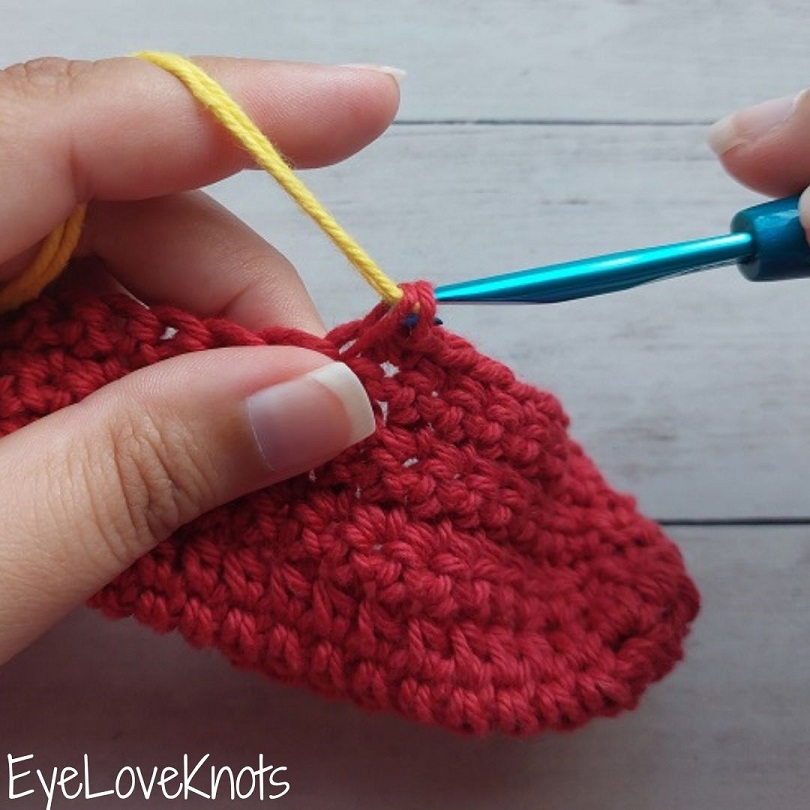
Pull through…
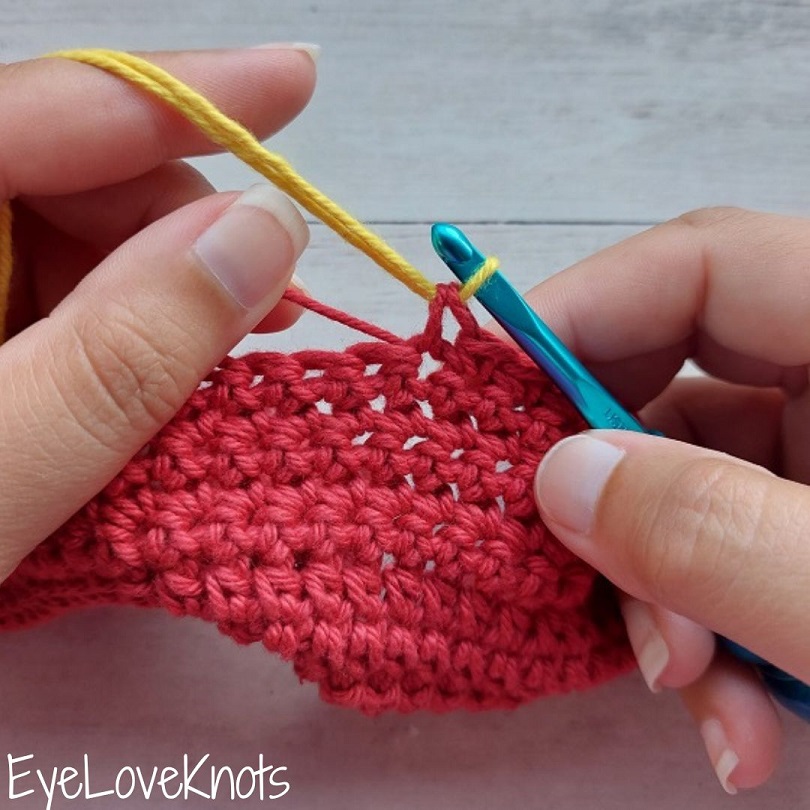
… to complete the stitch in the previous color, but now be ready to work in the new color. Tug on the tail end from the previous color to even out the stitch, then drop it to whichever side of your fabric you’ll leave your tails for weaving.
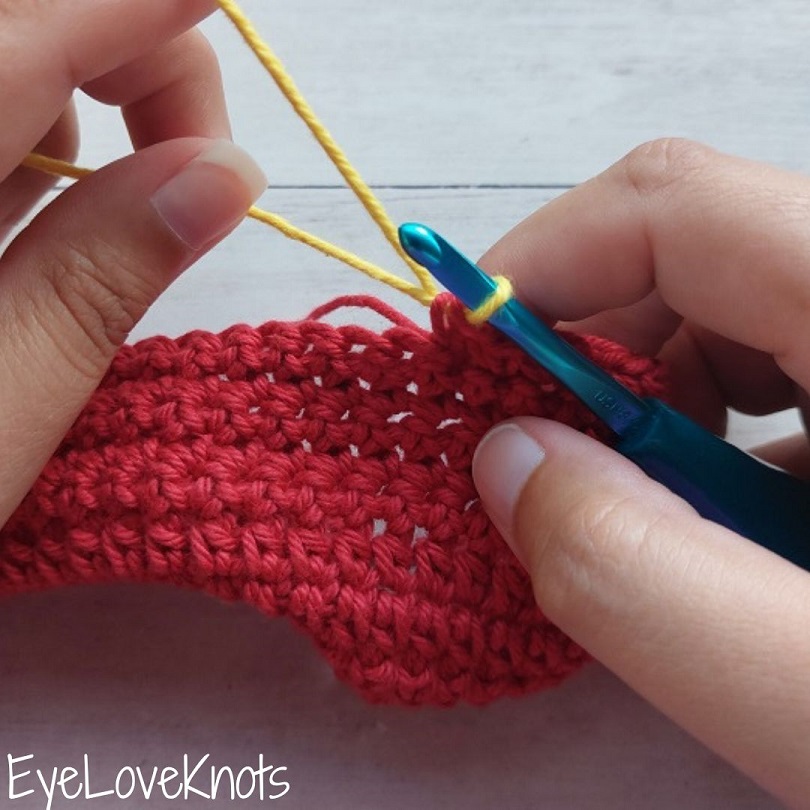
Tug on the new color’s tail end to bring the loop on your hook to normal tension, then drop it to the same side as the previous tail end to weave in later.
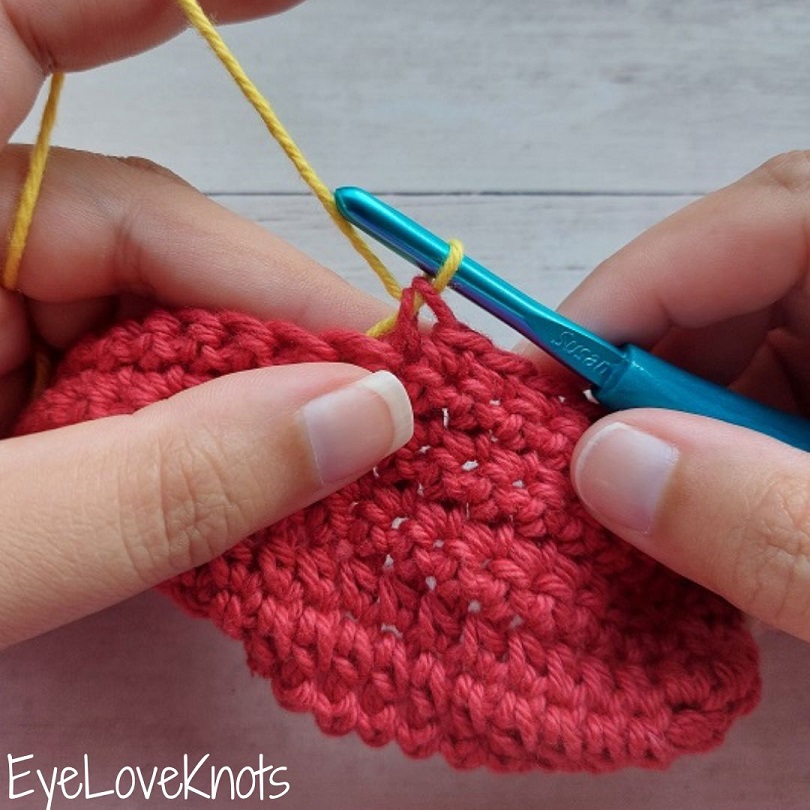
Now you are ready to continue working in your new color.
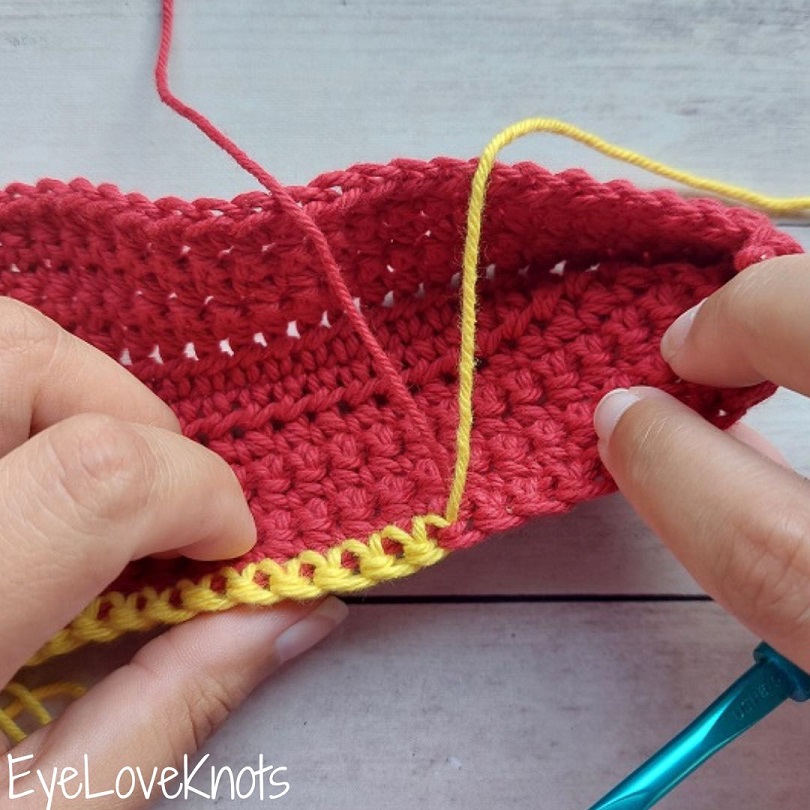
When you’re ready, weave in the tail ends from the color change.
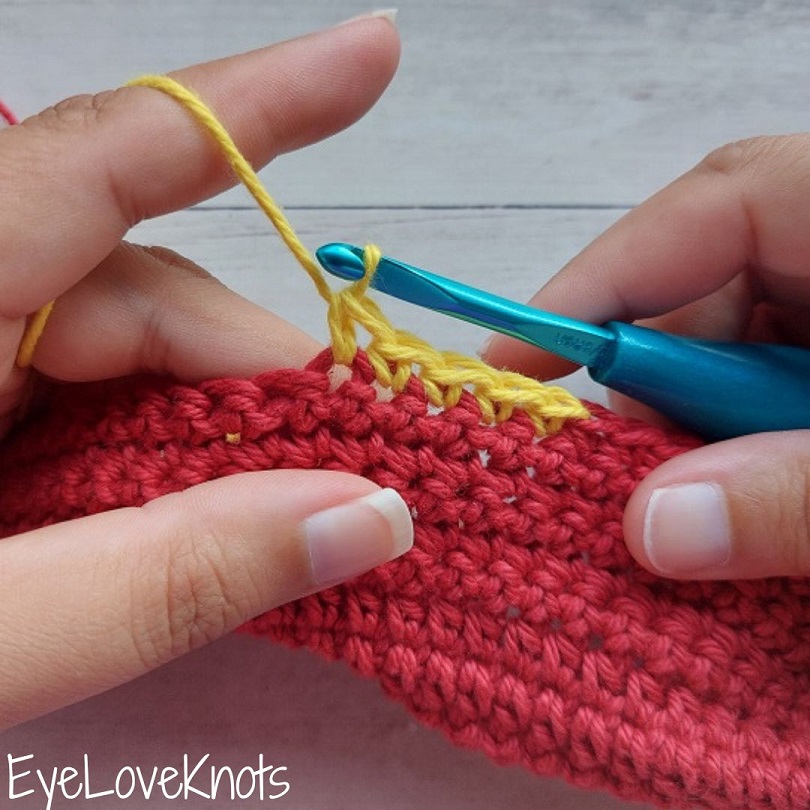
This is the Santa Shay Cosmetic Bag or Hook Pouch (Free Crochet Pattern) found on the Cre8tion Crochet blog.
Video Tutorial Showing 4 Ways to Change Yarn Colors on a Granny Square:
Photo Tutorial Showing 4 Ways to Change Yarn Colors on a Granny Square:
Yarn is Lily Sugar n Cream in the Rose Pink and Ecru colorways, and I’m using an H8/5mm crochet hook – I love this Koi Fish Ergonomic Clay I bought on Etsy. These appear in the same order as the video tutorial. The two I use the most often are the 2nd Way and 4th Way.
1st Way – Most Common Way of Changing Yarn Colors
While there are so many different ways to change yarn colors, I think the most common is in the last yarn over of the previous stitch. This was my second preferred method, but then I discovered the 2nd Way that creates a bit of a more seamless look. This method is good if you were going to alternate rounds, for example, white, black, white, black, etc. You can carry up the yarn, and use this color changing technique. I do not recommend this project for blocks of color because it creates floats on the wrong side.
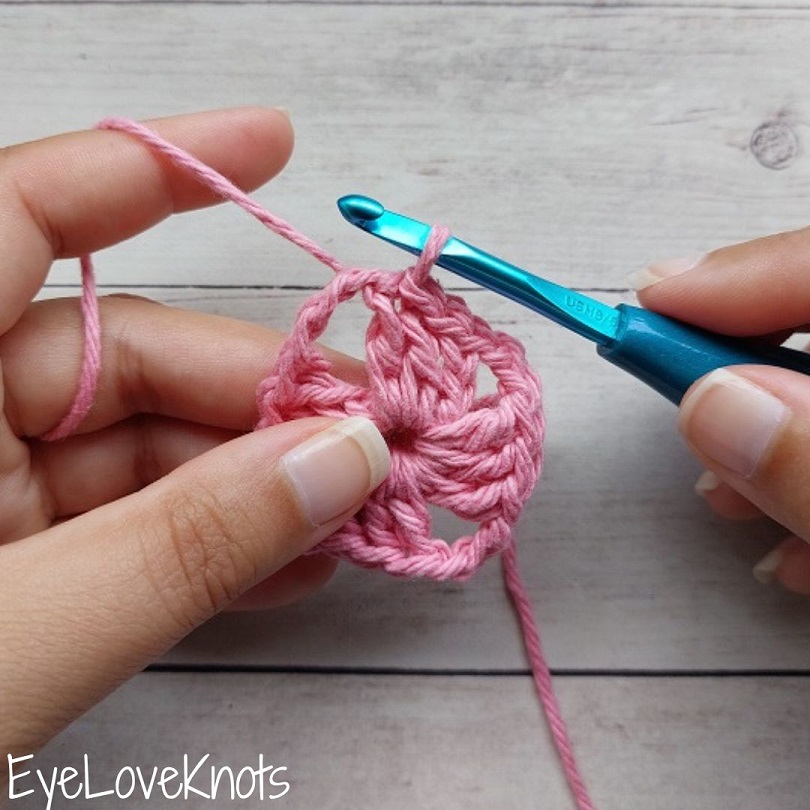
After joining the round, slip stitch over to the last double crochet before the corner chain space.
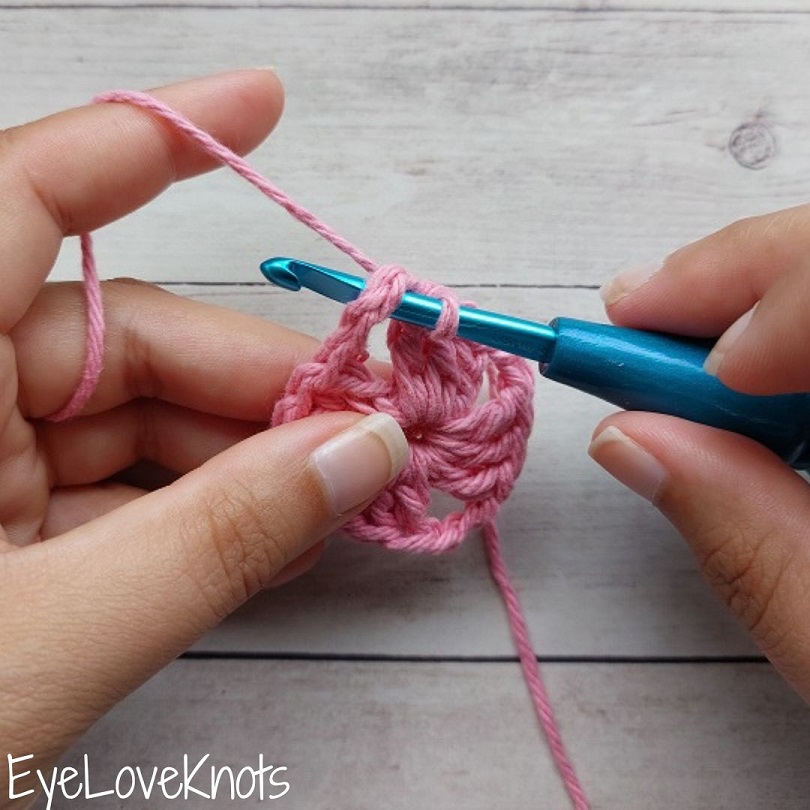
The next stitch is going to be a slip stitch into the corner chain space. We’re going to work up to the last yarn over of the stitch. Insert your hook into the chain space.
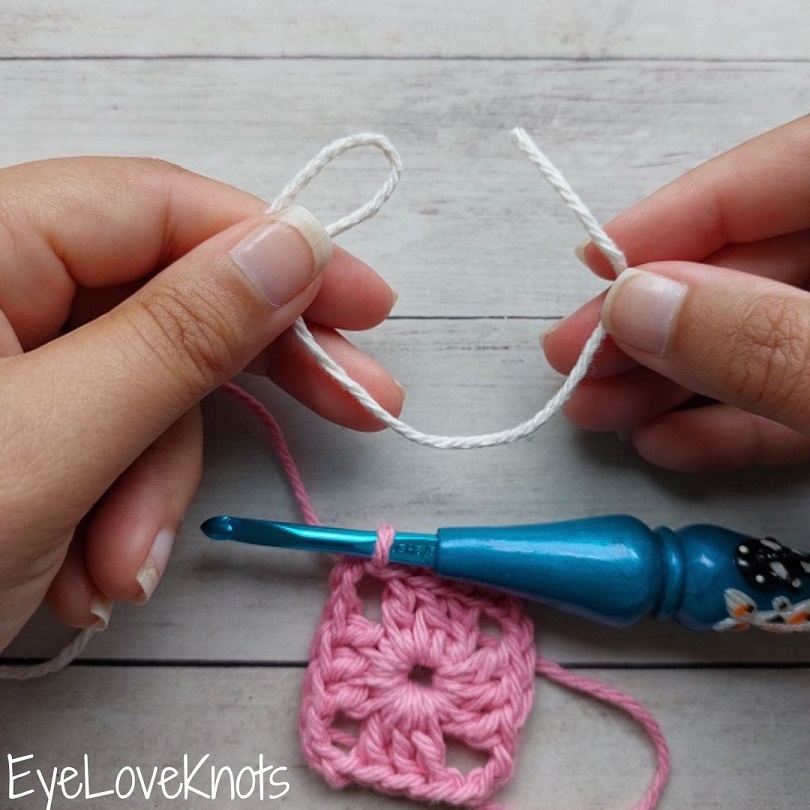
Set granny square aside. Grab the new color. Form a loop leaving a tail end long enough to comfortably weave in – about 4-6″.
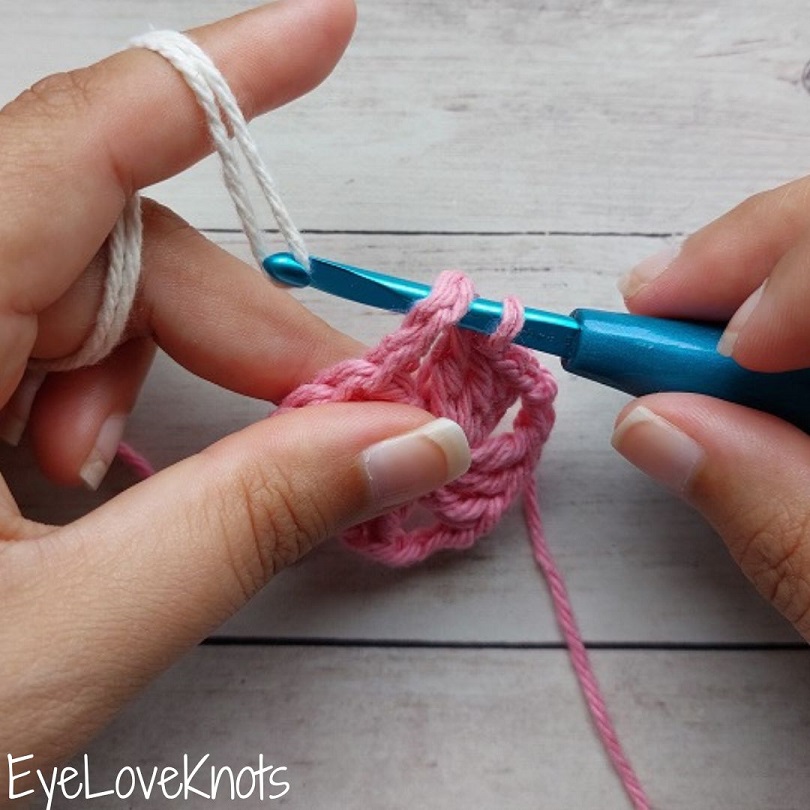
Pick up the granny square. Put the loop from your new color onto your crochet hook – this will count as the last yarn over.
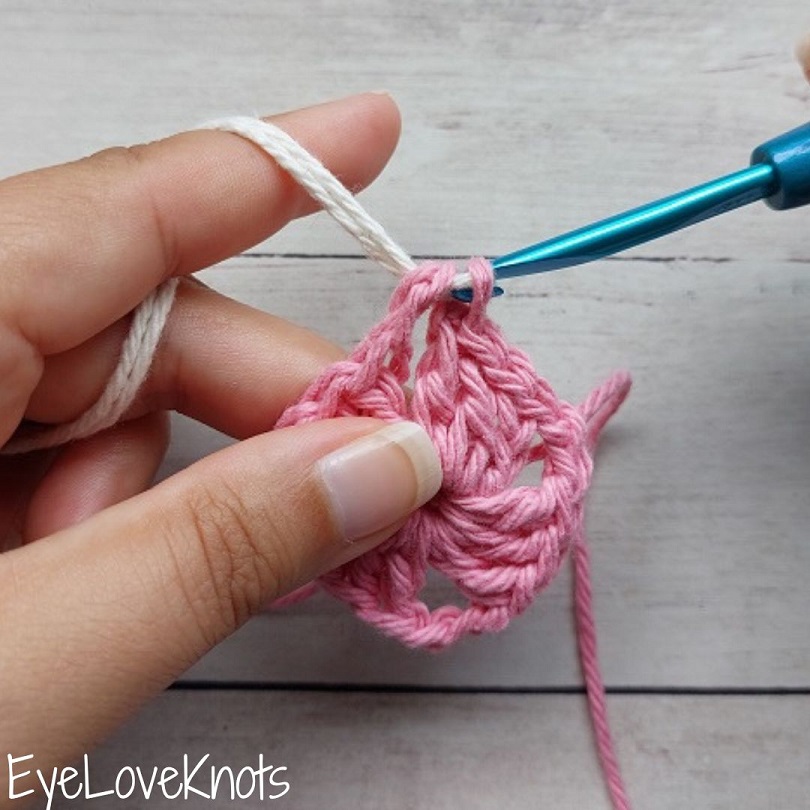
Pull through…
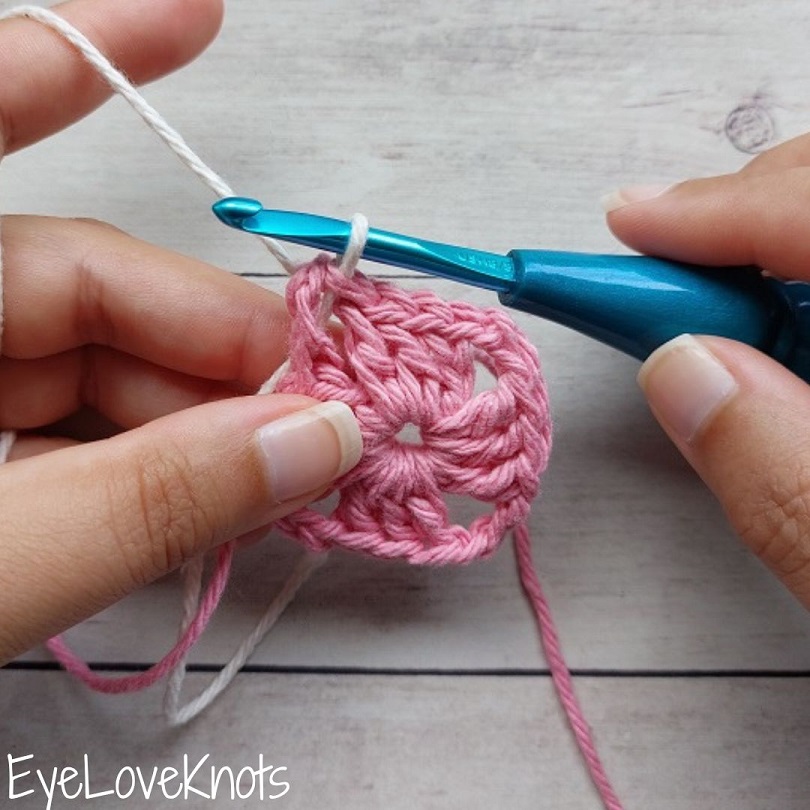
… to complete the slip stitch.
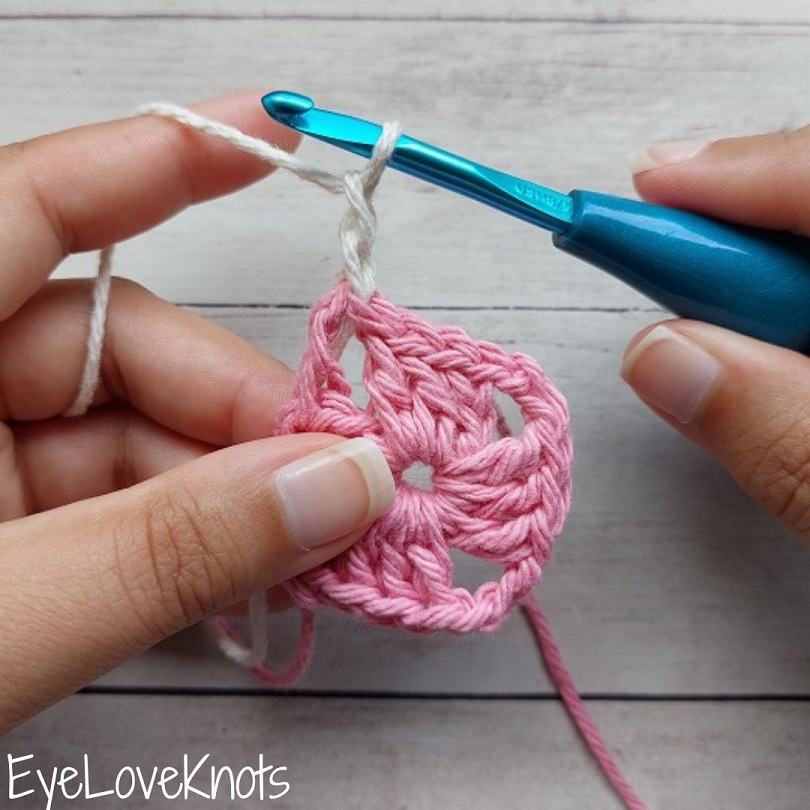
Chain 2 to begin the round.
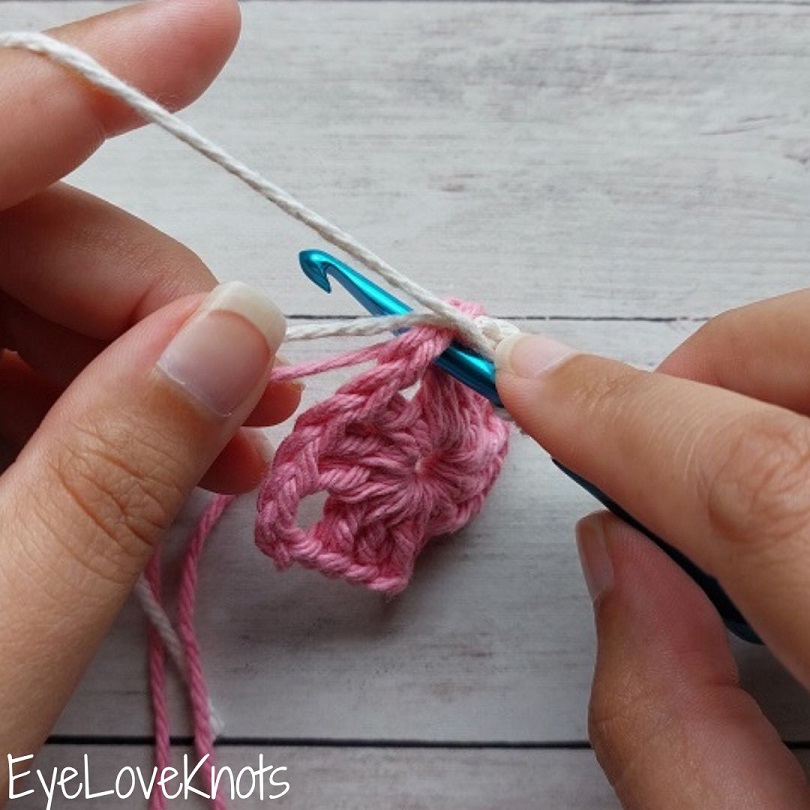
Here I drop the pink yarn, and I like to crochet over the tail end from the new strand while working in the corner…
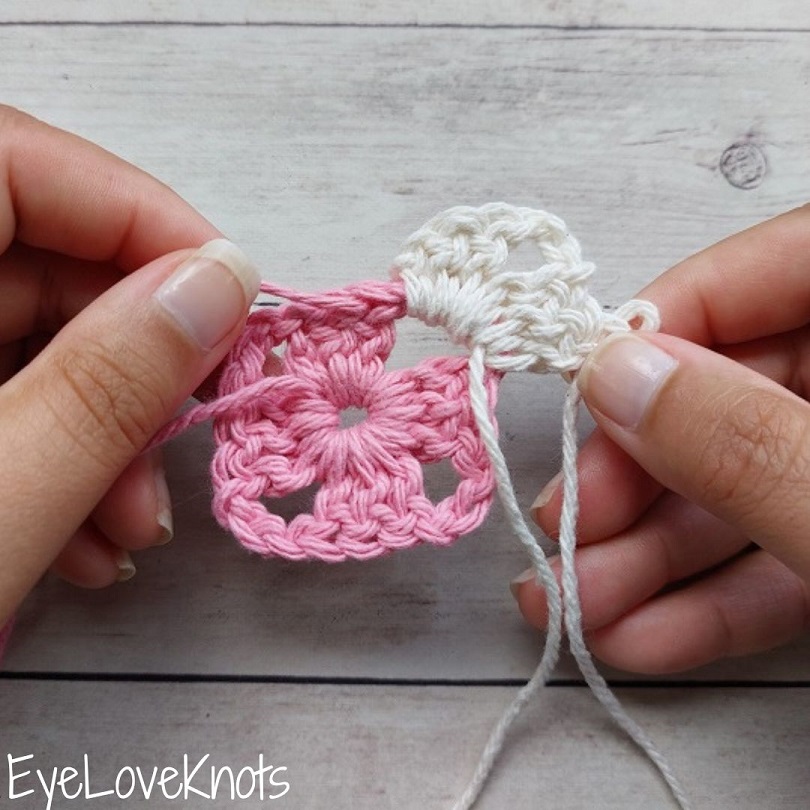
… minus the very last stitch so that it puts me in a better position to weave in the tail end later. Crocheting over the tail end counts as the first pass.
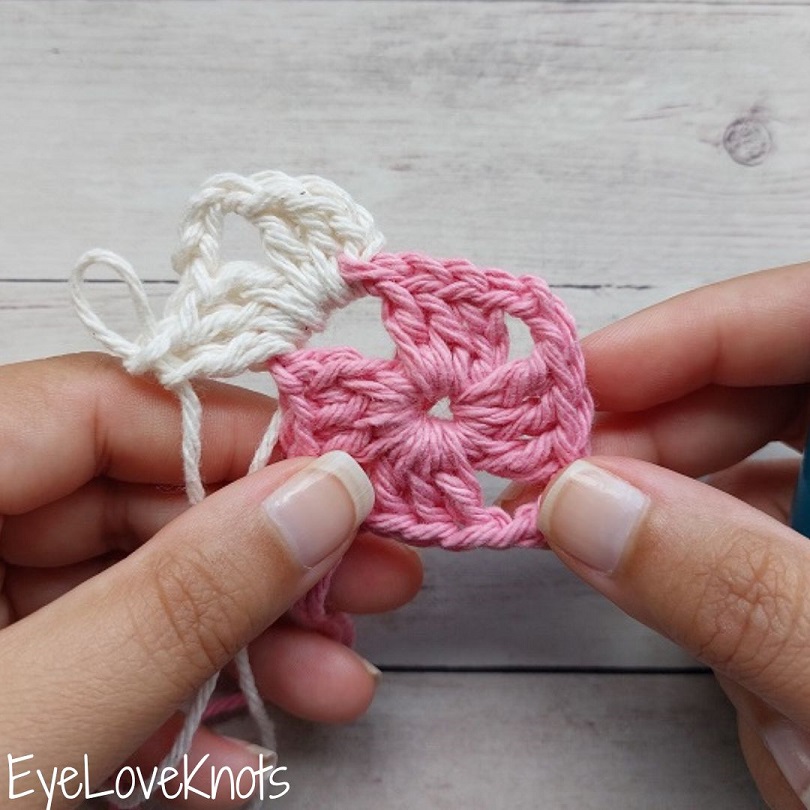
After working all the way around, slip stitch join as usual.
2nd Way – My Preferred Way for Alternating Stripes on Granny Squares
If I was going to alternate my rounds, for example, white, black, white, black, etc, then I would carry my yarn up, and use this color changing technique – I do this for projects like beanies as well. I do not recommend this project for blocks of color because it creates floats on the wrong side. This technique is similar to the 4th way, which uses the most common way of changing yarn colors, but I like that it gives a more seamless color change.
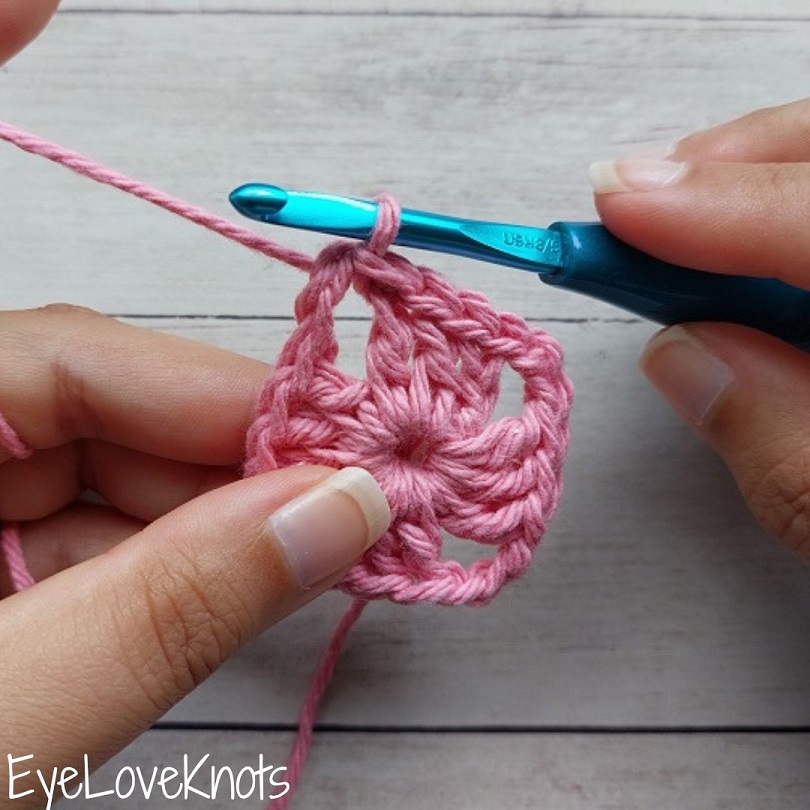
After joining the round, slip stitch over to the chain space.

Set granny square aside. Grab the new color. Form a loop leaving a tail end long enough to comfortably weave in – about 4-6″.
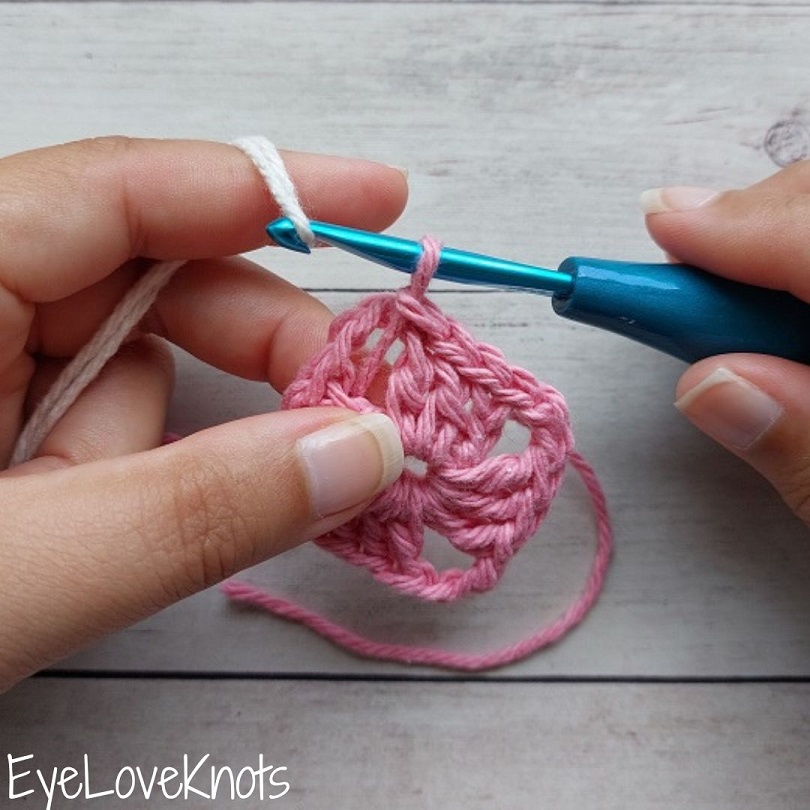
Pick up the granny square. Put the loop from your new color onto your crochet hook…
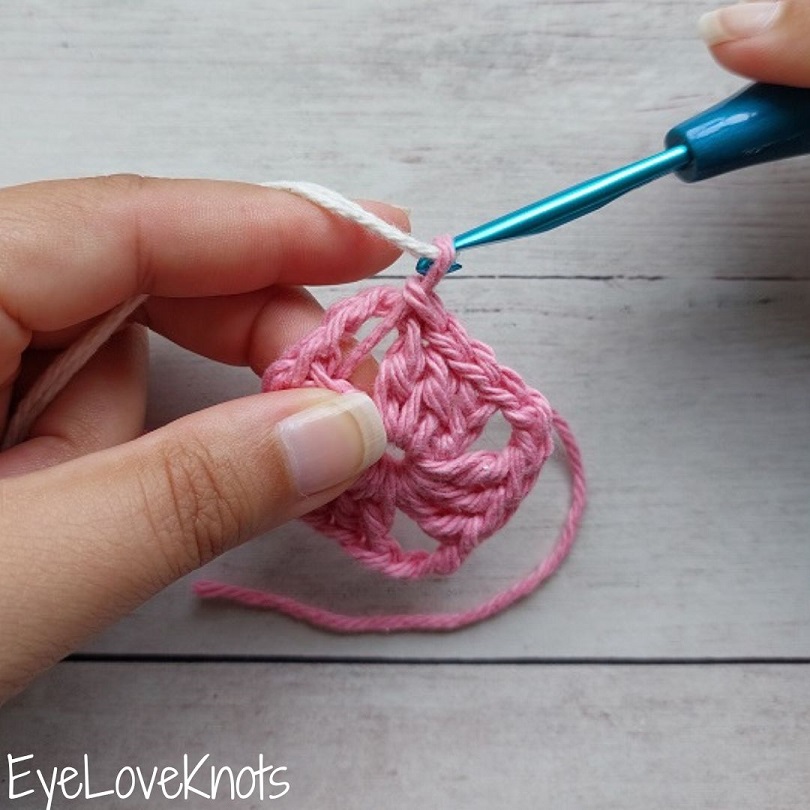
… and pull it through.
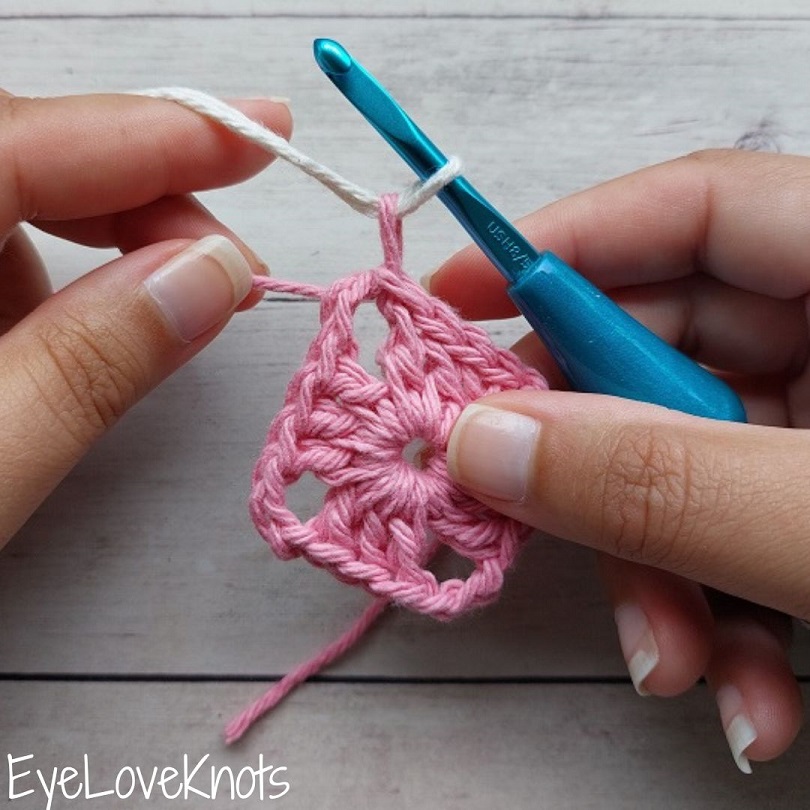
Pull the pink tail end to tighten.
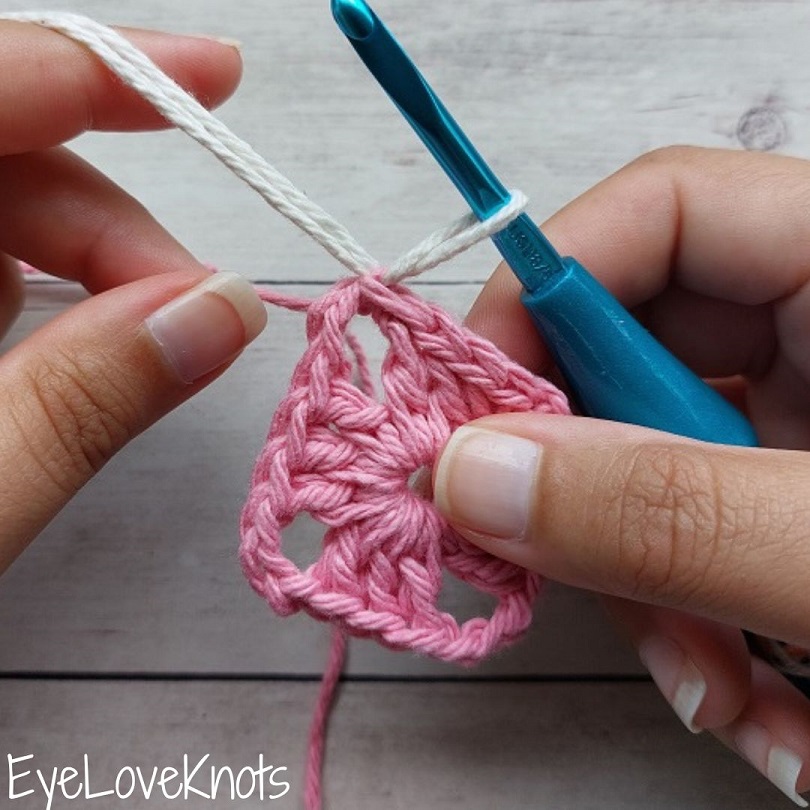
It will tighten down to practically unnoticeable.
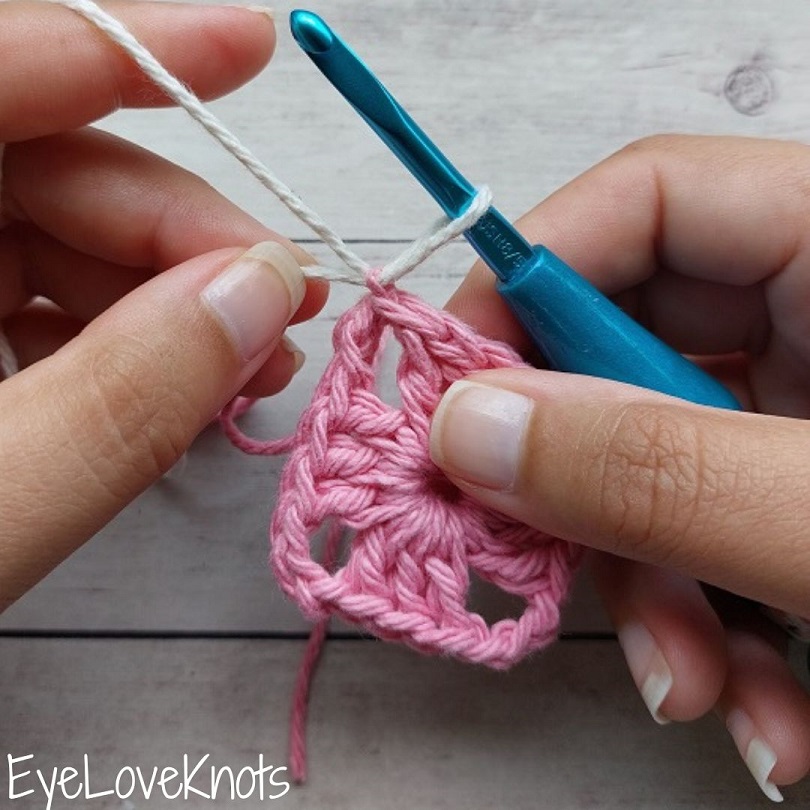
Tighten the new color down to normal tension. From working with this new color, the original loop may pop back up because it’s not secured until woven in, but you can tug on the tail end to tighten it back down.
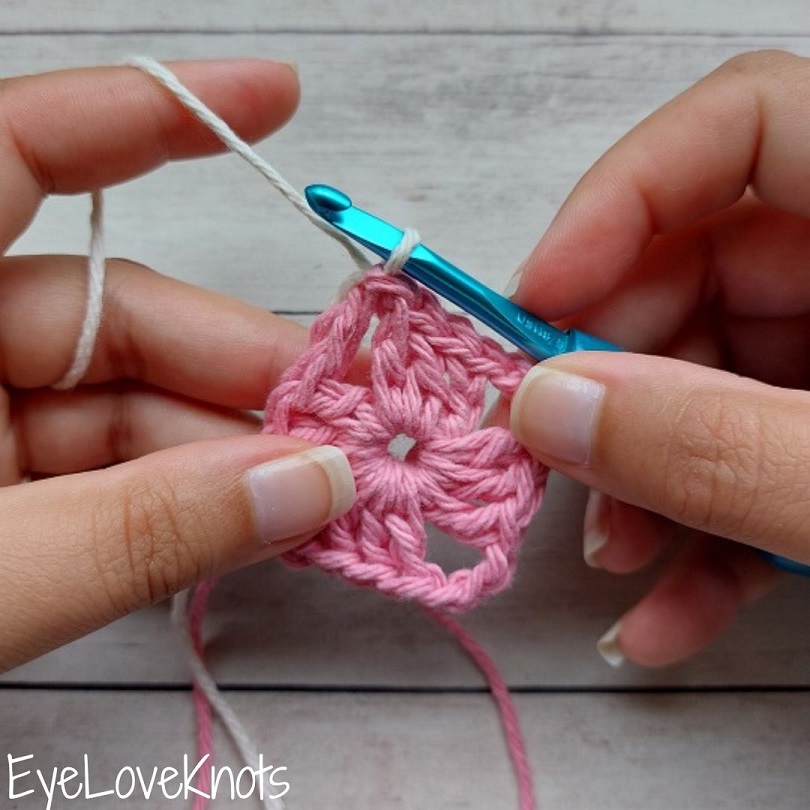
Time to chain 2 to begin the round.

I like to crochet over my tail ends while working in the corner…
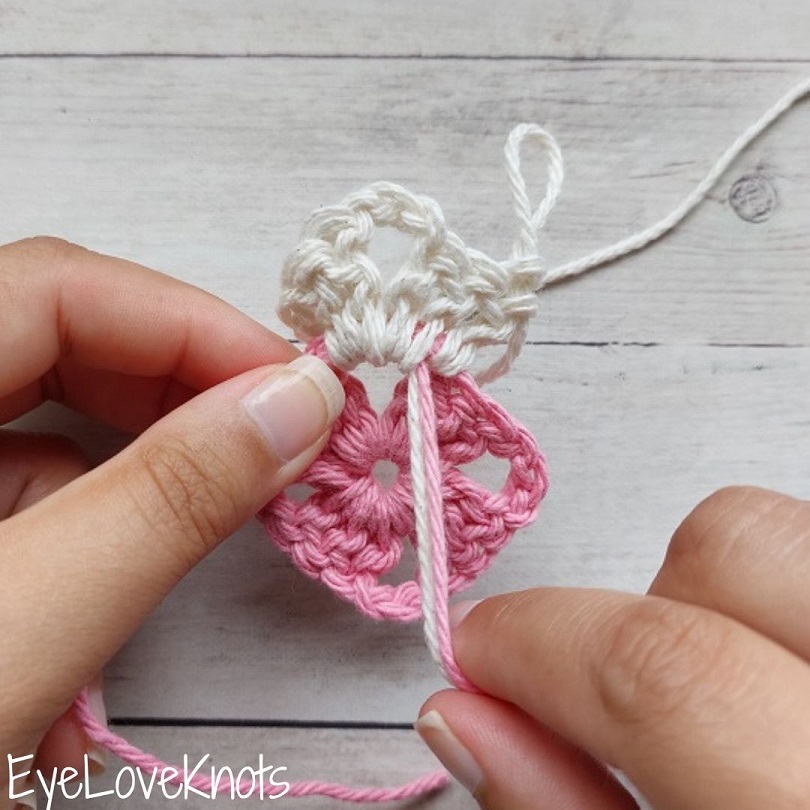
… minus the very last stitch so that it puts me in a better position to weave in the tail ends later. Crocheting over the tail ends counts as the first pass.
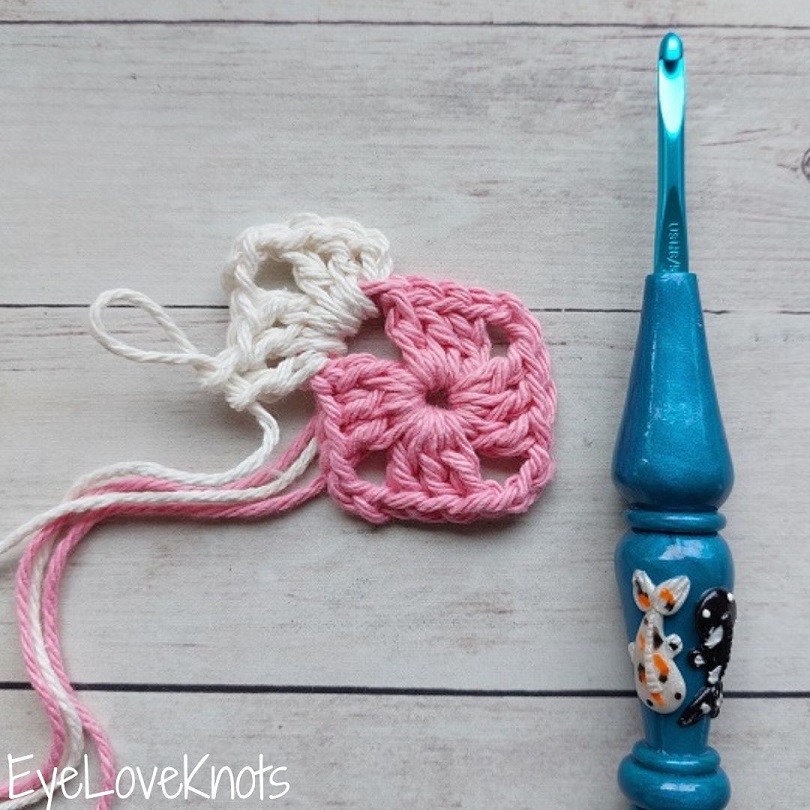
After working all the way around, slip stitch join as usual.
3rd Way – Great for Scrap Stripes on Granny Squares
Tying on with a double crochet is a great way to start your round in a new color! It’s easy, and provides a really nice, consistent look in stitches all the way around. I think this method is best used when working with a new color each round, perhaps using up scraps. The only reason this isn’t my favorite way when changing colors is because starting with a double crochet looks different than starting with a beginning chain, and I tend to work in stripes alternating the same two colors, in which case I carry up my yarn and use the 2nd Way, or I work in color blocks, and I want all my rounds to look uniformed with a chain 2.
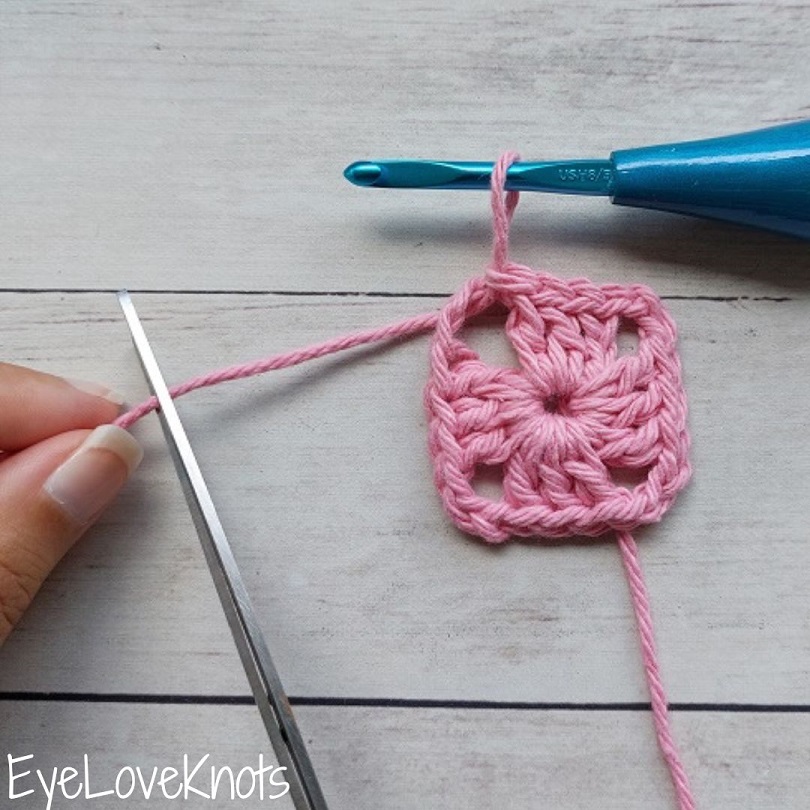
After joining the round, slip stitch over to the chain space, then fasten off with a tail end long enough to comfortably weave in – about 4-6″.
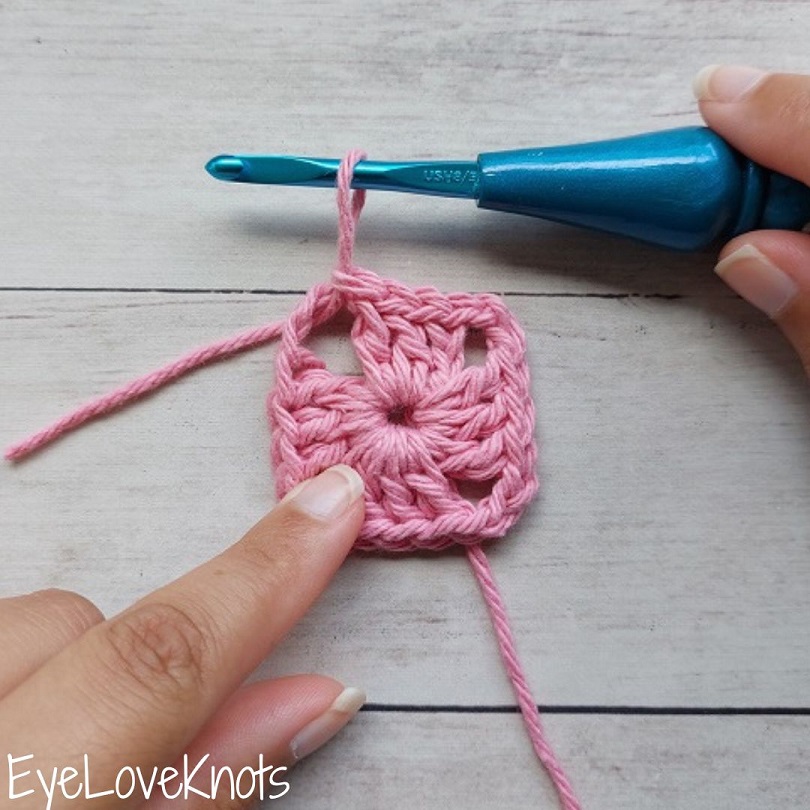
Pull up with your crochet hook on the loop…
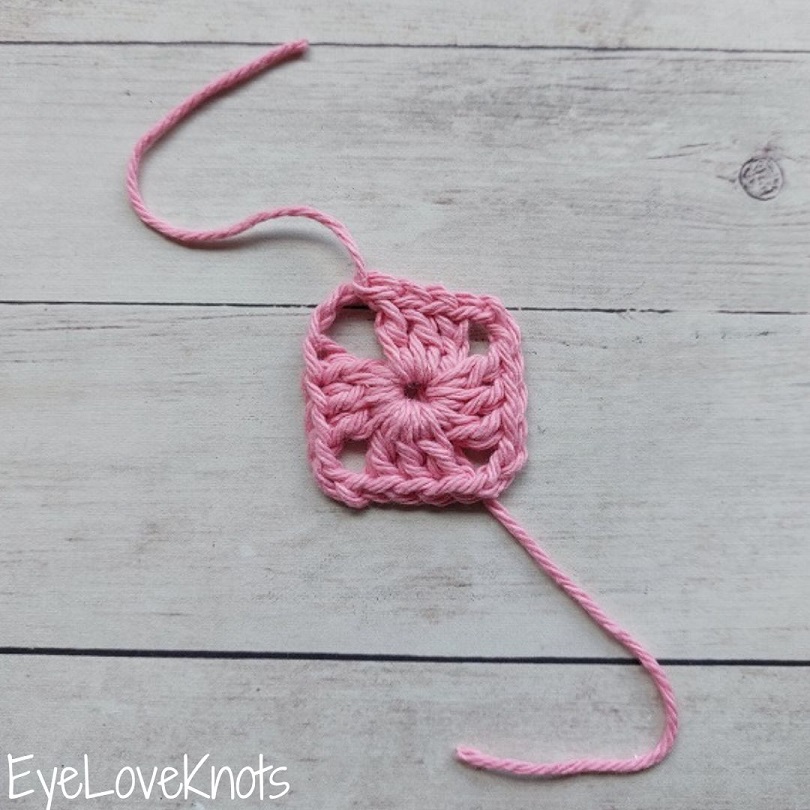
… to break it (aka comes all the way out).
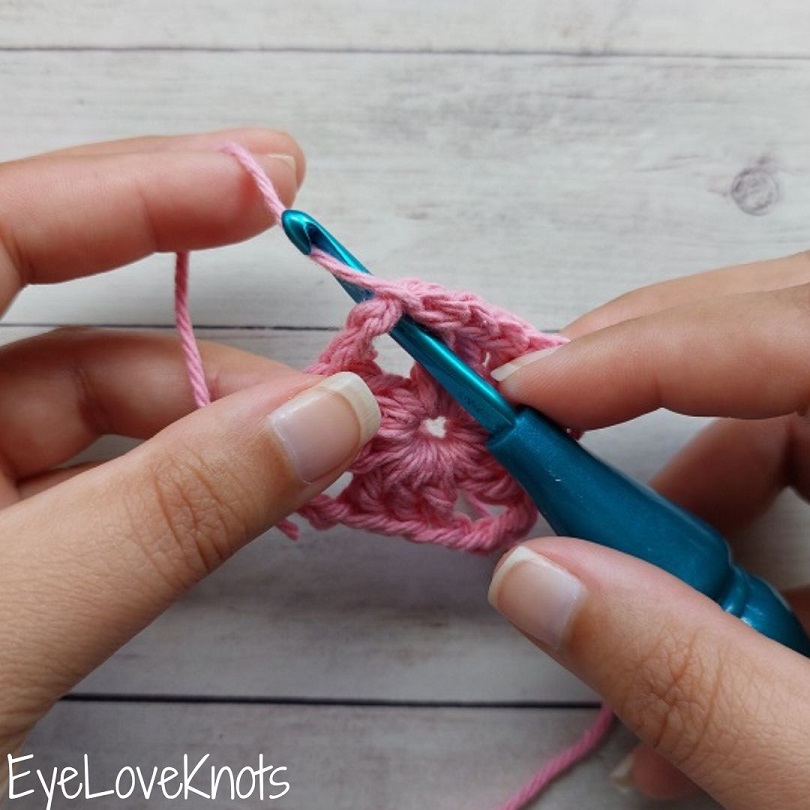
Insert your hook into the corner chain space. Wrap the tail end over the top of the chain, and yarn over with your hook…
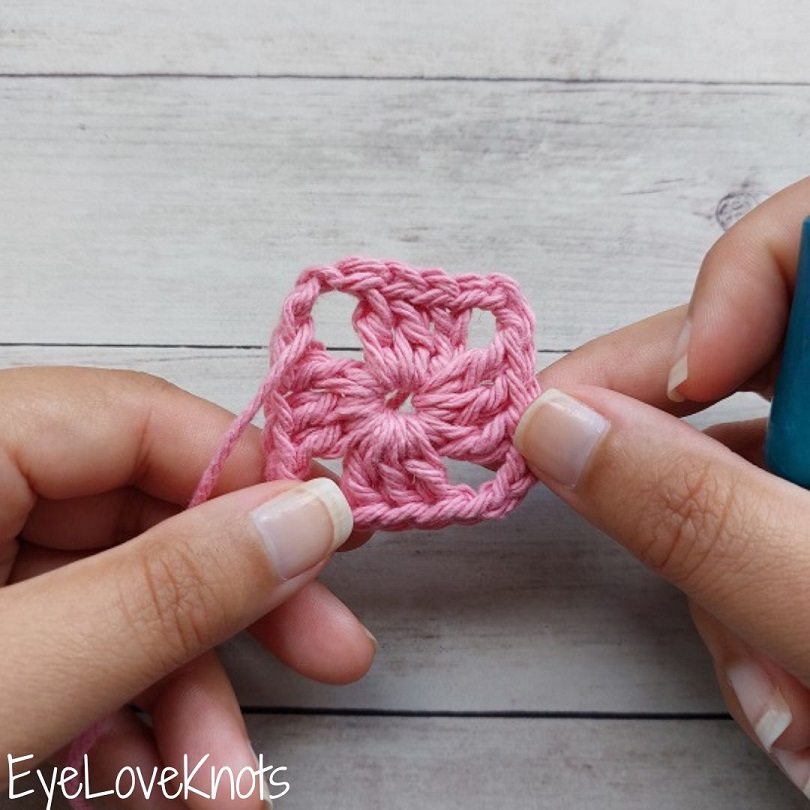
… and pull through. This keeps the proper shaping along the top where you fastened off. You can crochet over you tail end while working the corner, and the tail end will naturally fall to the back where it can be woven in later.
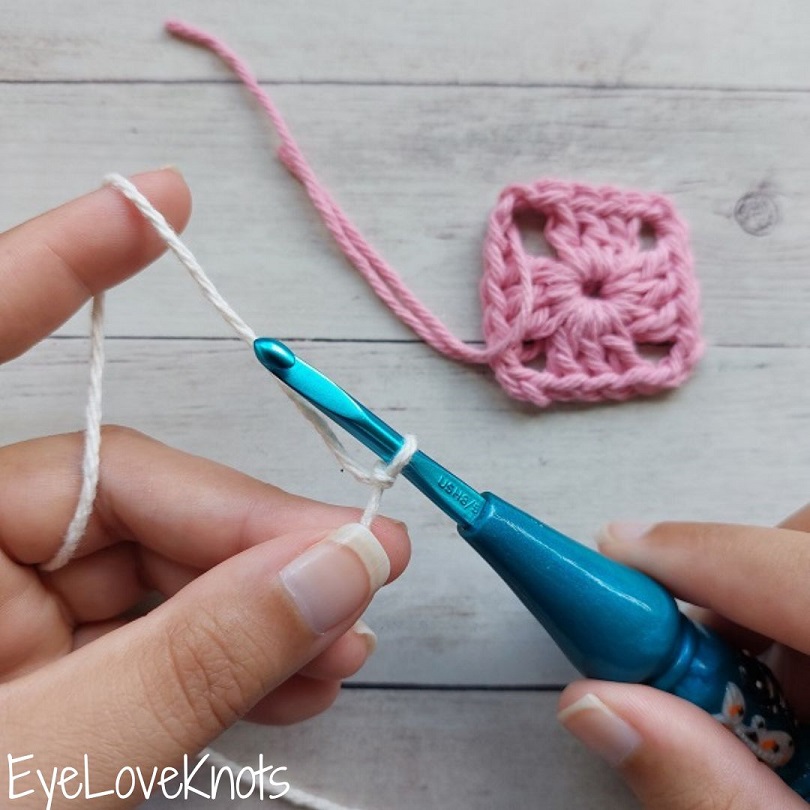
Set granny square aside. Grab the new color, and create a slip knot.
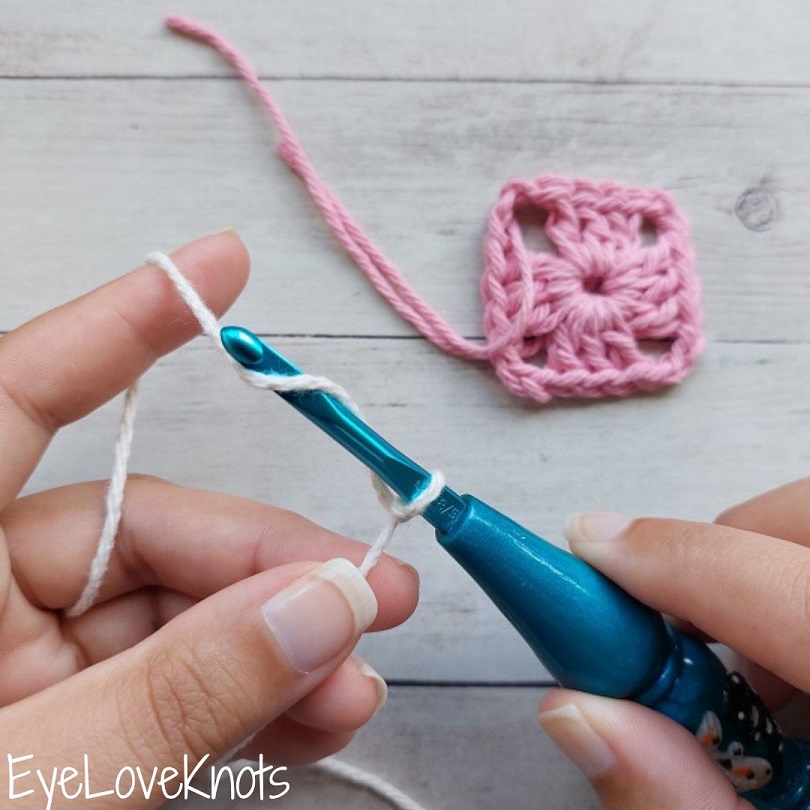
Since we’re working in double crochets, hold the tail of the slip knot and yarn over (the first step of the stitch).
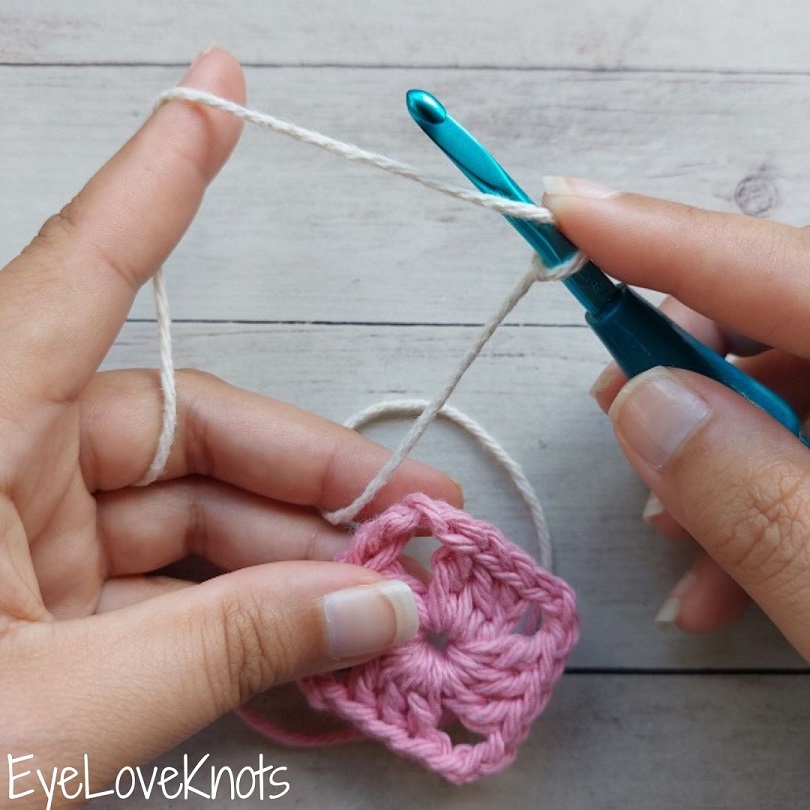
Hold the loops on your hook with your finger (otherwise it will spin around)…
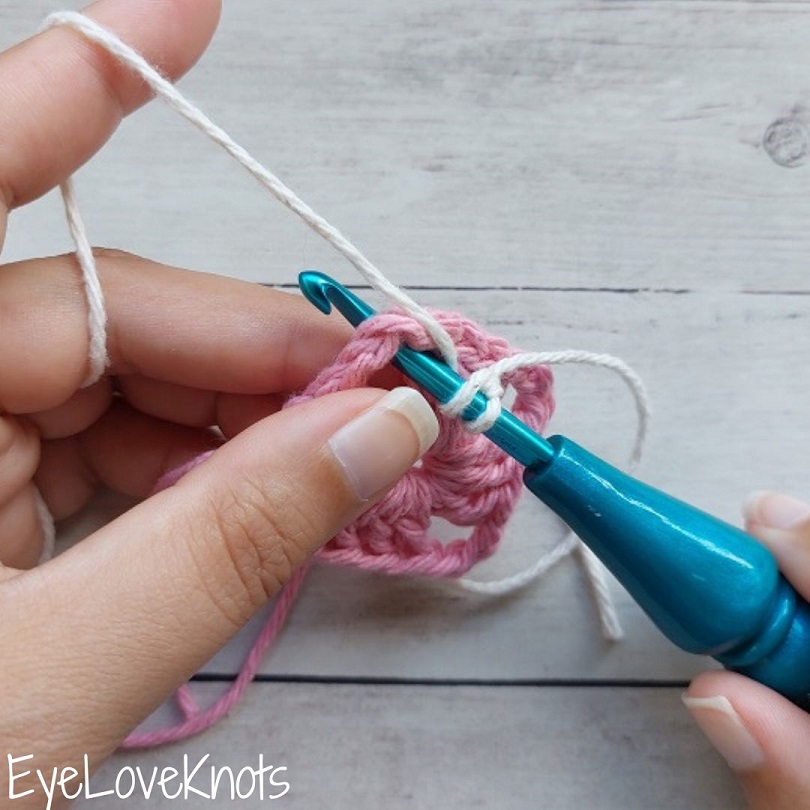
… then insert the crochet hook into the corner chain space.
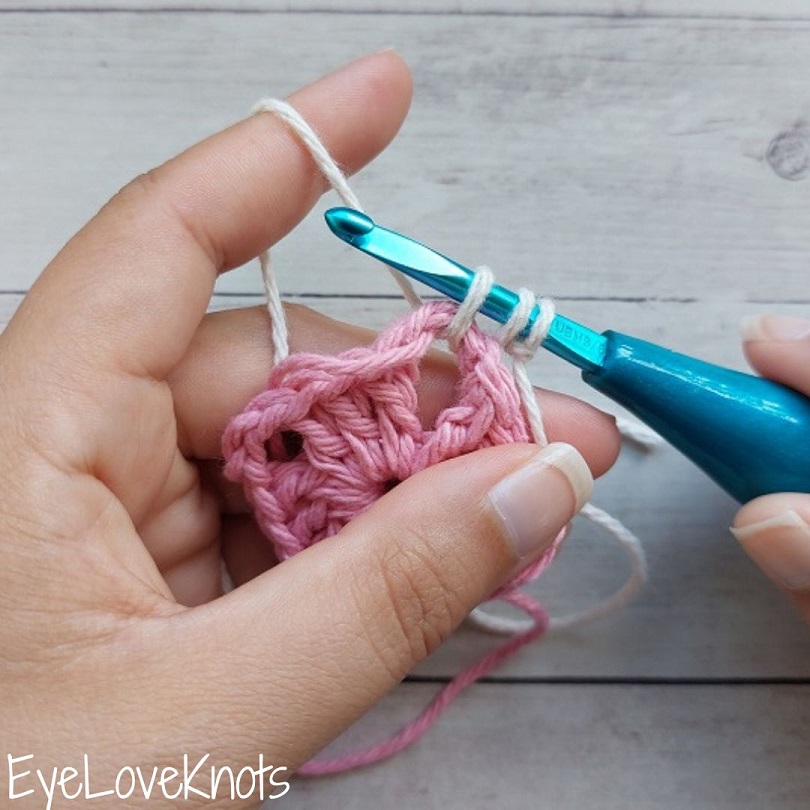
Yarn over and pull through – still holding the tail end of the slip knot so keep the stitches right side up.
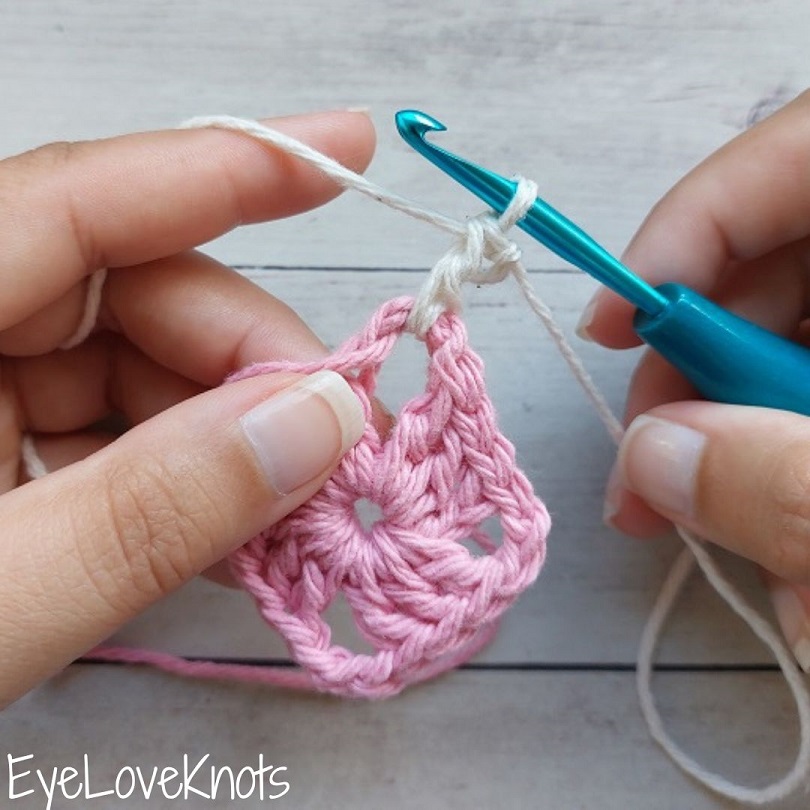
Complete the first double crochet.
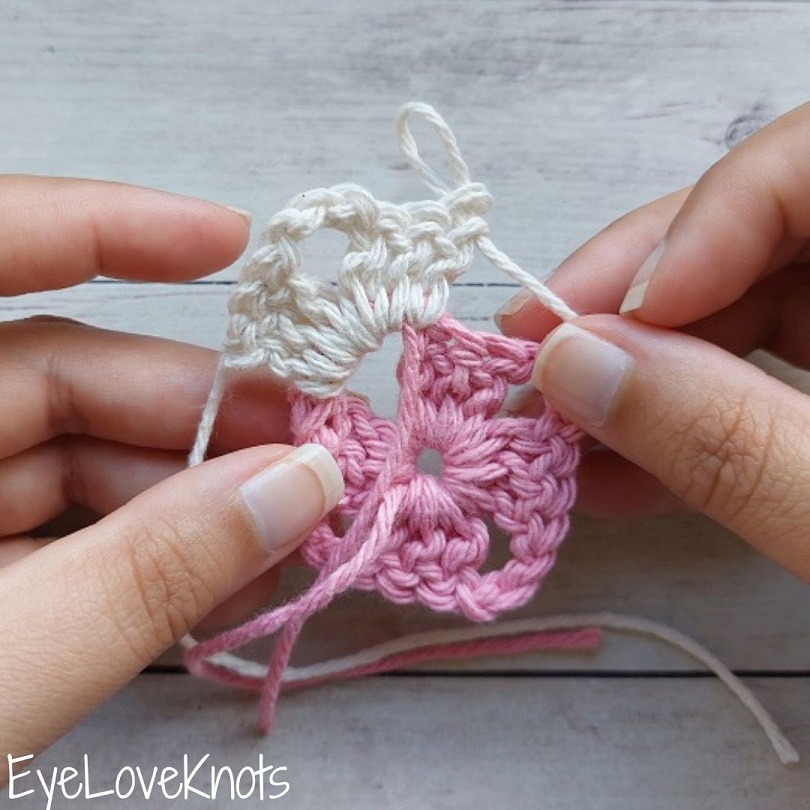
I like to work over my tail end from the original color minus the very last stitch so that it puts me in a better position to weave in the tail end later. Crocheting over the tail end counts as the first pass.
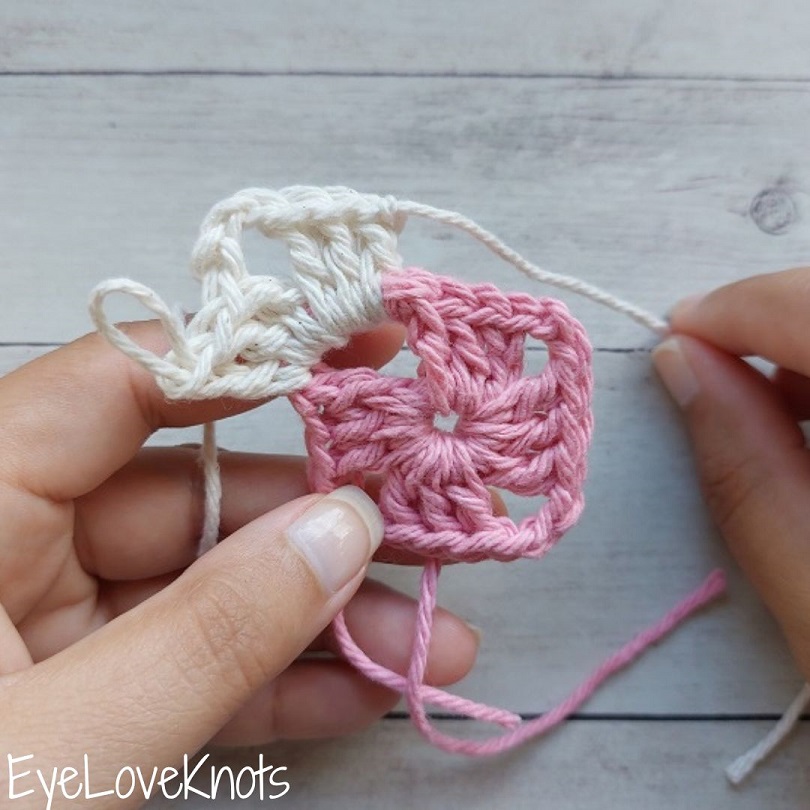
After working all the way around, and slip stitch join to the first double crochet.
4th Way – My Preferred Way for Blocks of Color on Granny Squares
Here we’ve reached my favorite way to change yarn colors on granny squares. It’s easy and secure, plus it provides the most consistent look as the tie on is around the corner chain space, as opposed to all the rest of the techniques that start on top of it.

After joining the round, slip stitch over to the chain space, then fasten off with a tail end long enough to comfortably weave in – about 4-6″.

Pull up with your crochet hook on the loop…

… to break it (aka comes all the way out).

Insert your hook into the corner chain space. Wrap the tail end over the top of the chain, and yarn over with your hook…

… and pull through. This keeps the proper shaping along the top where you fastened off. You can crochet over you tail end while working the corner, and the tail end will naturally fall to the back where it can be woven in later.
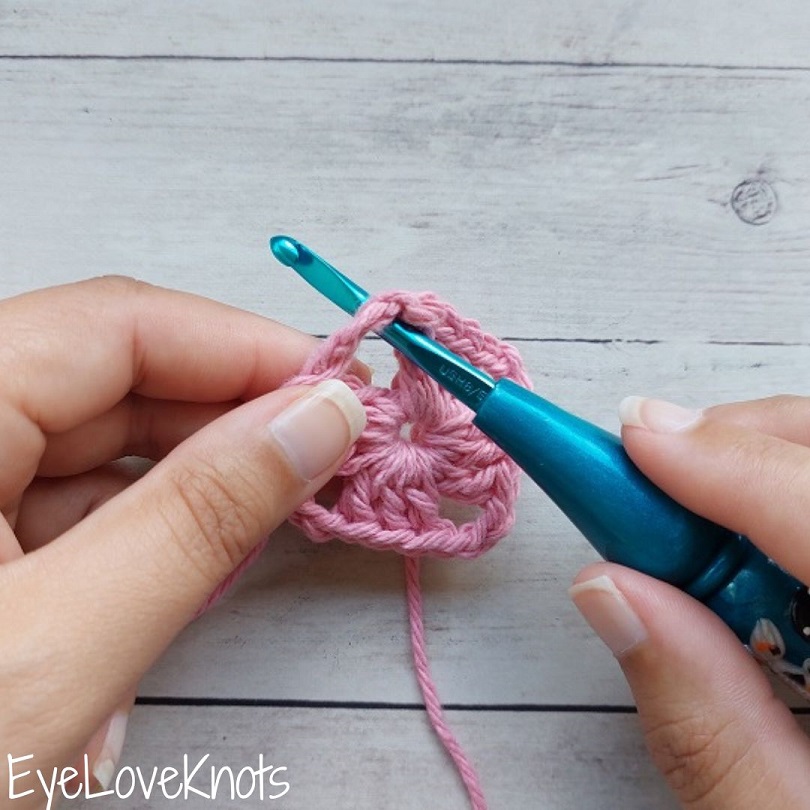
Insert your crochet hook into the corner chain space.

Set granny square aside. Grab the new color. Form a loop leaving a tail end long enough to comfortably weave in – about 4-6″.
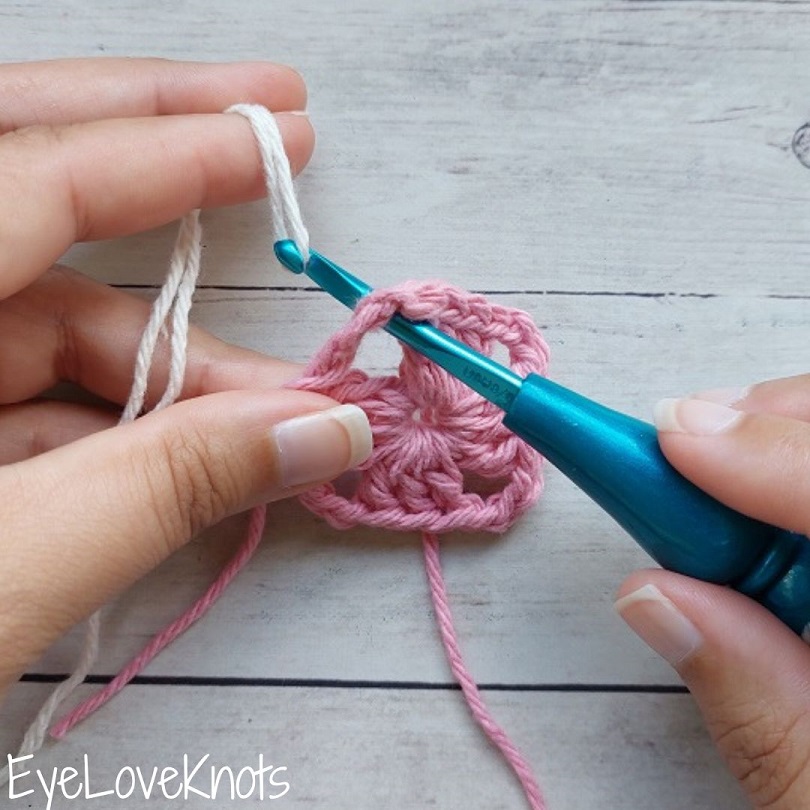
Pull loop through.
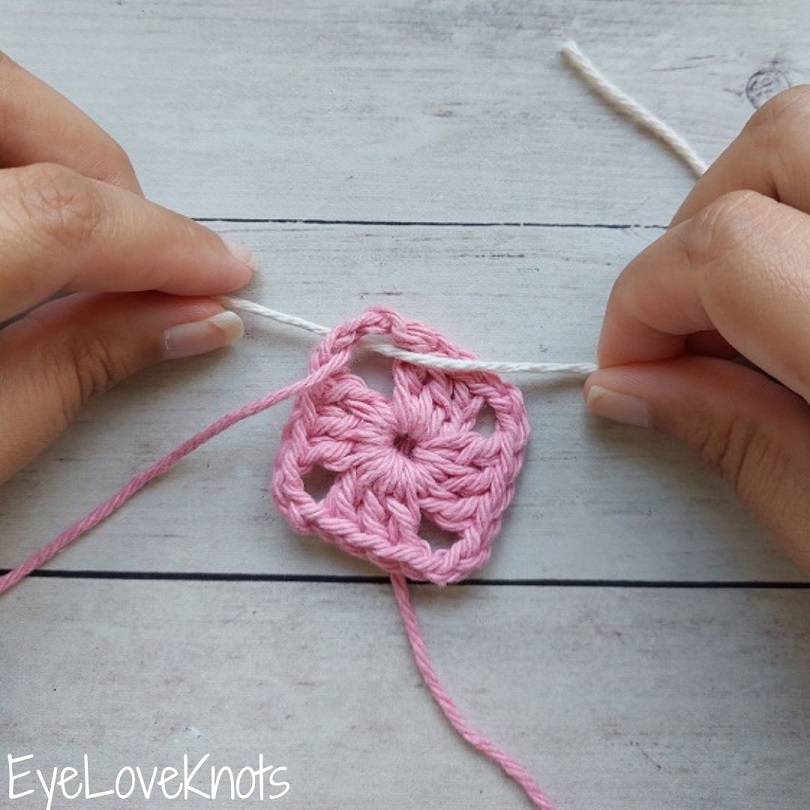
Continue to pull yarn through so you have access to both ends.
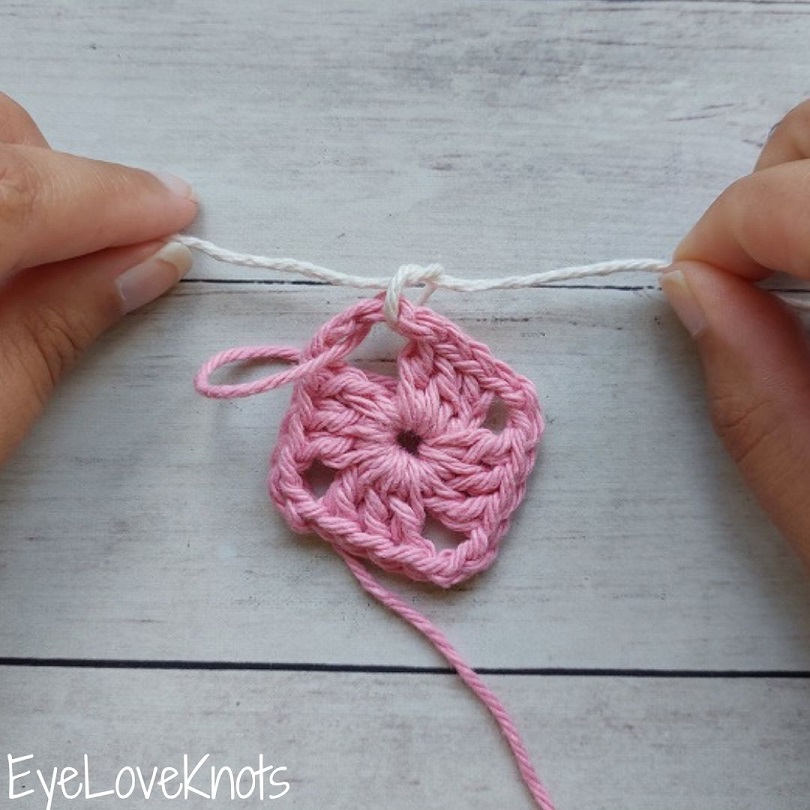
Tie a basic knot.
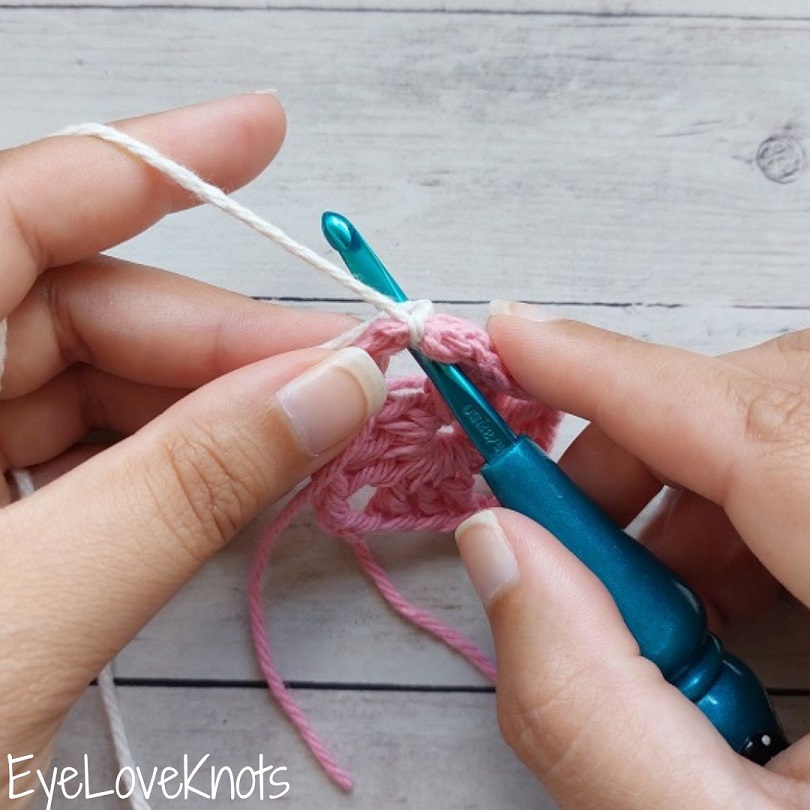
Insert crochet hook back into the same corner chain space.
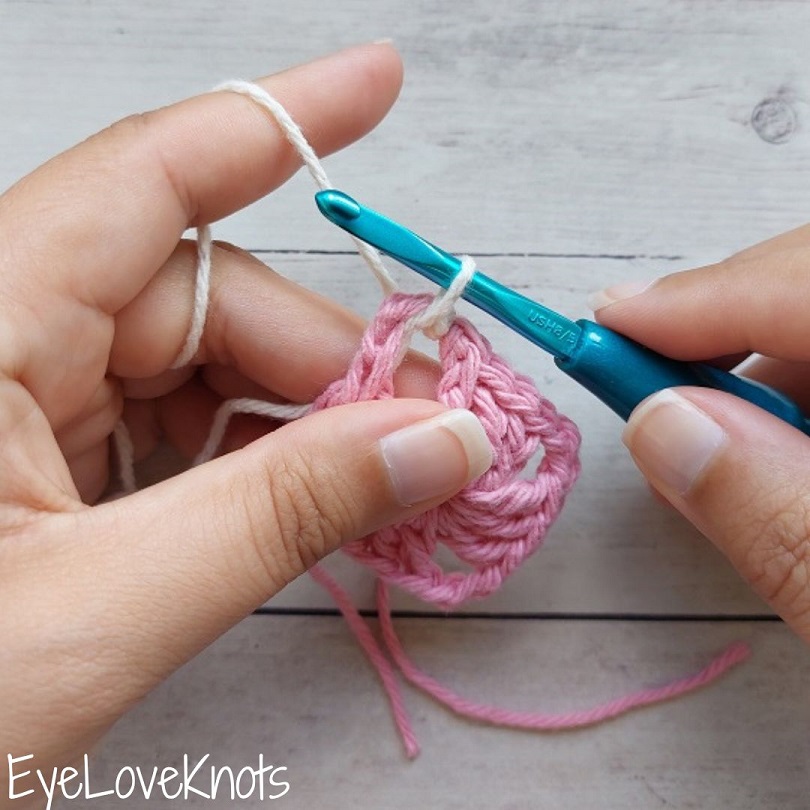
Yarn over, and pull through.
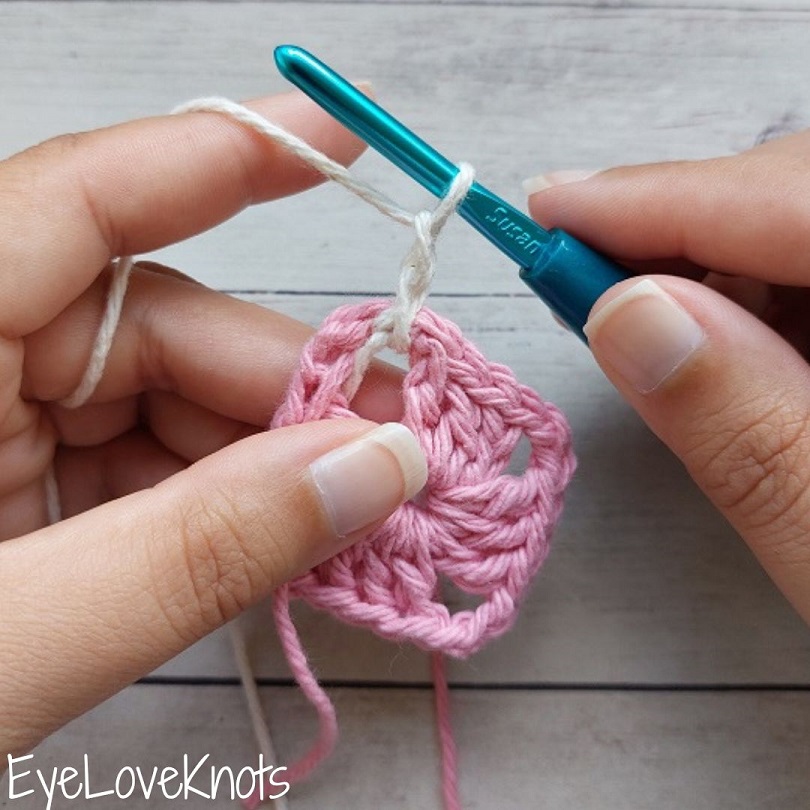
Chain 2 to begin the round.

I like to crochet over my tail ends while working in the corner…
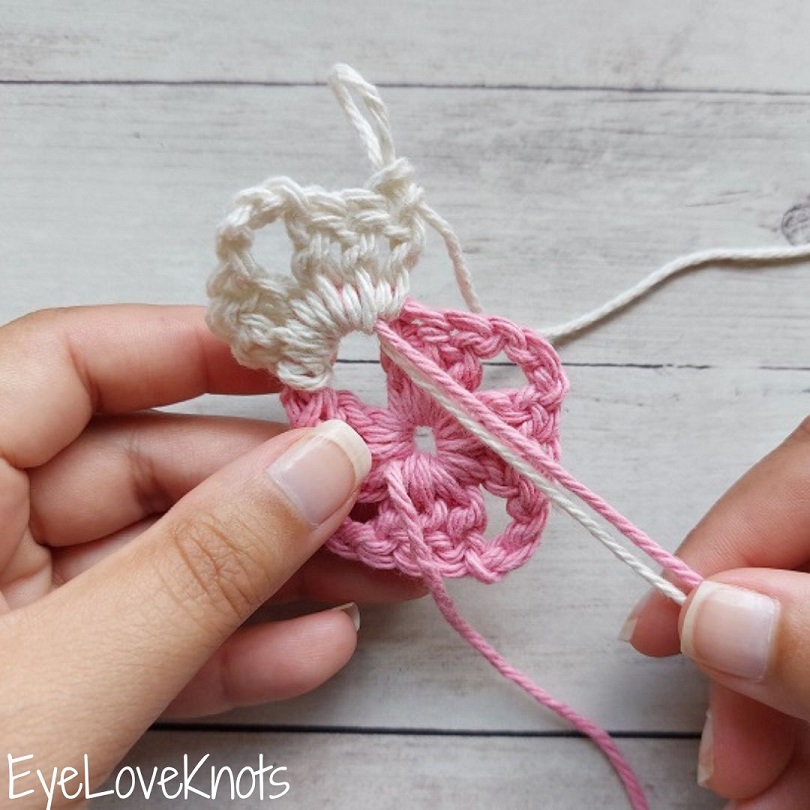
… minus the very last stitch so that it puts me in a better position to weave in the tail ends later. Crocheting over the tail ends counts as the first pass.
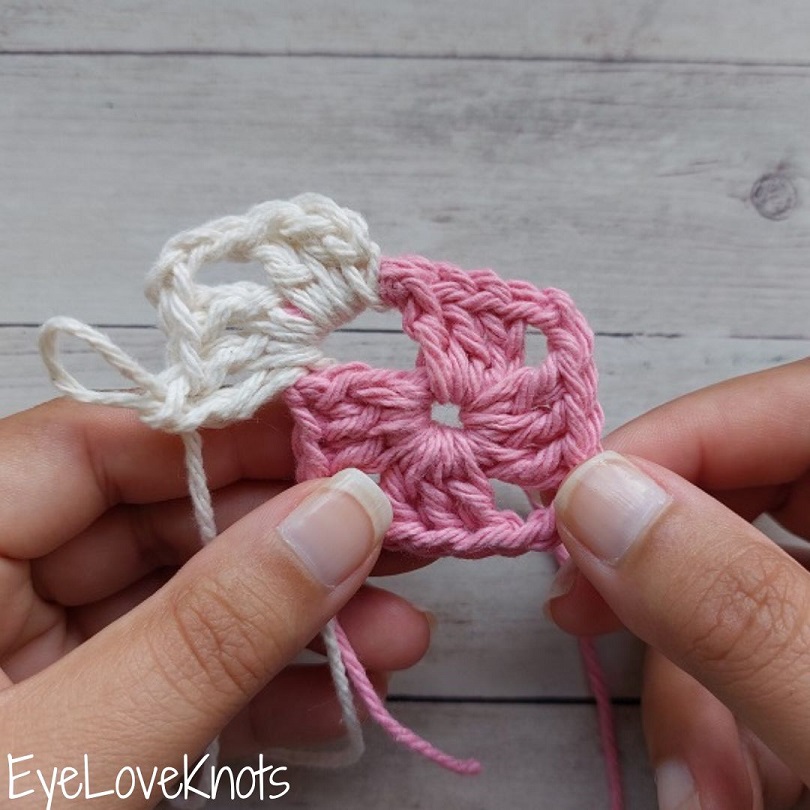
After working all the way around, slip stitch join as usual.
Join one of our awesome Facebook groups to share your creations, and see what others are up to!
– Yarn Crafts & Coffee Community
– DIY Home On Rockwood Lane
– Alexandra Lane Lifestyle
Linked Up To… Unlinked parties pages have been deleted or the blogs are no longer active 6/22/23
244th Inspire Me Tuesday – A Stroll Thru Life
Lou Lou Girls Fabulous Party #34 – Lou Lou Girls
Share Your Creativity Link Party No. 139 – It’s Overflowing
Wow Me Wednesday #182 – Ginger Snap Crafts
Hit Me With Your Best Shot #46 – One Krieger Chick
Your Whims Wednesday #190 – My Girlish Whims
Inspire Me Wednesday #48 – Seven Thirty Three
Totally Terrific Tuesday Link Party #9 – Live Randomly Simple
Just Only Home Link Up – Just Only Home
The Handmade Hangout #24 – Too Much Time On My Hands
The Creative Exchange Link Party #29 – The Happy Scraps
Share Your Inspiring Creations FDTR #145 – The DIY Dreamer
Kitchen Fun and Crafty Friday Link Party #142 – Kitchen Fun with my 3 Sons
Creative Collection Link Party – Blooming Homestead / The Cards We Drew
Best DIY and Projects Party – The 36th Avenue
Link Party 69 – Link and Share Wednesdays – Oombawka Crochet Design
Best of the Weekend! – Little Miss Celebration
November 2014 Sharing Time Week 3 – Raising Memories
Make It Monday – Etcetorize
Craft Schooling Sunday – Creative Jewish Mom
The Sunday Showcase No. 268 – By Stephanie Lynn
The Party Bunch Link Up Party – The Idea Room
Inspiration Monday – Scattered Thoughts of a Crafty Mom
12 Handmade Holiday Ornaments & Monday Funday Link Party – Club Chica Circle
Think Pink Sunday No 193 – Flamingo Toes
Create Link Inspire #53 Linky Party – The Crafty Blog Stalker
Nifty Thrifty Sunday #183 – Nifty Thrifty Things
Awesome Things Tuesday – Krafting Kreations / Sowdering About
Time to Sparkle #89 – Inside BruCrew Life
Take a Look Tuesday – Sugar Bee Crafts
Tutorials & Tips Link Party {187} – Home Stories A to Z
Yarn Fanatic Party #16 – The Philosopher’s Wife


Great information. My grandmother taught me to crochet when I was young and I am planning on getting back in to it this winter. I have a lot of questions though and this was one. Pinned it and following you!
So glad I could help! I only learned to crochet about a year and a half ago, but I have learned lots of tricks along the way that I wish I would have just been taught in the beginning and not had to discover on my own. But, now I can share them all here! More to come. 🙂
Thanks for posting this! I like your way better than mine. Just goes to show you can teach an old dog new tricks! 🙂
Sometimes it just takes fresh eyes. Happens to me all the time.
Oh my! Great post! Pinned and tweeted. We always love partying with you, I hope to see you tonight at 7 pm at our party. Happy Monday! Lou Lou Girls
Thank you – see you there!
Great instructions 🙂 Thanks so much for sharing at the Make it Monday Party! Hope to see you again next week.
Definitely! Thank you for stopping by.
Thanks for sharing this tutorial for color change!
🙂
Great tutorial! I don't know why, but I've always hated color changes. I only recently have decided that they aren't that bad. 😉 Silly since I crochet ALL THE TIME! 😉
Thanks for sharing!
Similar to the weaving of the ends though. One weaving takes all of a minute and a half – but it annoys us because we have to stop to accommodate the addition.
So much great advice! I almost always do my granny square colour changes with your 4th option, tying the new colour in a knot and the going from there. I like how secure this makes it. At the end of the day it’s down to personal preference, that’s one of the things I love about crochet, so many different ways to do things. It’s pretty flexible, “fudgeable” and forgiving 🙂
Love the 4th option for the same reason! But so true. I do enjoy knitting as well, but it’s not as forgiving.