Working in a continuous round is a great way to get rid of the unsightly seam in your crocheted pieces worked in the round, seeing as the seam is caused from slip stitching your round closed and chaining one to begin your next round. With a continuous round, you just keep going around and around until your piece reaches your desired measurement.
The continuation begins right after completing the last stitch of your first round, however, working the first stitch of round two can create a gap or hole in between these two stitches since there is no join to close round one.
This gap drives me nuts, so below you’ll find my secret for closing the gap without joining.
While, the easiest way to work a continuous round is with single crochets and half double crochets, it can also be done with double crochets, especially if you use my method.
Here, I am using Hobby Lobby’s I Love This Yarn in Cranberry and an H8/5mm Hook, but any size yarn and hook will work the same. I am also showing this using a half double crochet stitch – but it will be a similar method for your other stitches too.
If you would like to see a photo tutorial for using other stitches to do this with, please leave me a comment below.
Let’s Begin!
 |
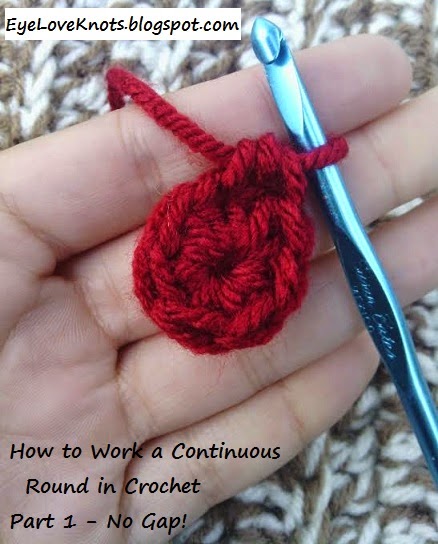
| First things first, work the first round of your project. Don’t join! Here, I chained 3, joined to form a ring and then worked 6 half double crochets into the ring. |
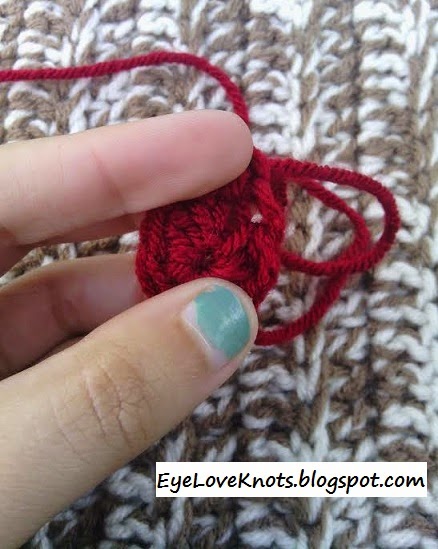 |
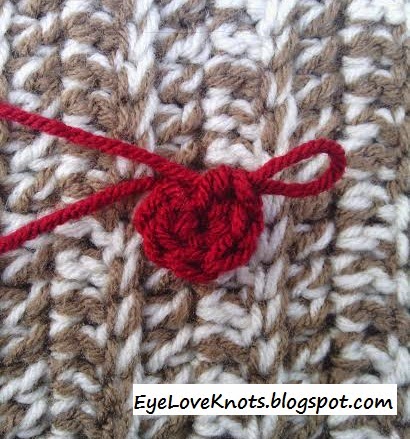
| Normally, after the final stitch of your first round, you would join to the first half double crochet to close the round and chain one to begin the second round. When working a continuous round, you do not join – Instead, you finish the last stitch of your first round, and then work the first stitch of the second round into the very next stitch. In this case, it would be the first half double crochet. In this photo, you will notice the gap in between my two fingers. This gap is present because the round was not closed by a join. Continue on to find out how to get rid of it. |
 |
| You will be working a half double crochet decrease. First, yarn over, and insert hook back into the ring. |
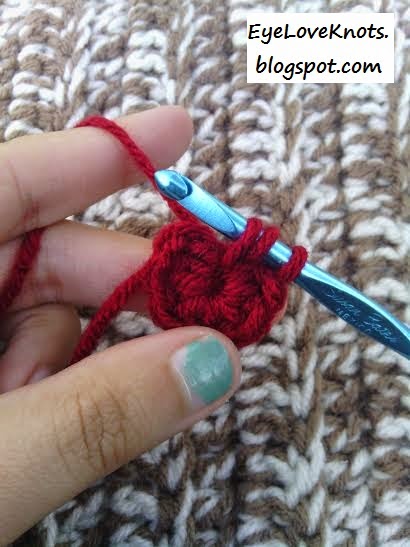 |
| Yarn over again, and pull a loop. You should now have three loops on your hook. |
 |
| Yarn Over again, and insert hook into the first stitch. Pull up a loop. |
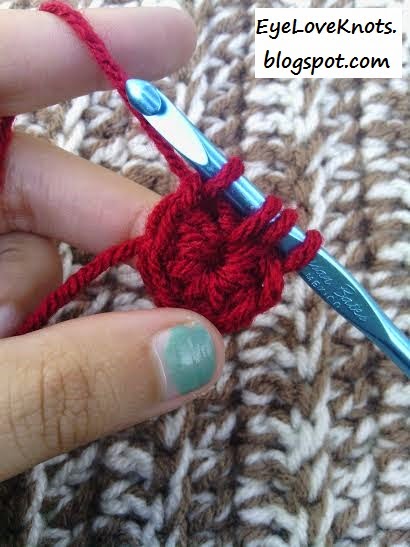 |
| You should now have four loops on your hook. Yarn over and pull through all four loops. |
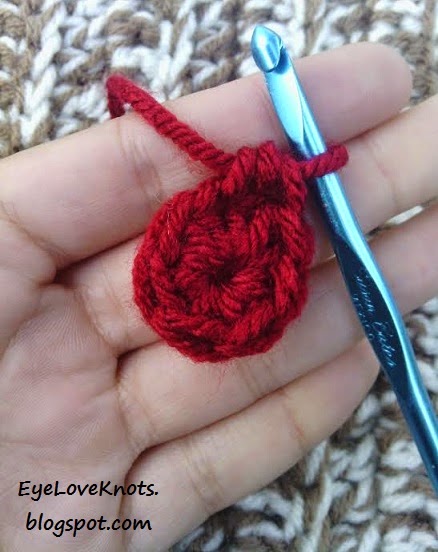 |
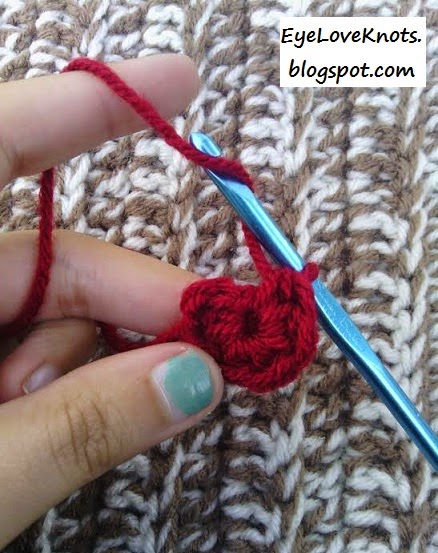
| Now, your gap is gone and the beginning of round two has begun. This decrease will count as the first stitch of the second round. Now, you can continue on with your pattern. |
This is definitely something I wish I would have figured out in the beginning of my crocheting. I hope you find this useful too!
Tune in on Thursday, for a free Christmas crochet pattern using this continuous round.
There will also be a How to Crochet in a Continuous Round Part 2 coming soon, where I will show you my trick for evening out the final round of your crocheted piece after having used the continuous round method.
Looking for More Crochet How To’s?
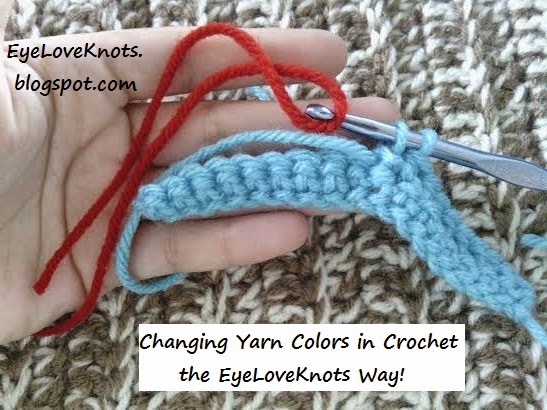 |
| Check Out my Changing Yarn Colors Post! |
 |
| Check Out my How To on Making Plarn! |
Linking Up To…
Hit Me With Your Best Shot #48 – One Krieger Chick
246th Inspire Me Tuesday – A Stroll Thru Life
Share Your Inspiring Projects FDTR #147 – The DIY Dreamer
Take-a-Look Tuesday – Sugar Bee Crafts
Tutorials & Tips Link Party {188} – Home Stories A to Z
Lou Lou Girls Fabulous Party #36 – Lou Lou Girls
The Sunday Showcase Party No. 269 – By Stephanie Lynn
Make it Monday – Etcetorize
December 2014 Sharing Time – Week 1 – Raising Memories
Share Your Creativity Link Party No. 141, Home Sweet Home – It’s Overflowing
Friday Finds Link Party 12.6.14 – Craftaholics Anonymous
Best DIY Projects and Recipe Party – the 36th Avenue
Craft Schooling Sunday – Creative Jewish Mom
Inspiration Link Party #74 – Scattered Thoughts of a Crafty Mom
The Party Bunch Link Party – The Idea Room
The Creative Exchange Link Party #31 – The Happy Scraps
Your Whims Wednesday #192 – My Girlish Whims
Yarn Fanatic Party #17 – The Philosopher’s Wife
Wow Me Wednesday #184 – Ginger Snap Crafts
Think Pink Sunday No. 195 – Flamingo Toes
The Creative Collection Link Party – The Cards We Drew / Blooming Homestead
Best of the Weekend – Little Miss Celebration
10 Handmade Neighbor Gift Ideas, I’m Lovin’ It – Tidy Mom
The Handmade Hangout #26 – Too Much Time on my Hands
What a helpful tutorial! I wish I'd known about this years ago!
Me too 🙂
Thank you for sharing this tutorial with Make It Monday.
Thank you for hosting!
I'm totally need to learn how to do this! Pinned and tweeted. We appreciate you being a part of our party, and I hope to see you on tonight at 7 pm. We love partying with you!
Happy Monday! Lou Lou Girls
Thanks! This is so helpful!
As always, great tutorial! I love all of your pictures.
Thanks Rachel!
This is such a great technique! In the past, when I lost the stitch marker in the first stitch of a round, I could always find my place by finding the gap. Now it’s a whole lot hatred. Thanks so mich!