EyeLoveKnots

  • Home
  • Crochet
    • Free Crochet Patterns
    • Crochet Pattern Reviews
    • Crochet 101
  • Knitting
  • Crafting
    • Plastic Canvas DIYs
    • Jewelry DIYs
    • Sewing
    • Cross Stitching
    • Upcycling
    • Other DIYs
  • Seasonal DIYs
    • 4th of July DIYs
    • Back to School DIYs
    • Christmas DIYs
    • Easter DIYs
    • Fall DIYs
    • Halloween DIYs
    • Spring DIYs
    • St. Patrick’s Day DIYs
    • Summer DIYs
    • Thanksgiving DIYs
  • Holidays/Seasonal
    • Valentine’s Day
    • St. Patrick’s Day
    • Spring
    • Easter
    • Summer
    • 4th of July
    • Fall
    • Halloween
    • Thanksgiving
    • Christmas
    • Winter
  • Home DIY & Decor
  • Fashion
    • Nail Art
  • Recipes
  • Living the Dream
  • Fun Finds Around the Web
  • Linking Up To…
  • Latest News & Links
  • Privacy and Sharing Policies
  • About Our GREAT Team!
  • Latest News & Links

Forming a Basic Loop – Jewelry DIY

April 3, 2015

A basic loop is probably one of the most common way to attach beads, charms, pendants, etc to your jewelry pieces.

This was the first technique I learned when I started my first jewelry adventure. I had bought one of those kits from JoAnn’s to get started, and taught myself how to form a loop and made about a million pairs of earrings. Hehe. Well not quite that many, but with this one technique, you can set out for your million.

One thing that is a little difficult to get just right when forming loops, is getting close enough to avoid the space that sometimes forms between your loop and bead. It just takes practice! I suggest purchasing a bag of head pins or eye pins and some beads that you like from your local craft store, and then sit down to practice. While you are practicing, you can use the “charms” you will create to put together a charm bracelet, or some earrings. You will get some practice in, and create some new jewelry pieces too!

Materials I Used:

     – 26mm 1″ 20 Gauge Antique Brass Eye Pins (CanterburyLane)
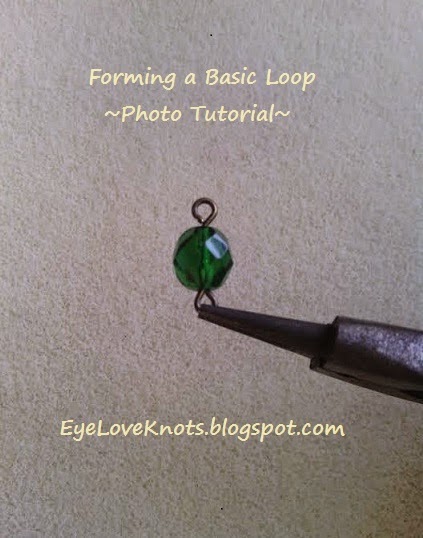
     – 8mm Glass Faceted Beads in Emerald (CanterburyLane)
     – Round Nose Pliers (found in Jewelry department of your local craft store)
     – Wire Cutters (found in the Jewelry or Floral department)

Materials Notes:
     The materials that I chose were for a project I was working on. I don’t suggest using these eye pins to practice on as they are really tough to manipulate. They are great quality eye pins, but I don’t recommend for beginning.
     To practice on, you can use some 2″ long Head Pins, such as the Gold Tone Head Pins by Darice found at JoAnns. Not only will you get practice forming your loops, but you will also get practice cutting down your wire to the right size. 
*If you are allergic – you will want to seek out some Surgical Steel wire.
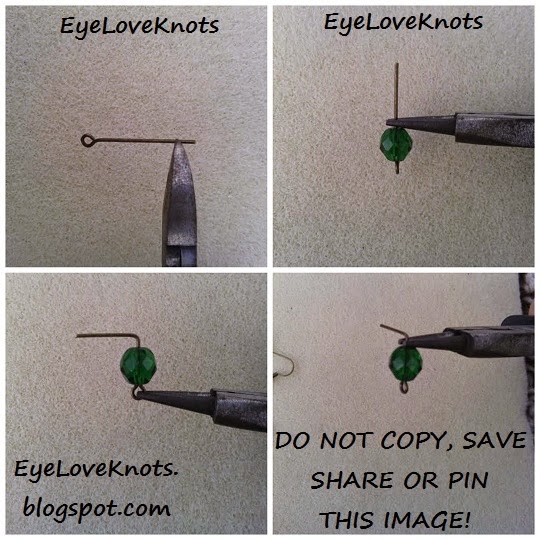
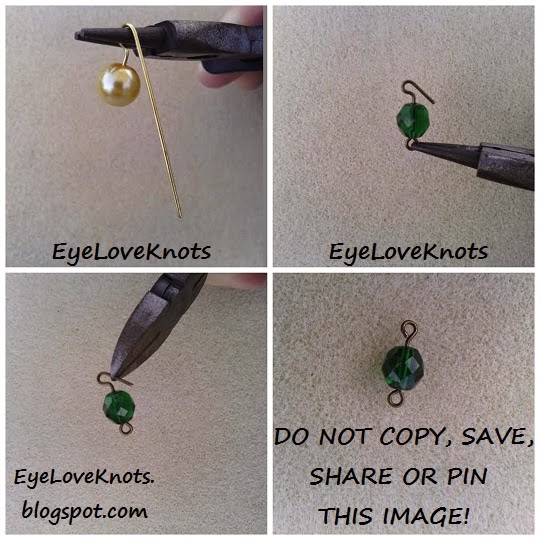
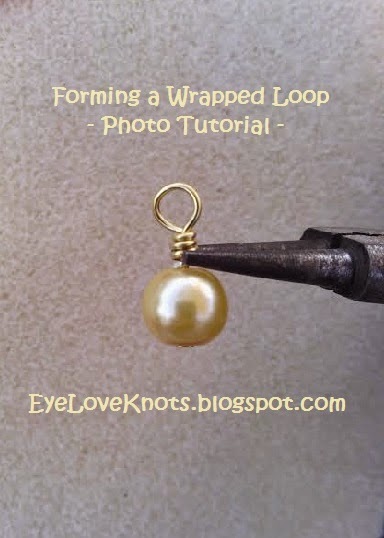
Tutorial:

To Create a Basic Loop:

Cut down the eye pin using the wire cutters. Make sure the flush side (flat side of the cutters) is facing the part of the eye pin that will remain.
The bigger you make your loop, the more space you will need to leave when cutting the eye pin. Vice versa for smaller.
Since the existing loop on the eye pin I used was small, I made my loop to match. For this, I cut off 5/16th of an inch. This is just over 1.25″.
This will also vary on the size of the bead you are using, so you will want to string your bead on first to get an idea.

Re-string the bead on the eye pin. 
The loop will be created around the round nose pliers, so settle on a place. You may want to mark it with a marker – will come off later with rubbing alcohol – so that the loops are consistent.
Keep in mind, the closer to the edge, the smaller the loop will be and vice versa.

After your pliers are set in place, bend the wire around the pliers at a 90 degree angle. 
Reposition your pliers by turning 90 degrees to the right. Your pliers should be on top of the wire at the corner.
Pull the wire over the loop of the pliers to form the actual loop. 

You will end up with something like the second photo on the top.

Use your wire cutters to trim the remaining wire, and then replace your round nose pliers to finish forming the loop.

Your finished loop should look something like the last photo on the bottom.
*NOTE: I messed up on this one, and made mine with too much space. You can see it on top of the bead. I redid it to photograph the main photo, found below, and measured how much I cut off. The correct measurement has been put in this tutorial.
And you’re done!

What will you be making with yours?

How was this tutorial? Your feedback is appreciated! And what helps me grow. Please comment below, or send an email to [email protected]
You May Also Like…
Forming a Wrapped Loop – Photo Tutorial

Linking Up To…

The Creative Exchange Link Party #55 – The Happy Scraps
Summer DIYs Funner Ideas, I’m Lovin’ It {linky party} – Tidy Mom
Pin Junkie Pin Party #120 – The Pin Junkie
Creativity Unleashed No. 72 – Practically Functional
Worthwhile Wednesday #73 – Crafty Allie
Your Whims Wednesday #216 – My Girlish Whims
{wow me} wednesday #210 – Ginger Snap Crafts
272nd Inspire Me Tuesday – A Stroll Thru Life
Totally Terrific Tuesday Link Party #37 – Live Randomly Simple
Hit Me With Your Best Shot #72 & {fun father’s day ideas} – One Krieger Chick
One Dream to Reality #172 – The DIY Dreamer
Show and Tell Link Party – Flamingo Toes

Filed Under: Jewelry DIYs, Uncategorized Tagged With: CanterburyLane, Charms, Jewelry DIY, Jewelry Technique, Pendant

❮ PREVIOUS POST

Yarn Fanatic Linky Party #30 – Sweet Potato 3 Patterns Giveaway!

NEXT POST ❯

Green Emerald Victorian Filigree Drop Earrings – Easy Jewelry DIY

Leave a Reply Cancel reply

Your email address will not be published. Required fields are marked *

This site uses Akismet to reduce spam. Learn how your comment data is processed.

Welcome!

Welcome!

Hey! I'm Alexandra, the blogger and creator behind EyeLoveKnots and On Rockwood Lane! My passion is being creative. My favorite thing to do is crochet, and you will almost always find me having a cup of coffee and working on a new crochet project, but when I'm not doing that, you might find me out at a local park rollerblading, baking some fresh cookies, picking veggies in the garden or re-decorating for a new season or holiday. My two cats are great supervisors for all my adventures (minus the being outside because they think it's too hot in Florida to be anywhere but inside), and make sure I take plenty of breaks.

Meet the Team!

Meet the Team!

On the left, Abby is the maker behind A Stitch Shy of Normal, and on the right Jessica is the maker behind Nice and Knotty and Candace is the maker behind TandC Crafters.

Together, they help me bring awesome crochet projects to you! Click the image to learn more about them, and get their Instagram links, where they are constantly sharing tons of crochet inspiration.

Don’t Miss Out

Crochet! Magazine Winter 2022

Crochet! Magazine Winter 2022

(Affiliate Link) Click this image to get this issue now. These 26 designs are the perfect way to stay warm this winter with easy to wear layers, and some fun holiday projects too.

Crochet World December 2022

Crochet World December 2022

The new issue of Crochet World - December 2022. (Affiliate Link) Click this image to get this issue now. More than 25 crochet patterns from seasonal decorations for your home to cozy accessories and whimsical designs, there are projects to keep your hands busy all winter long!! I I can't wait to get started on the Nordic Table Runner.

Lillet Pullover

Lillet Pullover

I love this lightweight, sampler sweater. Yellow has really won over my heart in recent years, but would look lovely in any color. It's designed to be oversized and relaxed, but if you prefer more fitted, go down a size and/or hook size. (Affiliate Link) Click this image to get a copy of this pattern!

Crochet Foundry Winter 2022

Crochet Foundry Winter 2022

This Winter issue has six fun projects to wear and use in your home! This hat/cowl combo you see here is the Brüma Balaclava, and it's sized from Baby to Adult. (Affiliate Link) Click this image to get this issue now.

Archives

Copyright © 2023 EyeLoveKnots · Custom site by Moonsteam Design