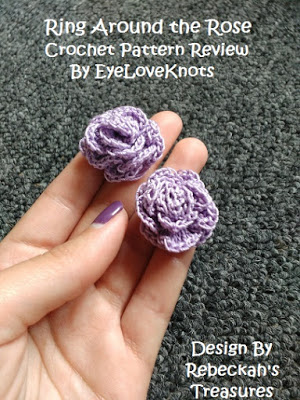
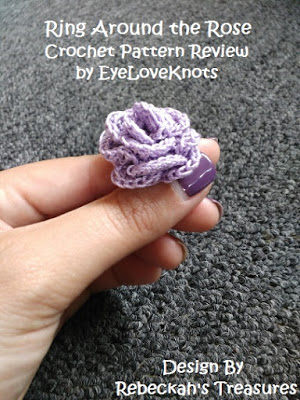
I really wanted to share a review on a St. Patrick’s Day project I have in progress, but with my new job, I ran out of time on it. I will have to save that one for next year…
This week, I have a review of a pattern I tested for my friend Rebeckah of Rebeckah’s Treasures. The first moment I saw it, I fell deeply in love and jumped on the opportunity to test. I won’t lie to you and say it was easy because I went through a couple seatings of working and ripping back before I actually got it. Originally, there were any instructions of which loops exactly to work into, but after I talked to Rebeckah, and she added those in there, BING! It was like a light bulb went off. Then, I couldn’t stop making roses.
These little roses are so fun, and so cute, and can be used for soooooo many different things. What kinds of things? Well, you could use them to embellish… a card, hat, pillow… You could create a headband or a hair clip, or you could glue to a bail and make a necklace charm or some earrings. Just to name a few.
Are you a raveler? If so, make sure to favorite this Ring Around the Rose and link up your project to it!
Don’t forget to check out Rebeckah’s Ring Around the Rosy Choker too!
Materials:
– Small Amount of #10 Crochet Thread – I used Hobby Lobby’s Artiste #10 Cotton Crochet Thread in the Orchid colorway
– 1.3mm Crochet Hook (larger than recommended)
– #20 Tapestry Needle for Weaving in Ends
– Ring Around the Rose, Crochet Pattern from Rebeckah’s Treasures
Material Notes:
The pattern calls for a smaller hook, but the smallest I had on hand was the 1.3mm that I used (and boy was that one small!). My gauge came out a little larger than Rebeckah’s with it, but usually my gauge is smaller and I have to go up a size anyway. It worked out for me.
Keep in mind that ANY yarn weight, and respective hook size will work for this!
Written instructions are available only for purchase through the above link, BUT! You can view the full tutorial via YouTube through the above link for free 🙂 I highly recommend the written instructions though – the purchase is well worth it!
Time Spent:
My first rosebud took me about 45 minutes to complete, but after that, I was able to work up the remaining rosebuds in about 25 minutes a piece.
Measurements:
My rosebuds measure about 1 1/8″ in diameter – a tad larger than in pattern.
Pattern Notes:
I worked my first rosebud as written with the initial chain of 45, but I only worked up to the 14th petal and then finished off as stated in the 15th petal. I was having a tough time as it was to keep the chain cord from slipping under previous stitches, so I just finished it a little early.
I decided on my next rose to try a chain of 48, and it was just enough more to finish the rose completely. I only struggled with the chain a tiny bit in the securing between the last two petals, but not enough to need to add more.
After finishing off, I pulled on my petals to straighten out and stretch a little so my chain loops were more open.
There were only two things I struggled with in the making of the rosebud – the placement of the petals and the rotation of Petal 2. The first issue was resolved with the update to the written pattern. As far as the rotation of Petal 2… Well…
I did it just fine in the first rosebud, but with the second, I could not remember how I did it. After several attempts and ripping back, I decided to omit the rotation, and just work all of it into the foundation chain, and then continue on. It actually worked so much better for me with the center of my rose, and so I worked the remaining rosebuds as such.
With the endless amount of possibilities. What are you thinking of making with them? If you would like to see a specific type of tutorial, drop me a line in the comments, and I will get together with Rebeckah 🙂
With so many size, yarn type and color options, I would love to see them! Join the EyeLoveKnots Crafting Community to share your creations, and see what other’s are up to!
Don’t miss out on new crochet patterns, reviews, jewelry tutorials and more! Subscribe to EyeLoveKnots by using the box on the right side toolbar, or follow me via Bloglovin
Linked Up To…
Craft Schooling Sunday – Creative Jewish Mom
{Nifty Thrifty Sunday #273} – Nifty Thrifty Things
Makers Gonna Make Link Party {No. 117} – The Girl Creative
March 2017 Sharing Time – Raising Memories
Funtastic Friday 117 Link Party – Olives n Okra
Best of the Weekend: Little Miss Celebration; Hello Little Home
BFF Link Party: The 36th Avenue; Tatertots and Jello
The Creative Corner Link Up Party – 03/12/17 – Curly Crafty Mom
Made by you Monday – Skip to my Lou
Monday Funday – Creatively Living
Inspiration Monday – Scattered Thoughts of a Crafty Mom
Inspire Me Monday – Week 271 – Create with Joy
Tutorials & Tips Link Party {296} – Home Stories A to Z


Leave a Reply