This pattern first appeared on The Stitchin’ Mommy where I was a contributor.
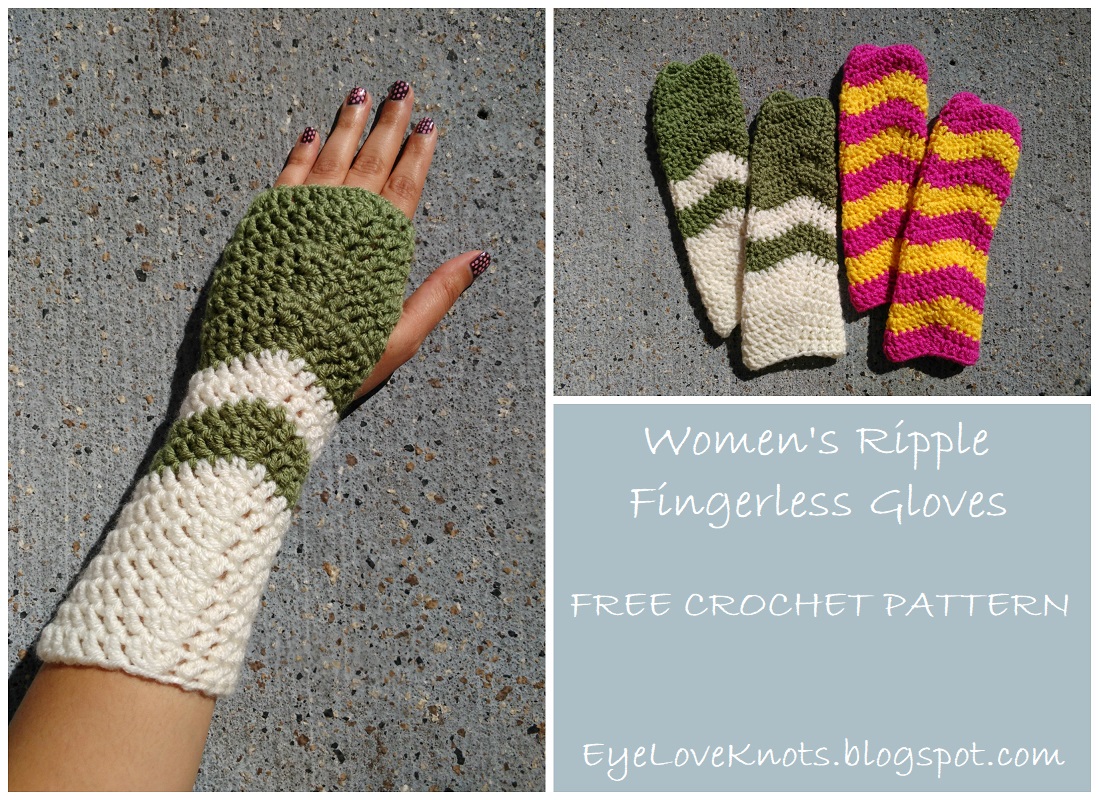
This pattern includes instructions for two sizes. Both are 3.75″ wide, but worked either 6.75″ in length to cover your wrist, or 9.25″ in length to reach mid-arm.
Gauge:
14 DC by 8 Rows = 4″ Square
DC – Double Crochet
DC2tog – Double Crochet Two Stitches Together to Decrease
To DC2tog: Yarn over, insert hook into the first stitch, yarn over, pull through (3 loops on hook), yarn over, pull through two loops on hook, yarn over, insert hook into the next stitch, yarn over, pull through (4 loops on hook), yarn over, pull through two loops on hook, yarn over, pull through all 3 loops on hook
DC3tog – Double Crochet Three Stitches Together to Decrease
To DC3tog: Yarn over, insert hook into the first stitch, yarn over, pull through (3 loops on hook), yarn over, pull through two loops on hook, yarn over, insert hook into the next stitch, yarn over, pull through (4 loops on hook), yarn over, pull through two loops on hook, insert hook into the next stitch, yarn over, pull through (5 loops on hook), yarn over, pull through two loops on hook, yarn over, pull through all 4 loops on hook
The beginning chain counts in all rounds except the thumb hole.
I chose to carry up my yarn using my How to Carry Up Yarn in the Round method so there were minimal ends to weave in.
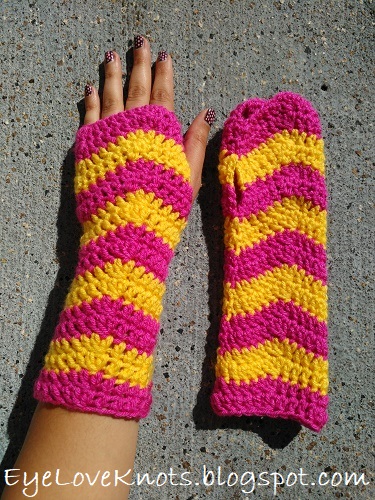
I worked two different color sequences. The first (with pink and yellow) was worked every two rounds, beginning and ending with pink. The second (with sage and ivory) was worked as seven rounds in sage, two rounds in ivory, two rounds in sage, seven rounds in ivory.
At the end of the rounds, it’s instructed to double crochet into the 1st chain. This double crochet will be to the right of the beginning chain.
Join to the top of the beginning chain 2, not the first stitch.
Watch for turning and joining instructions as they are not throughout.
If you need a larger thumb hole, work one more round with no join.
If you need a larger glove, to better fit around your knuckles, try going up a hook size. You can always drop down a hook size somewhere through the pattern if you need it tighter in certain spots.
Longer glove instructions are shown in parenthesis ( … )

There is a visible seam, but it is kept on the inside of your arm and not noticeable unless looking at the inside of your arm.
Chain 24. Join to form a ring. Chain 2. DC into the 1st chain and the next 4 chains, DC3tog, DC into the next 4 chains, 3 DC into the next chain, DC into the next 4 chains, DC3tog, DC into the next 4 chains, DC into the 1st chain. Join. (24 DC)
R2: Chain 2. DC into the 1st DC and the next 4 DCs, DC3tog, DC into the next 4 DCs, 3 DC into the next DC, DC into the next 4 DCs, DC3tog, DC into the next 4 DCs, DC into the 1st DC. Join. (24 DC)
R3, Thumb Hole: Chain 2. DC into the 1st DC and the next 4 DCs, DC3tog, DC into the next 3 DCs, 3 DC into the next DC, DC into the next 4 DCs, DC3tog, DC into the next 4 DCs, 2 DC into the 1st DC. DON’T JOIN. (25 DC)
R4 – 5, Thumb Hole: Chain 2, turn. DC into the 1st DC and the next 4 DCs, DC3tog, DC into the next 4 DCs, 3 DC into the next DC, DC into the next 4 DCs, DC3tog, DC into the next 4 DCs, 2 DC into the 1st DC. DON’T JOIN. (25 DC)
R6, Thumb Hole: Chain 2, turn. DC into the 1st DC and the next 4 DCs, DC3tog, DC into the next 4 DCs, 3 DC into the next DC, DC into the next 4 DCs, DC3tog, DC into the next 4 DCs, 2 DC into the 1st DC. Join. (25 DC)
R7: Chain 2, turn. DC into the 1st DC and the next 4 DCs, DC3tog, DC into the next 4 DCs, 3 DC into the next DC, DC into the next 4 DCs, DC3tog, DC into the next 4 DCs, DC2tog. Join. (24 DC)
R8 – 14 (18): Chain 2. DC into the 1st DC and the next 4 DCs, DC3tog, DC into the next 4 DCs, 3 DC into the next DC, DC into the next 4 DCs, DC3tog, DC into the next 4 DCs, DC into the 1st DC. Join. (24 DC).
Fasten off, and weave in ends.
Please feel free to make and sell your own Ripple Fingerless Gloves using this pattern, but please DO NOT claim this pattern as your own nor should you sell my pattern, and DO NOT re-publish my photos as your own. DO NOT copy and paste my pattern anywhere, link to it instead.
*If you would like a PDF version of this post, you may get one through my EyeLoveKnots Etsy Shop or EyeLoveKnots Craftsy Shop for a small fee. This fee is to compensate for the view/s lost once you no longer need to return to the blog for the information, as you will have your own copy. Plus! It helps fund supplies for new projects to share with you!
Shop EyeLoveKnots Etsy – Women’s Ripple Fingerless Gloves;
or EyeLoveKnots Craftsy – Women’s Ripple Fingerless Gloves.
Join the EyeLoveKnots Crafting Community to share your creations, and see what other’s are up to!
Share your version of this project on Ravelry – Women’s Ripple Fingerless Gloves. Check out the EyeLoveKnots Ravelry page to keep track of all your EyeLoveKnots favorites in your que, and share your WIPS and finished projects!
Don’t miss out on new crochet patterns, reviews, jewelry tutorials and more! Subscribe to EyeLoveKnots by using the box on the right side toolbar, or follow me via Bloglovin! You can also find me sharing on the EyeLoveKnots Facebook page, and @EyeLoveKnots on Twitter!
Linked Up To…
The Blended Blog Link Up – Living on Cloud Nine
Turning Heads Linkup – Elegantly Dressed and Stylish
The Style File – Lady in Violet
nice post
Very good pattern, I especially like the longer version! If you wanted to hide the seam, one could make a contrasting colour cross stitch along the seam.
I made a ouple pair of these for my sons in boy colors to match their favorite slouchy beanies Soon A girlfriend wanted a pair and then another friend and another…. These have been a huge hit at their high school this year!