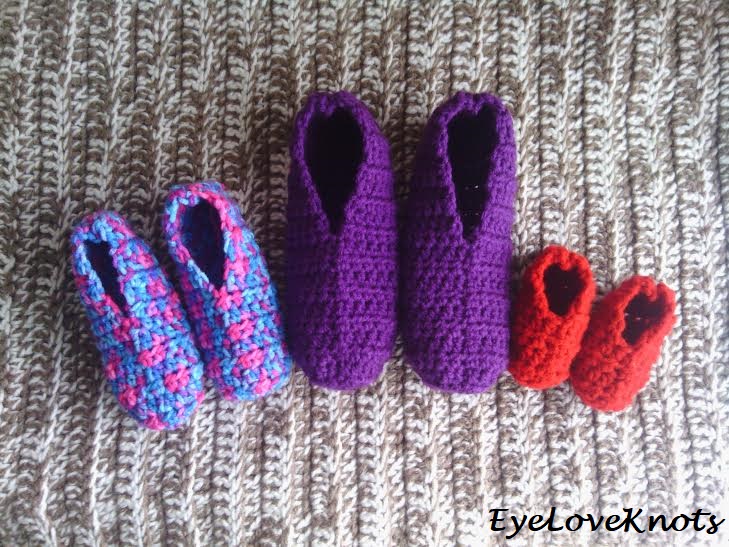
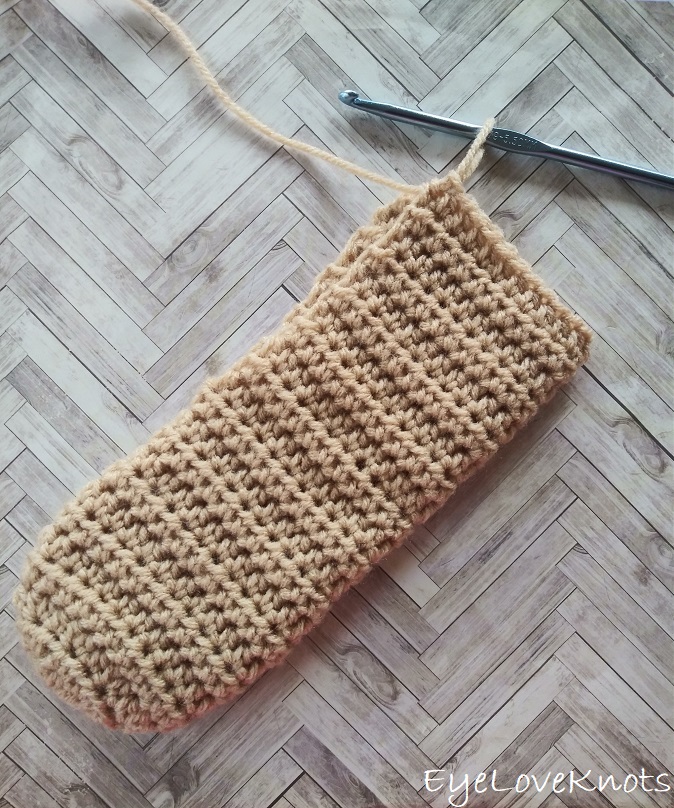
This is a free crochet pattern for how to crochet my new Kids Quick and Easy Slipper Socks – this includes Toddler and Big Kids sizes! They are a great stashbusting project, and worked in purely half double crochets throughout.
Find the free crochet pattern instructions below, or purchase a printer-friendly, ad-free PDF on Ravelry by clicking here.

This has been my most requested crochet pattern – a kid’s version of my adult Quick and Easy Slipper Socks – patterns found below! It took me some time to find a chart I could use for kid’s foot sizing, and then I needed a little motivation, but it’s finally here! And since I don’t have any kids to try this pattern on, I had it tested for fit by a few makers.
Before we go on, it’s important to measure the diameter, and the finished slipper BEFORE trying on. Red Heart Super Saver is a great yarn for so many different projects, but it’s also a little inconsistent. Just because you gauge with one color, does not mean you will meet gauge worked in another color – I’ve learned this the hard way. I am providing the diameters to check against, and the finished slipper should be about 1″ smaller than the actual foot length. I recommend measuring every time you make a pair.
Ad-Free, Printer-Friendly PDF:
If you would like a PDF version of this post, you may get one through either my EyeLoveKnots Etsy Shop, Ravelry or LoveCrochet Shop for a small fee. This fee is to compensate for the views lost when you no longer need to return to the blog to for the information, as you will have your own copy. Plus! It helps fund supplies for new projects to share with you!
Shop EyeLoveKnots Etsy: Kids Quick and Easy Slipper Socks.
Shop EyeLoveKnots LoveCrochet: Kids Quick and Easy Slipper Socks.
Share your version of this project on Ravelry – Kids Quick and Easy Slipper Socks.
Share to your Favorites: AllFreeCrochet, FaveCrafts, Crochet Pattern Bonanza.
Women’s Quick & Easy Slipper Socks in 9 US Sizes
Men’s Quick & Easy Slipper Socks in 13 US Sizes
Materials:
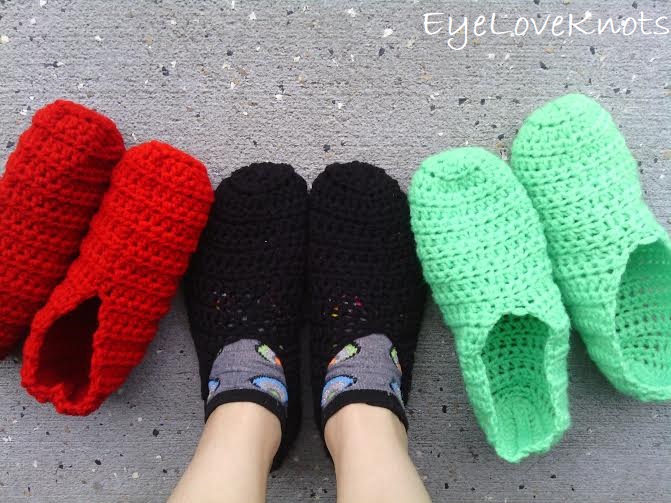
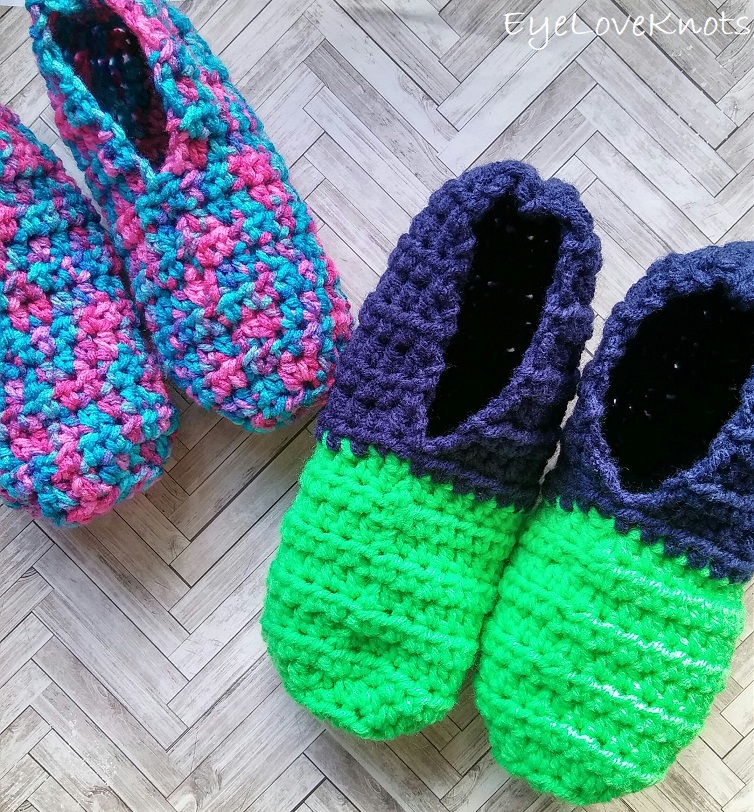
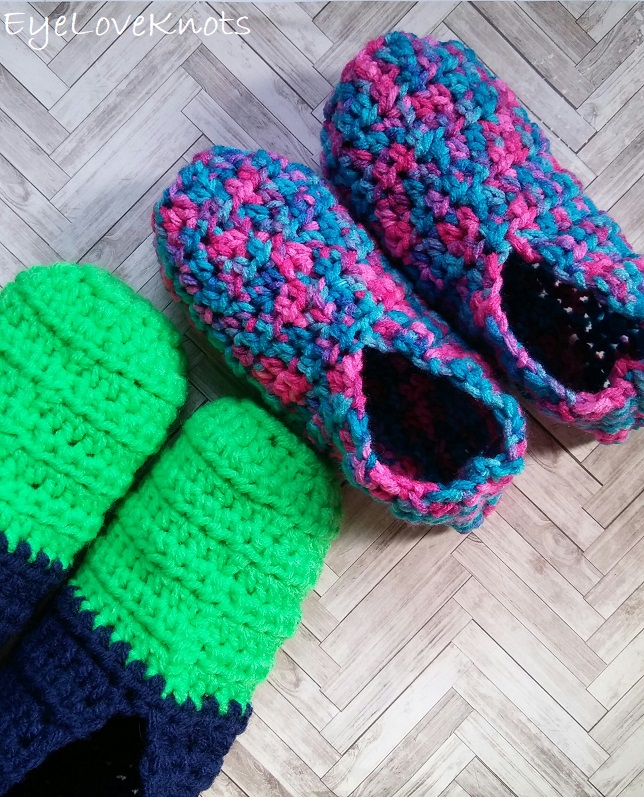
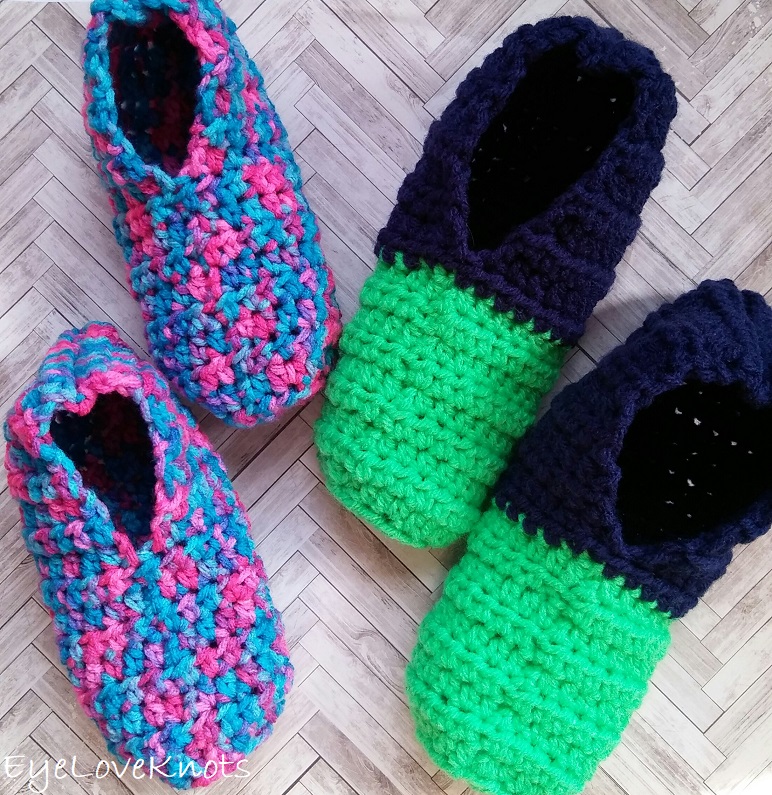
- Less than 120 Yards of Worsted Weight #4 Yarn – I used Red Heart’s Super Saver in Spring Green (Bright Green), either Soft Navy or Denim (Dark Blue), and Bonbon Prints
- I9/5.5mm Crochet Hook
- Tapestry Needle for Weaving in Ends
Material Notes:
Yarn Alternatives: Bernat’s Super Value Yarn, Caron’s One Pound, Hobby Lobby’s Crafters Secret.
I did make and test out some slippers using Vanna’s Choice Yarn, and while they worked up well, the yarn wasn’t as durable as the Super Saver yarn and became rather frizzy rather quickly. I also choose the Super Saver yarn because it has a nice cushion to it, and feels quite nice as it hugs your feet. For anyone with concerns regarding the rough feel – it will get softer after the first wash.
Time Spent:
Hour and a half or less (depending on size)
Sizes Included:
Included are Toddler’s US Sizes 7 through 9.5, and Big Kids US Sizes 10 through 7.5.
Foot sizes are included below. Choose the one best suited for your foot. Half sizes included for reference, but slipper size will be to whole size.
Gauge:
- Recommended: Follow instructions for the crown of the slipper, and check diameter to meet gauge.
- Straight Stitches: 12 HDC by 7 Rows – 4″ x 3″
Abbreviations (US Term):
HDC – Half Double Crochet (Photo Tutorial)
Pattern Notes:
Shoe sizes are not the same throughout – I have learned that through much research as I am sure many of you have realized while shoe shopping. Foot lengths are included below – choose the one that best suits your foot. For example, I wear a size 8.5 sneaker and 9 sandal. My foot size is 10″ so following the numbers below, I made myself a pair of the size 9 – 9.5 slippers.
Having the beginning increase split on either side of the beginning chain helps keep the seam straight, and also adds to the ease of keeping a looser tension.
Joining is to be done into the first half double crochet, not the beginning chain.
I suggest weaving in beginning tail after finishing round 3.
Finished slipper will be about two inches shorter than foot. If using other yarns other than I named, your ease could/will probably vary.
Slipper FAQ:
How do I start with a chain 3? Do I still need to make a ring? With 8/9 half double crochets in the first round, the circle does not lay flat – it cups rather, so to counter balance this cupping, we start with a chain 3, and work our round into the very first chain, instead of a ring. Make sure to leave a longer than normal tail as it will take some length away from it with the addition of stitches.
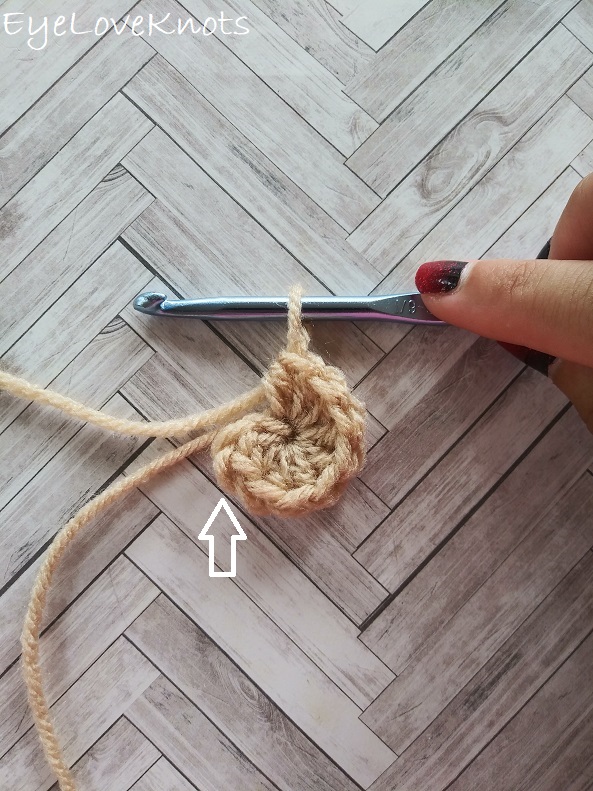
Where do I join the first round? You will slip stitch join to the first stitch of the round. If you are unsure of which stitch this is, count backwards from where your last stitch is counting it as one. In this example, I have 8 stitches.
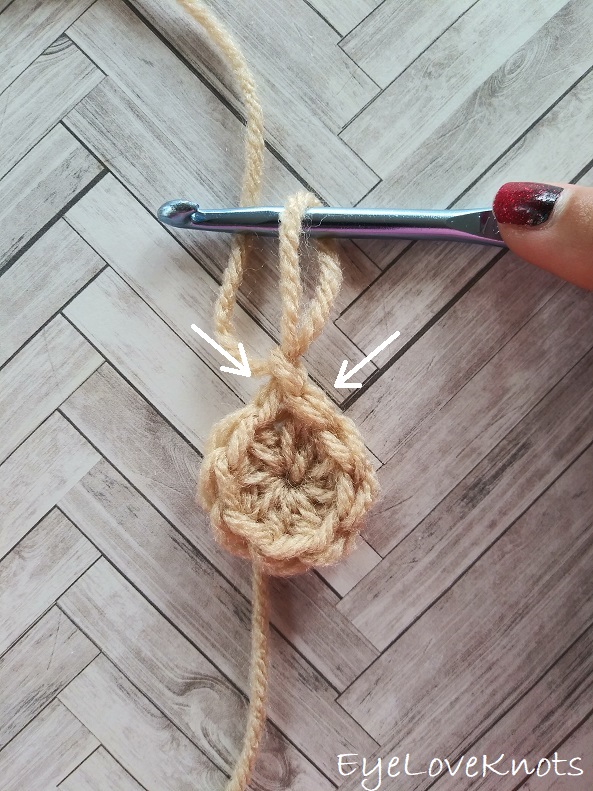
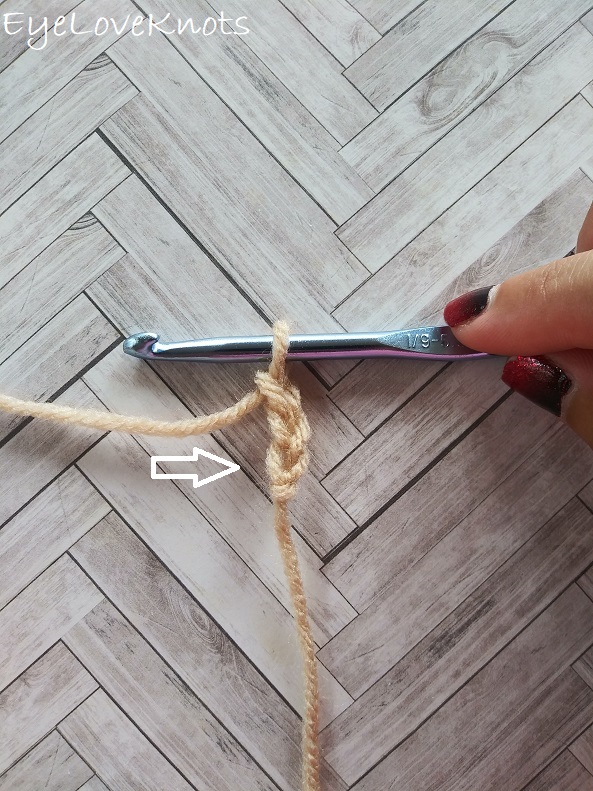
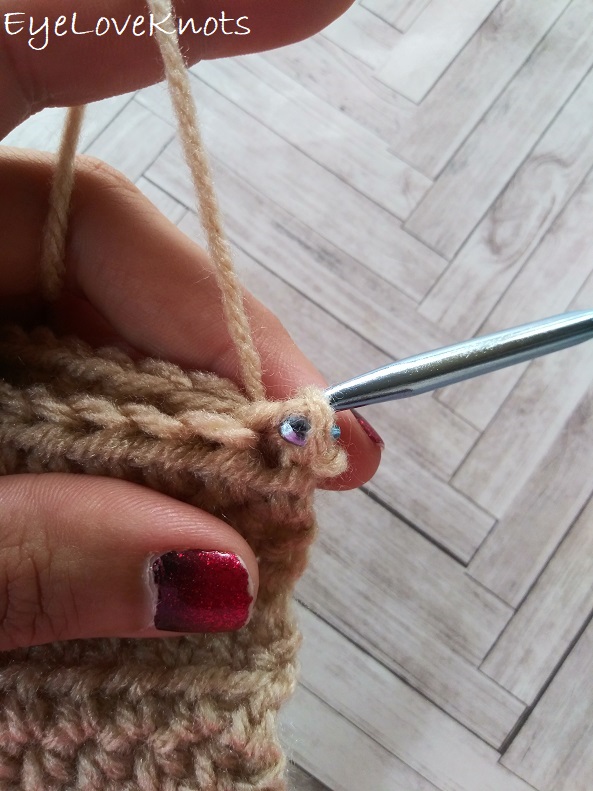
What do you mean that you split the beginning increase? And what does “1 HDC in the next/first stitch” mean? I split my beginning increase to help keep my seam straight. I work the first stitch as normal into the first stitch of the round which is to the left of the beginning chain (indicated by the arrow on the left), and then I work the second stitch of that first increase into the same stitch as the first, but to the right of the beginning chain (indicated by the arrow on the right). By hugging the beginning chain, the seam remains straight, rather than slanted.
What if I don’t want the seam to show on the top of my slipper? I designed this slipper to be really easy with minimal sewing, so the seam shows on the top, but if you don’t want the seam to show, you can fasten off your yarn after the first half of the slipper is done, flip the piece 180 degrees around so the seam is even along the back, then find the center of the new front, and join your yarn to begin the second half of the slipper.
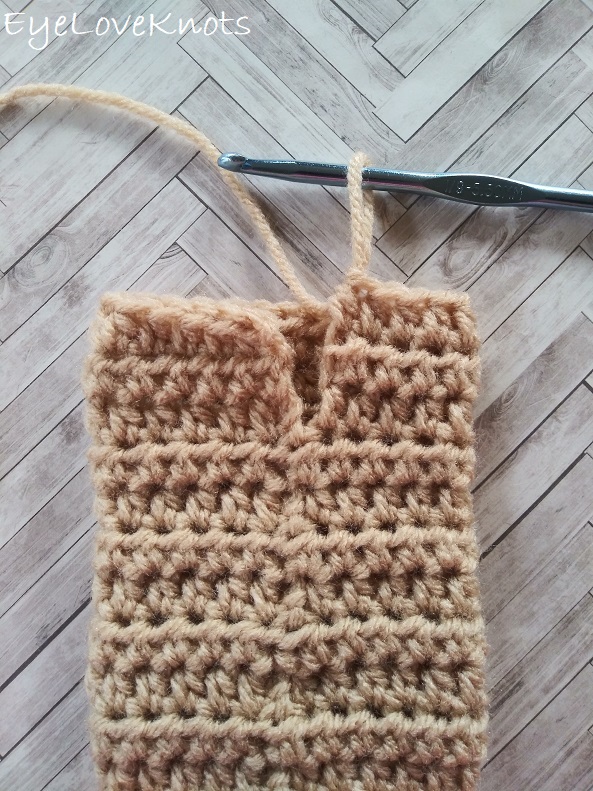
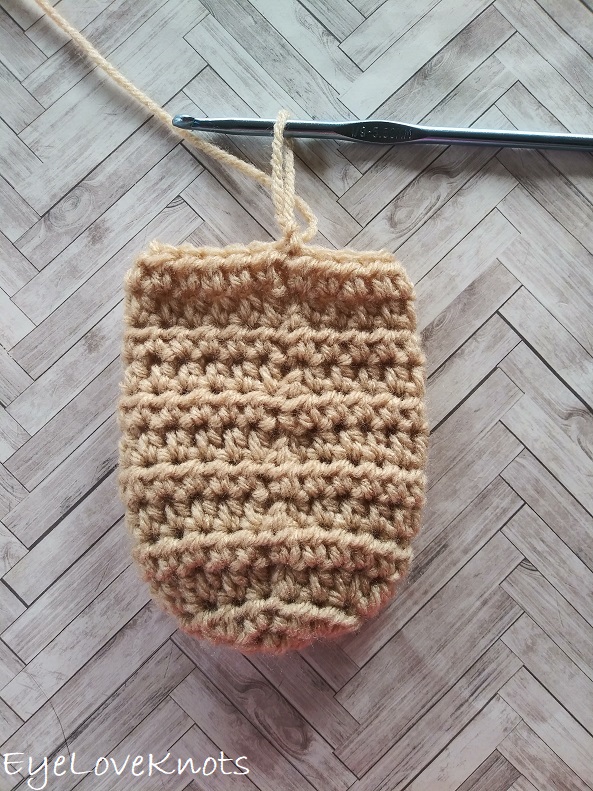
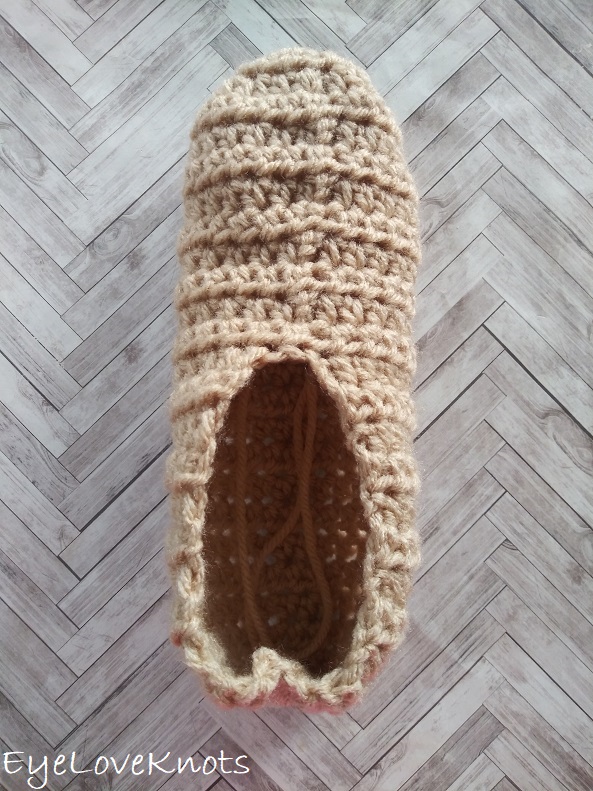
What is the difference between working around, and across? Working around means joined rounds, and working across means rows back and forth with no join. There are two halves to this slipper, the first half worked in rounds to fit over the foot, and the second half worked in rows to create the opening for the foot.
Where are the instructions for the heel? Indicated in each size are instructions to “scroll down to finish” where we seam up the back opening of the slipper to make it wearable.
How to Crochet Quick and Easy Slipper Socks Video Tutorial (shown in Women’s size 9):
Pattern:
Toddler US Size 7 (5 5/8” foot) – Toddler US Size 7.5 (5 7/8” foot); Diameter 1.88″ or 1 7/8″
Chain 3. 7 HDC into 1st chain. Join. (7 HDC)
R2: Chain 1, turn. Work 1 HDC in the 1st HDC, 2 HDC in each of the next 6 HDC’s around, 1 HDC in the next/first stitch. Join. (14 HDC)
R3 – 6: Chain 1, turn. HDC in 1st HDC, and each around. Join.
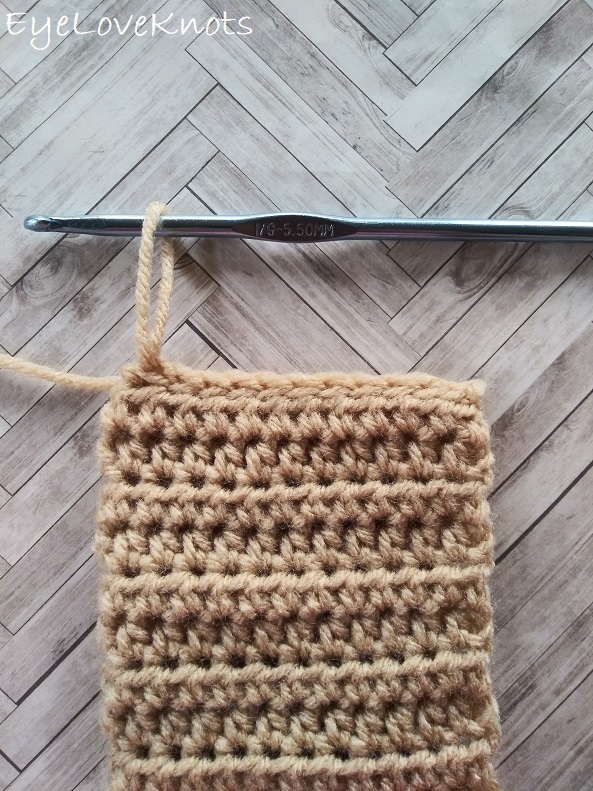
R7 – 13: Chain 1, turn. HDC in 1st HDC, and each across. DON’T Join.
Scroll to bottom for Finish…
Toddler US Size 8 (6” foot) – Toddler US Size 8.5 (6 1/8” foot); Diameter 2″
Chain 4. Join to create a ring. Chain 1. 8 HDC into the ring. (8 HDC)
R2: Chain 1, turn. Work 1 HDC in the 1st HDC, 2 HDC in each of the next 7 HDC’s around, 1 HDC in the next/first stitch. Join. (16 HDC)
R3 – 7: Chain 1, turn. HDC in 1st HDC, and each around. Join.
R8 – 14: Chain 1, turn. HDC in 1st HDC, and each across. DON’T Join.
Scroll to bottom for Finish…
Toddler US Size 9 (6 3/8” foot) – Toddler US Size 9.5 (6.5” foot); Diameter 2.13″ or 2 1/8″
Chain 5. Join to create a ring. Chain 1. 10 HDC into 1st chain. Join. (10 HDC)
R2: Chain 1, turn. Work 1 HDC in the 1st HDC, 2 HDC in each of the next 9 HDC’s around, 1 HDC in the next/first stitch. Join. (20 HDC)
R3 – 7: Chain 1, turn. HDC in 1st HDC, and each around. Join.
R8 – 15: Chain 1, turn. HDC in 1st HDC, and each across. DON’T Join.
Scroll to bottom for Finish…
Child US Size 10 (6 5/8” foot) – Child US Size 10.5 (6 7/8” foot); Diameter 2.13″ or 2 1/8″
Chain 5. Join to create a ring. Chain 1. 10 HDC into 1st chain. Join. (10 HDC)
R2: Chain 1, turn. Work 1 HDC in the 1st HDC, 2 HDC in each of the next 9 HDC’s around, 1 HDC in the next/first stitch. Join. (20 HDC)
R3 – 8: Chain 1, turn. HDC in 1st HDC, and each around. Join.
R9 – 16: Chain 1, turn. HDC in 1st HDC, and each across. DON’T Join.
Scroll to bottom for Finish…
Child US Size 11 (7” foot) – Child US Size 11.5 (7 1/8” foot); Diameter 2.38″ or 2 3/8″
Chain 5. Join to create a ring. Chain 1. 12 HDC into 1st chain. Join. (12 HDC)
R2: Chain 1, turn. Work 1 HDC in the 1st HDC, 2 HDC in each of the next 11 HDC’s around, 1 HDC in the next/first stitch. Join. (24 HDC)
R3 – 8: Chain 1, turn. HDC in 1st HDC, and each around. Join.
R9 – 16: Chain 1, turn. HDC in 1st HDC, and each across. DON’T Join.
Scroll to bottom for Finish…
Child US Size 12 (7 3/8” foot) – Child US Size 12.5 (7.5” foot) Diameter 2.38″ or 2 3/8″
Chain 5. Join to create a ring. Chain 1. 12 HDC into 1st chain. Join. (12 HDC)
R2: Chain 1, turn. Work 1 HDC in the 1st HDC, 2 HDC in each of the next 11 HDC’s around, 1 HDC in the next/first stitch. Join. (24 HDC)
R3 – 9: Chain 1, turn. HDC in 1st HDC, and each around. Join.
R10 – 15: Chain 1, turn. HDC in 1st HDC, and each across. DON’T Join.
Scroll to bottom for Finish…
Child US Size 1 (8” foot) – Child US Size 1.5 (8 1/8” foot) Diameter 2.38″ or 2 3/8″
Chain 5. Join to create a ring. Chain 1. 12 HDC into 1st chain. Join. (12 HDC)
R2: Chain 1, turn. Work 1 HDC in the 1st HDC, 2 HDC in each of the next 11 HDC’s around, 1 HDC in the next/first stitch. Join. (24 HDC)
R3 – 9: Chain 1, turn. HDC in 1st HDC, and each around. Join.
R10 – 19: Chain 1, turn. HDC in 1st HDC, and each across. DON’T Join.
Scroll to bottom for Finish…
Child US Size 2 (8 3/8″ foot) – Child US Size 2.5 (8.5″ foot) Diameter 2.75″
Chain 3. 8 HDC into 1st chain. Join. (8 HDC)
R2: Chain 1, turn. Work 1 HDC in the 1st HDC, 2 HDC in each of the next 7 HDC’s around, 1 HDC in the next/first stitch. Join. (16 HDC)
R3: Chain 1, turn. Work 1 HDC in the 2 HDCs, (2 HDC in the next HDC, 1 HDC in the next HDC) 7x around, 1 HDC in the next/first stitch. Join. (24 HDC)
R4 – 10: Chain 1, turn. HDC in 1st HDC, and each around. Join.
R11 – 20: Chain 1, turn. HDC in 1st HDC, and each across. DON’T Join.
Scroll to bottom for Finish…
Child US Size 3 (8 5/8″ foot) – Child US Size 3.5 (8 7/8″ foot) Diameter 2.75″
Chain 3. 8 HDC into 1st chain. Join. (8 HDC)
R2: Chain 1, turn. Work 1 HDC in the 1st HDC, 2 HDC in each of the next 7 HDC’s around, 1 HDC in the next/first stitch. Join. (16 HDC)
R3: Chain 1, turn. Work 1 HDC in the 2 HDCs, (2 HDC in the next HDC, 1 HDC in the next HDC) 7x around, 1 HDC in the next/first stitch. Join. (24 HDC)
R4 – 10: Chain 1, turn. HDC in 1st HDC, and each around. Join.
R11 – 21: Chain 1, turn. HDC in 1st HDC, and each across. DON’T Join.
Scroll to bottom for Finish…
Child US Size 4 (9″ foot) – Child US Size 4.5 (9 1/8″ foot) Diameter 2.75″
Chain 3. 8 HDC into 1st chain. Join. (8 HDC)
R2: Chain 1, turn. Work 1 HDC in the 1st HDC, 2 HDC in each of the next 7 HDC’s around, 1 HDC in the next/first stitch. Join. (16 HDC)
R3: Chain 1, turn. Work 1 HDC in the 2 HDCs, (2 HDC in the next HDC, 1 HDC in the next HDC) 7x around, 1 HDC in the next/first stitch. Join. (24 HDC)
R4 – 11: Chain 1, turn. HDC in 1st HDC, and each around. Join.
R12 – 22: Chain 1, turn. HDC in 1st HDC, and each across. DON’T Join.
Scroll to bottom for Finish…
Child US Size 5 (9 3/8″ foot) – Child US Size 5.5 (9 1/2″ foot) Diameter 2.75″
Chain 3. 8 HDC into 1st chain. Join. (8 HDC)
R2: Chain 1, turn. Work 1 HDC in the 1st HDC, 2 HDC in each of the next 7 HDC’s around, 1 HDC in the next/first stitch. Join. (16 HDC)
R3: Chain 1, turn. Work 1 HDC in the 2 HDCs, (2 HDC in the next HDC, 1 HDC in the next HDC) 7x around, 1 HDC in the next/first stitch. Join. (24 HDC)
R4 – 11: Chain 1, turn. HDC in 1st HDC, and each around. Join.
R12 – 23: Chain 1, turn. HDC in 1st HDC, and each across. DON’T Join.
Scroll to bottom for Finish…
Child US Size 6 (9 5/8″ foot) – Child US Size 6.5 (9 7/8″ foot) Diameter 2.75″
Chain 3. 8 HDC into 1st chain. Join. (8 HDC)
R2: Chain 1, turn. Work 1 HDC in the 1st HDC, 2 HDC in each of the next 7 HDC’s around, 1 HDC in the next/first stitch. Join. (16 HDC)
R3: Chain 1, turn. Work 1 HDC in the 2 HDCs, (2 HDC in the next HDC, 1 HDC in the next HDC) 7x around, 1 HDC in the next/first stitch. Join. (24 HDC)
R4 – 12: Chain 1, turn. HDC in 1st HDC, and each around. Join.
R13 – 24: Chain 1, turn. HDC in 1st HDC, and each across. DON’T Join.
Scroll to bottom for Finish…
Child US Size 7 (10″ foot) – Child US Size 7.5″ (10 1/8″ foot) Diameter 2.75″
Chain 3. 8 HDC into 1st chain. Join. (8 HDC)
R2: Chain 1, turn. Work 1 HDC in the 1st HDC, 2 HDC in each of the next 7 HDC’s around, 1 HDC in the next/first stitch. Join. (16 HDC)
R3: Chain 1, turn. Work 1 HDC in the 2 HDCs, (2 HDC in the next HDC, 1 HDC in the next HDC) 7x around, 1 HDC in the next/first stitch. Join. (24 HDC)
R4 – 12: Chain 1, turn. HDC in 1st HDC, and each around. Join.
R13 – 25: Chain 1, turn. HDC in 1st HDC, and each across. DON’T Join.
Scroll to bottom for Finish…
Finish:
Chain 1, Turn slipper inside out.
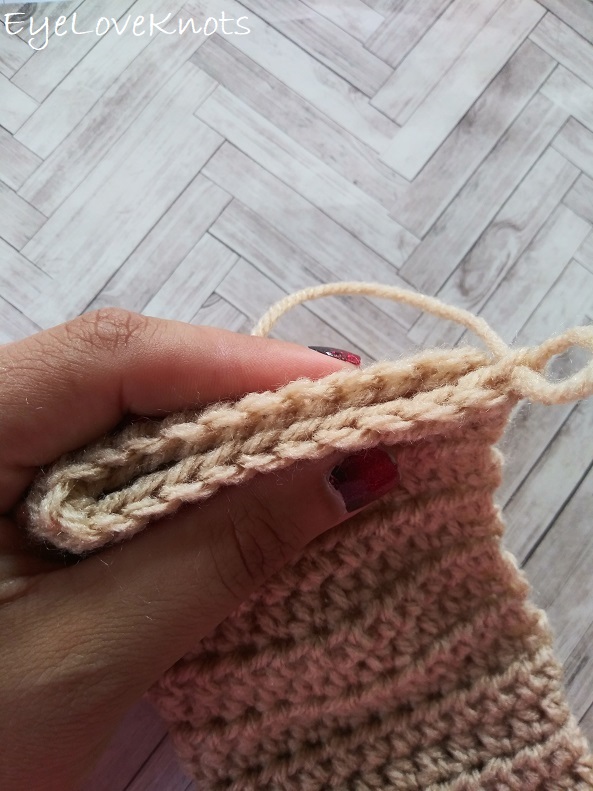
Line the stitches up.
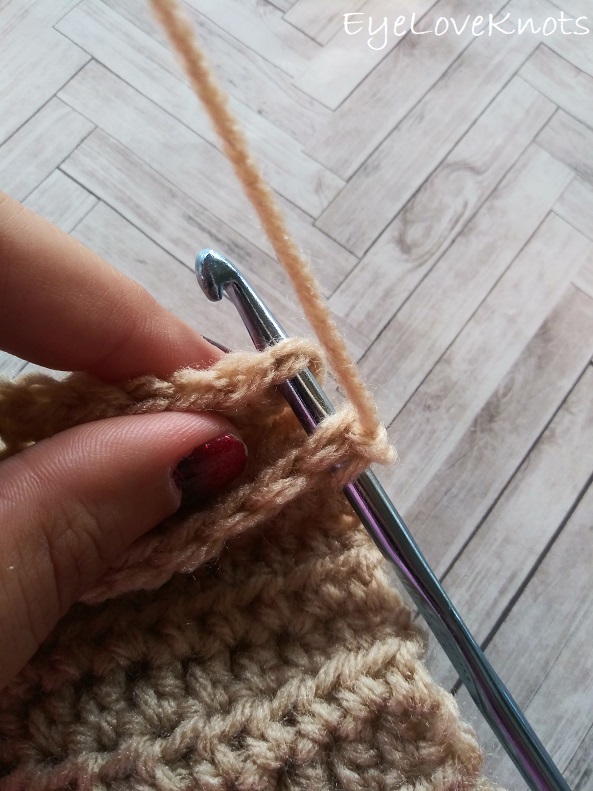
Working through both layers, insert hook into the first stitch…
… yarn over…

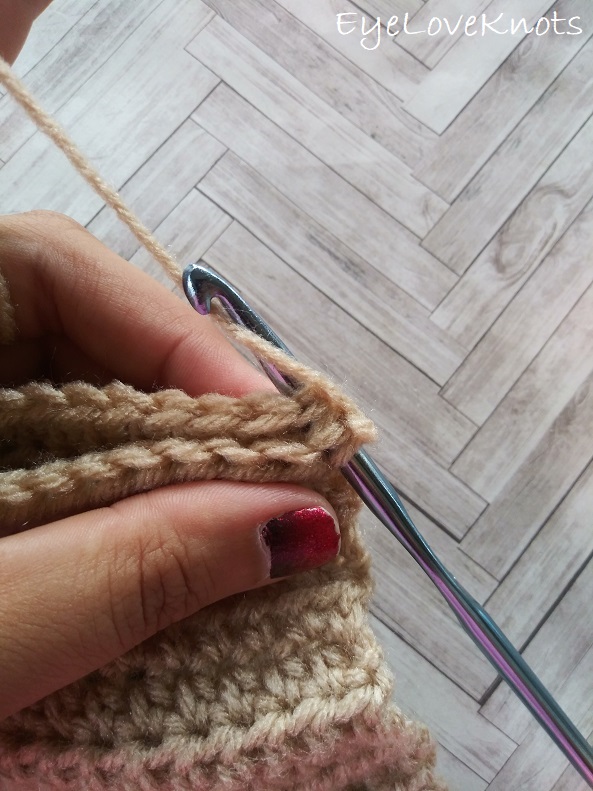
… pull through both loops…
… and the loop on the hook to complete a slip stitch.
Continue to slip stitch across the back of slipper to close up. Fasten off, and weave in ends.
The finished slippers will seem too small at first, but that’s normal! They will stretch to fit.
Please feel free to make and sell your own Slipper Socks using this pattern, but please DO NOT claim this pattern as your own nor should you sell my pattern, and DO NOT re-publish my photos as your own. DO NOT copy and paste my pattern anywhere, link to it instead.
Join one of our awesome Facebook groups to share your creations, and see what others are up to!
– EyeLoveKnots Crochet & DIY Community
– DIY Home On Rockwood Lane
– Alexandra Lane Lifestyle
Linked Up To…
Craft Schooling Sunday – Creative Jewish Mom
Handmade Monday #132 – Sum of their Stories (link up post deleted by host)
Ginx Woolly Linx Party for June – Ginx Craft
Creative Monday Link Up – Claire Justine
The Really Crafty Link Party #175 – Keeping it Real
Craftastic Monday Link Party – Sew Can Do
505th Inspire Me Tuesday – A Stroll Thru Life (link up post deleted by host)
Fabulous Party #273 – Lou Lou Girls (link up post deleted by host)
Weekday Wear Linkup – Away from the Blue
Tutorials & Tips Link Party #397 – Home Stories A to Z (link up post deleted by host)
The Linky Ladies Party #161 – The Purple Poncho
Sew It Cook It Craft It Link Party #107 – Sew Historically
Tuesday Turn About Link Party #5 – My Wee Abode
Hookin’ on Hump Day #193 – Petals to Picots
Turning Heads Linkup – Elegantly Dressed and Stylish
Confident Twosday Linkup – I do deClaire
Talk of the Town #180 – My Repurposed Life
{Wow Me} Wednesday #309 – Ginger Snap Crafts
Your Whims Wednesday #413 – My Girlish Whims
To Grandma’s House We Go Link Party #145 – Chas’ Crazy Creations (link up post deleted by host)
Style Me Wednesday – Shopping My Closest
Scrappy Stitchers Link Party #52 – Stitches n Scraps
Thursday Favorite Things #395 – An Artful Mom
Trendy Thursday LinkUp – Thirty Minus One
Thursday Fashion Files Link Up #218 – Curly Crafty Mom
Best of the Weekend – Calypso in the Country
Home Matters #239 – Mondern on Monticello
Snickerdoodle Create Bake Make Link Party 290 – EyeLoveKnots
Link Your Stuff – Annemarie’s Haakblog
wow, what an amazing resource! thanks so much for sharing and for sharing on craft schooling sunday, here’s to warm cozy feet!
Definitely! Cheers! 😉
These look really cool, thank you for sharing the pattern at The Really Crafty Link Party. Pinned.
Thanks, Teresa! The kids enjoyed the ones I made for them 🙂
The size 7 & 7.5 has to be wrong for the opening part. Just 3 rows doesn’t give you enough room to put a foot in the slipper after it’s joined.
Mhmm. Could you put it on your little ones foot, and measure to tell me how many more rows it should be?
I’m making for grand kids. I’m in NY & they’re in TX. Im just going to play with rows &try to get the opening correct.
Why is the size 10 child smaller than the size 5 child?
US size shoes are designed in the way I have them listed. If you aren’t sure what size your child is, I recommend measuring the foot length, and going by that.
This pattern has been retested, and updated.
Where do I download the free PDF for
Quick and Easy Slipper Socks, please someone help me, I don’t see the download button anywhere, yet it states it’s free!
It is a free pattern viewable completely in this post. Right above the Materials you will find links to purchase a PDF if desired. This fee for the PDF is to compensate for a loss in pageviews when you no longer need to return to my blog to view the pattern.
was wondering about this: Chain 5. Join to create a ring. Chain 1. 12 HDC into 1st chain.
or is it 12 hdc into the ring?
Oops! Yes. It was a copy from instructions of another size that is worked into a chain rather than ring. I can see I did it on a few sizes. Thank you for catching that! Sorry for the confusion. It should say to work those stitches into the ring.
My child’s foot is 5 inches long. Can I still make this pattern work?
I would follow the instructions for the smallest size, but work the first repeat to 5 rows, and the second repeat to 11 rows.
Love this!! As someone whose feet are always cold, simple slippers pattern are always appreciated.
So glad you like it! I wear mine year ’round because my feet are always cold too.
I need to make a size 2 child size. Upon reading the directions it is made exactly the same as a woman’s size 5 but with one more row. Is this correct?
All of the slippers are worked based off of foot measurements, which comparing these two sizes they appear to be nearly the same. The kids sizes are worked with just 1″ in stretch, while the women’s sizes are worked with 2″ in stretch. Short answer, the patterns are correct as is.
Hi
I guess I don’t understand why both children’s and women’s sizes are 24 stitches. Shouldn’t children’s sizes be less?
Scrolling through the children’s sizes, you’ll see it varies depending on the size. Feel free to adjust down to better fit your child if needed.
Is there supposed to be 18 rounds in the toddler size 9? It seems like it may be a typo since the next bigger size only has 16 rounds. 🙂
That’s quite possible. I will have to take a closer look, and do some quick math. It’s designed to be 1″ smaller than the foot, and each row adds 0.38″ if that helps at the moment. I will take a look at this tomorrow.
I just updated the pattern. Toddler size 9 is 15 rounds. Sorry for the inconvenience, but thank you for catching this!
I love this site! I have been looking all over for a site that has different sizes and patterns together for kids and toddlers. You have really helped me out tremendously. I am sure I will be coming back here more than once to use your patterns.
That makes me so happy to hear, Deborah! I try my best to include something for everyone.
Thanks so much for sharing. This was one of the best tutorials I’ve ever watched. You gave really clear and precise instructions and spoke very succinctly.
Thanks so much, Dottie! That warms my heart to hear. I try my best.
Fabulous……very clear voice and understandable instructions on video.
I am so looking forward to trying this pattern.
Thanks so much, Linda! It’s such a fun pattern, and great for using up scraps. Feel free to reach out with any questions. Happy crocheting!
Very easy and quick pattern. Loved it!! Thank you so much.❤️
So happy to hear!
Love these! Thank you for teaching how to make a clean straight seam. Now I know how to make a hat without a diagonal seam! Could have sworn I tried something maybe 10 years ago that did not leave a diagonal seam and since then I keep wondering how come my seam is always diagonal on hats & how to change that. Have tried the invisible seam but with bobbles you still see a slight slanted seam.
I did not watch the video but am working on the smallest of the children’s sizes. I find it very hard to find children’s slippers this small that aren’t booties so I am very appreciative of that as well!
Would like to ask please; how did you do the colour change on your green & navy pair pictured without it showing? Also, it looks like you alternate each round & row by crocheting into the first and second loop then the second and third loops to give it that neat ridged look? You might explain this in your video but I haven’t watched yet.
Thank you for the great pattern!
The diagonal seam drove me crazy for years! I use this split technique now anytime I work up a beanie, or pretty much anything in the round. After increases are done, the seam still travels (it’s natural, slanting one way if you are left handed and the other way if you are right handed) so in single and half double crochet projects (bobbles included), I turn at the end of each round, and for double crochet, I usually don’t turn, but alternate working one row with the first stitch into the first stitch of the round, and the next row with the first stitch worked into the second stitch of the round.
For the two tone slippers, I fastened off the green strand after I joined the round, then I tied on the new color to start the next round.
The pretty ridge detail comes from working the stitches as normal under both loops of the v-shape, but in turned rounds/rows. It is one of my favorite stitch patterns because of how beautiful the fabric comes out this way.
Thank you very much! Love it! Super happy to find such tiny sizes; quick & easy for donations to the local shelters. 😊
Hello, I got to the point where I need to scroll for finish, but I don’t see instructions as to how to leave the opening for the foot to go in. HELP PLEASE, thank you
Happy to help! About half of the slipper is worked in rounds and joined. The other half is worked in rows back and forth and this is the opening for the foot. To finish, you’ll slip stitch up the back only.