How to hold yarn for Crocheting, and Continental Knitting, two ways. Also, what is crochet tension?
This post contains affiliate links for LoveCrafts. If you make a purchase by clicking on them, I make a small commission at no extra cost to you. Thanks for your support!
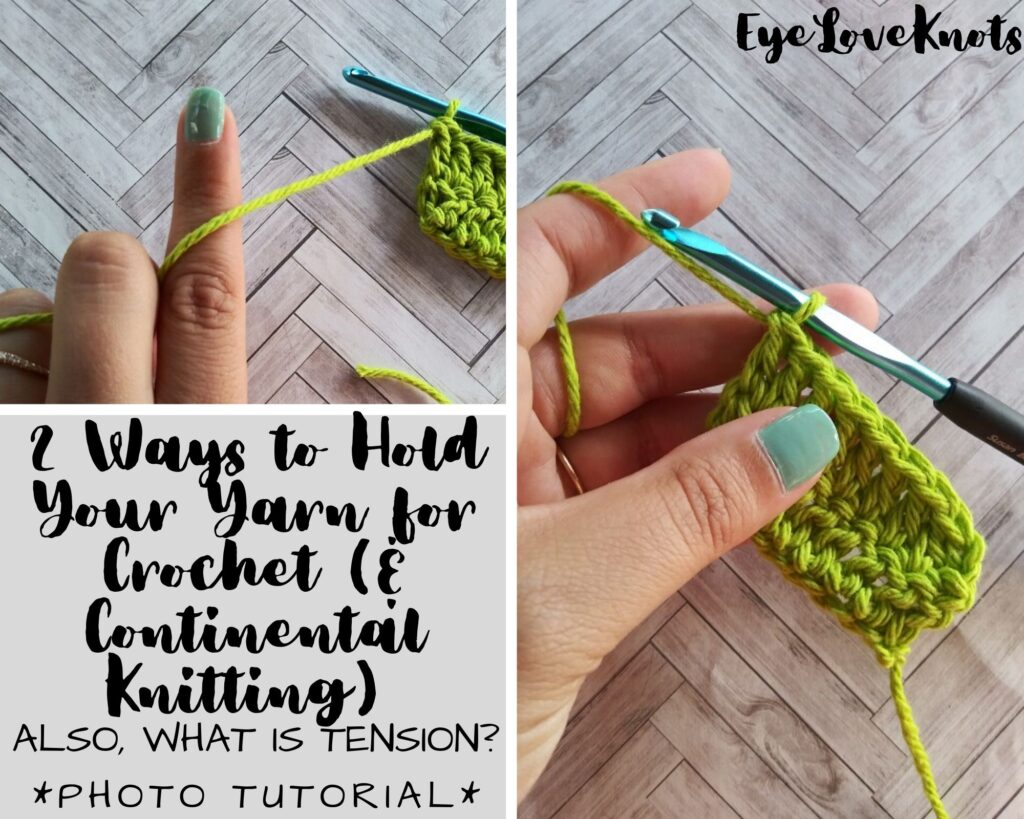
After you’ve made a slip knot on your hook, you’ll need to know how to hold your yarn to begin working, and also what “tension” is.
While crocheting is my main hobby, I do dabble in some knitting, and I follow the continental style, which is easier for crocheters to pick up since it’s very similar. I hold my yarn the same way for both crafts.
I am showing you two different ways you can hold your yarn. The first way will be the most common way you see others holding their yarn, and what books teach you. The second way, and the way I have been holding my yarn for years, is slightly modified to help aching hands. This second way has been a game changer for me, though it does take a little more focus at first to keep the tension – I will cover this at the end of this tutorial.
Before we go on, there are many other ways to hold your yarn that are all variations of these. There really is no wrong way to hold your yarn IF it works for you, as long as you do hold the yarn tension one way or another.
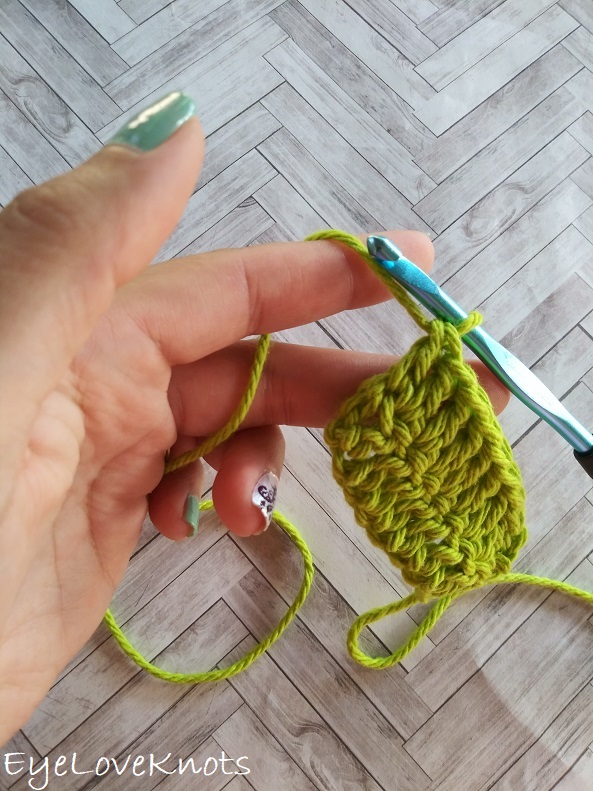
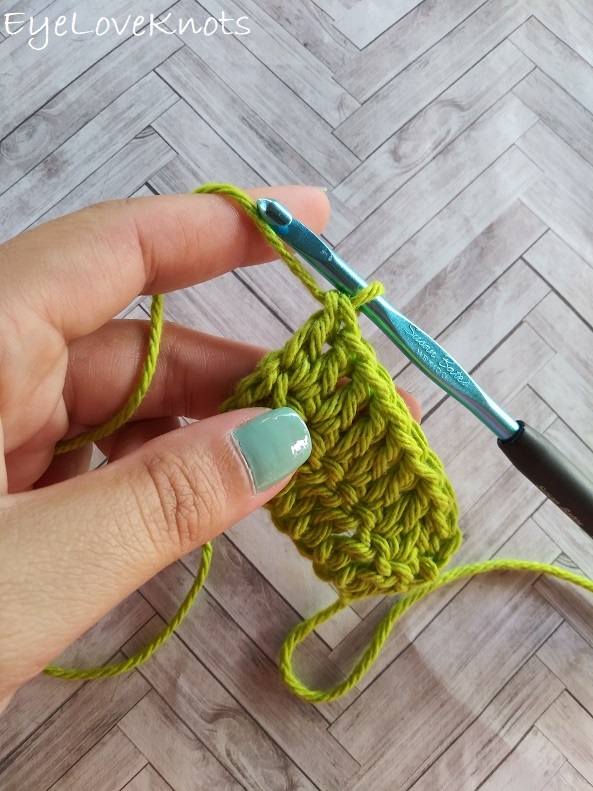
For this tutorial, I am using Lily Sugar n Cream in Hot Green, and an H8/5mm hook.
I am not creating anything new here, but I did take the time to take the photos, edit them, and put this tutorial together, so please respect my work. Do not pin or share any of the tutorial images – just the main photo. Provide the link for others to find my page (help out me and my blog with the traffic). Do not copy and paste my work anywhere. Thank you!
Video Tutorial: How to Hold Your Crochet Hook and Yarn:
Step by Step Photo Tutorial: How to Hold Your Yarn to Crochet:
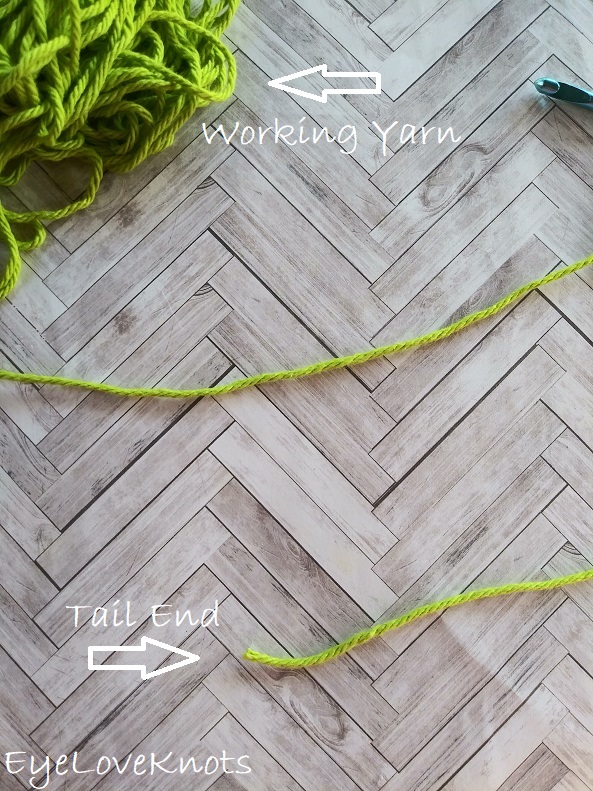
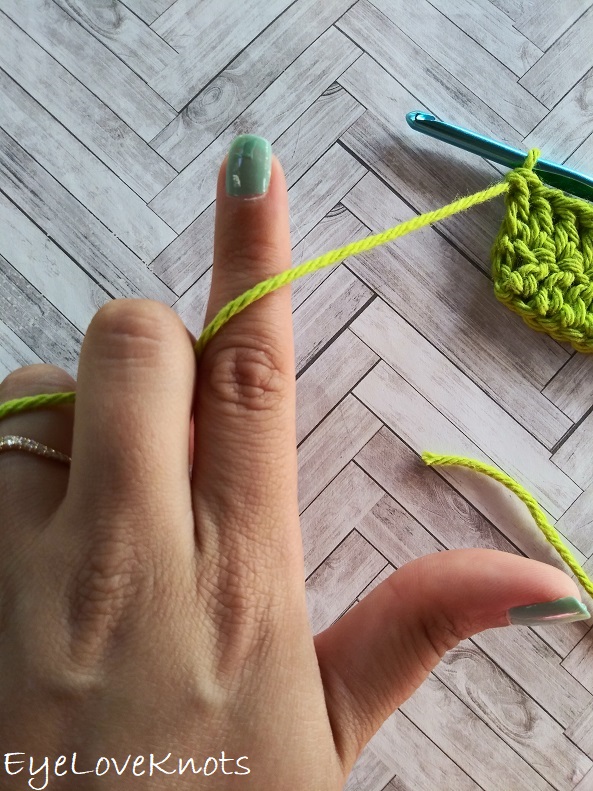
Before we get started, let’s cover one thing, as it’s the same throughout. The tail end is what will be hanging down from the bottom of your hand, and you will always be working from the ball/skein/bobbin, so that will be on your top finger. If you reverse this, you will realize very quickly because you will run out of working yarn.
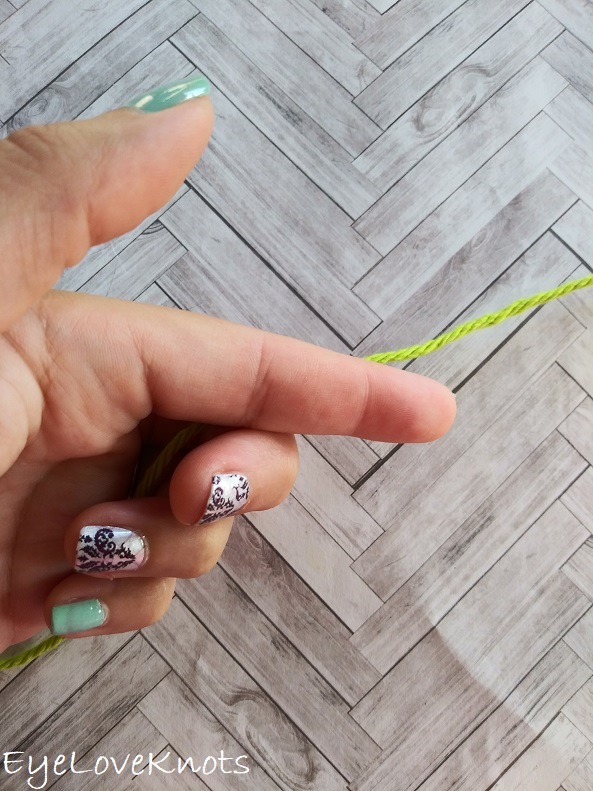
First Way – Most Common:
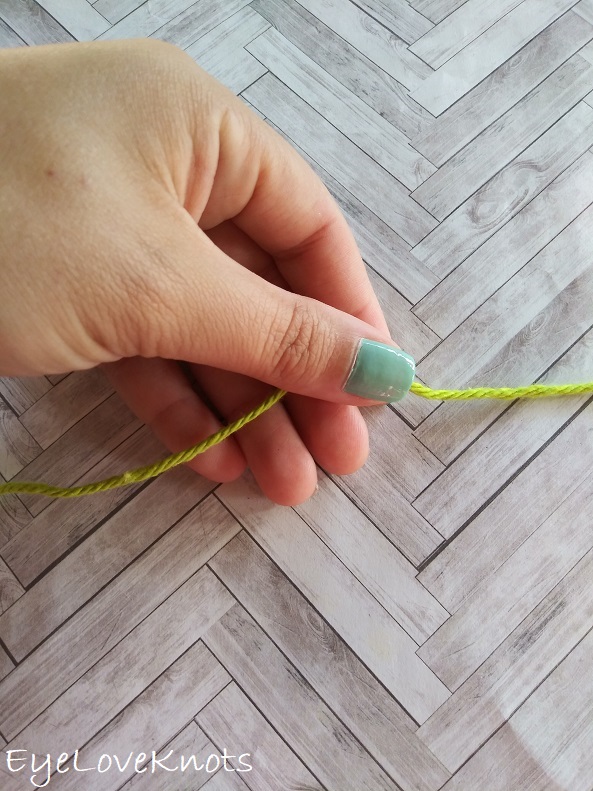
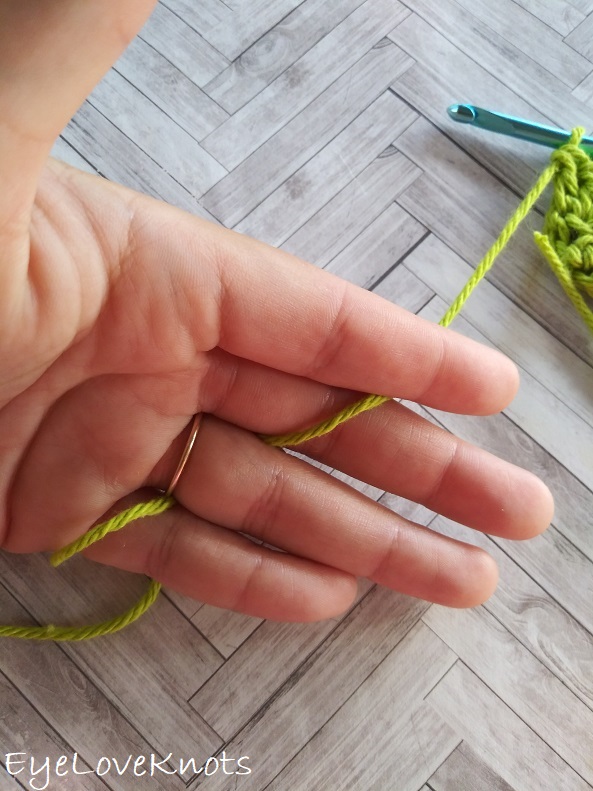
Pick up the yarn with the tips of your fingers, sliding it back towards the inside center of your fingers.
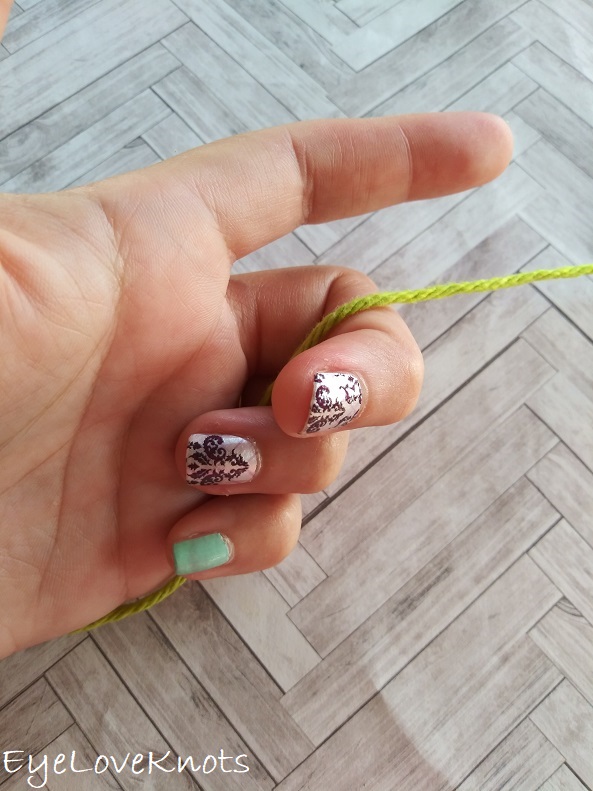
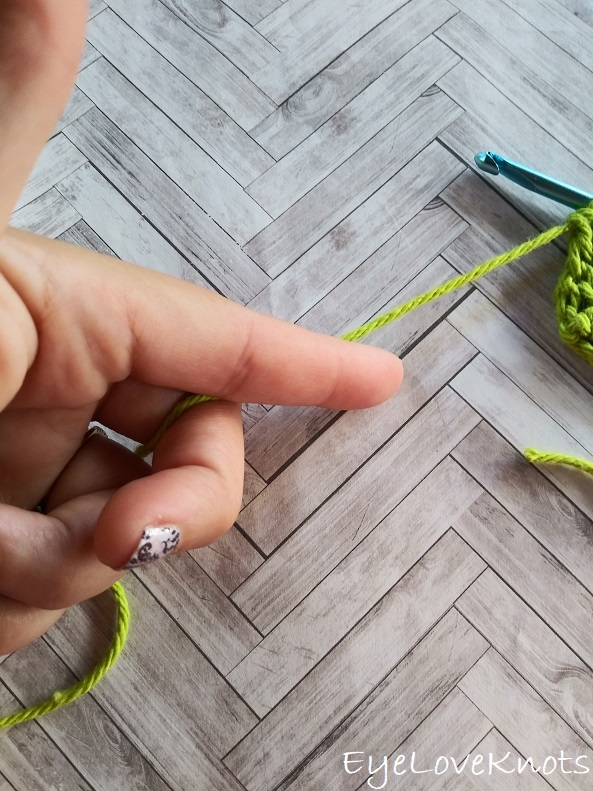
Pull your middle finger, ring finger and pinky towards your hand closing them around your yarn. (Your middle finger is currently hanging out here, but will be in a different position in the end.)
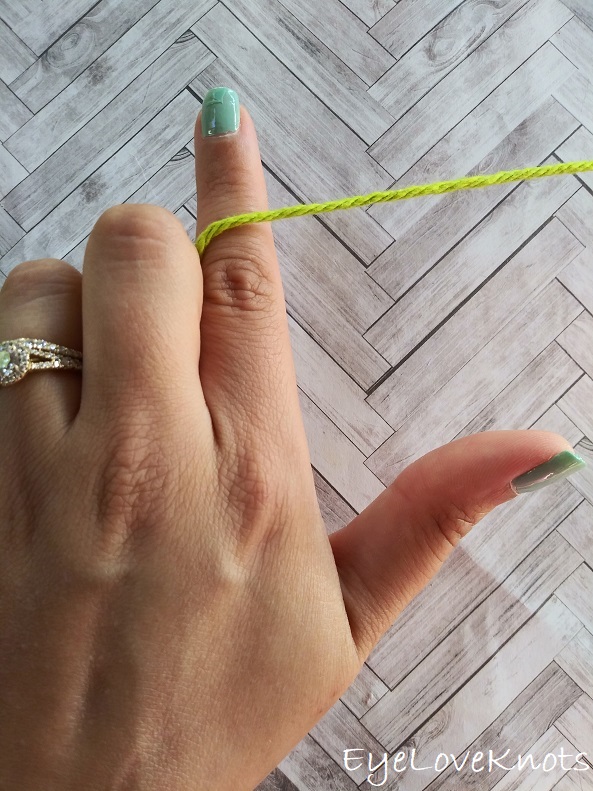
The working yarn will be over your middle finger, and your index finger will sit on top of it. Extend your index finger as if pointing.
Simultaneously rotate hand palm down, and swoop index finger under the yarn to pick up…
…Then rotate your hand back, keeping your index finger extended.
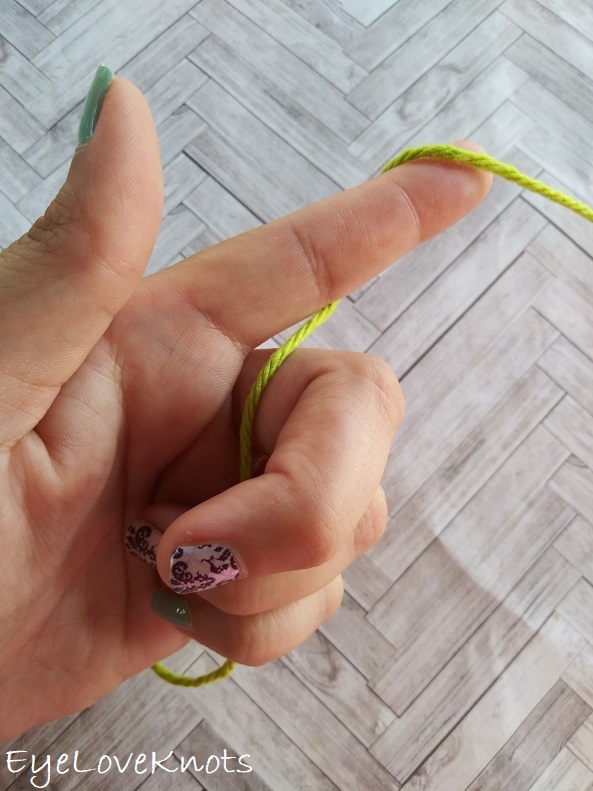
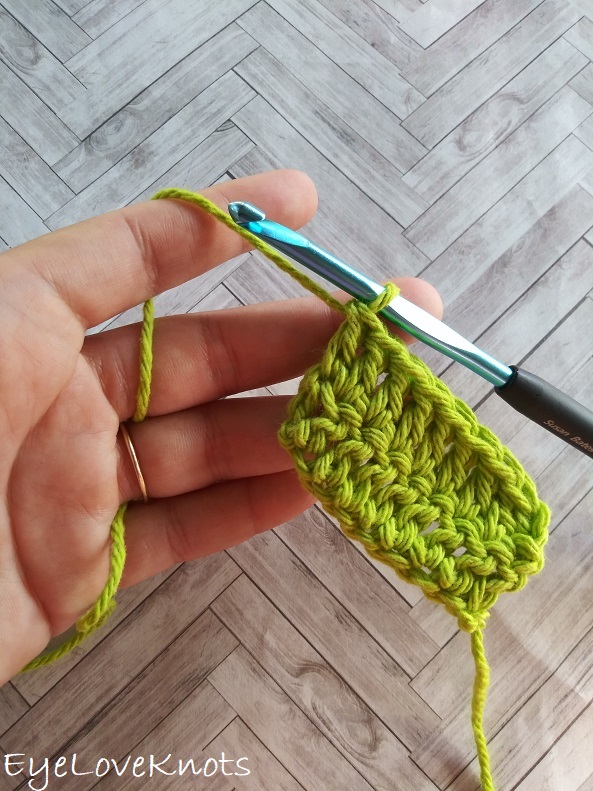
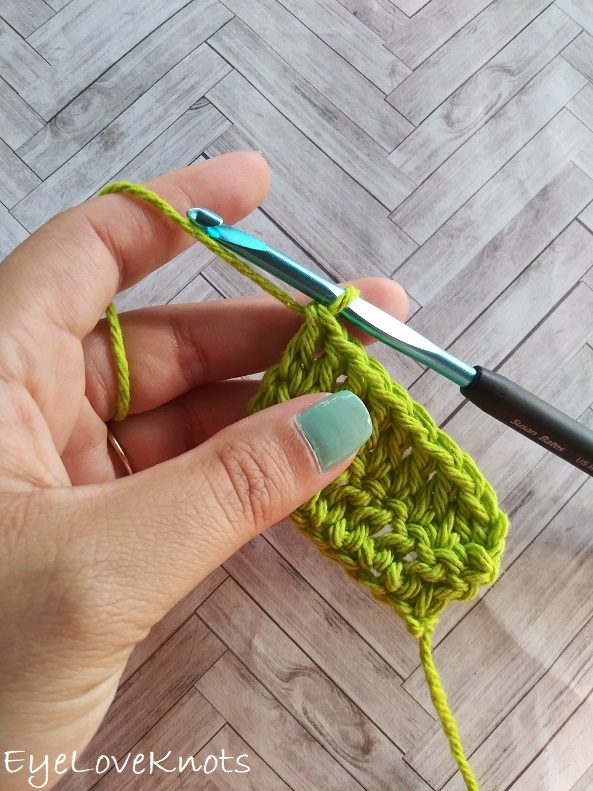
When you grab your work, it will look something like this. Your ring finger and pinky will always be closed around your working yarn, your index finger will always be slightly extended to keep the working yarn in position (and used to direct the yarn while working), and…
…your thumb and middle finger will be used to hold your piece as needed.
Second Way – Better for Sore, Achy Hands:
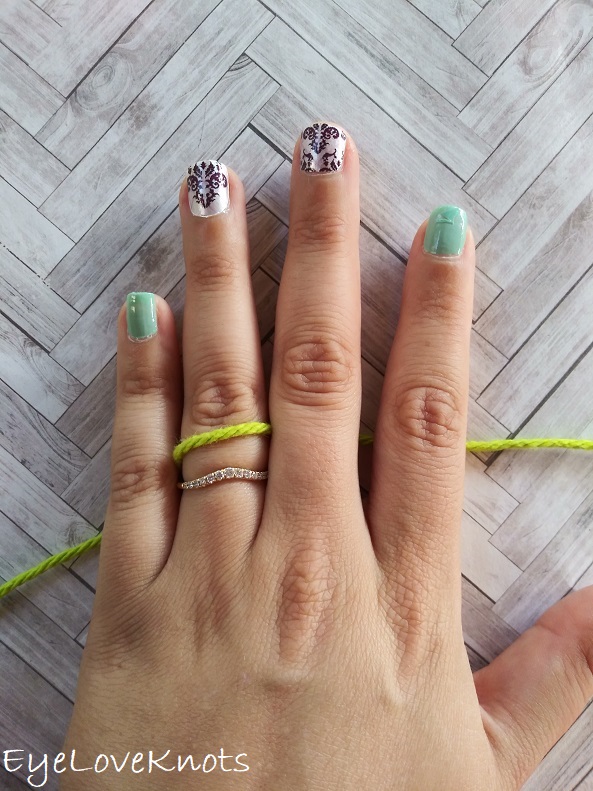
Your tail end is on the left side, wrap working yarn over ring finger only. If you’re wearing a ring, you may need to take it off, as it can get in the way.
This is what is looks like from underneath.
The working yarn will be over your middle finger, and your index finger will sit on top of it. Extend your index finger as if pointing.
Simultaneously rotate hand palm down, and swoop index finger under the yarn to pick up, then rotate your hand back, keeping all your fingers extended.
When you grab your work, it will look something like this. Your working yarn will always be wrapped around your ring finger, and sandwiched in between your middle finger and pinky, and pulled up over your index finger to keep in position (and used to direct the yarn while working), all your fingers will be slightly extended, and…
…all of your fingers (minus index) and thumb will be used to hold your piece.
What is Tension?
Tension is going to be how tight your stitches are, and this is controlled by the position in which you’re holding your working tail – held too tight/loose in your ring finger and pinky (first way), or too tight/loose in between your fingers (second way).
It is normal for beginners to have tight tension because we feel like our stitches are always too loose. Tight tension comes from holding your working tail too tight when you’re working a stitch and/or pulling stitches tighter after completing one. Loose tension comes from having slack in your working tail.
If you crochet too tight, your fabric will be very stiff, and stitches may be hard to work into, and if you crochet too loose, your stitches will be very airy, less defined and kind of messy looking.
How Can I Get my Tension Just Right?
Practice! Only by practicing will you find your happy place. Once you get more comfortable crocheting, your tension will even out. You may still be a tight or loose crocheter, but you will find a happy medium that your stitches look good, and you’re happy with your results.
When we cover gauge, we will talk about how to combat tight/loose crocheting when gauge (or size) matters. For many projects, gauge isn’t essential, meaning if you’re making a scarf that says it’s supposed to be 7″ wide, but your scarf comes out to be 6.5″ or 7.5″ wide, it really doesn’t matter. As a beginner, start with projects where the final measurements aren’t a big deal – allow for small victories.
Next topic, how to crochet a chain.
Join the EyeLoveKnots Crafting Community on Facebook to share your creations, and see what others are up to!
Linked Up To…
Unlimited Monthly Link Party 12 – Grammy’s Grid
Craft Schooling Sunday – Creative Jewish Mom
Happiness is Homemade Link Party #321 – Create with Cynthia
Handmade Monday #174 – Sum of their Stories
The Really Crafty Link Party #216 – Keeping it Real
Ginx Woolly Linx Party May – Ginx Craft
Little Cottage Link Party #50 – Love my Little Cottage
Craftastic Monday Link Party – Sew Can Do
All About Home #38 – Common Ground
{Wow Me} Wednesday #453 – Ginger Snap Crafts
Waste Not Wednesday 204 – Faeries and Fauna
Tuesday Turn About #47 – My Wee Abode
546th Inspire Me Tuesday – A Stroll Thru Life
Fabulous Party #318 – Lou Lou Girls
Linky Ladies Party #184 – The Purple Poncho
Your Whims Wednesday #458 – My Girlish Whims
The Wednesday Link Party #346 – The Stitchin’ Mommy
Thursday Favorite Things #438 – An Artful Mom
Creatively Crafty Link Party #222 – Life Beyond the Kitchen
To Grandma’s House We Go Link Party 191 – Chas’ Crazy Creations
Hookin’ on Hump Day #214 – Moogly
Scrappy Stitchers Link Party #63 – Stitches n Scraps
Traffic Jam Weekend Linky Party #232 – My Bijou Life
Creative Compulsions Linky Party #58 – My Bijou Life
Pin Party #367 – The Pin Junkie
May 2020 Best of the Month – Calypso in the Country
Snickerdoodle Create Bake Make Link Party 334 – EyeLoveKnots
Home Matters Linky Party #281 – Modern on Monticello
Handmade & Otherwise Weekly Link Up 48 – Petals, Pies and Otherwise
Create, Bake, Grow & Gather Link Party #418 – Shabby Art Boutique
Link Your Stuff – Annemarie’s Haakblog
I have literally no idea what I do. I will have to stop and look when I get some crochet time later this evening!
When I saw this post, I knew that I had to read it. Several years ago before my second son was old enough to be homeschooled I wanted to crochet. I tried and tried but could not figure out how to hold the string while crocheting. It seemed awkward. Fast forward, I gave up after a few years of trying to crochet and started knitting with a friend. I wanted to read this because it was the whole reason that I quit crocheting. I want to go back and try again soon. Thanks!
If you still knit, you may be able to hold your yarn very similarly. When I took knitting classes, the first thing the instructor did was see how I held my yarn for crocheting, and that is exactly how I hold it to knit now too.
Great tutorial!
Thank you for sharing with Creative Compulsions!
Michelle
https://mybijoulifeonline.com
Thanks! Trying to make it easy for everyone to learn.
Thank you for the tips. Nice nails too.
Haha – thanks! I am loving my Color Street nail strips!