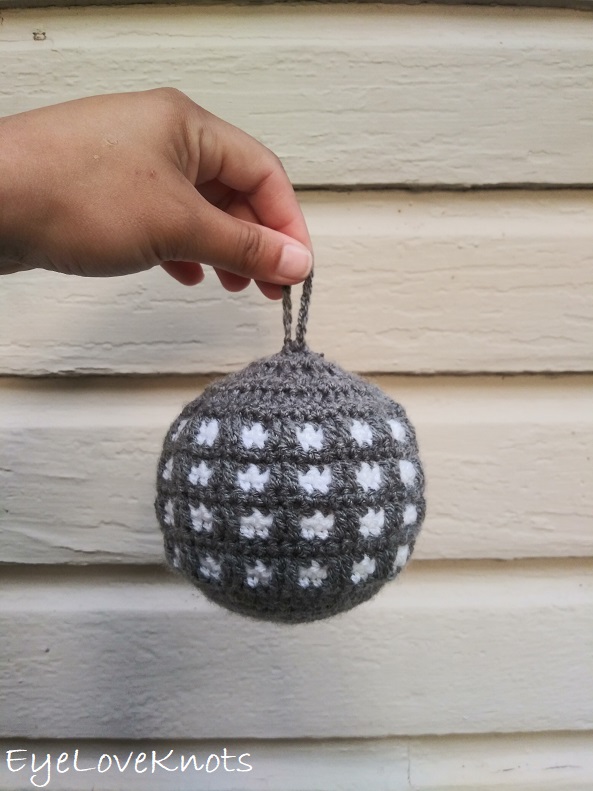
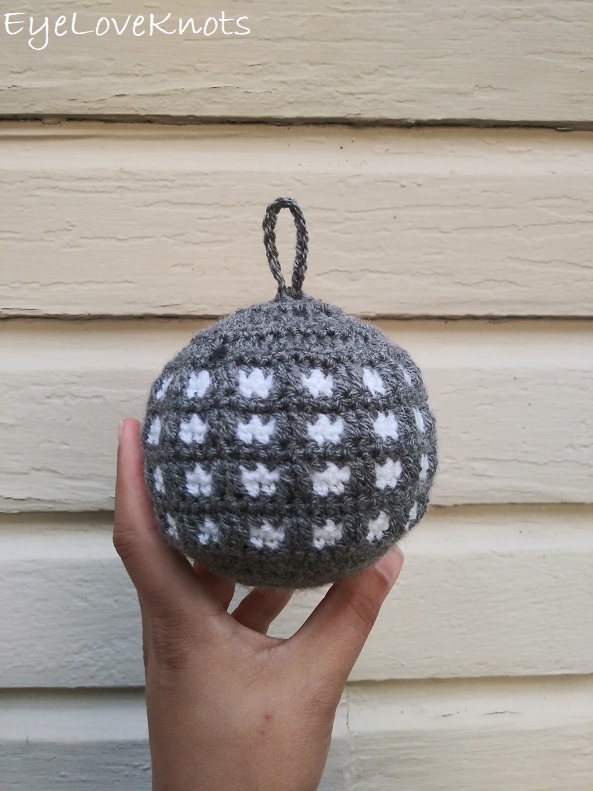
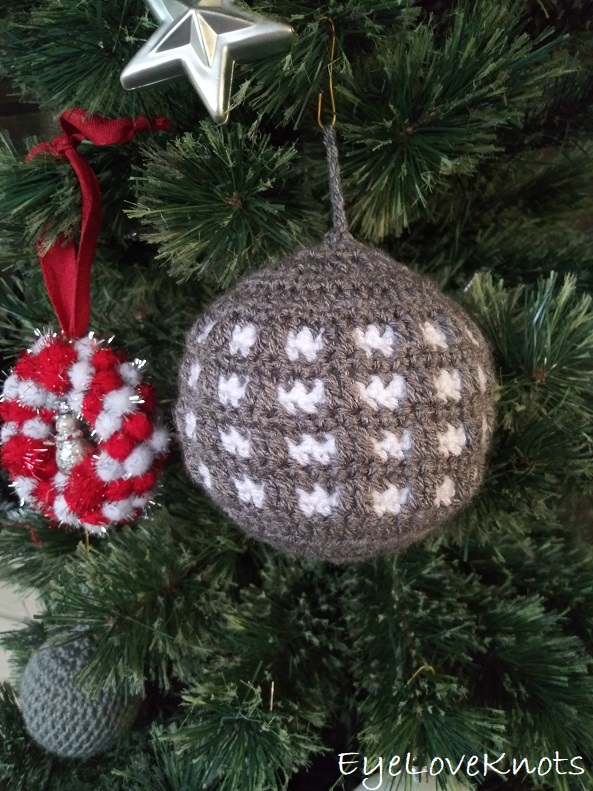
This is a free crochet pattern for how to crochet through the window bauble ornaments – a fun crochet pattern that uses the mosaic crochet technique. Don’t let it scare you! It’s comprised of simple single crochet stitches, chains and easy double crochets.
This post contains affiliate links for LoveCrafts. If you make a purchase by clicking on them, I make a small commission at no extra cost to you. Thanks for your support!
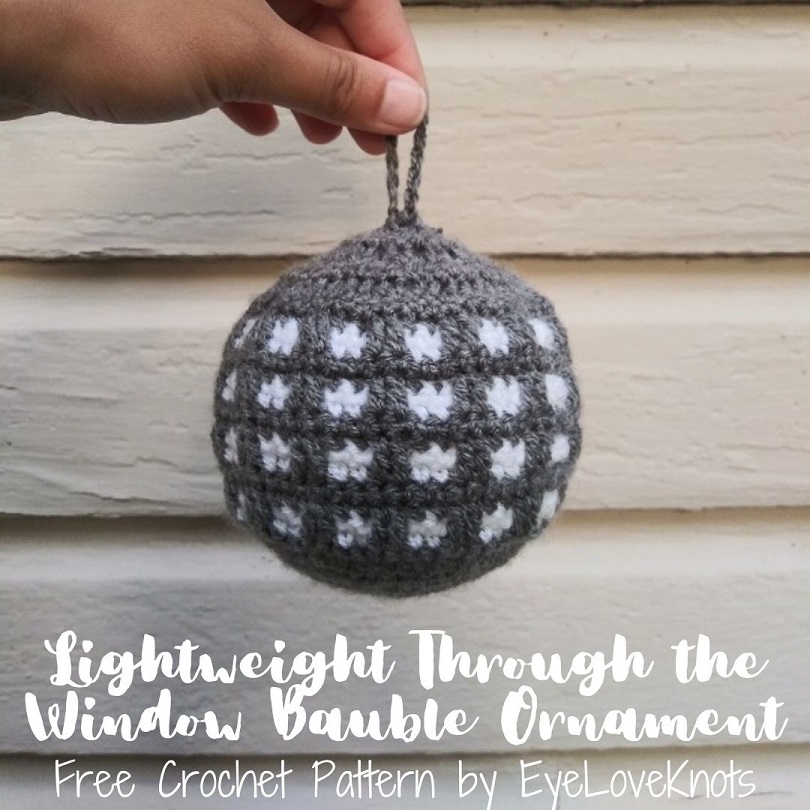
When I started experimenting with this fun mosaic stitch earlier this year, I knew I wanted to work up some ornaments this holiday season using it. Make sure to check out other designs in my Through the Window series.
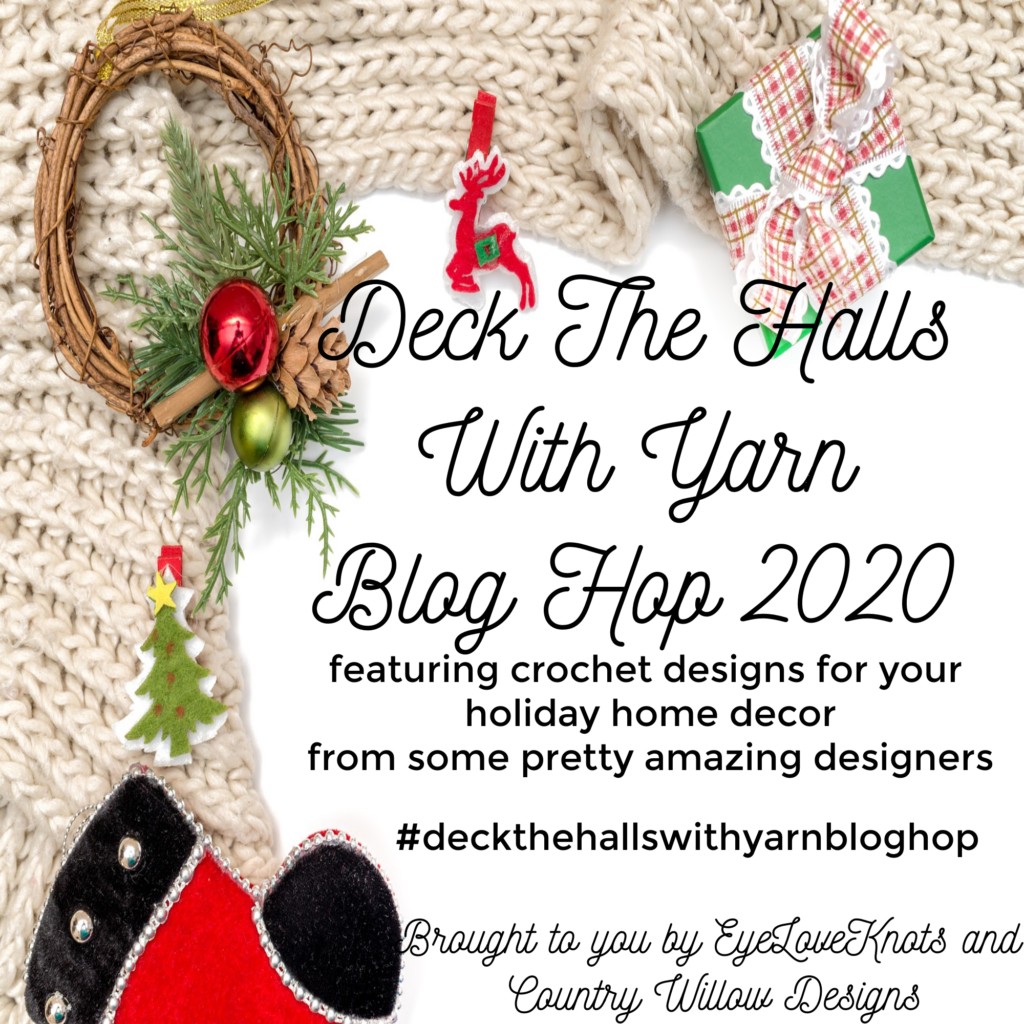
This ornament is part of this year’s Deck the Halls with Yarn Blog Hop, hosted by myself and Country Willow Designs.
Ad-Free, Printer-Friendly PDF:
If you would like a PDF version of this post, you may get one through either my EyeLoveKnots Etsy Shop, Ravelry or LoveCrochet Shop for a small fee. This fee is to compensate for the views lost when you no longer need to return to the blog to for the information, as you will have your own copy. Plus! It helps fund supplies for new projects to share with you!
Shop EyeLoveKnots Etsy: Lightweight Through the Window Bauble Ornament.
Shop EyeLoveKnots LoveCrafts: Lightweight Through the Window Bauble Ornament.
Share your version of this project on Ravelry – Lightweight Through the Window Bauble Ornament.
Save this to your Favorites – AllFreeCrochet, Crochet Pattern Bonanza, AllFreeHolidayCrafts, FaveCrafts, AllFreeChristmasCrafts.
Materials:
- Small Amount of Lightweight (#3) Yarn – I used Stylecraft Special DK in Grey and White
- G6/4mm Crochet Hook
- Tapestry Needle
- Styrofoam Balls – 2.4″ for Small, 2.8″ for Medium and 3.8″ for Large (Got mine from Hobby Lobby)
Materials Notes:
You can absolutely use bauble ornaments in place of the styrofoam balls – that’s how I did my original set of ornaments. 2.4″, 2.8″ and 3.8″ are diameter sizes.
Time Spent:
The large sized one took me just almost 1.25 hours to complete.
Gauge:
In Pattern Starting with 12 Stitches: 36 HDC in the Round = 2.5″ in diameter; 60 HDC in the Round = 3.88″ (that’s 3 7/8″) in diameter
Abbreviations (US):
- HDC – Half Double Crochet
- SC – Single Crochet
- DC – Double Crochet
- HDC2tog – Half Double Crochet Decrease Over 2 Stitches
Pattern Notes:
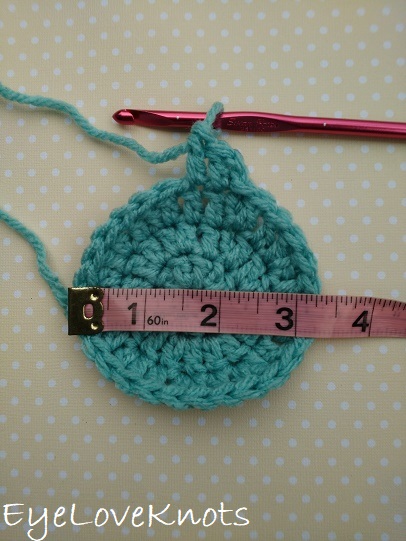
This is how we measure the crown diameter.
I work the increases differently than most to help keep my seam straight. Typically you would work an increase repeat as two stitches in the first, one stitch in the next, or one stitch in the first, two stitches in the next, but I split that first increase by working the first stitch of it into the first stitch, which positions it just to the left of the beginning chain, and then the last stitch of the increase into the same stitch as the first but it positions it just to the right of the beginning chain. By this increase hugging the beginning chain, it will remain straight. Feel free to replace my method with you preferred method of increasing.
Beginning chain does not count as a stitch in any round.
In the pattern, I will instruct for example, in Round 9 of the Large size “DC into R7”. In the photo above, you can see how there is a skipped stitch in white, and two rows of chains above it. You will push those chains to the back, and work the double crochet just into that skipped stitch in white.
Stitch multiple is 4.
To change yarn colors, after joining, turn to the new working side. Pull the new color through, then pull the original color tight (it will disappear). Work the round as written, but before joining, move the previous color to the inside so it won’t be visible from the right side of the ornament. Your previous color will be carried up the center seam on the inside of the ornament.
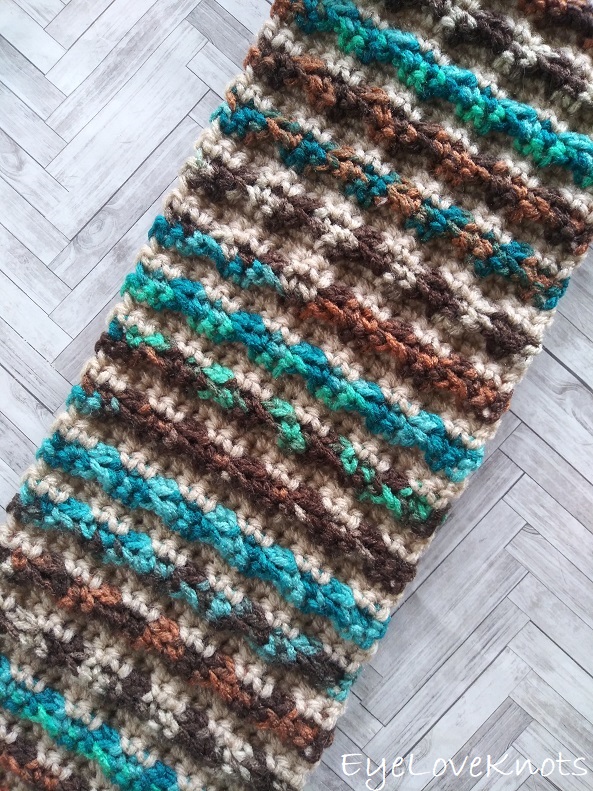
This is what the back of this stitch pattern looks like (shown on my Through the Window Scarf). There aren’t any floats throughout the pattern other than the yarn that will be carried up the join.
For a photo tutorial of the Finishing/Closing, please visit my Celtic Weave Bauble Ornament, Free Crochet Pattern, and scroll to the bottom.
Crown of Bauble (Increasing Rounds):
In Grey, chain 5. Slip stitch to join a ring. Chain 1. Work 12 HDC into the ring. Join. [8 (9, 12) HDC]
R2: Chain 1, and turn. Work 1 HDC into the first stitch, 2 HDC in each of the next (7, 8, 11) HDCs, and 1 HDC into the same as the first. Join. [16 (18, 24) HDC]
R3: Chain 1, and turn. Work 1 HDC into the first 2 stitches, (2 HDC into the next stitch, 1 HDC into the next stitch) (7x, 8x, 11x), 1 HDC into the same as the first. Join. [24 (27, 36) HDC]
R4: Chain 1, and turn. Work 1 HDC into the first 3 stitches, (2 HDC into the next stitch, 1 HDC into each of the next 2 stitches) (7x, 8x, 11x), 1 HDC into the same as the first. Join. [32 (36, 48) HDC]
Stop here for small and medium sizes.
R5 (Large Only): Chain 1, and turn. Work 1 HDC into the first 3 stitches, (2 HDC into the next stitch, 1 HDC into each of the next 3 stitches) 11x, 1 HDC into the same as the first. Join. (60 HDC)
Now is the best time to weave in the initial tail end.
Body of Bauble:
Small, Medium: Switch to White, and proceed to next round…
Large, R6: Chain 1, and turn. SC into the 1st stitch, and each around. Join, and switch to White. (60 SC)
R5 (5, 7): In White, chain 1, and turn. SC into the 1st stitch, chain 2, skip the next 2 stitches, (SC into each of the next 2 stitches, chain 2, skip the next 2 stitches) 7x (8x, 14x), SC into the next stitch. Join. [16 (18, 30) SC]
R6 (6, 8): Chain 1, turn. SC into the 1st stitch, chain 2, (SC into each of the next 2 SC, chain 2) 7x (8x, 14x), SC into the next SC. Join, and switch to Grey. [16 (18, 30) SC]
R7 (7, 9): In Grey, chain 1, and turn. SC into the 1st SC, DC into each of the 2 open stitches from R7, (SC into each of the next 2 SC, DC into each of the next 2 stitches of R7) 7x (8x, 14x), SC into the next SC. Join. [32 (36, 60) stitches]
R8 (8, 10): Chain 1, and turn. SC into the 1st stitch, and each stitch around. Join. [32 (36, 60) SC]
R9 – 12 (9 – 16, 11 – 22): Repeat Rows the last 4 rounds, fasten off White.
Decreasing:
Flip piece inside out, place ball and pull piece around slightly stretching.
Small, R13: Chain 1, and turn. (HDC2tog, HDC into each of the next 2 HDC) 8x, Join. (24 HDC)
Small, R14: Chain 1, and turn. (HDC2tog, HDC into each of the next HDC) 8x, Join. (12 HDC)
Small, R15: Chain 1, and turn. (HDC2tog) 8x. Join. (8 HDC)
Small, R16: Chain 1, and turn. (HDC2tog) 4x. Join.(4 HDC)
Fasten off with long tail.
Medium, R17: Chain 1, and turn. (HDC2tog, HDC into each of the next 2 HDC) 9x, Join. (27 HDC)
Medium, R18: Chain 1, and turn. (HDC2tog, HDC into each of the next HDC) 9x, Join. (18 HDC)
Medium, R19: Chain 1, and turn. (HDC2tog) 9x. Join. (9 HDC)
Medium, R20: (HDC2tog) 4x, HDC last. Join. (5 HDC)
Fasten off with long tail.
Large, R23: Chain 1, and turn. (HDC2tog, HDC into each of the next 3 HDC) 12x, Join. (48 HDC)
Large, R24: Chain 1, and turn. (HDC2tog, HDC into each of the next 2 HDC) 12x, Join. (36 HDC)
Large, R25: Chain 1, and turn. (HDC2tog, HDC into each of the next HDC) 12x, Join. (24 HDC)
Large, R26: Chain 1, and turn. (HDC2tog) 12x. Join. (12 HDC)
Large, R27: (HDC2tog) 6x. Join. (6 HDC)
Fasten off with long tail.
Finishing:
Pull up on final loop so yarn comes out. Thread tail end into needle.
Begin weaving in and out of every other stitch around top. Once back to the beginning, tug on yarn to close top hole and then weave into the stitches to secure.
Keep tension on yarn end with left hand, and insert crochet hook underneath the center stitches with the other. Pull up a loop. Chain 10 for Small, and 15 for Medium and Large – if you want a loop large enough to hang straight from tree, add 10 more chains. Fold chain in half with wrong sides facing each other, slip stitch to the same stitch the chain is coming from, and weave in remaining yarn to secure the loop in place.
If you are using a bauble ornament as the base, follow the same first step, however, after weaving in and out around the top, tug on the yarn to close up around the ornament hanger, and secure here. Skip the next step to make the hanger as you already have one.
Please feel free to make and sell your own Lightweight Through the Window Bauble Ornaments using this pattern, but please DO NOT claim this pattern as your own nor should you sell my pattern, and DO NOT re-publish my photos as your own. DO NOT copy and paste my pattern anywhere, link to it instead.
DIY Lovers: Join the EyeLoveKnots Crochet & DIY Community on Facebook to share your creations, and see what others are up to!
Home Decor Lovers: Join the DIY Home On Rockwood Lane Facebook group to share, and see what others are up to!
Linked Up To…
Craftastic Monday Link Party – Sew Can Do
Little Cottage Link Party #79 – Love my Little Cottage
Ginx Woolly Linx Party December – Ginx Craft
Linky Ladies Party #199 – The Purple Poncho
All About Home #68 – Common Ground Blog
One More Row Free Pattern Link Party #25 – Loops and Love Crochet
{Wow Me} Wednesday #482 – Ginger Snap Crafts
The Wednesday Link Party #376 – The Stitchin’ Mommy
Waste Not Wednesday – Pretty DIY Home
The Loop Scoop #3 – Moogly Blog
Hearth and Soul Link Party – April, The 21st Century Housewife
Handmade Monday #204 – Sum of their Stories
The Really Crafty Link Party #243 – Keeping it Real
569th Inspire Me Tuesday – A Stroll Thru Life
Fabulous Party #348 – Lou Lou Girls
Party In Your PJ’s #337 – The Apple Street Cottage
Your Whims Wednesday #487 – My Girlish Whims
Charming Homes and Gardens – White Arrows Home
Creative Crafts Linky Party #18 – Creatively Beth
Tuesday Turn About #77 – My Wee Abode
Creatively Crafty Link Party #252 – Life Beyond the Kitchen
Pin Party #396 – The Pin Junkie
Home Matters Linky Party #310 – Modern on Monticello
Create Bake Grow & Gather Party #448 – Shabby Art Boutique
Thursday Favorite Things #467 – An Artful Mom
Artsy-Fartsy Party #321 – Artsy-Fartsy Mama
Encouraging Hearts and Home Blog Hop – Apron Strings and Other Things
Creative Compulsions Linky Party #87 – My Bijou Life
Traffic Jam Weekend Linky Party #260 – My Bijou Life
Friday Favorites Linky Party 558 – Simply Sweet Home
Farmhouse Friday Link Party #183 – County Road 407
Embracing Home and Family Link Party #18 – The Everyday Farmhouse
Link Your Stuff – Annemarie’s Haakblog
Snickerdoodle Create Bake Make Link Party 364 – EyeLoveKnots
Unlimited Monthly Link Party 19 – Grammy’s Grid
A Morning Cup of Joe Linky Party – The Cottage Market
That is absolutely darling! You did such a great job!
Thank you so much, Laura!
Love it, Andrea! I’ve been enjoying your crochet holiday projects. Showing this one to my daughter.
Hehe. Sounds like you have made quite the wish list for your daughter, huh? I love that <3
The pattern on these baubles is just gorgeous, I love how detailed it is. Pinning.
Thank you, Leanna! Glad you like them. I am having so much fun with this stitch pattern.
That’s so beautiful!
xoxo
Lovely
http://www.mynameislovely.com
Thank you, Lovely!
This bauble is really pretty am going to do some for my Christmas tree for sure
So glad you like it! I hope you’ll share if you do – I’d love to see!
So pretty, I’ve loved your through the window series. This lovely bauble will be featured at Handmade Monday this coming week.
Thank you so much, Julie! I appreciate your support. I’ve been having so much fun with this stitch pattern. So many ideas, and so little time.
Hi Alexandra, Thank you for visiting and linking up at our weekly link party 🙂 Your Crochet Christmas Bauble Ornament is being featured tomorrow at Wednesday Link Party 377. Here’s the direct link in case you’d like to share your feature: https://oombawkadesigncrochet.com/2020/12/mosaic-crochet-christmas-bear-ornament.html
Wishing the best, Rhondda
Ha! Just when I think you’ve applied the window pattern to everything, you find a new way to use it. I love it!
Michelle
https://mybijoulifeonline.com
Hehe! I have a running list of ideas. I am having so much fun with it.