This is a free crochet pattern and video tutorial showing how to crochet the Through the Window Scarf – a fun scarf pattern that uses the mosaic crochet technique. Don’t let it scare you! It’s comprised of simple single crochet stitches, chains and easy double crochets. Four sizes included.
This post contains affiliate links for Etsy, WeCrochet, LoveCrafts and Lion Brand. If you make a purchase by clicking on them, I make a small commission at no extra cost to you. Thanks for your support!
Find the free crochet pattern instructions below, or purchase a printer-friendly, ad-free PDF on Ravelry by clicking here.
In a hurry? Pin this for later when you have more time.
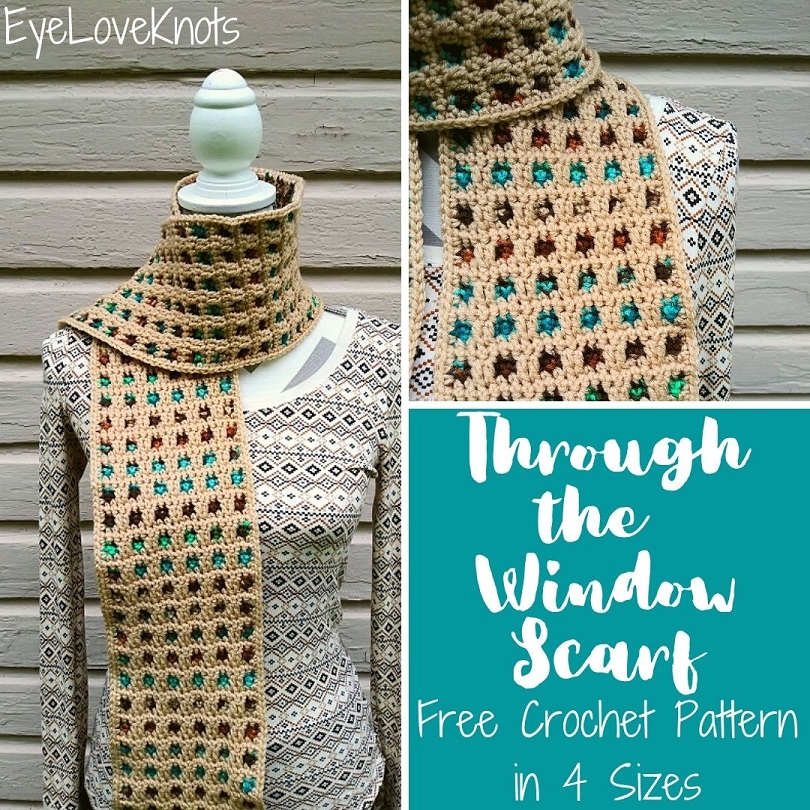
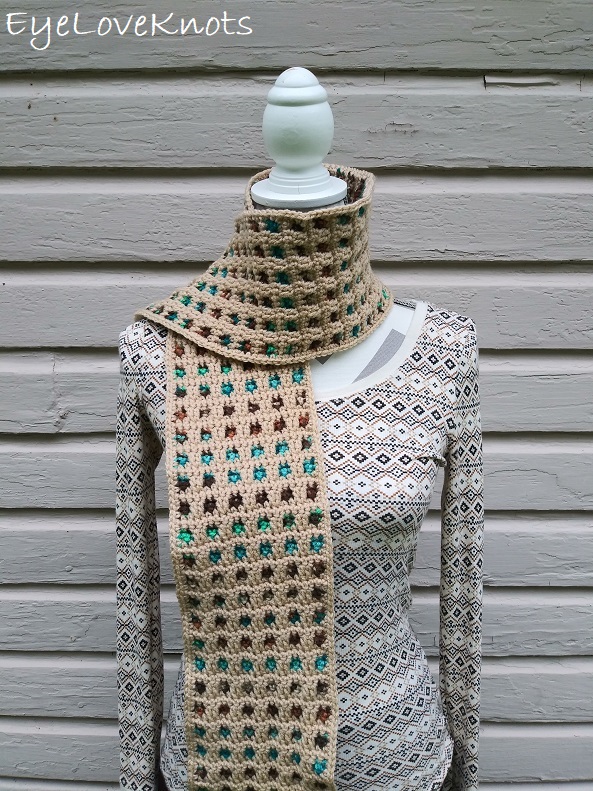
Ever since working up my Through the Window Soap Cozy, I have been in love with the idea of using a variegated color underneath, and a solid coordinating color on top for this mosaic crochet stitch pattern.
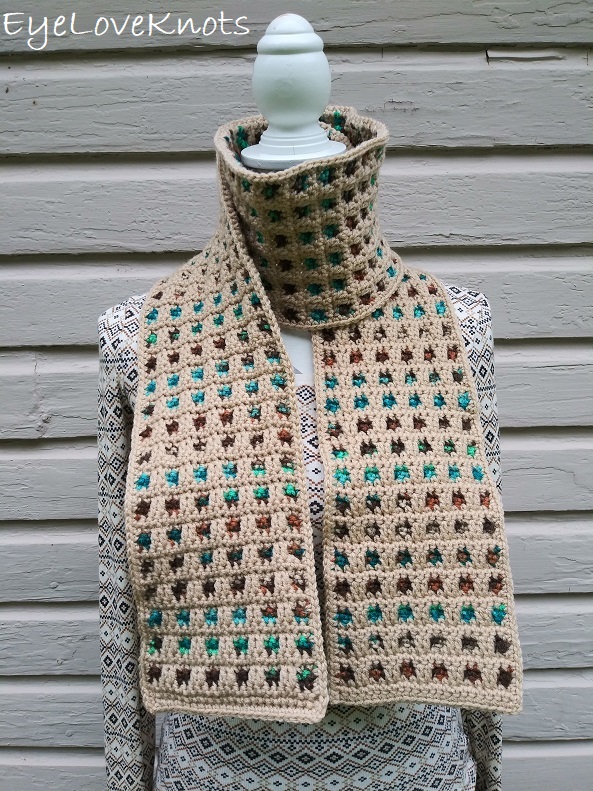
I set out to my local JoAnn’s with this idea, and while stock was low, I was able to find these Reef and Buff colorways for this scarf, which I think works out really well for Fall.
The idea of mosaic crochet may intimidate you, but please don’t let it. This scarf is comprised of single crochets and chains with some double crochets to create the overlap. I think a confident beginner could do this. Make sure to check the pattern notes for a photo that breaks the pattern down just a bit, and should ease your fear, and there is a video tutorial too!
I’ve used Red Heart Super Saver for my scarf, but you can use any worsted weight yarn from your stash – pick your favorite! If the finished size is essential to you, then check your gauge, but if not, then just start crocheting. There are 4 sizes included so you can make matching scarves for everybody in the family!
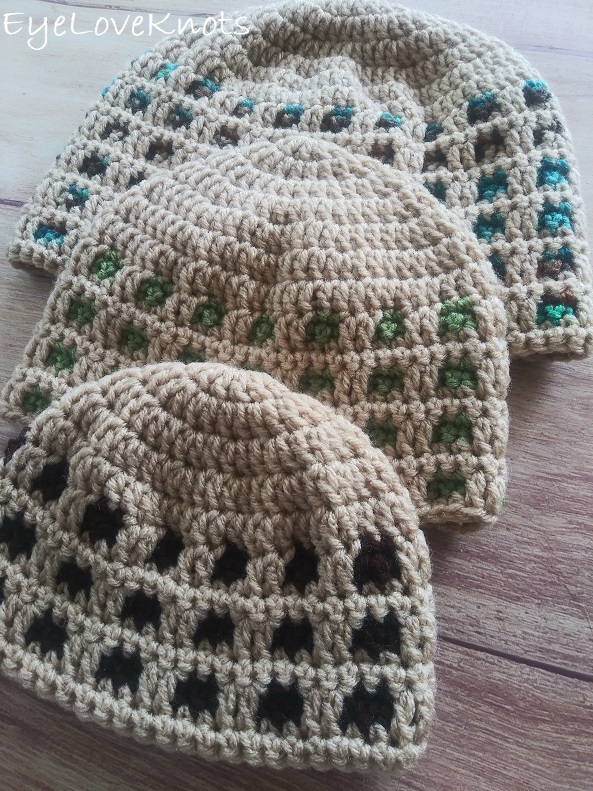
Make a matching Through the Window Beanie to complete your set!
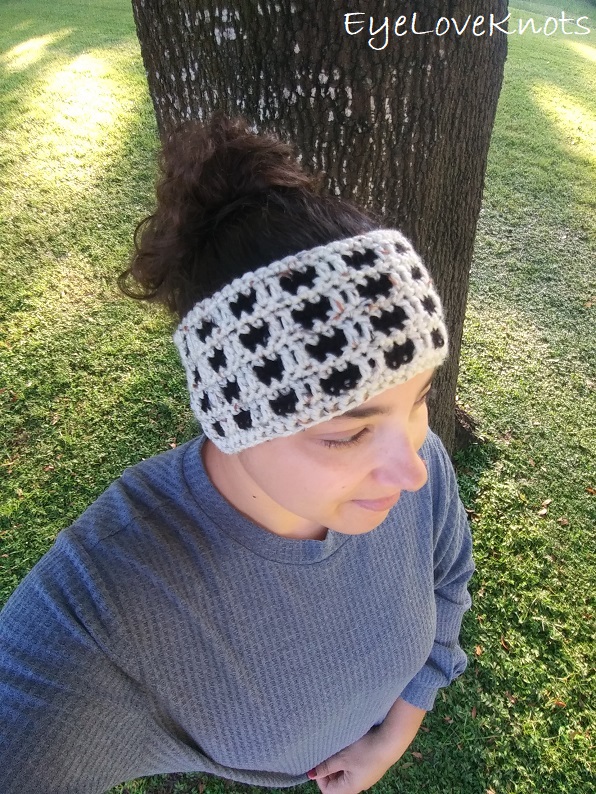
Or perhaps you prefer a matching Through the Window Earwarmer instead?
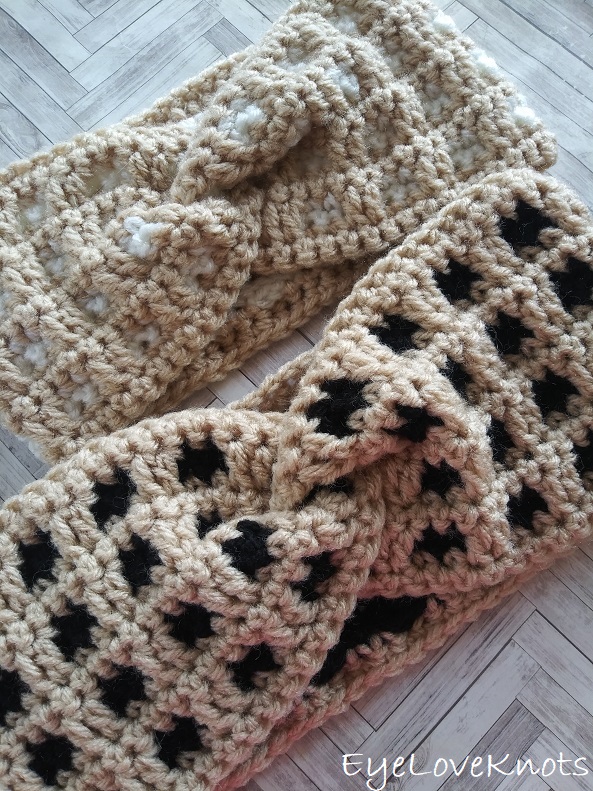
I also have a free crochet pattern for a matching Twisted Through the Window Earwarmer, which is my favorite!

Ad-Free Printer Friendly PDF:

If you would like a PDF version of this post, you may get one through either my Etsy Shop, Ravelry Shop or LoveCrafts Shop for a small fee. This fee is to compensate for the views lost when you no longer need to return to the blog to for the information, as you will have your own copy. In a hurry? Pin this for later when you have more time!


Save this to your Favorites On (sub 6/27/23) – AllFreeCrochet, FaveCrafts, Crochet Pattern Bonanza, Cheap Thrifty Living, DIYideaCenter, AllFreeHolidayCrafts, Free Crochet Tutorials, Free Crochet Family, Indie Designers Free Crochet Patterns Directory
What Supplies Do I Need to Crochet a Scarf?
- 144 (253, 381, 560) Yards of Worsted Weight Yarn (I used Red Heart Super Saver in Buff and Reef; Respectively, that’s 99 yards + 45 yards (167 + 86, 242 + 139, 341 + 219).
- H8/5mm Crochet Hook – I love this Koi Fish Ergonomic Clay one from SiennasBowtique on Etsy
- Tapestry Needle
- Soft Tape Measure if gauge is essential
Yarn Alternatives:
Similar Yarns: Bernat’s Super Value, Premier Yarns Everyday Soft, Lion Brand’s Heartland, WeCrochet Brava
Cozier Yarns (Wool Blends): Lion Brand Wool Ease, Berroco Vintage, Emma’s Washable Worsted, WeCrochet Swish
If the finished size isn’t essential to you, you can even switch out the worsted weight yarn for bulky/chunky weight to make an even cozier scarf.
If you have concerns about using Red Heart Super Saver and similar because of the roughness and stiffness of the fabric, I have a couple tips!
- If the yarn is too rough for your hands to crochet with, remove the skein wrapper, place the skein into a mesh lingerie bag (I bought mine at JoAnn’s), then machine wash it by itself on the gentle cycle in cold water with a mild detergent. Once it’s finished, toss it into the dryer on low heat – you may need to run it through 2 – 3 times to get the center dry.
- To add softness and better drape to the finished piece, crochet in it’s entirety and weave in the ends, then wash and dry in the same manner (without the lingerie bag) or simply dry once with a dryer sheet.
Time Spent:
For the adult small size, I had my scarf ready in 6.25 hours.
Measurements:
- Toddler: 4″ Wide by 30″ in Length
- Child: 4.88″ Wide by 45.38″ in Length
- Adult Small: 5.75″ Wide by 60.38″ in Length
- Adult Large: 7.5″ Wide by 71″ in Length
The child and adult small widths are a little smaller than average (being 5.5″ and 6″, respectively), but with the stitch pattern, this is how I worked it out. If you prefer something wider, for the child: work up the foundation chain for the adult small, and for the adult small: work a chain 27, then proceed in pattern with one more repeat. Follow the same row numbers.
Gauge (Not Essential):
In Pattern Measured Across a Row 4 of Repeat, 16 SC by 16 Rows = 4.13″ or 4 1/8″ Wide x 4″ Tall
The easiest thing to do to check gauge is going to be to start working up your size. After about 6 or 8 rows, measure the width, and it will be about 0.5” smaller than the finished size. If you want it to be larger, go up a hook size, and if you want it to be smaller, then go down a hook size.
Abbreviations (US Terms):
- SC – Single Crochet (Photo Tutorial)
- DC – Double Crochet (Photo Tutorial) – in this inset pattern it’s worked in front of the chains
- MC – Main Color
- CC – Coordinating Color
Pattern Notes:
If you wanted to alter the width of the afghan, the chain multiple is 4 + 3. That means the final stitch count must be a multiple of 4, then add 3, and work in pattern.
If you want to alter the height of the afghan, add or subtract rows by 4 – this is the repeat.
If you make adjustments, for the border: How many stitches is even stitching across and/or up/down the sides? Not counting the corners in these counts… Top/Bottom = total number of stitches across – 2. Sides = total number of rows – 1.
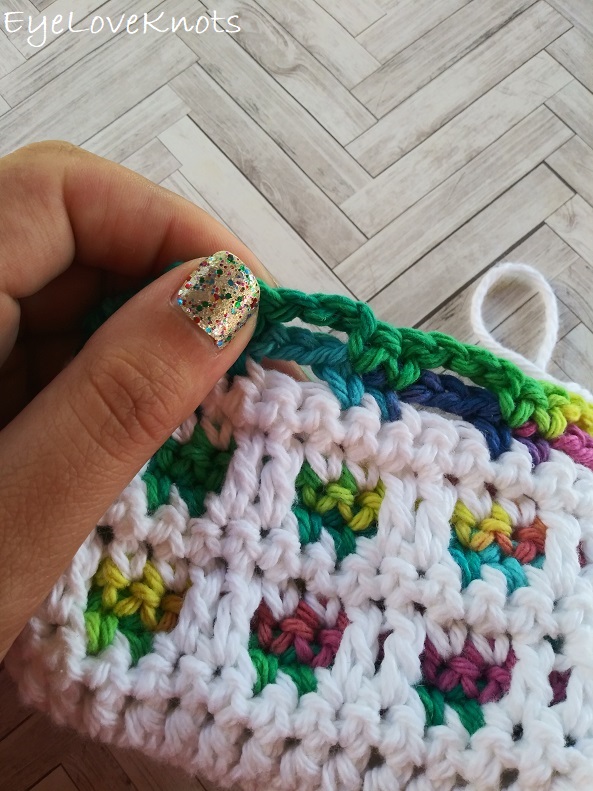
In the pattern, I will instruct for example, in Round 5 “DC into R3”. In the photo above, you can see how there is a skipped stitch in white, and two rows of chains above it. You will push those chains to the back, and work the double crochet just into that skipped stitch in white. The sample shown is my Through the Window Soap Cozy.
In the photo above, you can see the floats along the right side – this is how it looks when carrying yarn up the side, and the border will cover the floats up.
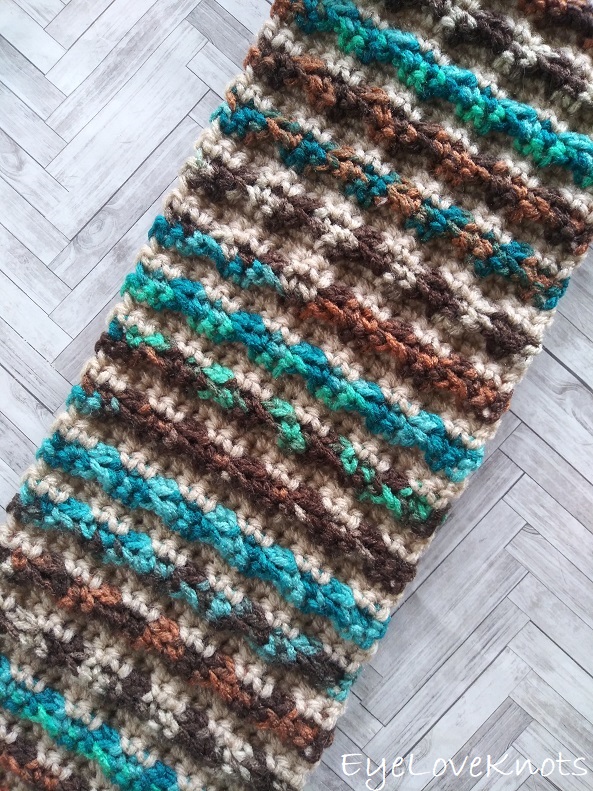
I really love to use this stitch pattern with a variegated yarn as my coordinating color – it is my favorite way to use variegated yarns! It also looks very nice in two solid colors, or in one solid color with the added texture.
The MC, or Main Color, is going to be the color you start your scarf with, and the color that shows on top as it’s also the same one the double crochets are worked in. The CC, or Coordinating Color, is going to be the color that you add in at the second row, and shows underneath to create the colored squares.
To change yarn colors, do so in the last yarn over of the previous row. If needed, see my How to Change Yarn Colors in Crochet tutorial. Drop old color to the back, and carry up on the side. When you add your border, it will cover up the carried yarn.
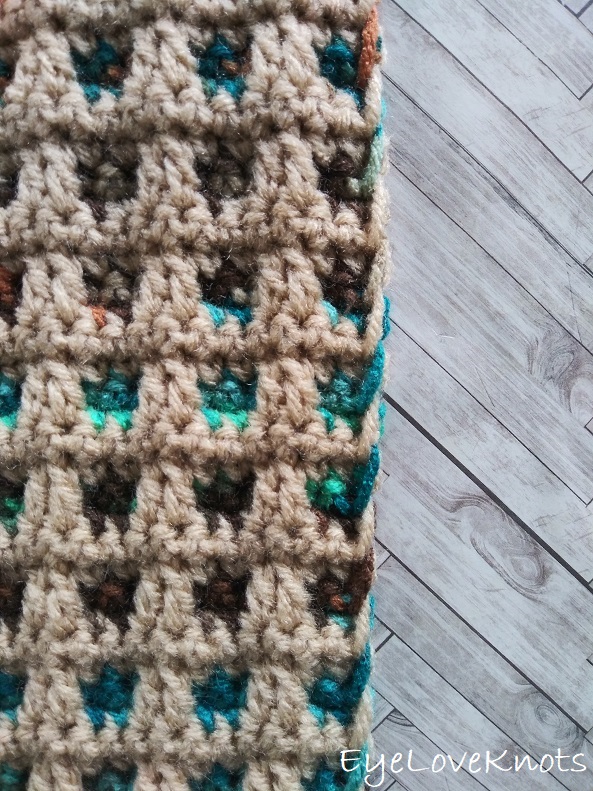
This is what the back looks like before adding the border.
If your border begins to ruffle, it is caused from a change in tension. My quick fix is to simply go down a hook size for the border. You can also continue with the same hook you’ve been working with, and just block the finished scarf.
Through the Window Scarf Video Tutorial:
Through the Window Scarf Written Pattern:
In MC, chain 15 (19, 23, 31). SC into the 2nd chain from the hook, and each across. [14 (18, 22, 30) SC]
R2: Chain 1, turn. SC into the 1st SC, and each SC across. Switch to CC.
R3: In CC, chain 1, turn. SC into the 1st 2 SC, (chain 2, skip the next 2 SC, SC into each of the next 2 SC) 3x (4x, 5x, 7x).
R4: Chain 1, turn. SC into the 1st 2 SC, (chain 2, SC into each of the next 2 SC) 3x, (4x, 5x, 7x). Switch to MC.
R5: In MC, chain 1, turn. SC into the 1st 2 SC, DC into each of the 2 open stitches from R3, (SC into each of the next 2 SC, DC into each of the next 2 stitches of R3) 3x, (4x, 5x, 7x).
R6: Chain 1, turn. SC into the 1st SC, and each SC across. Switch to CC.
R7 – 142 (214, 282, 334): Repeat Rows 3 – 6, fastening off CC in the last set of repeats.
Border: Chain 1, turn. SC into each stitch across, 3 SC into the next stitch to form a corner (or a SC, chain 2, SC for a more square corner), evenly SC (that’s 1 stitch per row) down the side of the scarf, 3 SC into the next stitch to form a corner (or a SC, chain 2, SC for a more square corner), SC across the opposite side of the foundation chain, 3 SC into the next stitch to form a corner (or a SC, chain 2, SC for a more square corner), evenly SC (that’s 1 stitch per row) up the side of the scarf, SC into the same stitch as the 1st, then slip stitch join to the 1st SC (which takes the place of the last SC).
Fasten off, and weave in ends.
Please feel free to make and sell your own items made using this pattern, but keep in mind, this written pattern and my photos are protected by copyright. Please DO NOT claim this pattern as your own nor should you sell my pattern. DO NOT re-publish my photos as your own. DO NOT copy and paste my pattern anywhere, link to it instead so other’s can visit. Making videos providing instructions how to make my projects on any social media platform is also not permitted.
Join one of our awesome Facebook groups to share your creations, and see what others are up to!
– Yarn Crafts & Coffee Community
– DIY Home On Rockwood Lane
– Alexandra Lane Lifestyle
Linked Up To…
Scrappy Stitchers Link Party #67 – Stitches n Scraps
Thursday Favorite Things #457 – An Artful Mom
Creatively Crafty Link Party #241 – Life Beyond the Kitchen
Artsy-Fartsy Party #310 – Artsy Fartsy Mama
Encouraging Hearts & Home Blog Hop – Apron Strings and Other Things
Creative Compulsions Linky Party #77 – My Bijou Life
Pin Party #386 – The Pin Junkie
Traffic /Jam Weekend Linky Party #250 – My Bijou Life
The Hearth and Soul Link Party – April, the 21st Century Housewife
Handmade Monday #193 – Sum of their Stories
Ginx Woolly Linx Party September – Ginx Craft
Craftastic Monday Link Party – Sew Can Do
Unlimited Monthly Link Party 16 – Grammy’s Grid
Craft Schooling Sunday – Creative Jewish Mom
The Really Crafty Link Party #232 – Keeping it Real
Fabulous Party #337 – Lou Lou Girls
Linky Ladies Party #193 – The Purple Poncho
Happiness is Homemade Link Party – Create with Cynthia
Party in Your PJs #326 – The Apple Street Cottage
{Wow Me} Wednesday #472 – Ginger Snap Crafts
Hookin’ on Hump Day #223 – Moogly Blog
The Wednesday Link Party 365 – The Stitchin’ Mommy
Waste Not Wednesday 223 – Pretty DIY Home
Friday Favorites – Busy Being Jennifer
Create, Bake, Grow & Gather Party #437 – Shabby Art Boutique
Link Your Stuff – Annemarie’s Haakblog
Scraptastic Saturdays Party 306 – Scrapality
Embracing Home and Family Link Party #8 – The Everyday Farmhouse
A Morning Cup of Joe Linky Party – The Cottage Market
One More Row Free Pattern Link Party #22 – Loops and Love Crochet
Snickerdoodle Create Bake Make Link Party 353 – EyeLoveKnots
Love this! Pinning!
Michelle
https://mybijoulifeonline.com
What a beautiful scarf! Thank you so much for sharing with us at Encouraging Hearts and Home. Pinned.
Thank YOU, JoAnne! I appreciate the pin.
Thank you for sharing your pattern for this beautiful scarf. I love it!
So very welcome 🙂
I adore this pattern! I need to give this a try ASAP. And I will feature this beautiful scarf in this week’s Creative Compulsions.
Michelle
https://mybijoulifeonline.com
It is a fun one! I am working on an oversized chunky version now. So many possibilities.
You are so talented! This is beautiful! Thank you for sharing at Embracing HOme and Family!
That is so kind – thank you, Jennifer!
Gorgeous and love the back side as well! thanks so much for sharing on craft schooling Sunday, I think a scarf like this is in my future!
So glad you like it! I’m working on an oversized, chunky version at the moment.
And when you get bored of the front, you could definitely flip it over to the back for a different look.
Very pretty! Can you confirm in row 5 (Buff) when you say you crochet into Row 3 (Reef), are you actually going into Row 2, also Buff, or rather doing a DC around the chains from Row 3 and 4? I’ve done both in my swatch and they look similar, but one will basically have a gap below my long stitches if I crochet around row 3, and to me it looks like you crocheted into the Buff yarn from row 2 instead, leaving no hole. Thanks!
I suppose working into Row 2 is a good explanation. It’s actually into each of the skipped stitches from Row 3. You push the chains to the back, and work just into the skipped stitches so the double crochets end up laying on top of the chains. No hole is correct.