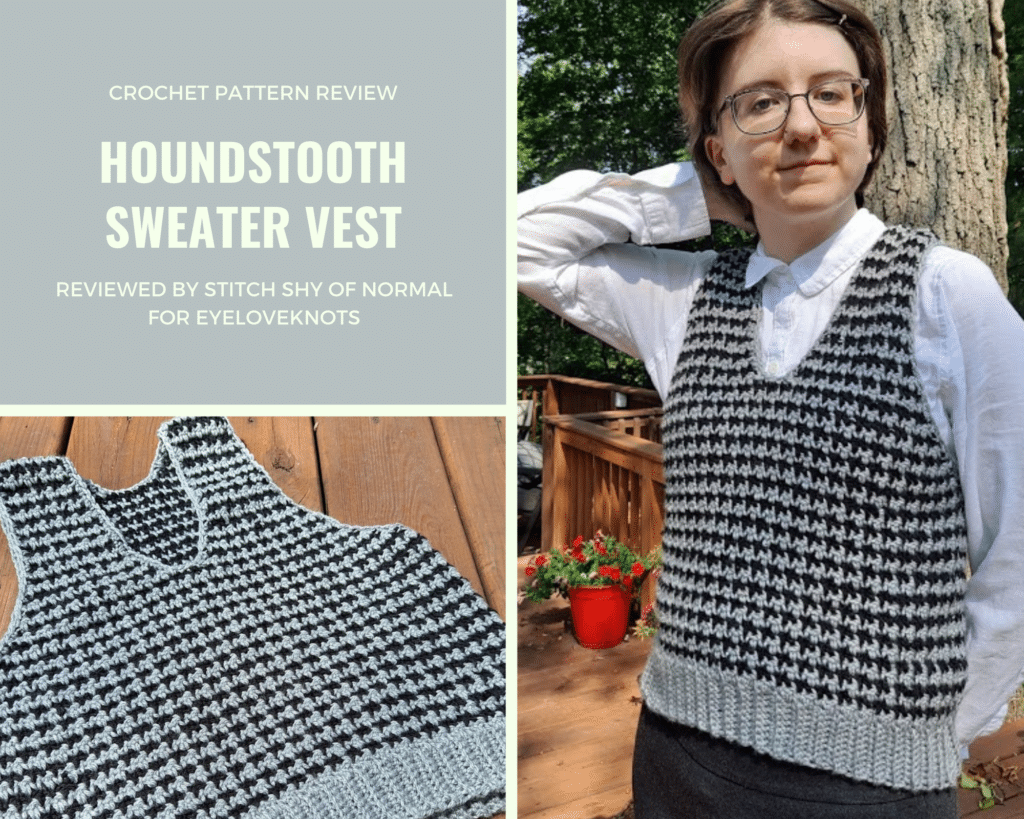
This is a crochet pattern review of the Houndstooth Sweater Vest pattern by Gillian Nestor. Review done by A Stitch Shy of Normal for EyeLoveKnots.
This post contains affiliate links for Lion Brand Yarn and WeCrochet. If you make a purchase by clicking on them, I make a small commission at no extra cost to you. Thanks for your support!

It’s me, Abigail with A Stitch Shy of Normal.
Visit with me on Instagram @astitchshyofnormal for all kinds of awesome crochet makes and inspiration.
Growing up in the early 2000s, I always had a secret love for the preppy look. I didn’t have much of an eye for fashion back then (still don’t), and definitely not much disposable income to really go crazy, but it was always the look that I would dream of embracing in that “if I won the lottery tomorrow” style. Think movies like Mean Girls if you have no idea what I’m talking about.
Anyway, for whatever reason, I’ve been in the mood for this sort of thing again. I’ve seen some cute pieces like plaid skirts popping up in stores again, and I’m totally anticipating the look of a collared blouse under a sweater to come back a little bit this fall/winter. I don’t know, I just have a feeling.
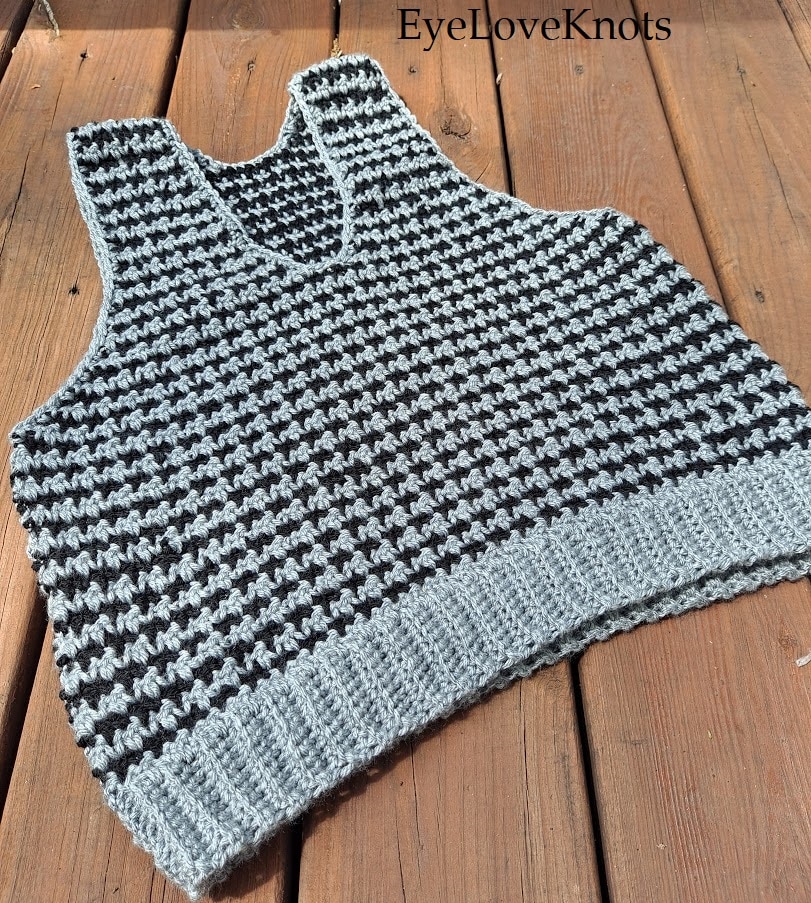
So when I was scrolling through the “newest releases” section on Ravelry a couple weeks back, and spotted the cutest houndstooth sweater vest, I knew it was fate. I bought it in seconds and went to Joann that afternoon dreaming of color combinations. It’s all my favorite things–houndstooth is a classic for a reason, and a two-color combination allows for so many beautiful options! Although the original designer chose an off-white and black, I decided to go with another timeless pairing of silver with black instead. I love anything in the gray family and thought this would go even better with darker shirts.
I’ll get more into detail here but I can summarize that I absolutely loved this pattern. Any minor confusion I had was cleared up right away, and I ended up with a piece I love so much that I’m already excited to wear as soon as the weather cools down! I would love several of these in different color combinations to go with various outfits.

Materials I Used to Make my Vest:
- Lion Brand Basic Stitch Anti-Pilling in ‘Silver Heather’ and ‘Black’ (just under 2 of each, you’d probably need 3 of each to make this size as written)
- H8/5mm hook – I like Clover Amour Ergonomic Hooks
- Scissors/yarn needle for assembly
- Houndstooth Sweater Vest, Paid Crochet Pattern from designer Gillian Nestor via Ravelry
Material Notes:
I loved my choice of yarn in this project, it worked beautifully! The designer used a yarn called Patons Canadiana, which I’ve never tried but it looks very similar. The two are fairly close in comparison as well, with 3.5 oz getting you 185 yards in the Lion Brand version and 205 yards in the Patons. Not exactly identical but close enough that you wouldn’t need to alter much at all to make a substitute! I did not change the pattern, and my fit ended up just fine.
I did compare my sizing to the written dimensions as I worked, just to ensure that I was staying reasonably close, and it was never a problem. The designer clearly lays out what the intended width and length should be for each size so you can play around as you like with your own fit. Because I anticipated a slight variation in gauge with my yarn, I did choose to make an XS when I could have gotten away with Small instead. I generally fall between these sizes so I went down a step to be safe, in case my vest ended up being an inch or two larger. I could have gone down a hook size but chose not to because my drape was coming out perfect. I wanted this vest to be appropriately slouchy and comfy.

Would I use this yarn again? Absolutely. No question. I could also see Caron Simply Soft working great, or Lion Brand Heartland. Vanna’s Choice might be nice but potentially a little too thick (but I’d still like to try it). Anything that’s solidly a medium-weight acrylic, plus nice and soft. You get the picture! Plus this pattern is very yarn-efficient. A few skeins each of two different colors in most worsted yarns will get you a whole sweater vest! (The largest size written is XL and uses 600 and 500 yards of the two colors, which is just 2 skeins each of Red Heart Super Saver!)
Time Spent:
I sort of became addicted to this project and finished it in only a few days. As in, I started it on a Thursday afternoon and had it sewn together and finished on Saturday night. If I had to be honest with myself and add up the hours spent, I would say this took me right around 10-12 hours. Again, this is for the XS size and I also left out one step. It probably “should” have taken me more like 14.
Measurements:
Height–16.5″ before the ribbing, 19″ with it.
Width–18″ laying flat.
Compared to the written dimensions, I got pretty close but just a bit larger, which makes perfect sense considering my yarn choice compared to the Patons one. The written length is 19″ so I got that one perfect, but the circumference is written as 34.5″. Mine would be just about 36″. The Small size is supposed to be 38″, so I did not quite get there. Rather, I accidentally got it perfect and made my vest solidly between XS and S, which is right where I usually fall!

Gauge:
The designer does not give a gauge for this pattern. If you’d like to compare to my project for your own use, I’ll put that here. Just remember that this is not the official pattern gauge and is probably slightly off from the original designer’s gauge, with my dimensions being a little larger than theirs!
Mine has 11 stitches and 13 rows in 4 inches. This is unblocked, and not intentionally stretched but it was measured after wearing the vest so I’m sure it got a little stretched out.
Pattern Notes
Lovely. That’s my summary, this pattern is just lovely.
I’m over the moon about this vest. I put it on for pictures and said out loud “this is the dorkiest thing I’ve ever owned, I love it so much”. It’s comfy and warm and fits so well, and I felt awesome wearing it! I can see this vest being flattering on all sorts of bodies, especially given the customizability of the sizing. I could have made it cropped for a cute topper vest, or longer to go more over my pants. I chose it as written because I tried it on and felt like this length would be the most versatile for my use. If I want a top to peek out at the bottom of the vest, it can. If I’d rather not have that look, I can tuck the shirt into my pants. It’s right in that happy middle ground.
The pattern was written with beginners in mind, and is very accessible for people of all crochet skill levels. I had one minor question while working on it, and I simply asked the designer through Ravelry and got a quick answer! The pattern has also since been updated to address that question I had, and I really appreciate that level of care! In the original version, the stitch list simply had “sc2tog” listed but the written directions only said “dec” when it came time to decrease. I was 95% sure those were the same thing, but I didn’t want to assume I knew what they meant. They were, and the current version now has a stitch list clarifying that “dec” means to single crochet 2 together.

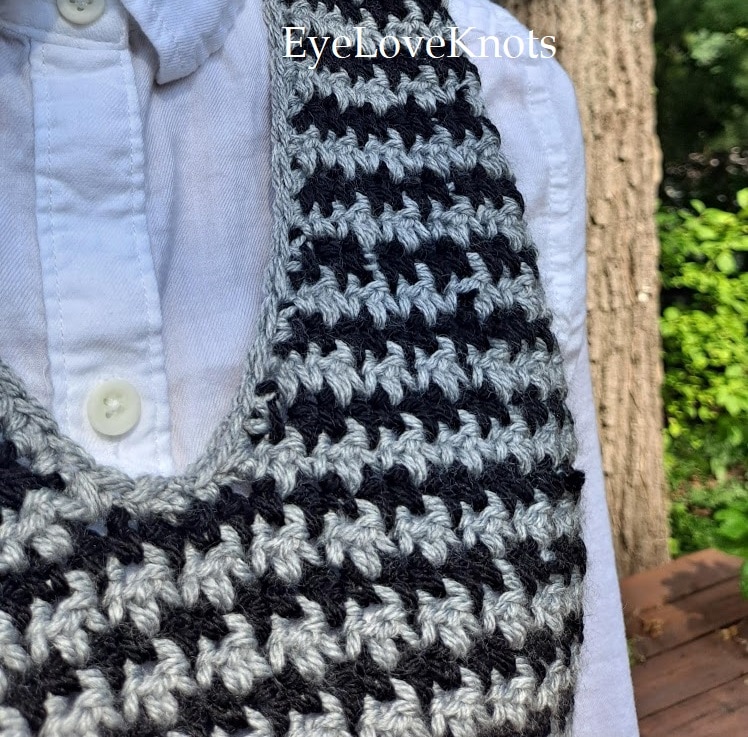
When I got to the shoulder portion, I’m not entirely sure if the pattern was a little weird or if I did something off. On one side of the front shoulders, I had to alter the written directions a little bit in order to continue doing SC into DC stitches, and vice versa. This only happened on the one side, and only on the front panel, so I’m sure I just did something a little off somewhere. But it was very easy to account for this. I simply did the decreases as written and then for the middle sections I made sure to do the opposite stitch from the previous row (SC into DC, DC into SC) to keep the houndstooth stitch pattern intact. This worked out perfectly fine for me. I’m sure I could have also not changed anything and it would have looked fine.
The only other change I made was also addressed in an updated version of the pattern. In the front panel, the pattern originally (I think) stated to skip only a single stitch between the two shoulder sections. When I did the math on this, it didn’t make sense for my size. I just crunched the numbers and learned I needed to skip 3 instead, and just proceeded with this change. The pattern now reflects that exact modification, so I must have figured out what they meant to put in there.
I also just want to mention one thing that the designer says in the notes–when changing colors, cut the ends and just crochet over the tails to avoid weaving in a zillion ends. This is so very, very true. I agree with it so much. It would have been a pain to weave these all in, and it wouldn’t have given a nice soft drape to carry the other color back and forth the whole time either. Mattress stitch was also the designer’s suggestion on assembly, and I wholeheartedly agree with this as well. It was already my favorite technique, though, so you probably aren’t surprised there if you’ve followed me for long.
You’ll notice if you look at the pattern pictures that the original vest has ribbing at the neckline and armholes, and I chose to leave this off. I just personally didn’t like that look, and I wanted the ribbing as more of a bottom accent that stood out. This is why I said if you do it exactly as written, the XS would probably take 3 skeins of Basic Stitch rather than my 2, because I did use most of both silver skeins (my main color). The written yardage suggestions do factor the ribbing in. I probably used more like 500 yards total between the two colors (300ish and 200ish) rather than the written 600 combined.

The pattern itself was a wonderful experience. It’s so easy to understand, and the stitch pattern is one of my favorites for a reason. It’s a timeless look that is surprisingly easy to replicate in crochet! The designer did a great job, the vest is a beautiful creation, and I can’t wait to wear it every day all fall and winter. I’ll enjoy the many conversations of people saying something like “that’s a cute sweater vest” followed by me responding “thanks, I MADE this!” Probably with a little twirl.
Check out this pattern for sure, if you’re feeling the urge to dress like you’re back in high school in 2005 like me. Or if you love simple but satisfying garment projects (don’t we all?). Whatever reason, this one is awesome and you need to make one right now.
What colors would you choose for this vest? Will you stick with classics like my gray/black or the designer’s ivory/black? Or do you feel like going a little more out there with brighter shades? A neutral + a fun color, or even two crazy shades together? I’d love to hear ideas!
Don’t forget to visit with me on Instagram @astitchshyofnormal for all kinds of awesome crochet makes and inspiration.
Join one of our awesome Facebook groups to share your creations, and see what others are up to!
– EyeLoveKnots Crochet & DIY Community
– DIY Home On Rockwood Lane
– Alexandra Lane Lifestyle
Linked Up To…
Ginx Woolly Linx Party August – Ginx Craft
Linky Ladies Party #215 – The Purple Poncho
The Loop Scoop #20 – Moogly Blog
Weekday Wear Link Up – Away from the Blue
Turning Heads Link Up – Elegantly Dressed and Stylish
Confident Twosday Linkup – I do deClaire
Style with a Smile Link Up – Style Splash
Style on the Daily Link Up – Straight A Style
Thursday Fashion Files Link Up #321 – Curly Crafty Mom
Chic and Stylish Link Up – Mummabstylish
Style Link Up – Lizzie in Lace
Fancy Friday – Nancy’s Fashion Style
Neverending Style Link Up – The Grey Brunette
Top of the World Style Linkup – High Latitude Style
Spread the Kindness Link Up #239 – Shelbee on the Edge
Heart and Soul Link Party – April, the 21st Century Housewife
Handmade Monday #242 – Sum of their Stories
Craftastic Monday Link Party – Sew Can Do
You’re the Star Blog Hop – Decor Craft Design
Happiness is Homemade 389 – Decor Craft Design
Craft Schooling Sunday – Creative Jewish Mom
Unlimited Link Party 32 – Grammy’s Grid
603rd Inspire Me Tuesday – A Stroll Thru Life
Fabulous Party 386 – Lou Lou Girls
Party in Your PJs #373 – The Apple Street Cottage
{Wow Me} Wednesday #519 – Ginger Snap Crafts
The Wednesday Link Party 413 – Oombawka Design Crochet
Creative Crafts Linky Party #56 – Creatively Beth
Wonderful Wednesday – Oh My Heartsie Girl
Thursday Favorite Things Link Party #505 – An Artful Mom
Grace at Home No. 436 – Imparting Grace
Creatively Crafty Link Party #291 – Life Beyond the Kitchen
Team Creative Crafts Link Party #57 – Artsy-Fartsy Mama
Encouraging Hearts & Home Blog Hop – Scratch Made Food
Traffic Jam Weekend Link Party #293 – My Bijou Life
Friday Favorites – Busy Being Jennifer
Create, Bake, Grow & Gather Party #485 – Shabby Art Boutique
Funtastic Friday Link Party #349 – Simply Beautiful by Angela
Saturday Sparks Link Party 439 – Pieced Pastimes
A Morning Cup of Joe – The Cottage Market
that is such a great vest on you! I really like the silver and grey you chose too and I agree you will get a lot of wear from this in the cooler weather! 🙂
Thanks for joining the #WeekdayWearLinkup. Hope you are having a great weekend 🙂 We have another birthday party today!
Thank you so much! I’m getting excited to wear it now that I see the leaves starting to change 🙂 Cooler weather should be on the way!
What a fantastic project! I love crocheted vests and would really love to be able to make one myself. It looks great on you. Thanks for linking up!
Emma xxx
http://www.style-splash.com
Thank you! It was a very approachable pattern if you ever decide to try it out!