This is a crochet pattern review of the Seafoam Cardigan from Yay for Yarn by EyeLoveKnots. It’s an easy crochet pattern that works up a beautiful cardigan perfect for Spring, Summer or Fall.
This post contains affiliate links for LoveCrafts. If you make a purchase by clicking on them, I make a small commission at no extra cost to you. Thanks for your support!
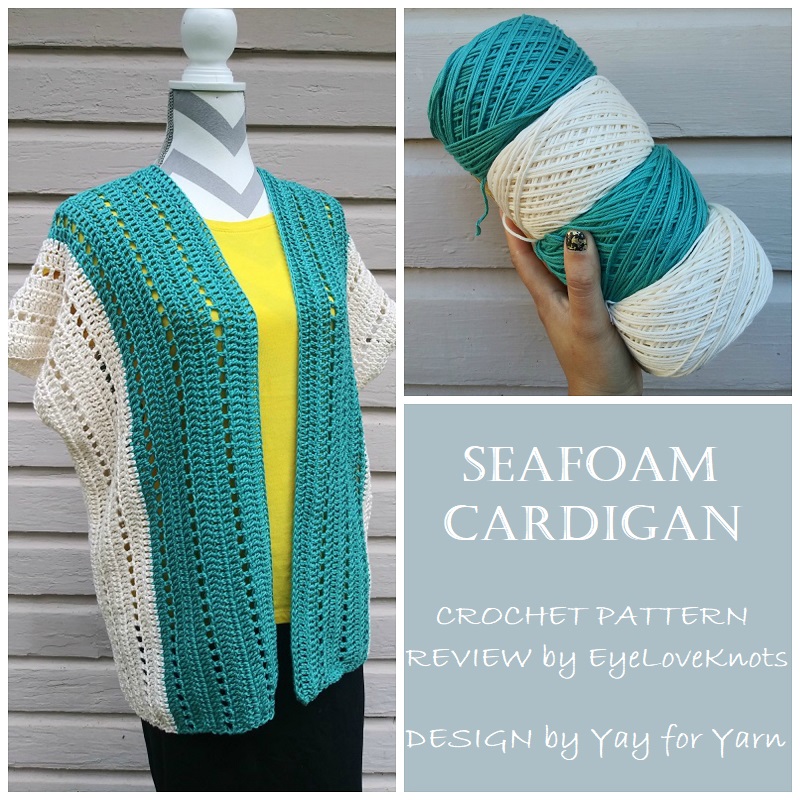
Back in March of 2020, I received a custom order in my EyeLoveKnots Etsy Shop for the Seafoam Cardigan from Yay for Yarn. I no longer take custom orders, but if you’re looking for something special, I can’t recommend enough Candace from TandCCrafters – she is really great to work with, and so incredibly talented.
The request was for Size 2 – for Large – 2X, and the colors as close to the original as possible. I questioned a wool or cotton blend, and when cotton was the fiber of choice, I sent over the link to Berroco’s Modern Cotton – my number one cotton blend choice for garments and accessories. It is so soft, and machine washes and dries beautifully!
Though this yarn was not a variegated yarn, I suggested the Matunuck and Sandy Point colorways, and that I would work a similar color pattern. Originally, I was going to just switch back and forth to create my own variegated coloring, but it was looking more patchy, so instead, I worked 13 rows of teal, and 10 rows of cream, and sent the above photo for approval, which was approved! I was a little nervous, but happy it was liked.
Materials I Used:
- 945 Yards of Berroco’s Modern Cotton – 2.5 Skeins of Matunuck and 2 Skeins of Sandy Point [More than 300 more yards!]
- J10/6mm Crochet Hook [Smaller than recommended]
- Tapestry Needle
- Seafoam Cardigan, Free Crochet Pattern from Yay for Yarn
Material Notes:
Original pattern uses Red Heart Super Saver Ombre. I asked my client what fiber she preferred, and she said cotton, so I recommended the Modern Cotton. If you plan to use this cardigan inside, or cooler weather (like Spring and Fall), than the Super Saver will work well!
I think because I changed hook sizes, this is why my piece required soooo much more yarn. The original pattern calls for 600 yards in the second size, and I used more than 900 yards!
I went down a couple hook sizes because the larger hook size was creating a fabric that was much to airy and not sturdy structure or pretty fabric. With the heavier weight yarn used in the original pattern, it works, but with the lighter weight yarn I used, the original hook size was just too large (even though gauge was met with it). More about this in my Pattern Notes.
How Long Does it Take to Crochet a Cardigan?
This cardigan took me just over 11 hours to complete.
Measurements:
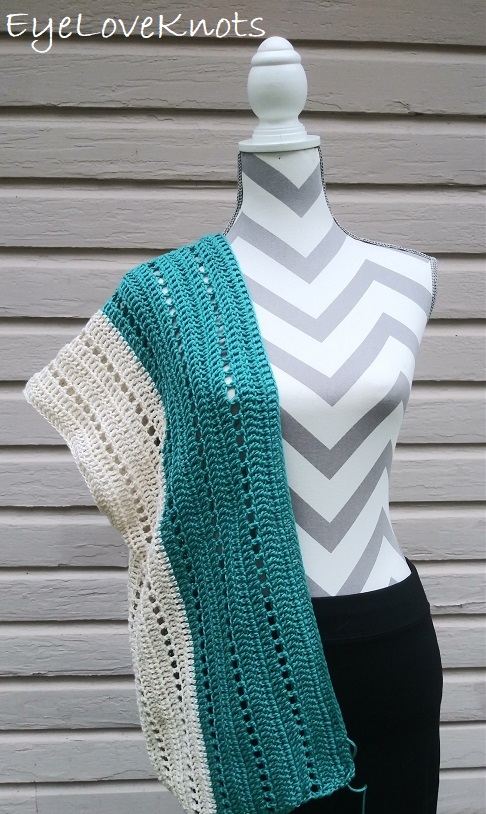
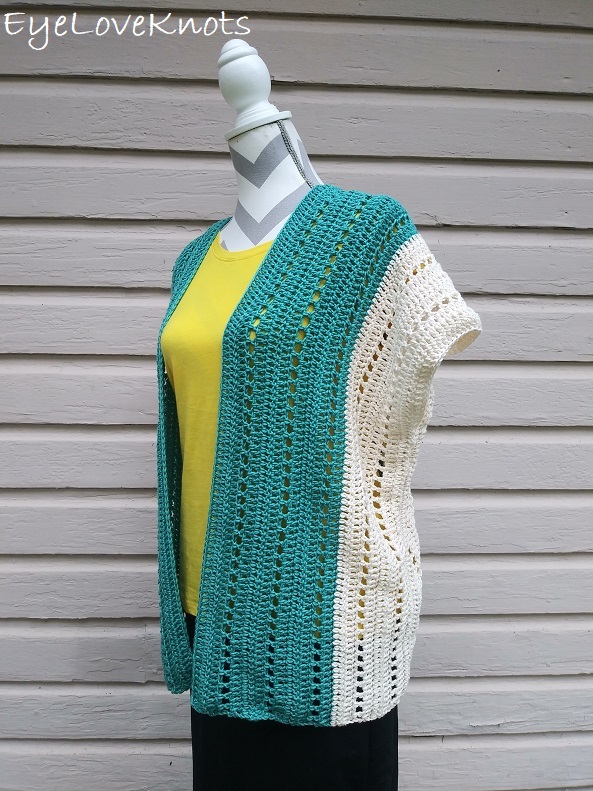
24″ in Length by 12.5″ Wide (One Panel – goal was Size 2)
I goofed, and only realized it as I typed this review up. The panel should have been worked to 14.25″ wide. I guess I got confused with the length, and divided that in half. The good thing is that this size is designed to fit a 40-50″ bust, and even with a 12.5″ panel, it falls into that range [12.5″ * 4 (sides) = 50″].
My Gauge (with J10/6mm Hook):
10 DC = 2 7/8″ Wide; 4 Rows = 2.5″ Tall
Pattern Notes:
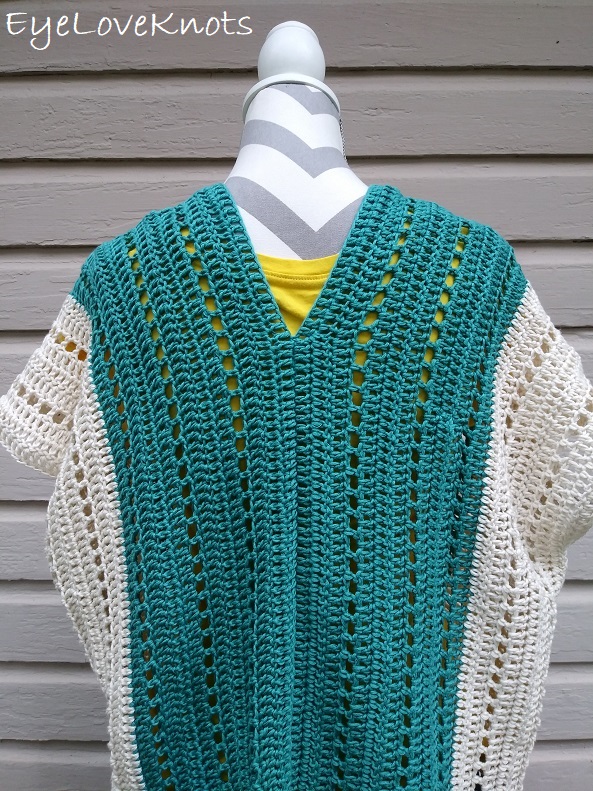
Since I changed hook sizes, I had to also add stitches to the panel to get the same size. In working the second size for Large – 2X, I worked a beginning chain of 179, then double crocheted in the 4th chain, and across, and ended up with 177 double crochets for a 24″ long panel.
The original pattern recommends a foundation double crochet. I opted to work a regular chain because I didn’t think it mattered. When I finished the top, and tried it on, I noticed that the foundation row lacked the stretch intended on with the foundation double crochet and a whipstitch – I also worked a slip stitch join of the panels. My recommendation: do a foundation double crochet, and whip stitch the center of the panels together (a slip stitch join is fine for the sides).
To avoid an uneven bottom edge, I began the eyelet row as a chain four to count as a double crochet plus chain 1, and I worked the last two stitches of the following row over the fourth chain, and then into the third chain of the beginning chain four. [If working as is, it will create a little curve along the edge because technically it will have an extra stitch. If you decide to work as written, you can cover this edge up and create a clean look by simply working a border around the bottom edge.]

To get a 12.5″ wide panel, I worked 13 teal rows, and 10 cream rows.
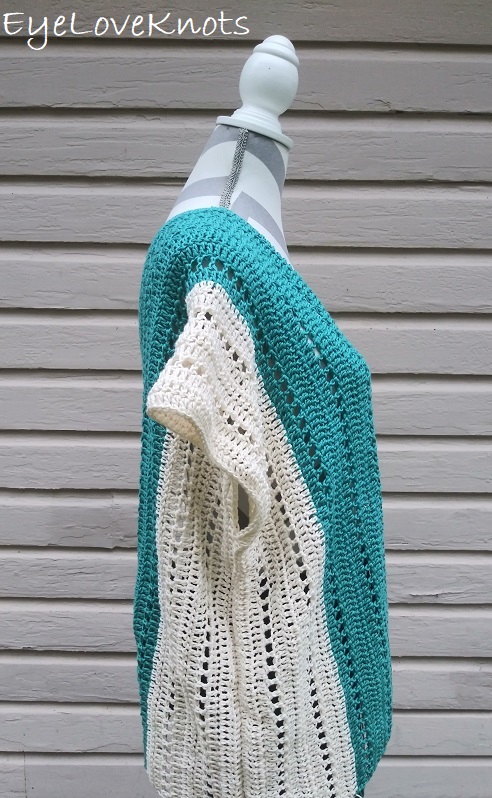
In the assembly, the pattern does not give extra measurements. For the armholes, I followed the Women’s measurements provided by the Craft Yarn Council, and left an 8.5″ armhole opening.
For the back, I seamed up a a several inches less than half for the back seam. You don’t want to seam it up equally because it will not sit comfortably on the back of the neck.
The pattern was very easy to follow, and with the repetitive nature and easy stitch pattern, it’s perfect for an on-the-go project, or binge watching Netflix. Also plenty suitable for a confident beginner to tackle.
Join one of our awesome Facebook groups to share your creations, and see what others are up to!
– EyeLoveKnots Crochet & DIY Community
– DIY Home On Rockwood Lane
– Alexandra Lane Lifestyle
Linked Up To…
Inspirations Link Party 2 – Pieced Pastimes
Handmade Monday #277 – Sum of their Stories
The Really Crafty Link Party #315 – Keeping it Real
Link-up Potpourri #43 – My Bijou Life
Craftastic Monday Link Party – Sew Can Do
Happiness is Homemade Link Party #426 – Decor Craft Design
You’re the Star Blog Hop – Decor Craft Design
The Happy Now Blog Link- Up #320 – JENerally Informed
Linky Ladies Party #224 – The Purple Poncho
637th Inspire Me Tuesday – A Stroll Thru Life
Fabulous Party 423 – Lou Lou Girls
Talent Sharing Tuesday Link Up – Scribbling Boomer
The Loop Scoop #37 – Moogly Blog
The Wednesday Link Party 450 – Oombawka Design Crochet
Team Creative Crafts Link Party #92 – Artsy-Fartsy Mama
Wonderful Wednesday – Oh My Heartsie Girl
Wonderful Wednesday Blog Hop – My Life Abundant
Thursday Favorite Things #540 – An Artful Mom
Creatively Crafty Link Party #327 – Try It – Like It – Create It
Encouraging Hearts and Home Blog Hop – My Slices of Life
Grace at Home No. 467 – Imparting Grace
Linky Party – Karins Kottage
Anything Goes Linky 329 – My Random Musings
Traffic Jam Weekend Link Up Party #323 – My Bijou Life
Create, Bake, Grow & Gather Party #519 – Shabby Art Boutique
Funtastic Friday Link Party #384 – Simply Beautiful by Angela
Saturday Sparks Link Party 514 – Pieced Pastimes
Pink Saturday – How Sweet the Sound
A Morning Cup of Joe – The Cottage Market
Craft Schooling Sunday – Creative Jewish Mom
Share the Wealth #19 – Big Fat Menopausal Life
Very nice! And summery cool, too 😉
Thanks for sharing: have a funtastic week!
I love this. I think even I could make it!! Pinned! Thanks for sharing at My Big Fat Menopausal Life’s Share the Wealth party. Hope the rest of your month is wonderful!
You can definitely make it! Reach out if you ever have any questions, and I’d be happy to help 🙂
This is a lovely top layer that would look wonderful over a dress, pants-and-top, or skirt-and-top. With the seafoam color and the contrasting off-white color, it could be quite versatile with numerous outfits. I love the open pattern to create a lightweight piece for warm weather.
Thank you for participating in Talent-Sharing Tuesdays Link-Up 19.
Carol
http://www.scribblingboomer.com
Definitely! Thanks, Carol! My creativity for color and print mixing is evolving as I explore fashion blogs, and I’m having a lot more fun experimenting.