This is a crochet pattern review of the Weekend Snuggle Sweater pattern from designer For the Frills. Review done by A Stitch Shy of Normal for EyeLoveKnots.
This post contains affiliate links for Etsy, Lion Brand Yarn and WeCrochet. If you make a purchase by clicking on them, I make a small commission at no extra cost to you. Thanks for your support!
Find the crochet pattern review below, or check out the free crochet pattern at For the Frills! There is also an ad-free, printer friendly option on Etsy.
It’s me, Abigail with A Stitch Shy of Normal.
Visit with me on Instagram @astitchshyofnormal for all kinds of awesome crochet makes and inspiration!
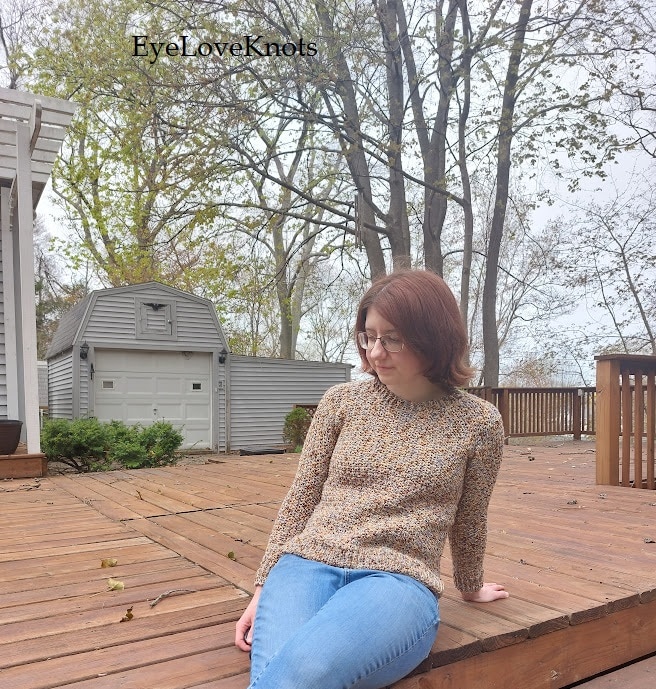
I had the opportunity this spring to go on a week-long road trip to visit some family. And if you know me at all, you know how much I love road trip projects! I can’t help it. I might have a dozen WIPs sitting around (and I probably do right now), but I still need to start something new for the road because it just creates so many memories. Whatever I make on that trip will always be connected to that journey for me. It’s one of my weird crochet habits that’s probably not all that weird. I’m sure I’m far from the only one with that ritual.
I actually planned to make something entirely different, specifically a gorgeous jumpsuit/romper pattern from one of my favorite designers. But I made the classic mistake of buying the yarn right before I was going to leave, and then checked the gauge the night we were packing up the car! Of course it wasn’t going to work out. But I had four cakes of Lion Brand Comfy Cotton Blend and a desire to make something on my trip. What was I going to do? I went to my Ravelry library and wishlist to look for something that used at least a couple of cakes of a lightweight yarn, and discovered the Weekend Snuggle Sweater free pattern that had been on my list forever. I tried the gauge swatch on a whim, and it came out literally perfect. Obviously this was meant to be!
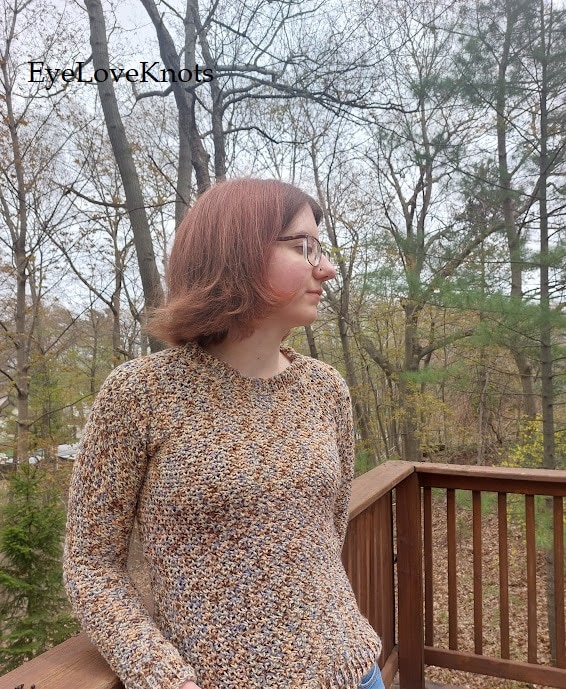
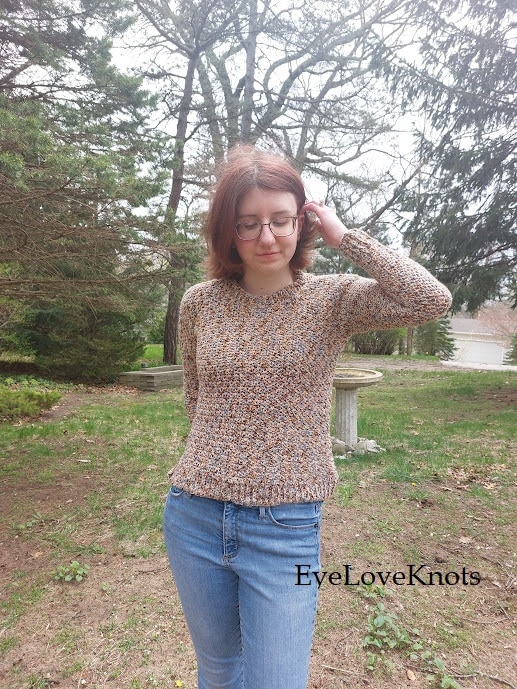
I’m glad this “oops” worked out in my favor, because now I have a beautiful spring sweater in a fun colorway, and I still get to make that romper at a later date when I find the right yarn pairing. This pullover turned out so comfy and soft, and I’m very happy with it. I would definitely recommend this pattern to anyone looking for a simple garment pattern to try.
What Materials Do I Need to Make This Sweater?
- About 2.5 cakes of Lion Brand Comfy Cotton Blend in “Driftwood” (roughly 950-1000 yards for my customized size)
- J10/6mm hook – I like Clover Amour Ergonomic Hooks
- Yarn needle, tape measure, and scissors
- Simple Textured Sweater, Free Crochet Pattern from For the Frills
Material Notes:
I love how this came out but I wish I had used a different colorway. That’s purely just buyer’s remorse, I wanted it to be a “neutral-ish” colorway for the planned romper so that I could wear most shirt colors underneath, if I knew from the start it was going to be a sweater I would have chosen something brighter. Something like their “Stained Glass” colorway with gorgeous purple, orange, green and blue would have been so gorgeous! Again, I do like what I got. I just only like it about 80-90% as much as I think I would with a different colorway.
In terms of the fiber content, I’m so glad I chose a cotton-based yarn. Comfy Cotton Blend yarn is a fifty-fifty blend (see what they did there?) of cotton and polyester, giving it all the softness of acrylic yarns with the durability and light feel of cotton. Whenever I’m planning to make a garment for warmer weather, it’s definitely one of the first choices I go for as long as the colorways agree with what I’m trying to make. That’s probably my only issue with it, I wish they had more color selection! There’s a few solids (and actually as I check the page, it seems there’s only one solid option now) and a few multicolored, but even a couple of those are pretty similar. Although they are pretty. I’m not knocking it, I use it all the time! But if they expanded the selection I’d love it even more. Anyway, for this pattern, it led to a beautiful lightweight sweater that blocks the breeze but doesn’t make me feel too warm. It could easily be shoved into a backpack and come out looking fine, so it would be great for traveling when you’re not sure what to expect of the weather! And I haven’t tried this yet, but usually cotton garments hold up pretty well to cleaning and stay gorgeous for a long time.
Would I make another one with this yarn? Totally. I would obviously pick a different colorway, but I would make this in pretty much any of them that had a little more color. It’s also quite affordable, the size I made would have cost me about $24 without any Joann coupon (and let’s be honest, you always use a coupon of some kind). Most sizes should cost under $40 in this yarn, and that’s pretty good for a comfy handmade sweater!
How Long Does it Take to Crochet a Sweater?
Approximately one road trip plus a couple hours of assembly! Sorry, I couldn’t help myself.
I would estimate about 14 to 16 hours put into this one. It’s a longer time investment, as garments tend to be. And a pullover sweater often takes longer than a cardigan because you’re making two full panels, so you feel like it’s going slower! But if you were working on this in the evenings after work, it could likely get done in a few weeks. That’s pretty reasonable for a homemade sweater!
Gauge:
This one was exciting for me because I almost never meet the exact gauge!
A 4″ square of the main sweater panels should contain 15 stitches and 16 rows. My swatch came out to exactly that, but I’ll double check my finished sweater now.
Currently it has 16-17 stitches and 15 rows in that 4″ square. This is after I modeled it, so it makes sense that it stretched out slightly and has fewer rows but more stitches fitting in the same space–it got stretched in length by me pulling it over my head! Gauge isn’t an exact science and it will change back and forth like this as it gets worn and washed.
Measurements:
I realized when putting it on for the pictures that it’s just a touch smaller than I would have liked. That’s odd, because during the stitching process I was constantly holding it up to myself to measure, but being in the car for the majority of the work meant I couldn’t really try it on! It looks like the sizing I followed would have been a 36″ bust, which would be perfect for me as mine measures about 34-35″.
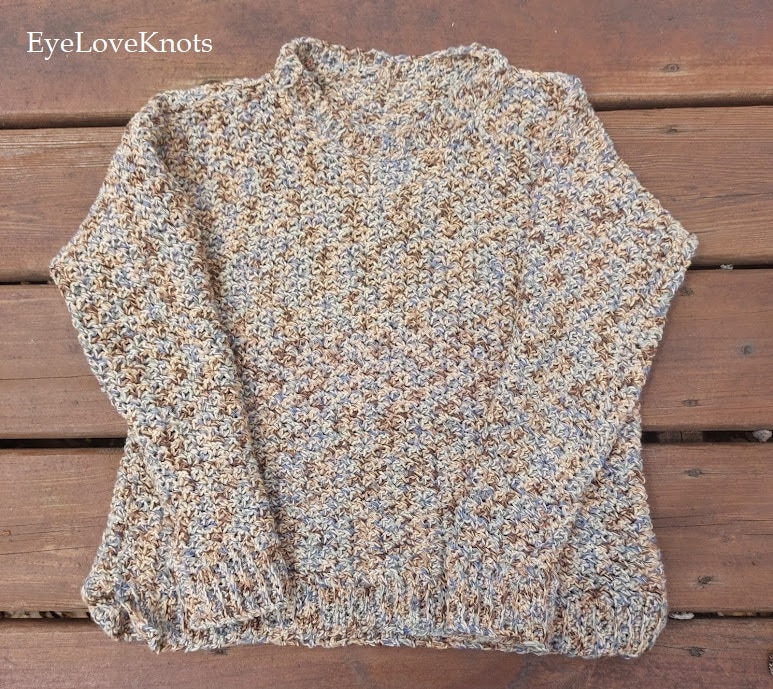
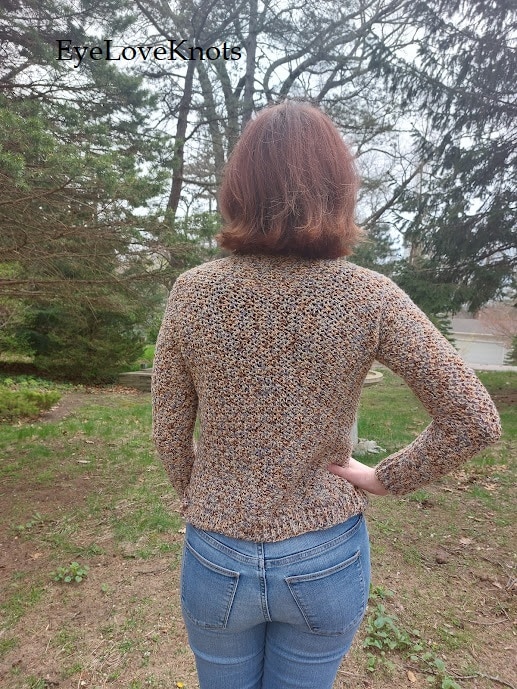
My finished sweater measures about 18″ laying flat, so it’s actually right on target! I think I just wanted it to be looser but didn’t size up, which I absolutely could have done. I also chose to end it shorter than I would have if I had realized. I like how the designer made hers longer, I didn’t realize I was stopping mine right at my hips.
I’m happy with the fit, but I would make small changes next time.
Pattern Notes:
This pattern is wonderfully simple! Most of the stitching is a basic rectangle with a little bit of shaping for the neck and sleeves. Then you just sew the pieces together and enjoy it! If someone is looking to get into garments and wants to try a relatively simple one, I highly recommend this one. It’s not always easy, and of course there’s some frogging involved to get your fit just right sometimes, but it would be a great choice for an approachable garment pattern.
I love how the simple stitch enhances my colorful yarn, but I also think it looks better in the solid yarn the designer chose. That way the texture could really stand out without the muddled chaos of colors. But that’s just my opinion, it’s beautiful in any yarn I’ve seen on the Ravelry project page! I think what matters is what you like to wear. This is a very versatile sweater that could look great in anything. You like to stick to neutrals or black? It would be stunning in a charcoal gray or a solid black. Want to jazz up your wardrobe? Obviously I love it in a multicolored option! It works with anything.
As with a lot of the garments from this designer, they leave it up to you to pick your customization options. At many stages in this pattern, you’re reminded that you can work a section longer or shorter as you please, as long as you keep a note about it to match the other pieces to the same sizing. This can become a long tunic sweater to wear over tights or leggings in the fall, or a light short breezy one for spring like mine! You could size up, like I wish I had, to have it be a little more slouchy and casual-looking. The options are all laid out in front of you and you just need to put together your ideal sweater.
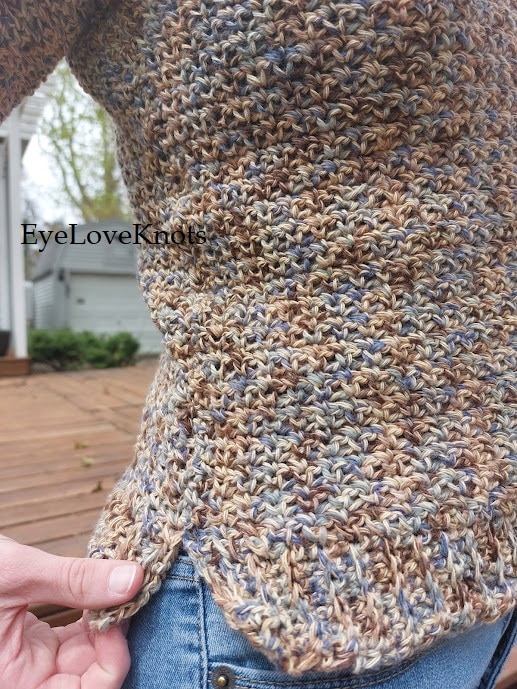
The small touches really make this one stand out, as well. I’m a sucker for ribbing and this pattern is no exception. There’s even ribbing on the neck, and it works out better than any time I’ve tried adding it! Plus you can leave a slit in the side, which I chose to do, giving it an even more casual look. The stitching is so simple but looks really impressive in the big picture. I’m so happy I stumbled onto this pattern accidentally, because now I can’t wait to make another!
Don’t forget to visit with me on Instagram @astitchshyofnormal for all kinds of awesome crochet makes and inspiration.
Join one of our awesome Facebook groups to share your creations, and see what others are up to!
– EyeLoveKnots Crochet & DIY Community
– DIY Home On Rockwood Lane
– Alexandra Lane Lifestyle
Linked Up To…
Craft Schooling Sunday 05/22/22 – Creative Jewish Mom
You’re the Star Blog Hop – Decor Craft Design
Link-up Potpourri #45 – My Bijou Life
Hello Monday – Pink Lady
Anything Goes Linky #331 – My Random Musing
Last Week, This Week – Fine, Whatever…
Weekday Wear Linkup – Away from the Blue
639th Inspire Me Tuesday – A Stroll Thru Life
Fabulous Party 425 – Lou Lou Girls
The Happy Now Blog Link- Up #322 – JENerally Informed
Team Creative Crafts Link Party #95 – Artsy-Fartsy Mama
Wonderful Wednesday – Oh My Heartsie Girl
Wonderful Wednesday Blog Hop – My Life Abundant
Wow on Wednesday – Is This Mutton
Style on the Daily – Straight A Style
Turning Heads Tuesday – Elegantly Dressed and Stylish
Confident Twosday – I do deClaire
Style with a Smile – Style Splash
Thursday Favorite Things #542 – An Artful Mom
Encouraging Hearts & Home Blog Hop – My Slices of Life
Linky Party – Karins Kottage
Thursday Fashion Files – Doused in Pink
Chic and Stylish Link Up – Mummabstylish
Traffic Jam Weekend Link Party #325 – My Bijou Life
Remarkable Rags Link Up #7 – My Bijou Life
Link Up on the Edge #297 – Shelbee on the Edge
Style Link Up – Lizzie in Lace
Fancy Friday Linkup – Nancy’s Fashion Style
Neverending Style Linkup – The Grey Brunette
A Morning Cup of Joe – The Cottage Market
Pink Saturday – How Sweet the Sound
Happiness Is Homemade Link Party #428 – Decor Craft Design
Handmade Monday #279 – Sum of their Stories
Craftastic Monday Link Party – Sew Can Do
Linky Ladies Party #224 – The Purple Poncho
The Loop Scoop #38 – Moogly Blog
The Wednesday Link Party – Oombawka Design Crochet
Creatively Crafty Link Party #329 – Try It, Like It, Create It
Create, Bake, Grow & Gather Party #521 – Shabby Art Boutique
Saturday Sparks Link Party 516 – Pieced Pastimes
Share the Wealth Linky #20 – Big Fat Menopausal Life
Inspirations Link Party 3 – Pieced Pastimes
Hello i was wondering if you could please graph me an anchor with a compass for a large crochet blanket it will be 130 stitches across and im not sure on the length…. i will be doing half double stitches. It is for a 13 year old boy.
I think if you search on either Ravelry or Etsy for “anchor blanket” or “compass blanket” you may find the perfect crochet pattern. You can also use graph paper, and draw out your vision, and then stitch it.
Nicely done 😉
And it looks comfortable, too.
It really is! Very much a chill Saturday sweater.
Love that sweater! How talented you are. The neutral colors will work with everything. Thanks for linking.
This is lovely. I think this neutral colour palette will end up being really useful and you can always make your next sweater a brighter coloured one 🙂
That’s a great way to look at it! I like that this one is neutral enough to match most things but still has some different shades in it. I’ll probably have to pick something with pinks and purples for my next one though!
You did a lovely job crocheting the Weekend Snuggle Sweater Abigail ♥ I actually love the neutral yarn you selected too! Thank you for linking up at our weekly Link Party! You are being featured at our Wednesday Party #453 this week. Here’s the direct link to the post in case you’d like to share your feature:
https://oombawkadesigncrochet.com/crochet-rose-baby-blanket-weekend-snuggle-sweater-how-to-make-a-kitchen-towel-scarf-link-party-453/
Hope to see you again next week! Rhondda
Cute sweater – great colors – Thanks for sharing at My Big Fat Menopausal Life’s Share the Wealth Party. Hope your week is amazing!