
A few days ago, I posted the Crochet Large Solid Colored Hair Bow. I wanted to get this post up two days ago, however, life got in my way a little.

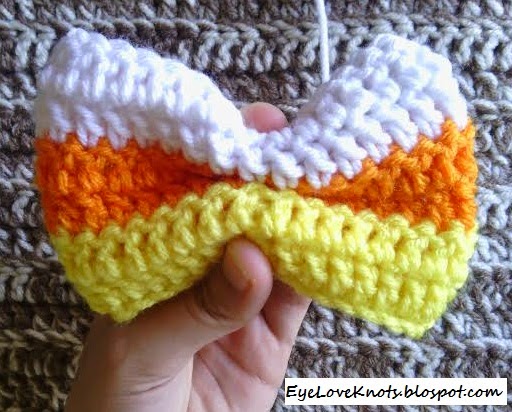
The Witchy Hair Bow and Candy Corn Hair Bow (shown above) are the original inspiration for this post. I made them last year before I started my blog and (shame on me!) did not write the pattern down! It took a little working and reworking and measuring but I finally got it! Enjoy this large striped hair bow pattern!
Materials:
– I9/5.5mm Hook
– Tapestry Needle for Weaving in Ends
– Worsted Weight Yarn. I used Red Heart Super Saver in Yellow and Pumpkin, and Caron One Pound in White.
Material Notes:
Keep in mind that a heavier worsted weight yarn, such as the Super Saver, Bernat Super Value or Caron One Pound will work the best on this pattern because they are more sturdy. They aren’t as soft or shiny as others but they will stand up the best and last longer.
If you choose to use a different yarn (as any will work!), you may have to adjust the pattern to get the same measurements and it may not be as loose as the following one is (I know because I tried this pattern with two different yarn types!)
Time Spent:
This bow works up in less than half an hour.
Measurements:
This bow measures 3.25″ tall and 5″ wide (about 10″ before sewing seam).
Abbreviations:
DC – Double Crochet
Pattern Notes:
I worked this bow with three colors but you could easily work it with two colors or six different colors! Work it however you would like to – you are the artist!
To make my candy corn pattern, I started with yellow, switched to orange on the third row and switched to white on the fifth row.
 |
| Change colors in the last yarn over of the last double crochet. |
There is no need to weave in your ends with the color changes. Continue on to see how I took care of those pesky tails.
Beginning chain counts as a stitch.
Pattern:
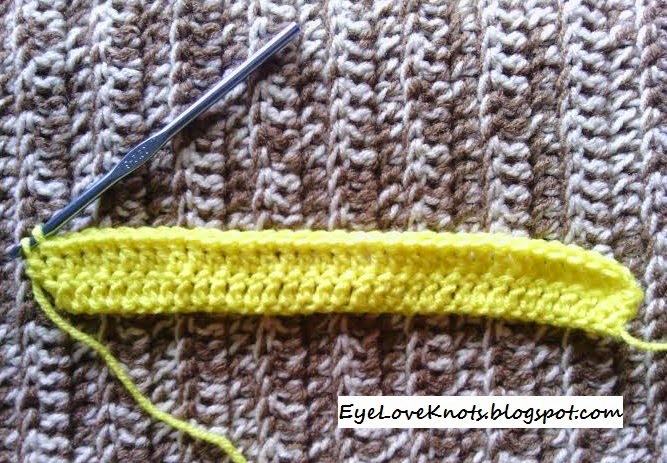
CH 35. DC in 3rd CH from hook and in ea CH across.
Row 2-6: CH 2, turn. DC in 2nd DC and in ea DC across. (34 DC)
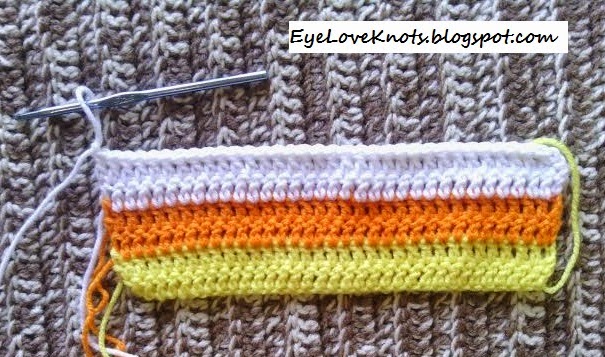 |
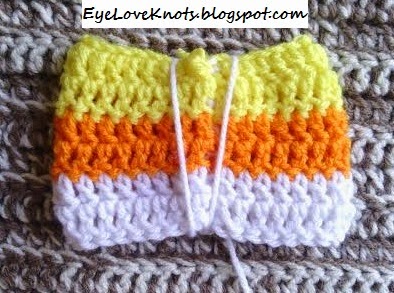
| This is what your finished rectangle will look like. |
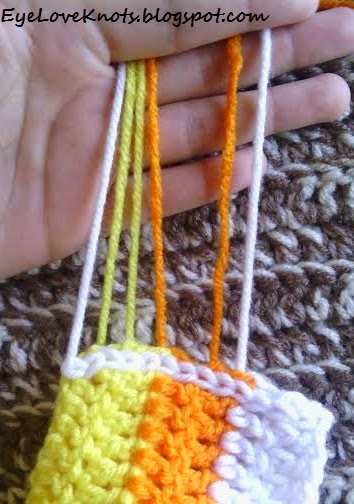 |
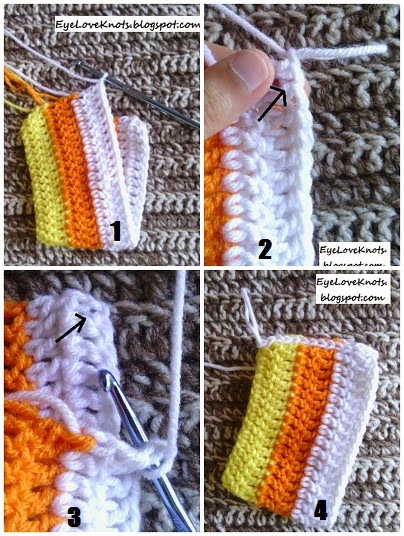
| Now, tackling those pesky tails! |
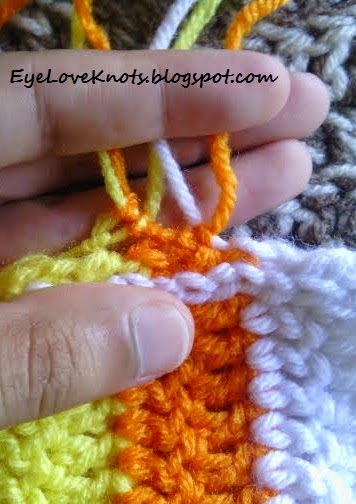 |
| Begin by loosely knotting them together. If you pull tight, it will scrunch up your piece. Simply tie the tails that are closest to each other! I went across left to right once, and then from right to left once. Then, trim your tails and fold your piece inside out so that the seam in on the inside. |
 |
| Pinch the center of your bow in the shape that you want. |
 |
| While this rectangle is flattened, it’s to illustrate that you will begin wrapping around the seam – so your first few wraps will look like a V. With the pinched center, your V will be a little smaller than this one. Keep your tail tight so your bow keeps the tight center and puffed sides. |
 |
| You can wrap the center as much/thick as you want. After you are finished wrapping, move your tail to the wrong side, slide your crochet hook underneath your center wrapping and pull the tail through. From here, you can either thread your tail into a tapestry needle and weave it into the piece. OR… You can repeat the process with your crochet hook a few more times. |
|
| If your sides come out uneven once you are finished, just hold the center and tug at the sides of your bow to even it out a little better. Also take this opportunity to shape your bow if needed. |
Your striped bow is finished! Attach a lined alligator clip to the back and Voila!
Please feel free to make and sell these large crochet bows, but please DO NOT claim this pattern as your own nor should you sell my pattern, and DO NOT re-publish my photos as your own. DO NOT copy and paste my pattern anywhere, link to it instead.
With so many size, yarn type and color options, I would love to see them! Join the EyeLoveKnots Crafting Community to share your creations, and see what other’s are up to!
Check out the EyeLoveKnots Ravelry page to keep track of all your EyeLoveKnots favorites in your que, and share your WIPS and finished projects!
Don’t miss out on new crochet patterns, reviews, jewelry tutorials and more! Subscribe to EyeLoveKnots by using the box on the right side toolbar, or follow me via Bloglovin! You can also find me sharing on the EyeLoveKnots Facebook page, and @EyeLoveKnots on Twitter!
These bows are perfect to attach to a headband and use in a photo shoot, clip into your or any little girls hair to hold it out of the face or to decorate by clipping or hot gluing as desired!
Leave a Reply