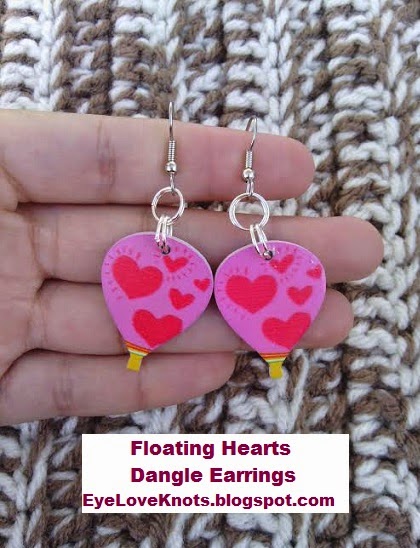
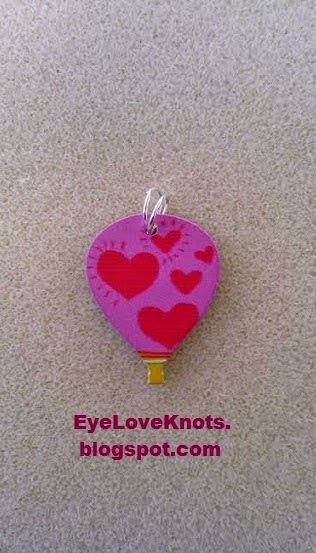
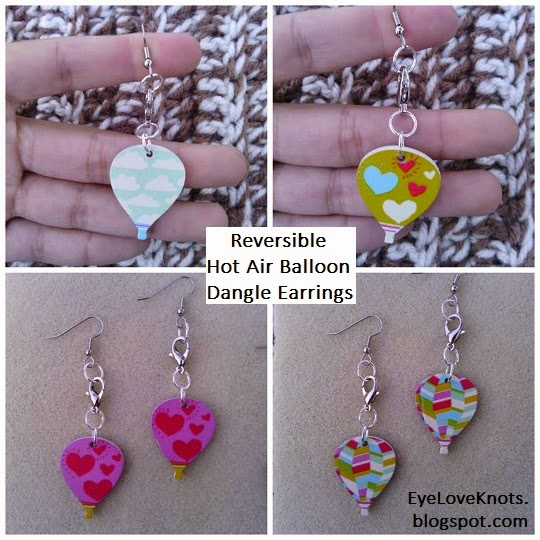
While shopping around my local Hobby Lobby, I found the most adorable Hot Air Balloon Charm! Cool thing about them – they are reversible! Today, I will be showing you how to make some dangle earrings displaying just one side of the charms, but next week I will show you how to make earrings that take advantage of the reversible-ness of these charms.
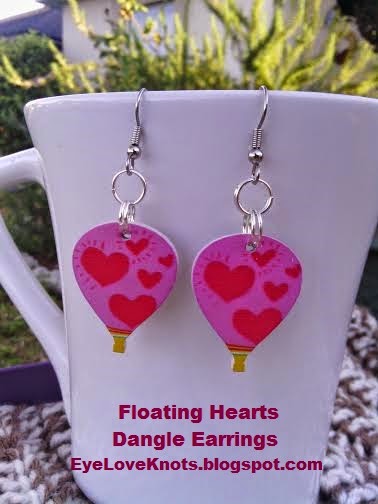
03.26.15 Update: Reversible Hot Air Balloon Dangle Earrings.
Materials I Used:
 |
| I ended up not using the kidney wires shown here because I didn’t like how they looked with these earrings. I also didn’t end up using the small jumps photographed here. |
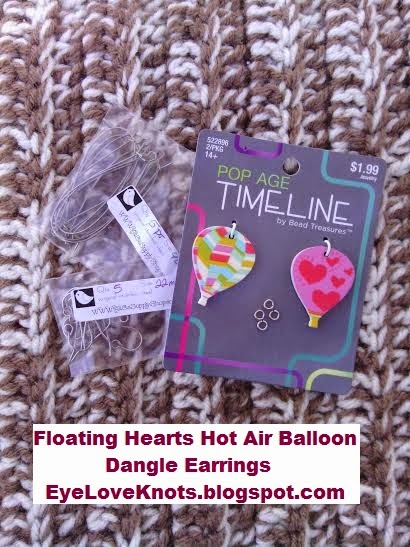
– Hearts & Stripes Hot Air Balloon Charms by Pop Age Timeline
– 8 (4 each pair) 8mm 18 Gauge Silver Plated Jump Rings – JoAnn’s
– 2 Surgical Steel Ear Wires Ball and Coil – Ali C’s Supply Shop on Etsy
– Round Nose Pliers – I use this pair. I also have a second pair that is more generic from a kit as I like to use two pairs, one in each hand but it’s up to you.
Material Notes:
CHARMS: Also available is the Hearts and Clouds Hot Air Balloon Charms – I went with the others though because they looked more Valentine-y, and I wanted this pair of earrings to be part of my 14 Days of Valentine Craft Challenge.
JUMP RINGS: I don’t usually use the jump rings I used in this project since I came to the realization that they are extremely soft and with pressure will open on their own resulting in the loss of bead/charm/pendant/etc. I do, however, have a large stash of them left from before I made that realization. In a pinch, they do work, just use them with caution.
Instead, I use and recommend the 8mm 18 Gauge Open Jump Rings from CanterburyLane on Etsy. They are strong and professional grade. You cannot pry them open with your fingers so with pressure, they also will not go anywhere. I just happen to be out of the Silver Plated at the moment, and didn’t think Gold Plated was suitable for this project.
If you do decide to give these professional grade jump rings a try, you will only need one in place of the two that I used for these dangles earrings.
Time Spent:
You can have this pair of earrings ready to wear in 15 minutes or so.
Measurements:
Your earrings will dangle down about 2″.
Jewelry DIY:
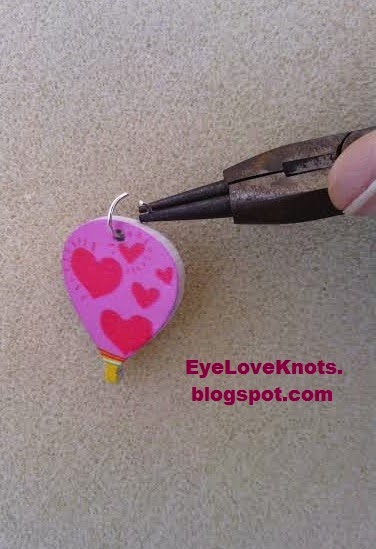 |
| Slip on your charm. I added a second jump ring for addedsecurity, but if you are using the professional grade as suggested in the Material Notes section, you will only need (and be able to fit) one jump ring through the hole on the charm. |
 |
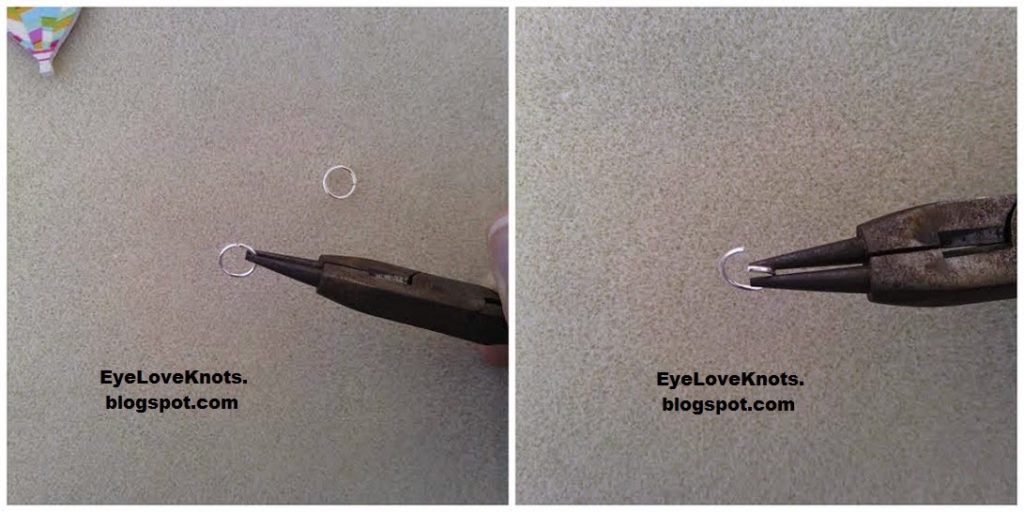
| Close your jump rings by reversing the process. |
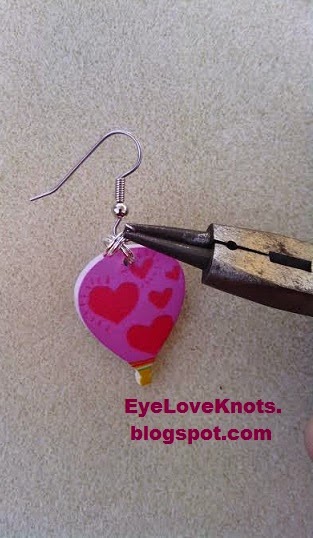 |
| Open the loop on your Earring Wires. You do this the same way that you opened the Jump Rings. *Make sure the front of your charm is facing the correct way before you close up your loop. It’s easy to get it on backwards. |
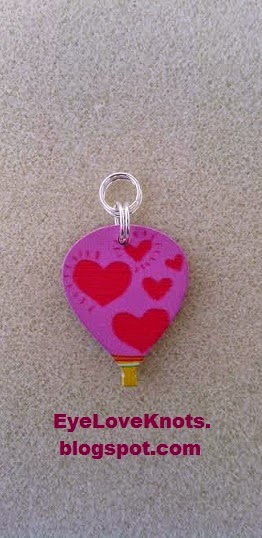 |
| Repeat the process of adding jump rings. You need this additional row (if you will) or jump rings so that your charms face the correct way when you are wearing the earrings. |
Linked Up To…
Craft Schooling Sunday – Creative Jewish Mom
Idea Box Link Party #2 – Mila’s Little Things
Pin Junkie Pin Party #109 – The Pin Junkie
Be.You.Tiful Link Party #62 – Fry Sauce and Grits
Easy Breakfast Recipes, I’m Lovin’ It – Tidy Mom
Worthwhile Wednesdays #60 – Crafty Allie
Your Whims Wednesday #204 – My Girlish Whims
March 2015 Sharing Time, Week 2 – Raising Memoring
It Is Well With My Soul, Share Your Creativity Link Party No. 156 – It’s Overflowing
Bowdabra Saturday Craft Showcase {Mar 21} – Bowdabra Blog
Funtastic Friday #16 – Olives n Okra
Crafting Along #82 – Be a Crafter
Awesome Things Tuesday – Sowdering About in Seattle / Krafting Kreations
Link Your Stuff Party – Lunamon Design
261st Inspire Me Tuesday – A Stroll Thru Life
Totally Terrific Tuesday Link Party #25 – Live Randomly Simple
So Much At Home Link Up Party – So Much At Home
Hit Me With Your Best Shot #61 & Spring Projects to Inspire – One Krieger Chick
From Dream to Reality #160 and 12 Kid Inspired Projects – DIY Dreamer
{wow me} wednesday #198 – Ginger Snap Crafts
These are so cute!
Thanks Cyndee!
Beautiful!
Thanks 🙂
These are so adorable! Thanks for linking up to Funtastic Friday. Hope you can join us again this week.
Thanks! Will be there 🙂