Yay! This is the ninth post of the year for the 2017 GrannySpiration Challenge! I am so excited to see what everyone has been working on, especially you! At the end of this post, you will find the information for this month’s giveaway, and link up.
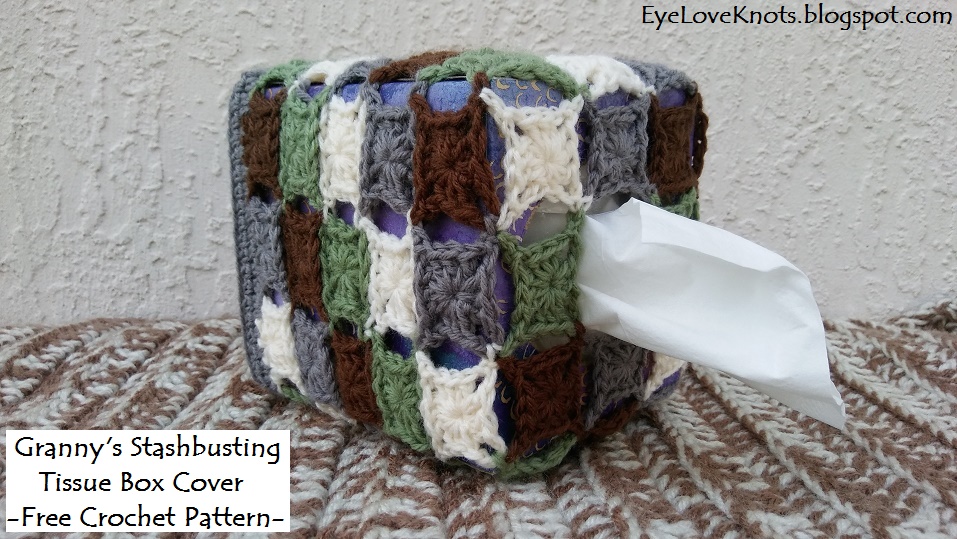
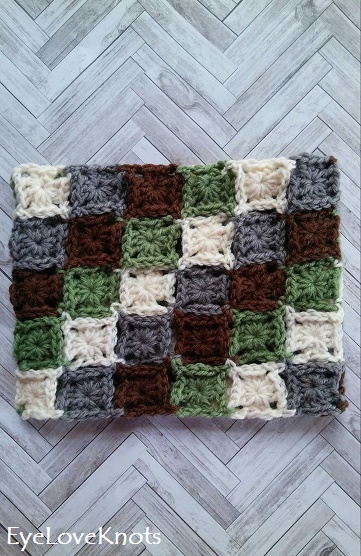
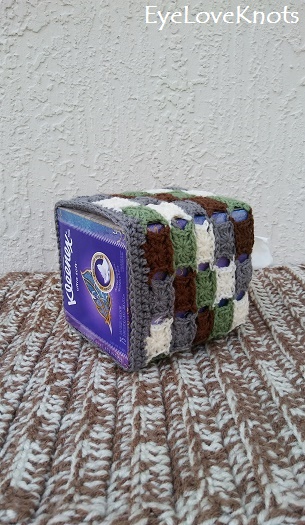
This month, I am sharing a fun tissue box cover. I wanted to share this one last month, but I couldn’t get around to working it up in time to share, so I saved it for this month. This is a great project to work up as a teacher gift, or to decorate your desk if you work in an office, or as I have used it, in my bathroom (even though it doesn’t match my current color scheme).
 |
|
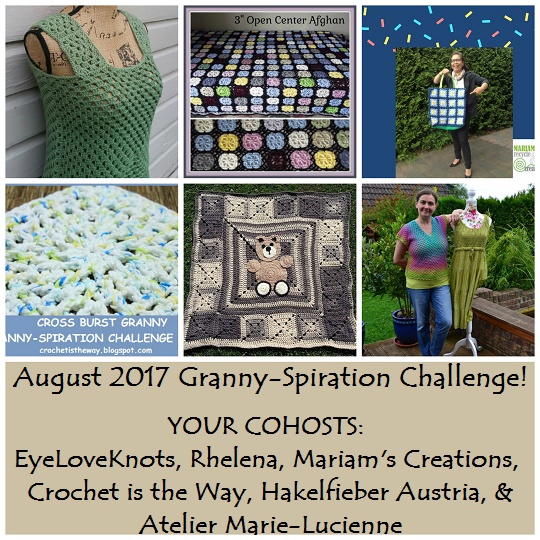
From Your Hosts: Granny Square Tank & Happily Hooked Magazine Issue #40 from EyeLoveKnots (that’s me!), Open Center Afghan (Crochet Inspiration with Links) from Rhelena, Another Upcycled Shopping Bag (Crochet Inspiration) from Mariam’s Creations, Cross Burst Granny (Free Crochet Pattern) from Crochet is the Way, Teddybear Blanket (Crochet Inspiration) from Hakelfieber Austria and Granny Square Summer Top (Crochet Inspiration) from Atelier Marie-Lucienne.
|
Please make sure to stop by our other co-host and see what they’ve been working on too. In the image above, you’ll find their projects (and mine) from last month’s challenge.
Marjan from Atelier Marie-Lucienne
Sandra from Hakelfieber Austria (in German)
Jenny from Crochet is the Way
Rhelena from Crochet n Crafts
Mariam from Mariam’s Creations: Recycle and Create
– G6/4mm Crochet Hook
*I suggest going up to a 4.5mm crochet hook – see Pattern Notes below.
HDC – Half Double Crochet
DC – Double Crochet
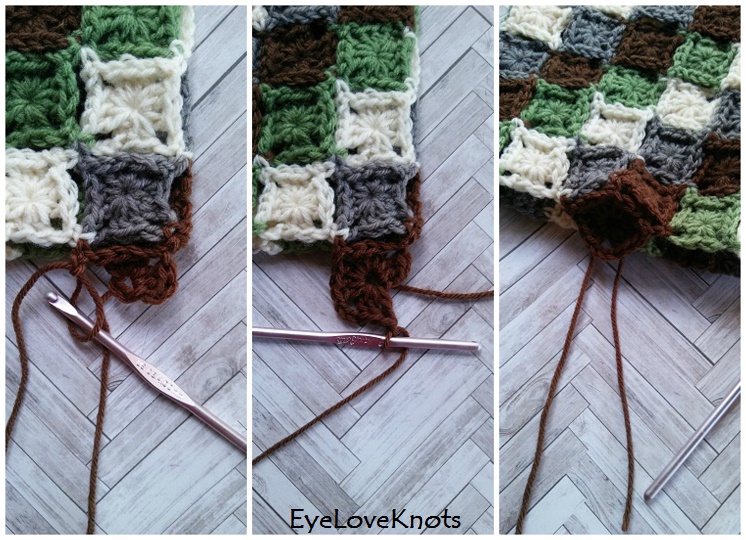
The squares are joined using the Join-As-You-Go (JAYG) Method, and are found at the points following “from behind” throughout the pattern. The single crochet takes the place of the center chain in the chain three corner of the square.
After completing my cover, I think I’d work another in the same manner, but one hook size up. The yarn stretched just fine to cover my box, but I think it would cover easier with less stressed joins if done with one hook size larger.
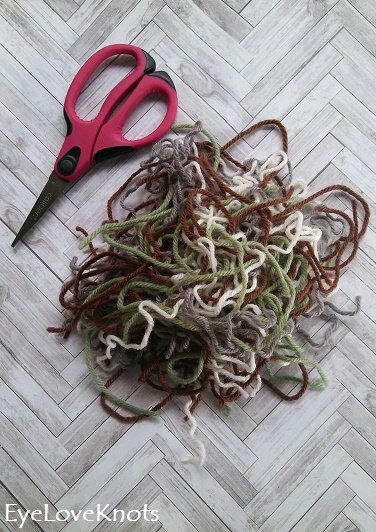
This pattern has 70 ends…::sighs::…A thing that could make this a long time resident in a WIPs bin. I highly suggest weaving in ends as you go – I did so at the end of each round.
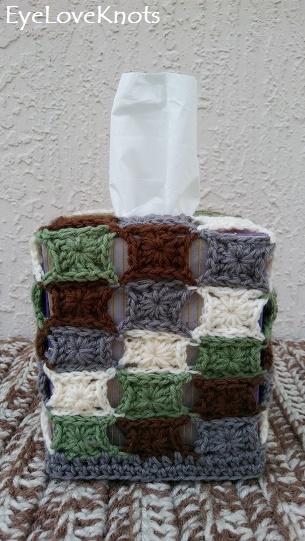
As far as color goes, I used four. In the following rounds, I shifted my colors over by one square so they would be in a diagonal. This would look great in one solid color, two colors, three colors, six colors or even 12 colors!
Round 1, 1st Square:
Chain 5. Join to form a ring. Chain 2. 2 DC into the ring, chain 3, (3 DC into the ring, chain 3) 3x. Join, and Fasten Off. (12 DC)
Round 1, 2nd – 11th Squares:
Chain 5. Join to form a ring. Chain 2. 2 DC into the ring, chain 1. From behind, SC into the chain 3 space of the previous square. Chain 1, 3 DC into the current square, chain 1. From behind, SC into the next corner of the previous square, chain 1. (3 DC into the ring, chain 3) 2x. Join, and Fasten Off.
Round 1, 12th Square – Here you’ll join to the 1st square:
Chain 5. Join to form a ring. Chain 2. 2 DC into the ring, (chain 1. From behind, SC into the chain 3 space of the previous square, chain 1, 3 DC into the current square) 3x, chain 1. From behind, SC into the chain 3 space of the previous square, chain 1. Join, and Fasten Off.
You will now have a stripe that’s joined. Each of the next rounds will be worked in the same manner with the 1st square being worked into any right corner of any square from the previous round, and working to the left around.

Rounds 2 – 4, Square 1:
Chain 5. Join to form a ring. Chain 2. 2 DC into the ring, chain 1. From behind, SC into the join of the previous row, chain 1, 3 DC into the ring of the current square, chain 1. From behind, SC into the next join of the previous row, chain 1, 3 DC into the ring, (chain 3, 3 DC into the ring) 2x. Join, and Fasten off.
Rounds 2 – 4, Squares 2 – 11:
Chain 5. Join to form a ring. Chain 2. 2 DC into the ring, chain 1. From behind, SC into the bottom corner of the previous square, (chain 1, 3 DC into the ring of the current square, chain 1. From behind, SC into the join of the previous row) 2x, chain 1, 3 DC into the ring of the current square, chain 3. Join, and Fasten Off.
Rounds 2 – 4, Square 12:
Chain 5. Join to form a ring. Chain 2. 2 DC into the ring, chain 1. From behind, SC into the bottom corner of the previous square, (chain 1, 3 DC into the ring of the current square, chain 1. From behind, SC into the join of the previous row) 2x, chain 1, 3 DC into the ring of the current square, chain 1. From behind, SC into the corner of the 1st square from this round, chain 1. Join, and Fasten Off.
Before beginning the top, I rotated the piece to work along the top edge of Round 1. Corners will be formed in the top, and four less squares will be worked.
Top, Square 1:
Chain 5. Join to form a ring. Chain 2. 2 DC into the ring, chain 1. From behind, SC into the bottom corner of the previous row, chain 1, 3 DC into the ring of the current square, chain 1. From behind, SC into the next join of the previous row, chain 1, 3 DC into the ring, chain 3, 3 DC into the ring, chain 1. From behind, SC into the join of the previous rows previous square to form a corner, chain 1. Join, and Fasten Off.
Top, Square 2:
Chain 5. Join to form a ring. Chain 2. 2 DC into the ring, chain 1. From behind, SC into the chain 3 space of the previous square, (chain 1, 3 DC into the ring of the current square, chain 1. From behind, SC into the join of previous row) 2x, chain 1, 3 DC into the ring of the current square, chain 3. Join, and Fasten Off.
Top, Square 3:
Chain 5. Join to form a ring. Chain 2. 2 DC into the ring, chain 1. From behind, SC into the chain 3 space of the previous square, (chain 1, 3 DC into the ring of the current square, chain 1. From behind, SC into the join of the previous row) 3x, chain 1. Join, and Fasten Off.
Top, Square 4:
Chain 5. Join to form a ring. Chain 2. 2 DC into the ring, chain 1. From behind, SC into the join of the previous 2 squares from this top round, (chain 1, 3 DC into the ring of the current square, chain 1. From behind, SC into the join of previous row) 2x, chain 1, 3 DC into the ring of the current square, chain 3. Join, and Fasten Off.
Top, Square 5 – 7:
Repeat Squares 3 – 4, ending on a Square 3.
Top, Square 8:
Chain 5. Join to form a ring. Chain 2. 2 DC into the ring, chain 1. From behind, SC into the join of the previous 2 squares from this top round, (chain 1, 3 DC into the ring of the current square, chain 1. From behind, SC into the join of the previous row) 2x, chain 1, 3 DC into the ring of the current square, chain 1. From behind, SC into the join of the 1st and 2nd squares, chain 1. Join, and Fasten Off.

Bottom Border – Make sure not to skip beginning chain 2 as a stitch in Round 1 of border:
Attach yarn in any stitch, and chain 1. HDC into the 1st stitch, and in each DC, chain 1 space, and join around. Join. (72 HDC)
Round 2: Chain 1. HDC into the 2nd HDC, and each HDC around, making sure to end last stitch into the 1st stitch on the right side of the beginning chain 1. Join, and Fasten Off. (72 HDC)

Please feel free to make and sell your own Granny’s Stashbusting Tissue Box Cover using this pattern, but please DO NOT claim this pattern as your own nor should you sell my pattern, and DO NOT re-publish my photos as your own. DO NOT copy and paste my pattern anywhere, link to it instead.
Share your version of Granny’s Stashbusting Tissue Box Cover on Ravelry. Check out the EyeLoveKnots Ravelry page to keep track of all your EyeLoveKnots favorites in your que, and share your WIPS and finished projects!
Don’t miss out on new crochet patterns, reviews, jewelry tutorials and more! Subscribe to EyeLoveKnots by using the box on the right side toolbar, or follow me via Bloglovin! You can also find me sharing on the EyeLoveKnots Facebook page, and @EyeLoveKnots on Twitter!
Linked Up To…
Sundays at Home #252 – Celebrating Everday Life
Inspiration Monday – i should be mopping the floor
Craftastic Monday Link Party – Sew Can Do
Craft Schooling Sunday – Creative Jewish Mom
Handmade Monday #127 – Sum of their Stories
Ginx Woolly Linx Party May – Ginx Craft
In Stitches Party #36 – Nicki’s Homemade Crafts
Creative Mondays Linkup – Claire Justine
501st Inspire Me Tuesday – A Stroll Thru Life
Fabulous Party #268 – Lou Lou Girls
The Linky Ladies Party #159 – The Purple Poncho
Tutorials & Tips Link Party #393 – Home Stories A to Z
Sew It Cook It Craft It Link Party – Sew Historically
{Wow Me} Wednesday #304 – Ginger Snap Crafts
Your Whims Wednesday #408 – My Girlish Whims
The Wednesday Link Party #296 – The Stitchin’ Mommy
Wall to Wall DIY Wednesday Link Up Party Week 48 – Dabbling and Decorating
To Grandma’s House We Go Link Party 140 – Chas’ Crazy Creations
Thursday Favorite Things #390 – An Artful Mom
Crochet Patterns and Anything Crochet Link Party #11 – Joy of Motion
Hookin’ on Hump Day #191 – Petals to Picots
Pin Party #317 – The Pin Junkie
Best of the Weekend – Calypso in the Country
Link Your Stuff – Annemarie’s Haakblog
Snickerdoodle Create Bake Make Link Party #285 – Across the Boulevard
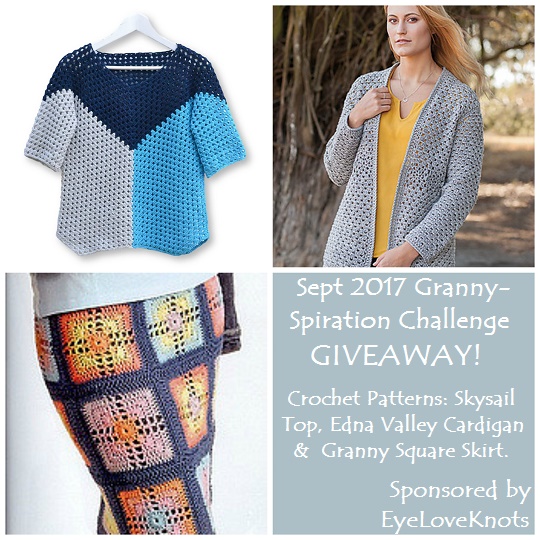
This Month’s Giveaway is sponsored by myself, Alexandra of EyeLoveKnots! One winner will receive three granny square crochet patterns via Ravelry. Patterns include: Crochet Granny Square Skirt by Doris Chan, Skysail Top by Elena Fedotova, and Edna Valley Cardigan by Lena Skvagerson for Annie’s.
a Rafflecopter giveaway
Must be 18 or older to enter. Open to all countries. Void where prohibited. Winner has 48 hours to respond to email notification, or another winner will be chosen. Alexandra of EyeLoveKnots is responsible for prize fulfillment.
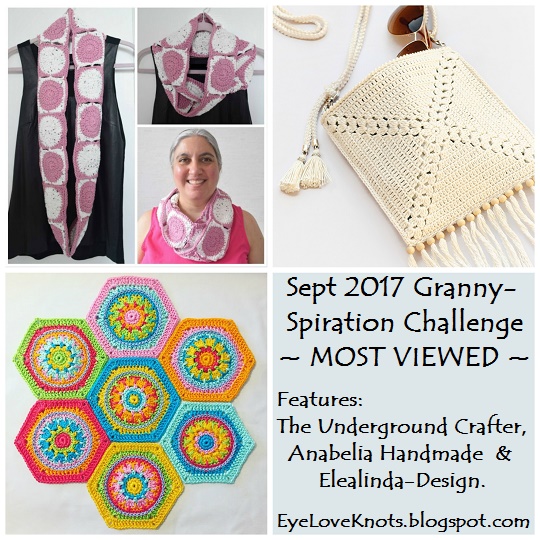
The three most viewed projects from last month’s challenge can be found in the image above. From left to right, top to bottom: Little Dots, Big Dots Infinity Scarf – Free Crochet Pattern from The Underground Crafter, Summer Shoulder Bag – Free Crochet Pattern from Anabelia’s Handmade, and Granny Hexagon Crystal – Crochet Inspiration (with link to Paid Pattern) from Elealinda-Design.
New Granny-Spiration Projects will be shared from your hosts the first Saturday of each month. Post times will vary. You will be able to link up from 12:00am EST on the first Saturday of the month, through midnight EST on the second Thursday from the start date – specific dates are on top of the Rafflecopter form – giving you almost two weeks to link up and enter the giveaway!
Please share projects that are family friendly, and GRANNY INSPIRED through use of regular granny square or solid granny square, granny stitch pattern or other afghan square in the form of a free pattern, pattern review, or inspiration piece. Not limited to crochet or knit.
Please make sure to link to your post, and not your home page.
*If you don’t have a blog, you can still share with us by creating a Free Flickr Account – powered by Yahoo. Add your projects there, and then come back here with the link for the project.
*Link ups cannot be to Etsy listings or Ravelry pages where patterns are sold. You can link to blog posts, Flickr or Facebook pages, Pins, etc that are directed towards it, but can’t directly link to it.
To be clearer though, Raverly pages of finished projects are okay to share. Sorry for the inconvenience! That’s per InLinkz guidelines. Thanks!
Features may be chosen at the discretion of each host. By linking up, you give us permission to feature your item.
I was wondering what it would be! I never would have guessed by the sneak peek you shared. 🙂
This is smart because most of us have scraps that match our home decor. It's a small item that could use them up if you don't have a ton of leftovers. This would also make a great gift for a teacher – Could be made in school colors, too.
I've got a box full of very small scraps of yarn and this gives me inspiration! Good idea!
Always anxious to see what you make in this challenge, going to have a look to the other blogs 🙂
This is such a great idea! We've all got scraps all over the place, haven't we?
Thanks so much for be featured with the mini shoulder bag. Great inspiration here, as always! Have a lovely weekend! ????
I am currently working on a temperature Blanket, 1 line of crocheting each day of the year, representing the highest temperature of the day. It's a great talking point.
I have seen those. I really love the idea, and have been wanting to work up one, but I am terrible at deciding on my colors. Are you using one stitch throughtout, or more of a sampler?
For fall I love to work on blankets, hats and scarves. Love all types of yarns.
Mostly clothes for warmth, like scarves and sweaters!
I've just started making hats for Autumn, also love making scarves for this time of year! ? kimmienotes(at)yahoo (dot)com
I always want to make a sweater ?
I am actually working on two sweaters at the moment! Definitely interesting designing garments over more basic items.
I am going to try and make a hooded sweater and maybe some baskets
My name is Bev Marks that's my comment above ??????
Thanks for taking time to leave me a message, Bev!
I love this idea. I'm definitely going to make one. I've been working on my first adult cardigan and it has been a challenge. But I have learned a lot. I like working with soft and cozy yarn in the fall.
How did you cardigan turn out?
I love making ponchos in the fall. They are perfect for fall weather.
Ponchos are fun to make! My favorite accessories are shoulder cozies. I love that I can pull my arms up into them if I am cold, but it doesn’t restrict my movement.
Our UK winters etc aren't usually that bad so I am still using light weight yarns. Just bought myself some silk laceweight (no idea what to do with it yet though)
What did you end up making with the silk laceweight?
Living in Florida, our Winters are not very cold at all. It’s pretty much like Spring weather (kind of) for the Winter. I usually use lightweight yarn all year, and just change the fiber.
soo inspiring. I love your idea, thanks for sharing <3
Cheers,
Mariam
I love this and I love that it uses up scraps I have already thanks for sharing it.
Stashbusting projects are the best!
That’s a clever idea. I’m not sure I’d have the patience for all those ends, but I imagine this would look great in a single colour too right?
Hehe it sure was quite a bit of ends! But I made it a point to weave in as I went so I wouldn’t end up putting the project into my WIP bin, instead of finishing it. Would look great in a solid color, or alternating, or random. So many possibilities!
What a great idea for your granny squares. I have not seen anything like that before. Thanks for joining in Ginx Woolly Linx Party for May.
I try to be original. I had a lot of fun putting this cover together.