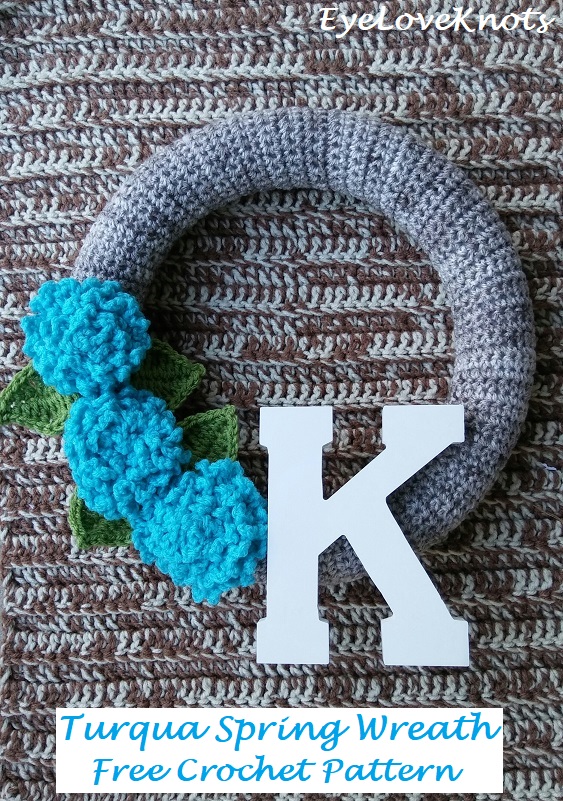
Free crochet pattern for how to crochet a Hydrangea inspired wreath for Spring.
Find the free crochet pattern instructions below, or purchase a printer-friendly, ad-free PDF on Ravelry by clicking here.
I have been having so much fun making wreaths over the last year, experimenting with different crocheted bases and embellishments. I know you are thinking, “I haven’t seen any on the blog”, and you are so right! I have been slacking a little on sharing my wreaths, but I plan on sharing more with you this year.
In preparation for the upcoming Spring, I thought the Turqua colorway from the Super Saver line would be perfect! And paired with it, I chose a trendy gray colorway from the same line, Soapstone.
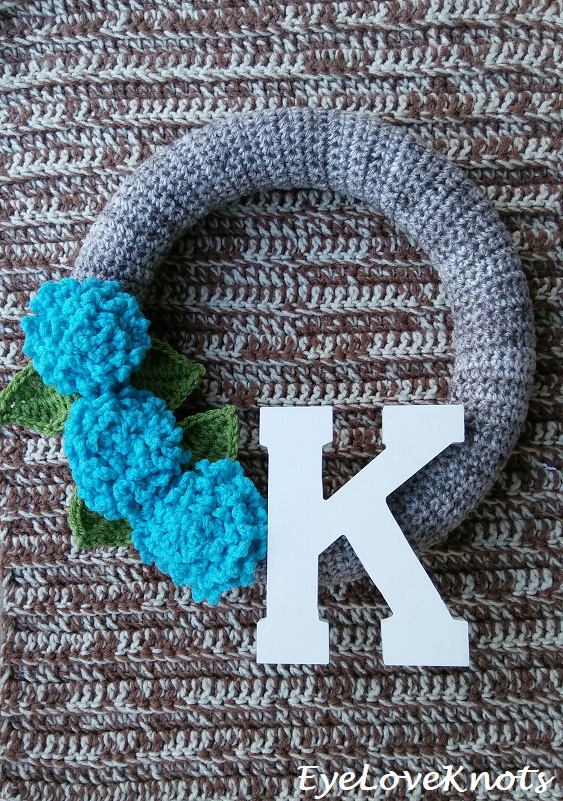
I oogle over the beautiful Hydrangea wreaths all over Pinterest and Etsy, and I have really wanted to create my own version. This Make it for Me Event hosted by Kathy of Elk Studio was exactly what I needed to get my butt in gear, and work up my own Hydrangea wreath, and I am soooo happy with it! It came out perfect!

If you aren’t familiar with the Make it for Me Event, it is basically a time when we stop, and take some time to crochet something for ourselves to wear or display, and enjoy. I don’t know about you, but I received a few orders right at Christmas time, plus was finishing up last minute Christmas gifts, and I was just non-stop on-the-go crocheting and creating (and stressing a little bit) for others. It is nice when you have a break, to spend a little time on something special for you! This wreath was my special make for myself to place on my front door.
There are so many possibilities for this wreath – changing up the base color or flowers to match any occasion, holiday or color theme, adding a fun pennant banner diagonal from the flowers of instead of the monogram, how about a bird cut out or a “Welcome” sign? These are just a few ideas. Drop me a line below if you’d like to see a specific design.
After spending all your time crocheting the base and embellishments, save yourself some time, by using your hot glue gun to secure the flowers and leaves. I am not sure if you’ve used a glue gun with yarn before, but it is very, VERY secure. I have even washed items made that hot glue was used on, and they hold up extremely well.
AD-FREE, PRINTER FRIENDLY PDF:
If you would like a PDF version of this post, you may get one through either my EyeLoveKnots Etsy Shop, LoveCrafts Shop or Ravelry for a small fee. This fee is to compensate for the views lost when you no longer need to return to the blog to for the information, as you will have your own copy. Plus! It helps fund supplies for new projects to share with you!
Shop EyeLoveKnots Etsy: Turqua Spring Wreath.
Shop EyeLoveKnots LoveCrochet: Turqua Spring Wreath.
Are you a Raveler? Share your version of this project on Ravelry – Turqua Spring Wreath.
Save this to Your Favorites – AllFreeCrochet.
Materials:
- 275 Yards of Worsted Weight Yarn – I used Red Heart’s Super Saver; 185 Yards in the Soapstone [Gray] colorway for the wreath base, about 55 Yards in the Turqua [Blue] colorway for the frilly flowers, and 25 Yards in the Tea Leaf [Green] colorway for the leaves
- H8/5mm Crochet Hook
- Tapestry Needle
- 12″ Styrofoam Wreath Form – I used a white Floracraft brand
- 6″ White Wood Letter (JoAnn’s) – “K”
- Hot Glue Gun and Sticks
- Basic 12″ Wreath Form Cover, Free Crochet Pattern
- Frilly Flowers Free Crochet Pattern
- Basic Leaf Pattern 2 Ways, Free Crochet Pattern
Material Notes:
Yarn Alternatives: Bernat’s Super Value Yarn, Caron’s One Pound, Hobby Lobby’s Crafters Secret.
Time Spent:
I had my wreath ready to go in just over three and a half hours.
Measurements:
12″ Wreath
Gauge:
20 Single Crochet by 14 Rows = 6 1/8″ Wide by 3 7/8″ Tall
Wreath Base:
First things first, you will need to work up a Basic 12″ Wreath Form Cover, a free crochet pattern found here on the EyeLoveKnots blog! Don’t forget the wreath hanger if you need one – I made mine with the same yarn as the wreath base.
Frilly Flowers – Make 3:
Once finished, time to start your flowers! I used my Frilly Flowers Free Crochet Pattern to work up three flowers in Turqua Blue. There are some photos in that post to help you roll up your flowers too.
Leaves – Make 4:
For the leaves, I used Tea Leaf Green and my Basic Leaf Pattern 2 Ways in withOUT the vein.
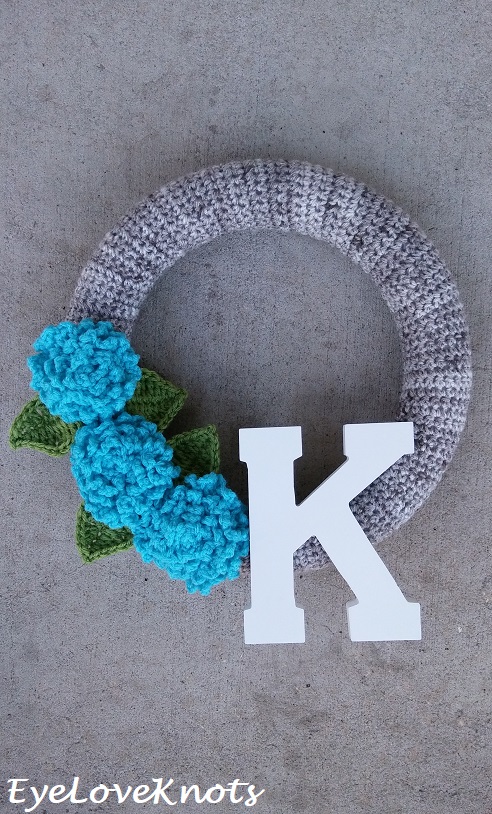
Assembly:
Your wreath base should already be sewn closed on the styrofoam base. Next, decide where to place your flowers, leaves and letter. To do so, lay them down on top of the wreath base, and move around until you have found the perfect spots for them. I suggest using them to cover up the seam from sewing the two ends together of the wreath form cover. The larger seam sewn lengthwise to join the two sides of the wreath cover should lay on the inside back of the wreath, and not be visible.
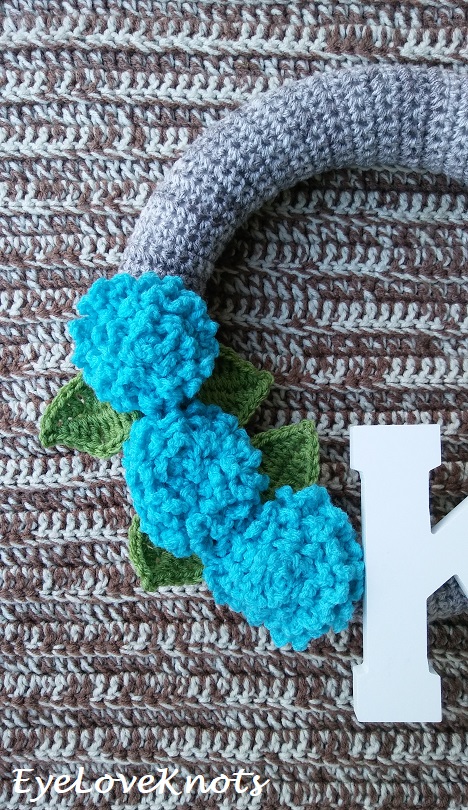
For mine, I knew that because the letter was a little heavier, that I wanted it to be closer to the bottom center so it wouldn’t make the finished wreath tilt. I placed it slightly off centered. Keep in mind, that it is best if the letter reaches the side too, so it can be tacked down here as well for extra security. After deciding on the letter placement, I placed the first flower closest to the letter, and then the other two flowers following each other. After I had the flower placement down, I added in the leaves in between the flowers, making sure they didn’t touch each other, but were sticking out a bit so they could be clearly seen over the flowers. After I was satisfied with the placement of everything, I carefully picked up one item at a time, and hot glued down.
Please feel free to make and sell your own Turqua Spring Wreath using this pattern, but please DO NOT claim this pattern as your own nor should you sell my pattern, and DO NOT re-publish my photos as your own. DO NOT copy and paste my pattern anywhere, link to it instead.
Join one of our awesome Facebook groups to share your creations, and see what others are up to!
– EyeLoveKnots Crochet & DIY Community
– DIY Home On Rockwood Lane
– Alexandra Lane Lifestyle
Linked Up To…
Craft Schooling Sunday – Creative Jewish Mom
Happiness is Homemade Link Party #312 – Create with Cynthia (link up post deleted by host)
Unlimited Monthly Link Party 10 – Grammys Grid (link up post deleted by host)
Creative Mondays – Claire Justine
Handmade Monday #165 – Sum of their Stories
The Really Crafty Link Party #207 – Keeping it Real
Craftastic Monday Link Party – Sew Can Do
Ginx Woolly Linx Party March – Ginx Craft
Fabulous Party #309 – Lou Lou Girls (link up post deleted by host)
538th Inspire Me Tuesday – A Stroll Thru Life (link up post deleted by host)
All About Home #29 – Common Ground (link up post deleted by host)
Linky Ladies Party #179 – The Purple Poncho
One More Row Free Pattern Link Party #16 – Loops and Love Crochet
{Wow Me} Wednesday #444 – Ginger Snap Crafts
Your Whims Wednesday #449 – My Girlish Whims
The Wednesday Link Party 337 – The Stitchin’ Mommy
To Grandma’s House We Go Link Party 182 – Chas’ Crazy Creations (link up post deleted by host)
Tuesday Turn About #38 – My Wee Abode
Waste Not Wednesday Link Party 195 – Pretty DIY Home
Hookin’ on Hump Day #210 – Moogly Blog
Thursday Favorite Things #429 – An Artful Mom
Creatively Crafty Link Party #213 – Life Beyond the Kitchen
Creative Compulsions Linky Party #49 – My Bijou Life
Scrappy Stitchers Link Party #61 – Stitches n Scraps
Pin Party #358 – The Pin Junkie
Traffic Jam Weekend #224 – My Bijou Life
Best of the Month Link Party March 2020 – Calypso in the Country
Home Matters Linky Party #272 – Modern on Monticello
Create, Bake, Grow & Gather Party #409 – Shabby Art Boutique
Handmade & Otherwise Weekly Link Up Week 39 – Petals, Pies and Otherwise
Link Your Stuff – Annemarie’s Haakblog
Snickerdoodle Create Bake Make Link Party 325 – EyeLoveKnots
THIS is the year I will learn! I love this pattern!
This would be a really good one to start on. For the base cover, you just need to know the basic single crochet, and for the flower, it's just the single crochet and a basic chain stitch. The leaves have a little more advanced stitches, but you could always use leaves from floral stems. Let me know if you have any questions, I am happy to help!
Thank you for all your wonderful lpatterns
Thank you for your support! Very appreciated.
Great wreath! I love hydrangeas 🙂 The blue is so bright!
Me too! I have been admiring the wreaths with full, beautiful hydrangeas for quite some time, and I really wanted to make my own.
I’m excited to try this out – I love having a beautiful wreath on my front door. How many inches long is the Wreath Form Cover before it is sew onto the form? I know I could count 130 rounds but am worried I’ll lose count and instead could just measure the final piece. 🙂
This is my favorite for my front door! I don’t have the measurements written down, but you could use the gauge as a guide. I might also suggest some stitch markers. Enjoy.
This is beautiful! I have been struggling to think of a housewarming gift for my cousin now that she has purchased her first home and this will be perfect! Thank you and I can’t wait to make it and see her face!
How wonderful! Would make a lovely housewarming gift 🙂
Looks really nice, I like it! Thanks so much for linking up with me at my #UnlimitedMonthlyLinkParty 10, open March 1 to 26. All entries shared on social media if share buttons installed. I invite you to my Themed Linkup 12 for Crock Pot and Instant Pot Recipes, open February 28 to March 10 if you have any appropriate posts. Won’t you join me at my Short Story Prompt Party for fun and creativity? Open March 2 to 9. Just start typing, see what you come up with! Remember, no story is too short! The prompt is: I woke from a long nap to see…
Very nice wreath! I like the color combination you chose. I’m visiting from Happiness is Homemade.
Thank you for visiting! That turquoise color has become my favorite.
I love your wreath. I love to crochet so I have pinned this and hope to make one. Congratulations, you are being featured at happiness Is Homemade! I hope you will stop by. https://www.eclecticredbarn.com/2020/03/happiness-is-homemade.html
Have a wonderful weekend.
Hugs,
Bev
Woo!! Thank you so much!
Very nice: thanks for sharing at the #TrafficJamWeekend Linky Party.
Thank YOU for hosting 🙂
What a cool wreath!
Thanks for linking up to Creative Compulsions!
Michelle
http://mybijoulifeonline.com
Thanks, Michelle!