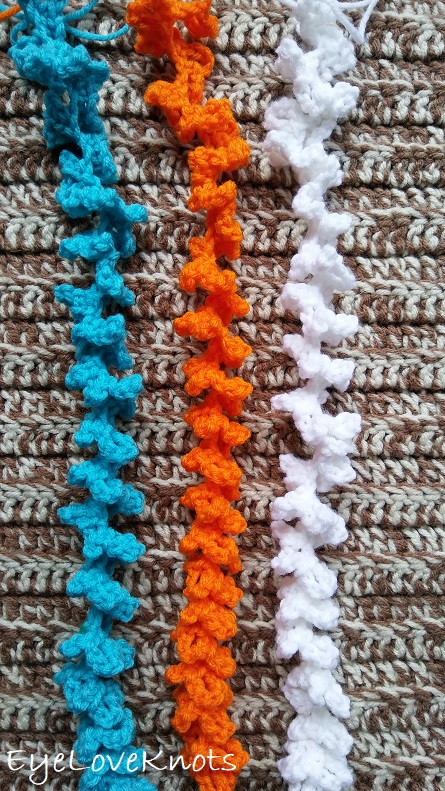
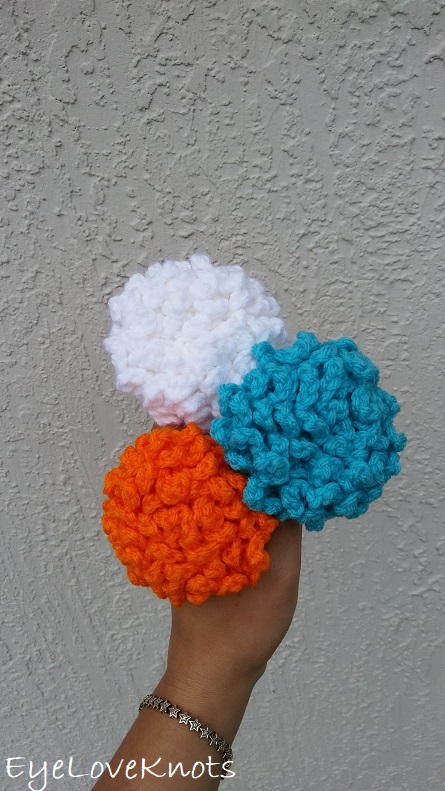
Free crochet pattern for how to crochet Frilly Flowers, an easy flower crochet pattern inspired by the Hydrangea, and it has a video tutorial.
Find the free crochet pattern instructions below, or purchase a printer-friendly, ad-free PDF on Ravelry by clicking here.

So, I joined another monthly craft blog hop – Inspire My Creativity, and I am so excited! I really love the motivation, and making new friends 🙂 Each month, there will be a different theme for the link up. If you have a post that fits that theme, feel free to link up too!
I joined this group a little later (only a few days ago), and so I had to think about what kind of Spring related post I could put together in a short amount of time, and I came up with these Frilly Flowers!
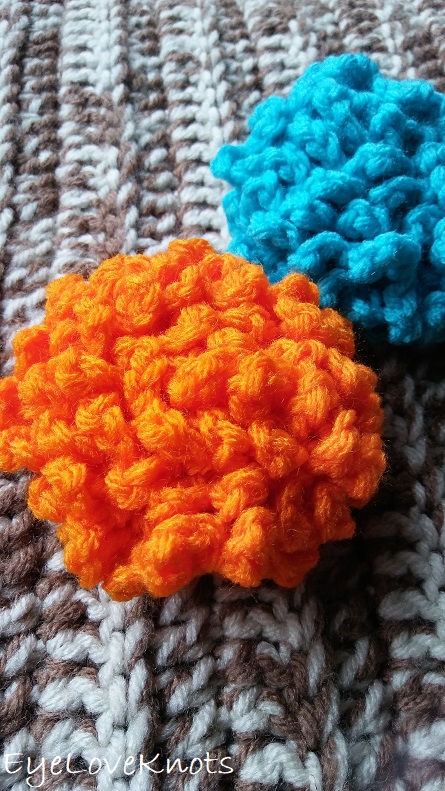
This is something I have been wanting to share for a while now, and not gotten around to it, but these are actually the flowers I will use to make my wedding bouquets – the same colors too! It is my take on a Hydrangea, though it could reflect a couple of flowers too – in the eye of the beholder.
AD-FREE, PRINTER FRIENDLY PDF:
If you would like a PDF version of this post, you may get one through either my EyeLoveKnots Etsy Shop, Ravelry or LoveCrochet Shop for a small fee. This fee is to compensate for the views lost when you no longer need to return to the blog to for the information, as you will have your own copy. Plus! It helps fund supplies for new projects to share with you!
Shop EyeLoveKnots Etsy: Frilly Flowers (with Basic Leaf Pattern).
Shop EyeLoveKnots LoveCrochet: Frilly Flowers (with Basic Leaf Pattern).
Are you a Raveler? Share your version of this project on Ravelry – Frilly Flowers (with Leaf).
Save this to Your Favorites On: AllFreeCrochet, FaveCrafts, Crochet Pattern Bonanza, Cheap Thrifty Living, DIYideaCenter, AllFreeHolidayCrafts
See How to Make this Flower on YouTube!
Materials:
- Small Amount of Worsted Weight Yarn – I used Red Heart’s Super Saver in the Turqua [Blue], Pumpkin [Bright Orange] and White
- H8/5mm Crochet Hook
- #18 Tapestry Needle for Weaving in Ends
- Floral Wire – I used 24 gauge
- Floral Tape
- Wire Cutters
Material Notes:
Yarn Alternatives: Caron’s One Pound, Bernat’s Super Value, Crafters Secret
Really, you can use any yarn weight with respective hook, but I love the flower that worsted weight yarn produces. I did try with a lightweight yarn, and it doesn’t hold it’s weight as well for a larger flower like these.
You can even try two strands of lightweight #3 yarn held together in place of the worsted weight yarn! This is fun to mix colors with.
I picked up some floral wire and tape in the floral department of my local Hobby Lobby, but 24 gauge is pretty thin. I might suggest trying some 22 or 20 gauge jewelry wire instead.
You can use green washi tape in place of the floral tape – you can find this in the scrapbooking area of your craft store.
Time Spent:
One flowers takes just over 30 minutes to put together – about 20 minutes to crochet, and sew up, and about 15 minutes to cut wire, and tape up.
Measurements:
Flower: 3.25″ wide, 1.25″ tall; Stemmed: 10.25″ tall
Abbreviations (US Term):
- SC – Single Crochet (Photo Tutorial)
Pattern Notes:
The size of this flower can easily be changed – the multiple is only 1 plus 4.
IF YOU WANT TO ADD LEAVES TO YOUR STEMS: Use my Basic Leaf Pattern (Free Crochet Pattern). To add them, make the flower, and add the floral wire, but not tape. Make as many leaves as you want, and add floral wire to each one as well. Then you can wrap the floral wire of the leaves around the flower’s wire where you want them to be. Cover the wire with the floral tape.
Pattern:
Chain 79. SC into the 5th chain, (chain 4, SC into the next foundation chain) 74x. (75 loops)
After working last single crochet, fasten off with a long tail and pull up last stitch to break loop. Weave in initial tail end.

Thread needle with long tail, and starting at the end that does not have the yarn tails, you will begin rolling up the piece.
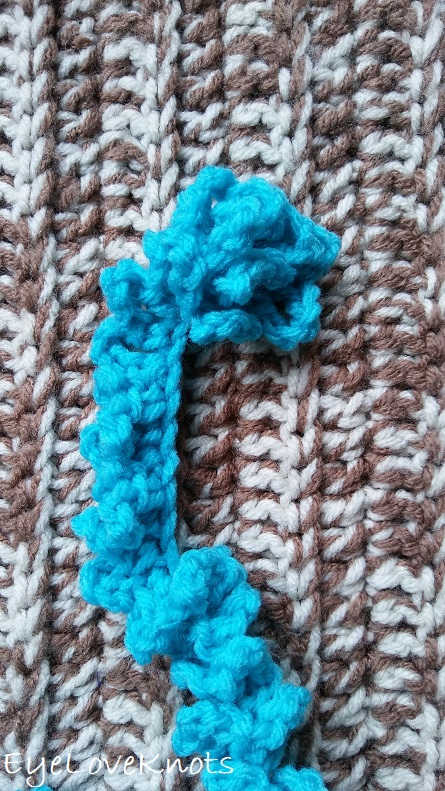
Continue rolling lining the edging just under the previous round.
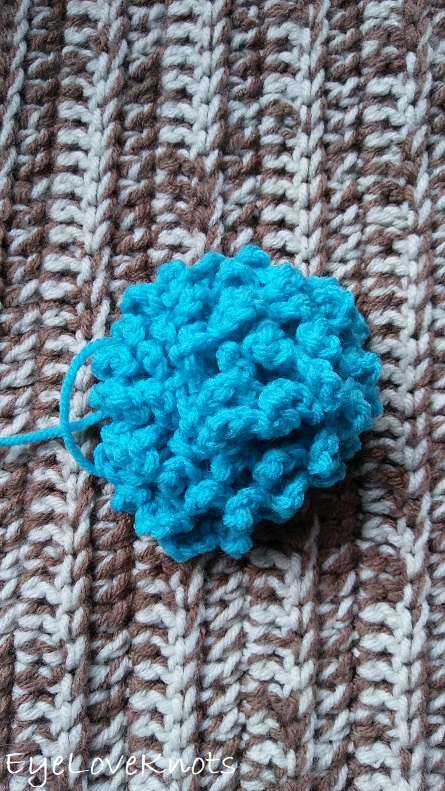
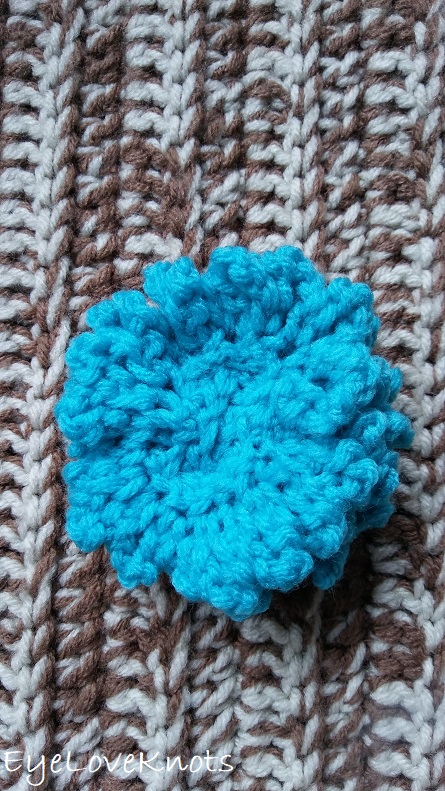
Flower will look something like this.
Carefully turn to the bottom.
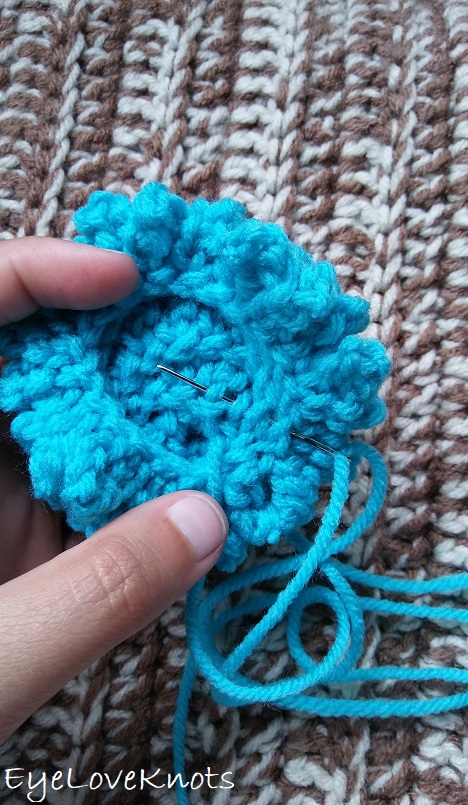
Make long strides working from one side of the flower to the other, making sure to work through all layers. Once to the other side, turn a little, and work across again. Continue in this manner until all has been secured.
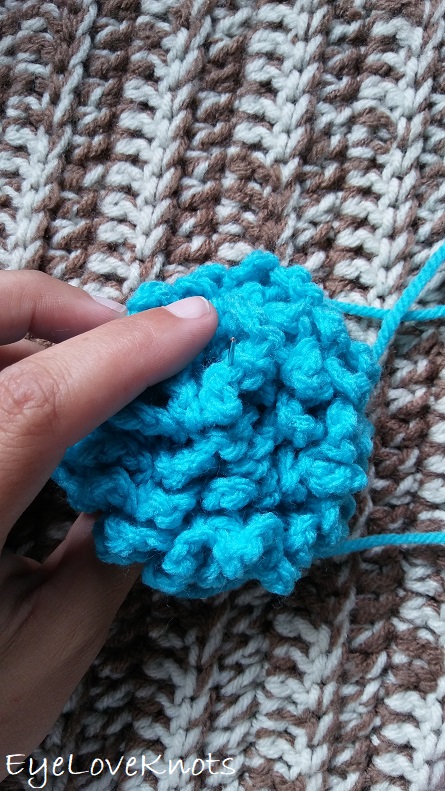
Check the first little loopy part to make sure it did not get missed. If it isn’t secured down, just come up from the back side, and tack it in place.
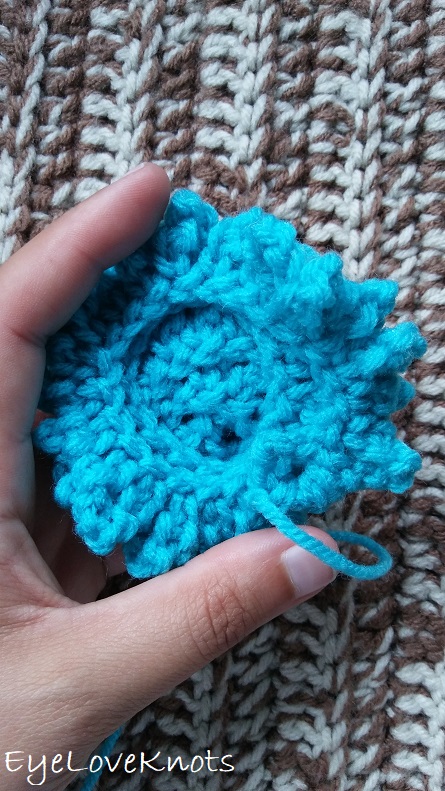
Weave in final end.
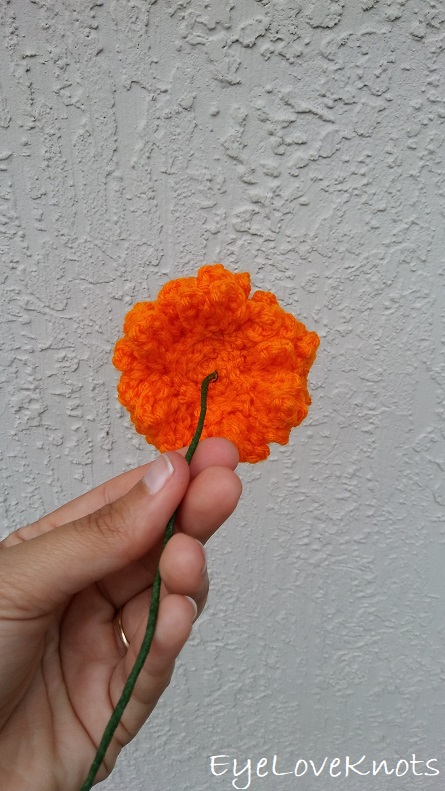
Here is the finished back.
Turn into Floral Pieces:
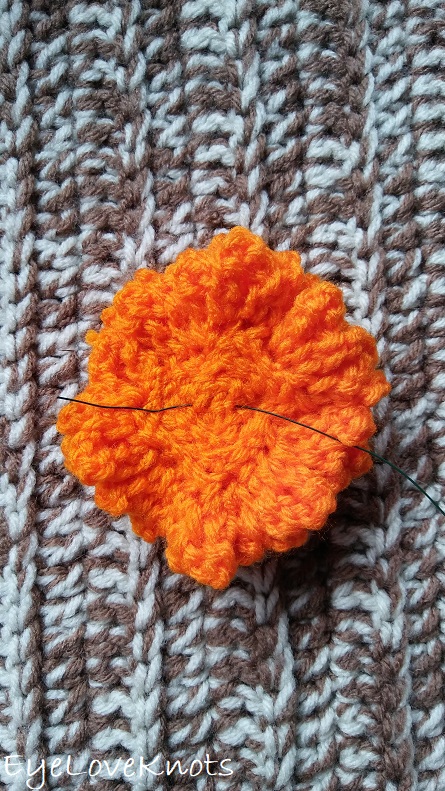
Cut floral wire – I measured the vase that I wanted my flowers to go into, and found that it was 10″, so I cut the wire to be 20″ long. Weave in under the center stitches on the back side of your flower – make sure it is under some good planted stitches, otherwise the finished flower will droop, and even them out.
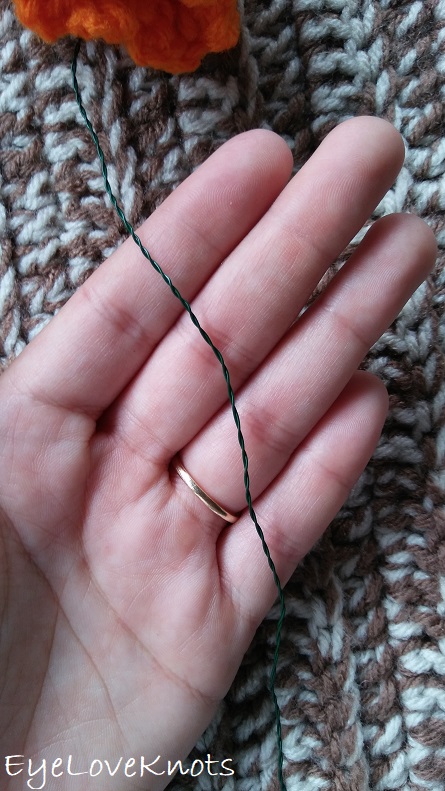
Twist the two strands together all the way down, taking special care at the initial twist to make sure it is as close to the flower as possible.

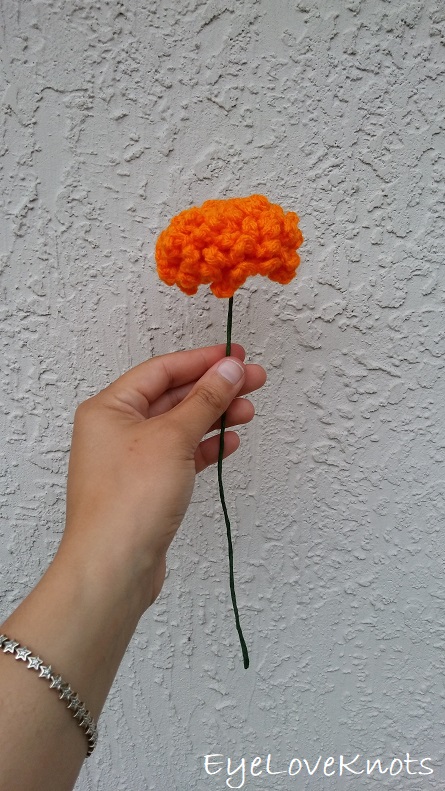
Wrap wire with floral tape – I started on the end, and worked my way up as far as I could get to the bottom of the flower.
These are my wedding colors <3
You can place a rubber band around them to better bunch, or simply place one or two stems in a small vase.
Please feel free to make and sell your own Frilly Flowers using this pattern, but please DO NOT claim this pattern as your own nor should you sell my pattern, and DO NOT re-publish my photos as your own. DO NOT copy and paste my pattern anywhere, link to it instead.
Join one of our awesome Facebook groups to share your creations, and see what others are up to!
– EyeLoveKnots Crochet & DIY Community
– DIY Home On Rockwood Lane
– Alexandra Lane Lifestyle
Linked Up To…
Craft Schooling Sunday – Creative Jewish Mom
In Stitches Party #32 – Nicki’s Homemade Crafts (link up post has been deleted by host)
Craftastic Link Party – Sew Can Do
Ginx Woolly Linx Party March – Ginx Craft
The Really Crafty Link Party #161 – Keeping it Real
The Scoop Link Party #369 – Worthing Court Blog (link up post has been deleted by host)
Merry Monday Link Party #245 – A Wonderful Thought
Handmade Monday #118 – Sum of their Stories (link up post has been deleted by host)
Creative Mondays Linkup – Claire Justine
Tutorials & Tips Link Party 387 – Home Stories A to Z (link up post has been deleted by host)
Inspiration Monday – i should be mopping the floor
Make it Pretty Monday – Week 286 – The Dedicated House
Talk of the Town 166 – My Repurposed Life
{Wow Me} Wednesday #295 – Ginger Snap Crafts
Hookin’ on Hump Day #187 – Petals to Picots
Your Whims Wednesday #399 – My Girlish Whims
Wall to Wall DIY Wednesday Week 40 – Dabbling and Decorating (link up post has been deleted by host)
To Grandma’s House We Go Link Party #131 – Chas’ Crazy Creations (link up post has been deleted by host)
Crafty Love Link Party #43 – Jessie at Home
Scrappy Stitchers Link Party #50 – Stitches n Scraps
Thursday Favorite Things #381 – An Artful Mom
Best of the Weekend – Calypso in the Country
Home Matters #225 – Domestic Deadline
Sweet Inspiration #149 – Just Measuring Up (link up post has been deleted by host)
Link Your Stuff – Anniemarie’s Haakblog

This post is part of the monthly link party I host called Inspire My Creativity. Each month, a group of bloggers all create a project based around a theme and this month the theme is SPRING. There are tons of great ideas and I know you’ll get inspired to create something fun and new!
Your Co-Hosts:
Shani | Sunshine & Munchkins — Meg | See The Happy
Christine | Swordfights & Starry Nights — Candice | She’s Crafty
Julia | The Quiet Grove — Marie | The Inspiration Vault
Brooke | My Beautiful Mess — Heather | Glitter On A Dime
Rachel | Adventures of a DIY Mom — Jenny | Cookies, Coffee and Crafts
Anna | Practical and Pretty — Keala | Recipe For A Sweet Life
Carmen | Living Letter Home — Cathy | A Boy and His Mom
Sarah | The Strawberry Nest — Adree | The Keele Deal
Aimee | Things Small and Simple — Alexandra | EyeLoveKnots
If you have a post that fits, feel free to link up too! Link up will stay live for two weeks.

Beautiful colors! Thanks for the pattern!
So happy you joined our hop! I enjoy the motivation too. Your flowers are beautiful. I look forward to seeing all your creations each month!
So kind of you Heather! I apologize for the delay in responding, but I’ve been buried in Spam Comments – had to work through it all. I am enjoying being a part of this challenge very much!
These flowers will make a beautiful bouquet! What pretty colors. Welcome to the inspire my creativity party!
Thank you so much, Jenny, for the welcome! I apologize for the delay in responding, but I’ve been buried in Spam Comments – had to work through it all.
These are so unique and beautiful! I love them!
I am so going to have my mom make me some of these. She is the one who crochets. I cannot to save my life. They are darling.
These are adorable!! I love a simple crochet project
So pretty! It would be lovely to make a bouquet of these for Mother’s Day. Thank you for sharing at The Really Crafty Link Party. Pinned!
Love this flower! I created the features on the early side so missed your contribution, but will feature it next week, and add it to the party this week so I don’t forget. Thanks for sharing on craft schooling Sunday!
Thank you so much, Sara!
What a darling way to make a flower! I love how these turned out and they would be so cute to add to so many places. Love it!
What a fun and unique way to make flowers. They turned out so cute!
Thank you, Adree!