Before I get started, can I share my Super Crafty Sunday Link Up #4? I have been sharing it in my newsletters, but if you haven’t visited, please stop by. See what our most clicked projects were from last month, enter the giveaway for some Cotton Fair Yarn (open worldwide, sponsored by Helena of Crochet n Crafts), and share what you’ve been working on – AND you don’t have to be a blogger to share in the link up!
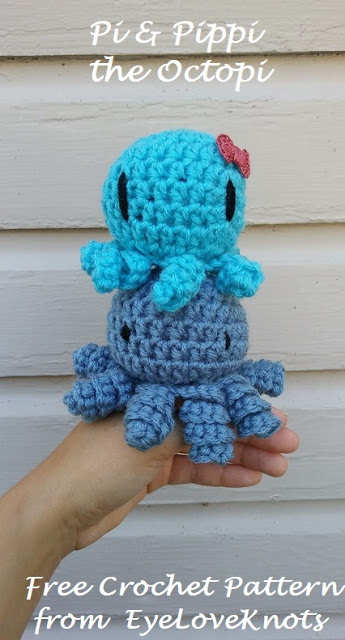
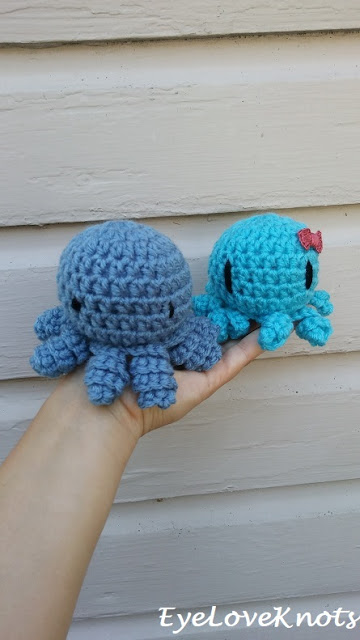
Last week I received a custom order in my EyeLoveKnots Etsy shop for a small Octopus plush. The order included a basic photo of one that she already had at home, and a few basic measurements. I pulled some yarn out of my stash, and got to work on Pi, the dusty blue octopus. I was so excited with how well this cute little octopus came out, especially the tight tentacles, which I managed to evenly get 8 on the first try. Yes!
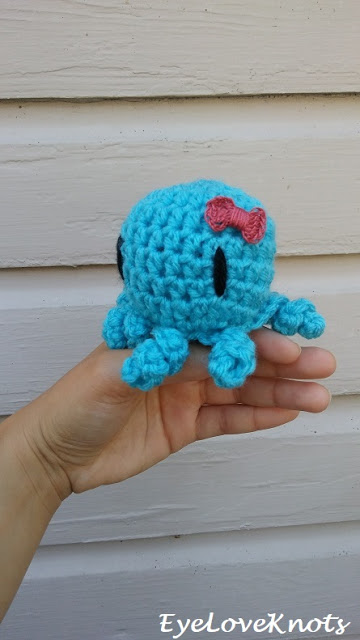
I sent pictures of Pi to my guest, and she sent back that she wanted looser tentacles, and longer eyes. I grabbed a different color out of my stash, and got to work on Pippi, the bright blue octopus.
Originally, I figured I would just post instructions for the first octopus I made, but then I started thinking that maybe you guys would like to have the other instructions too, in case you preferred one or the other differences, and so I got the idea to add a bow to what seems like the smaller octopus (just because the tentacles are softer), and make this a his and her duo. Such a cute little set!
And aside from a plush, you could attach a string around the top of the head, and the make the octopus into an ornament for an under the sea/nautical themed party or Christmas tree.
Materials:
– 40 Yards of Worsted Weight Yarn – I used Red Heart’s Super Saver (affiliate link) in Turqua and Country Blue found at my local JoAnn’s
– Small Amount of Black for Eyes – I also used Red Heart’s Super Saver
– Bow: Small Amount of #10 Crochet Cotton Thread – I used Artiste’s #10 Crochet Thread in the Country Rose colorway from my local Hobby Lobby
– H8/5mm Crochet Hook
– Bow: 2mm Crochet Hook
– Tapestry Needle
– Small Amount of PolyFil
Material Notes:
Yarn Alternatives: Caron’s One Pound, Bernat’s Super Value, Crafter’s Secret Yarn from Hobby Lobby
Time Spent:
I was able to work up one in about an hour.
Measurements:
3″ Wide by 3″ Tall. 4″ if Standing on Tentacles (Pi). Legs extend out 1.5″
Gauge:
With H8/5mm and Red Heart Super Saver: 20 SC by 14 Rows = 6 1/8″ wide by 3 7/8″ tall
Abbreviations:
HDC – Half Double Crochet
HDC2tog – Half Double Crochet Decrease Over Two Stitches
SC – Single Crochet
Pattern Notes:
You will be working in a continuous round, meaning, no joining after rounds. To help with the gap at the end of Round 1, there is a decrease worked as the first stitch of the next round.
In the title image, you may notice the black strand in between the eyes of my bright blue, Pippi. This was because I left the strand loose inside. To ensure you don’t end up with a visible strand, you can weave in under some stitches over to the other spot, and begin the second eye.
Pattern:
Chain 4. Join ring. 8 HDC into the ring. Yarn over, insert hook into the ring, yarn over, pull through (3 loops on hook)… (8 HDC)
R2: …insert hook into the first stitch, yarn over, pull through, yarn over, pull through all four loops (counts as first stitch of the round), HDC into the same first stitch, 2 HDC into each of the next 7 HDCs. (16 HDC)
R3: (2 HDC into the next HDC, HDC into the next HDC) 8x. (24 HDC)
*Weave in initial tail.
R4 – 8: HDC into each HDC around. (24 HDC)
R9: (HDC2tog, HDC into the next HDC) 8x. (16 HDC)
Eyes: There are two options for the eyes, Pi has small, 0.38″ long eyes, while Pippa has 1″ long eyes.
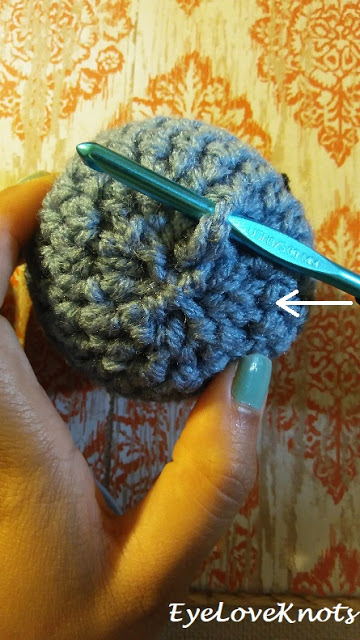
Shorter eyes are worked out of Round 6 and into Round 7, while the longer eyes are worked out of Round 5 and into Round 8. From the wrong side, weave in and out nearby the entry point three times to secure, then bring the needle out of the middle of the indicated stitch (middle to secure), and repeat to thicken eye. Measure six stitch to the right (or 1.75″), and repeat the process, keeping in mind that the stitches for the second eye will not be exactly directly across because the octopi is worked in a spiral.
*Stuff body.
R10: (HDC2tog) 8x. (8 HDC) Fasten Off with a Long Tail.
*Stuff again if necessary.
Close Bottom: Pull out last loop, and thread needle. Weave in and out of stitches along the last round. Pull tight, and weave in to secure.
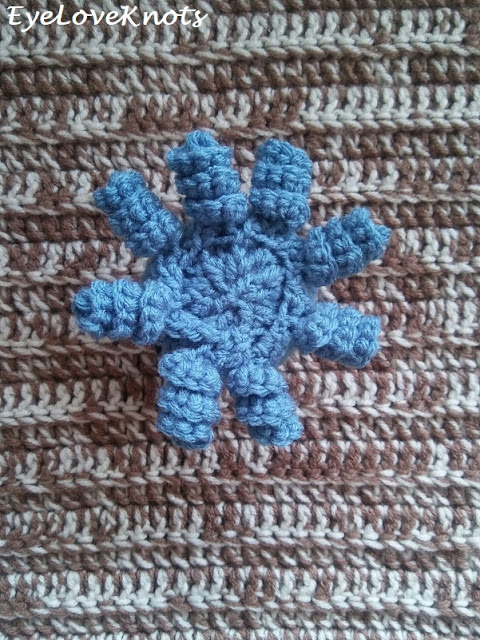
Tentacles: These are worked into the stitches of Round 10. Essentially, I worked into the actual stitches as if I were working around posts. After slip stitching, I skipped a “post”. Pi has tighter tentacles, while Pippa has looser ones. Pi’s instructions are in parenthesis.
Attach yarn into a stitch of Round 10. [Chain 9 (12). Work 2 (3) SC into the 2nd chain, and each of the next 7 (10) chains. Slip stitch into the next stitch of Round 10.] 8x for 8 tentacles
Fasten Off, and Weave in Remaining Ends.
Pippi’s Bow: Use a 2mm Crochet Hook and Crochet Thread
Chain 4. Join to form ring. [Chain 4. 4 TR into the ring, chain 4, slip stitch into the ring] 2x. Fasten Off with long tail for wrapping and sewing.
Pull initial tail tight to close up the hole from the beginning chain 4, and sew closed like you would on a beanie. On end tail, pull loop all the way out. Begin wrapping the tail around the center of the bow until desired look is achieved. Thread tapestry needle, take thread to wrong side, and weave in and out of center wrapping. Place bow – I did so at an angle just above eye. Weave in thread behind bow so not visible. Fasten Off.
Please feel free to make and sell your own Pi or Pippi Octopi using this pattern, but please DO NOT claim this pattern as your own nor should you sell my pattern, and DO NOT re-publish my photos as your own. DO NOT copy and paste my pattern anywhere, link to it instead.
Join the EyeLoveKnots Crafting Community to share your creations, and see what other’s are up to!
Share your version of this project on Ravelry – Pi & Pippi the Octopi. Check out the EyeLoveKnots Ravelry page to keep track of all your EyeLoveKnots favorites in your que, and share your WIPS and finished projects!
Don’t miss out on new crochet patterns, reviews, jewelry tutorials and more! Subscribe to EyeLoveKnots by using the box on the right side toolbar, or follow me via Bloglovin! You can also find me sharing on the EyeLoveKnots Facebook page, and @EyeLoveKnots on Twitter!
Linked Up To…
Home Matters Linky Party #181 – Domestic Deadline
Crafty Love Link Party #33 – Jessie at Home
Craft Schooling Sunday – Creative Jewish Mom
Ginx Woolly Linx Party July – Ginx Craft
Handmade Monday #134 – Sum of their Stories
Tutorials & Tips Link Party #399 – Home Stories A to Z
507th Inspire Me Tuesday – A Stroll Thru Life
Fabulous Party #275 – Lou Lou Girls
The Linky Ladies Party #162 – The Purple Poncho
Talk of the Town 182 – My Repurposed Life
Sew It Cook It Craft It Link Party #109 – Sew Historically
Tuesday Turn About #7 – My Wee Abode
In Stitches Party #40 – Crochet Kim
They are both very cute. I can imagine them hung on a Christmas tree.
This octopus is the cutest. My kids would love this. Thank you for sharing at Merry Monday. Hope to see you at the party next week!
These are both adorable, what a lovely set. Pinning.
So cute! I'm going to try to make two of these for my kids. Thank you for sharing the pattern at The Really Crafty Link Party. Pinned.
So cute – my kids would love these!
Bethany | http://www.CuteCapsuleLife.com | Simply Share Friday Linkup
These are so adorable! Thanks for sharing at the Friday Frenzy!
These little guys are totally over-the-top cute!!! Thanks for sharing on Friday Frenzy! Faith, Hope, Love, & Luck – Colleen
These are so cute! I have a new granddaughter coming and I think I will make them for her for Christmas. Thank you
So fun! These are especially good since they don’t have any pieces that can come off, and pose a chocking hazard. Looking forward to seeing your little octopi 🙂 Congrats on the new granddaughter!