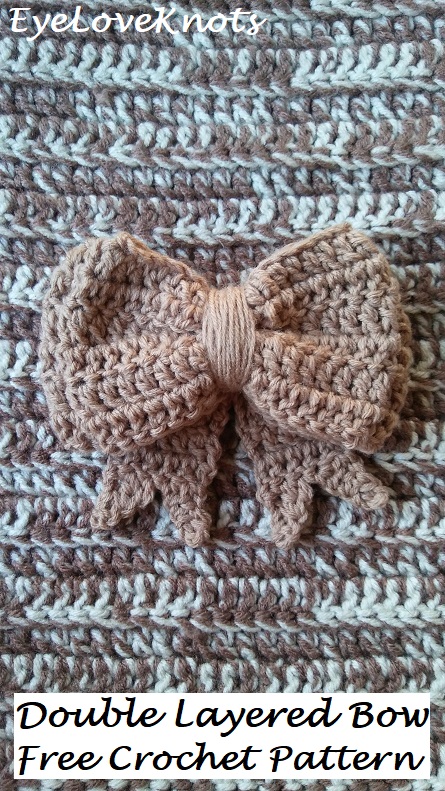
I love the look of burlap bows and projects, but the idea of working with burlap intimidates me, mostly because of the fraying. I am sure it is easy, just more involved, but rather than go that route, I decided to crochet a burlap inspired double layered bow.
In my mind, the measurement width differences were going to be larger than they turned out, but I still love it. If you want a larger width difference, simply work the small bow with less stitches.
Use can attach a pin to the back of the bow to easily add or move around – imagine pinned to a cowl or headband, or sew or glue to embellish anything, like a tote bag, throw pillow, hat.
How would you use this fun double layered bow?
If you would like a PDF version of this post, you may get one through either my EyeLoveKnots Etsy Shop or EyeLoveKnots Craftsy Shop for a small fee. This fee is to compensate for the views lost when you no longer need to return to the blog to for the information, as you will have your own copy. Plus! It helps fund supplies for new projects to share with you!
Shop EyeLoveKnots Etsy: Double Layered Bow.
Shop EyeLoveKnots Craftsy: Double Layered Bow.
Shop EyeLoveKnots LoveCrochet: Coming Soon.
Are you a Raveler? Share your version of this project on Ravelry – Double Layered Bow.
Materials:
- Lightweight #3 or Worsted Weight #4 Yarn – I used two strands held together of Baby Bee’s Sweet Delight Yarn in the Teddy colorway
- H8/5mm Crochet Hook
- Tapestry Needle for Weaving in Ends
- Hot Glue and Sticks
Material Notes:
You can use one strand of worsted weight yarn – like Red Heart Super Saver, Caron One Pound, or Bernat’s Super Value, or two strands of a lightweight yarn, as I have done, such as Berroco’s Vintage DK yarn.
Time Spent:
My bow was assembled in a little over an hour.
Measurements:
The smaller bow measures 3.5″ wide, while the larger bow measures 6″ wide. From the top of the bow to the bottom of the pennant, my piece measures 5.25″ tall.
Abbreviations:
- DC – Double Crochet
- DC2tog – Double Crochet Two Stitches Together (Decrease)
- To DC2tog: yarn over, insert hook into the first indicated stitch, yarn over, pull through 2 stitches, insert hook into the next stitch, yarn over, pull through 2 stitches, yarn over, pull through all the stitches on the hook.
Pattern Notes:
Instructions for small bow are given, with large bow in parenthesis.
Beginning chain 2 counts as a double crochet.
If you would like to see a photo tutorial on the pinching, wrapping, and finishing, I have one in my Large Striped Hair Bow – a free crochet pattern.
Pattern:
Bows:
Chain 36 (43). DC into the 4th chain from the hook, and across. [34 (41) DC]
R2 – 6: Chain 2, turn. DC into the 2nd DC, and across. [34 (41) DC]
Chain 1, but DON’T turn. Fold rectangle with the right sides facing each other, and the wrong side facing you. Slip stitch across. Fasten off with a loonng tail for wrapping.
Weave in initial tail at this point.
Small Bow: Turn to the right side, pinch the center of the bow together to your liking, and lightly wrap the center to hold it in position. Set aside.
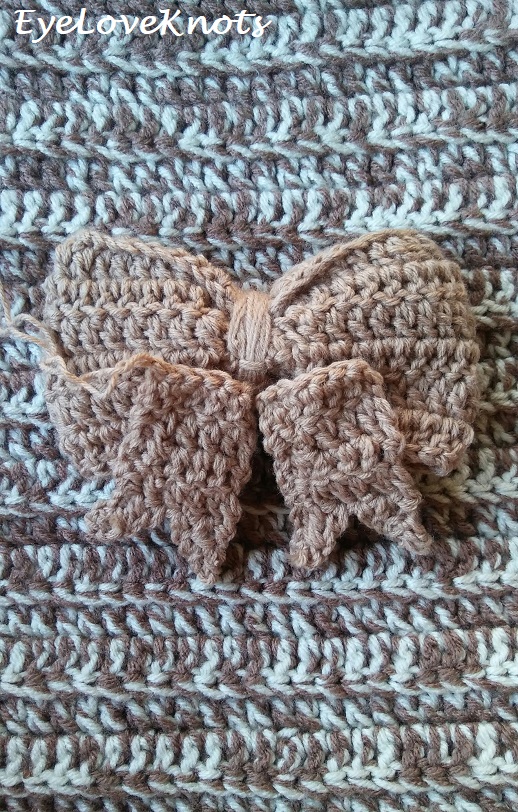
Large Bow: Turn to the right side, pinch the center of the bow together to your liking, and lightly wrap the center to hold, then place the small bow on top, aligning the centers up and continue wrapping.
To finish off, you can weave in your tail, or tuck it into the piece.
Pennants – Make 2:
Chain 8. DC into the 4th chain from the hook, and across. (6 DC)
R2 – 4: Chain 2, and turn. DC into the 2nd DC, and across. (6 DC)
R5I: Chain 2, and turn. DC2tog over the 2nd and 3rd DC. (2 DC)
R6: Chain 2, and turn. DC into the 2nd DC. (2 DC)
Fasten Off.
R5II: Turn piece, and join yarn in the end chain 2. Chain 2. DC2tog over the 2nd and 3rd DC. (2 DC)
R6: Chain 2, and turn. DC into the 2nd DC. (2 DC)
Fasten off, and weave in ends.
Assembly:
You can use the foundation tails to sew the pennants to the bow, or you can hot glue together – I used the hot glue, and will show this method.
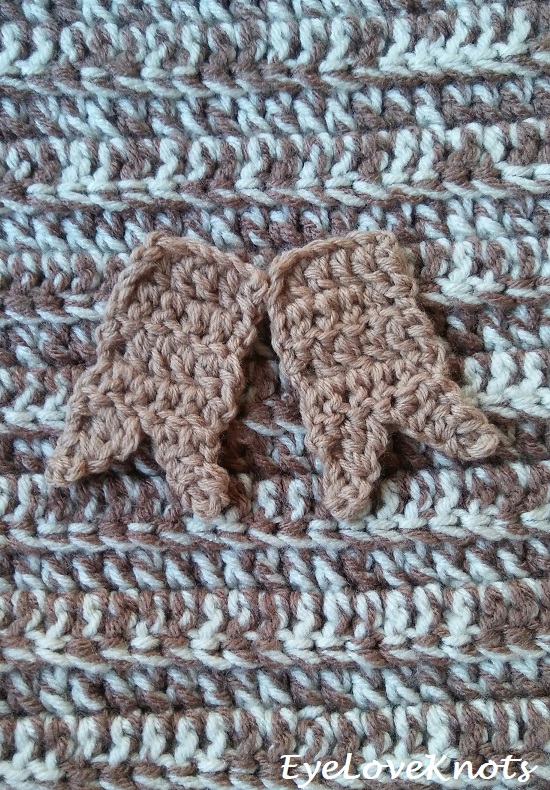
You’ll want to position your pennants touching at the center tips, but angled like an upside “V”.
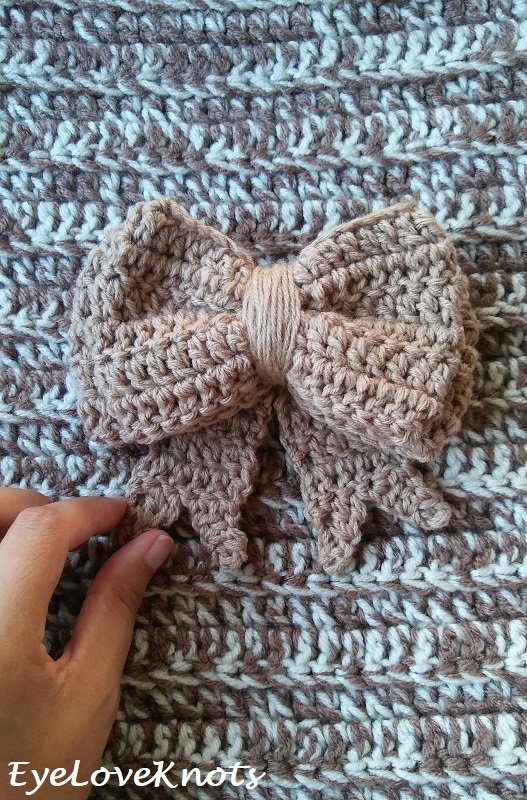
Set the bow down on top of the pennants to make sure it is how you like it. You can adjust now. Take note to where the bow will sit.
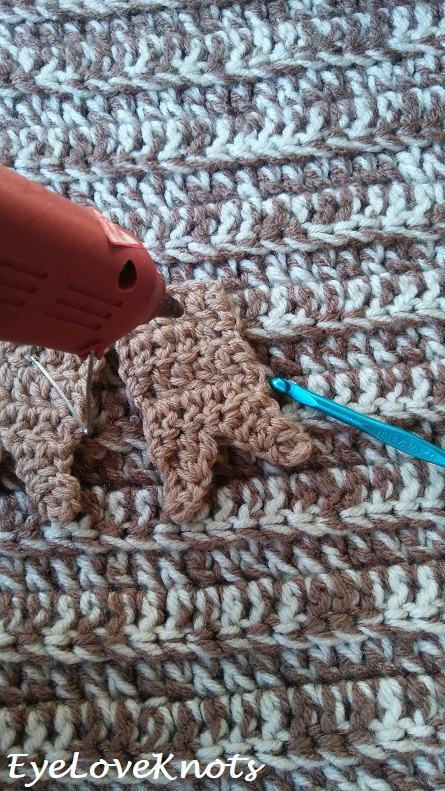
My crochet hook is pointing to where my bow will sit, so I don’t over hot glue. Then I just filled in this corner, and matched on the other side.
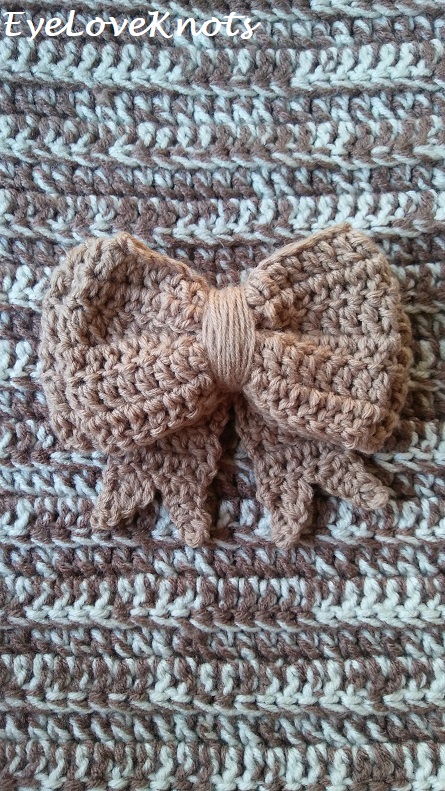
And now you have a cute double layered bow!
Please feel free to make and sell your own Double Layered Bow using this pattern, but please DO NOT claim this pattern as your own nor should you sell my pattern, and DO NOT re-publish my photos as your own. DO NOT copy and paste my pattern anywhere, link to it instead.
Join the EyeLoveKnots Crafting Community on Facebook to share your creations, and see what others are up to!
Linked Up To…
Nifty Thrifty Sunday #350 – Meet Our Life
Craft Schooling Sunday – Creative Jewish Mom
Inspiration Monday – Scattered Thoughts of a Crafty Mom
Handmade Monday #91 – Sum of their Stories
Merry Monday Link Party #220 – A Wonderful Thought
The Really Crafty Link Party #133 – Keeping it Real
Craftastic Monday Link Party – Sew Can Do
In Stitches Party #18 – Nicki’s Homemade Crafts
Ginx Woolly Linx Party September – Ginx Craft
438th Inspire Me Tuesday – A Stroll Thru Life
Fabulous Party #231 – Lou Lou Girls
Talk of the Town #139 – My Repurposed Life
{wow me} wednesday #367 – Ginger Snap Crafts
Your Whims Wednesday #371 – My Girlish Whims
The Wednesday Link Party #261 – The Stitchin’ Mommy
Crafty Love Link Party #37 – Jessie at Home
The Linky Ladies Party #140 – The Purple Poncho
Hookin’ on Hump Day #174 – Petals to Picots
Confident Twosday Linkup – I Do deClaire
Turning Heads Linkup – Elegantly Dressed and Stylish
Scrappy Stitchers Link Party #45 – Stitches n Scraps
Thursday Fashion Files Link Up #177 – Curly Crafty Mom
Sweet Inspiration Party #123 – Purple Hues and Me
Friday Frenzy Link Party – 09/07/18 – Kelly Lynn’s Sweets and Treats
Home Matters Linky Party #200 – Domestic Deadline
Weekend Wear Linkup – Mom with Style
Best of the Weekend – Hello Little Home
Link Your Stuff – Annemarie’s Haakblog
Snickerdoodle Create Bake Make Link Party #248 – Across the Boulevard
Sundays at Home #222 – Celebrating Everyday Life
I see so many possibilities for these bows, from home decor to gift wrapping. Thank you for sharing the tutorial at The Really Crafty Link Party. Pinned.
Love it, adorable! thanks so much for sharing on craft schooling Sunday!
I love this pattern! It adds such a pretty touch to so many projects 🙂
Oh yes, the ideas are flowing!
So very pretty. I don’t crochet but my mother does so I certainly appreciate the work that goes in to making something. Thanks for sharing at #HomeMattersParty
This bow is adorable! Burlap can be a hassle, so this cute bow is a great alternative. Thanks for sharing at the Snickerdoodle Create Bake Make Party!?
Burlap intimidates me because of the fraying and mess. This is definitely a good alternative. Thanks for stopping by, T’onna!
So cute. These would make cute hair embellishments for little girls. Thanks for sharing on MM.
For sure! I have been thinking about making some for Christmas gifts.
I love the bow, some things just need a pattern.
This bow would look lovely on Christmas presents, I need to make some!
I’m sorry, I forgot to post my favorite yarn, it’s Lion Brand Scarfie. I have made many things from it, I just finished a scarf with this yarn, it works up fast which I like.
Definitely would be perfect for gifts! I think I am going to try to incorporate it this year.