Free crochet pattern for how to crochet a Hydrangea inspired wreath perfect for Spring.
Find the free crochet pattern instructions below, or purchase a printer-friendly, ad-free PDF on Ravelry by clicking here.
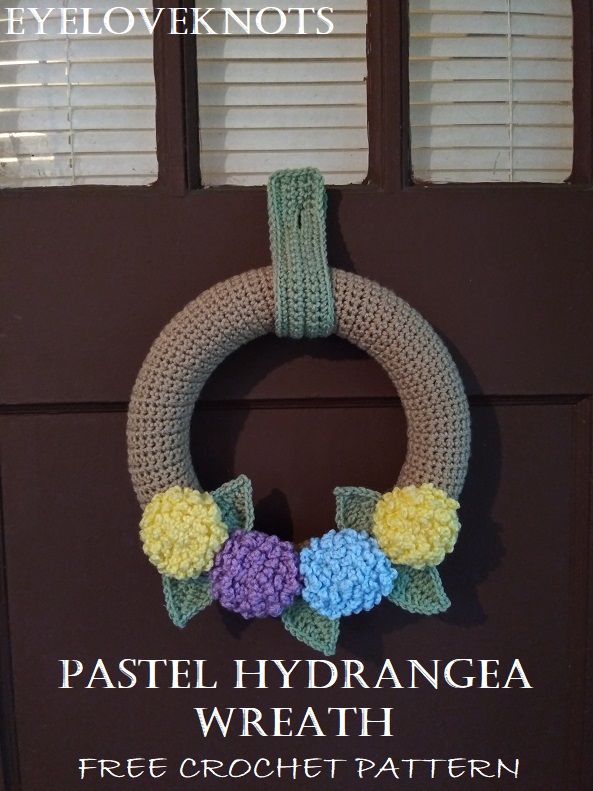
It’s time again for the Inspire My Creativity Challenge! This is a monthly craft blog hop, and each month, there is a different theme. This month’s theme is Pastels, the colors, not the medium. If you have a post that fits that theme, feel free to link up too!
First off, I want to apologize for the quality of my photos. I upgraded my phone, and the camera on it is disappointing, and I didn’t have enough time for any kind of back up plan, so I hope to retake some photos after I figure out how to work my actual camera, but for now, sorry!
On to my wreath’s story! I love the Hydrangea flower, as you might be able to tell – being that I recently designed a Endless Summer Hydrangea Tote Bag, and shared the Frilly Flower inspired by the Hydrangea flower. I have several more ideas I’d like to share too!
So this wreath is a pastel version of my take on the popular Hydrangea wreaths you may have seen on Etsy and Pinterest.
I am pretty proud to say that all but the blue yarn came from my stash, so this project only cost me $3ish to make. Score!
I will say this is a project post, but the actual patterns have been previously published on my blog, so I will be linking to them (so Google doesn’t penalize me for duplicate information).
AD-FREE, PRINTER FRIENDLY PDF:
If you would like a PDF version of this post, you may get one through either my EyeLoveKnots Etsy Shop, Ravelry or LoveCrafts Shop for a small fee. This fee is to compensate for the views lost when you no longer need to return to the blog to for the information, as you will have your own copy. Plus! It helps fund supplies for new projects to share with you!
Shop EyeLoveKnots Etsy: Pastel Endless Summer Wreath.
Shop EyeLoveKnots LoveCrafts: Pastel Endless Summer Wreath.
Share your version of this project on Ravelry – Endless Summer Wreath.
Save this to your Favorites: AllFreeCrochet, FaveCrafts, AllFreeHolidayCrafts, Cheap Thrifty Living, Crochet Pattern Bonanza
Materials:
- 300 Yards of Worsted Weight Yarn – I used Red Heart’s Super Saver in Warm Brown for the base, Light Sage for the leaves, and for the flowers, Lemon, Light Blue and Orchid
- H8/5mm Crochet Hook
- Tapestry Needle
- 12″ Styrofoam Wreath Base – I used a white Floracraft brand
- Hot Glue Gun and Sticks
Material Notes:
Yarn Alternatives: Bernat’s Super Value Yarn, Caron’s One Pound, Hobby Lobby’s Crafters Secret.
Time Spent:
This wreath came together in around four hours.
The wreath base cover will take the longest at just over two hours. Each flowers takes about 20 minutes to stitch and sew up, and the leaves are 5 minutes each.
Measurements:
12″ Wreath
Gauge:
20 SC by 14 Rows = 6 1/8″ Wide by 3 7/8″ Tall
Tutorial:
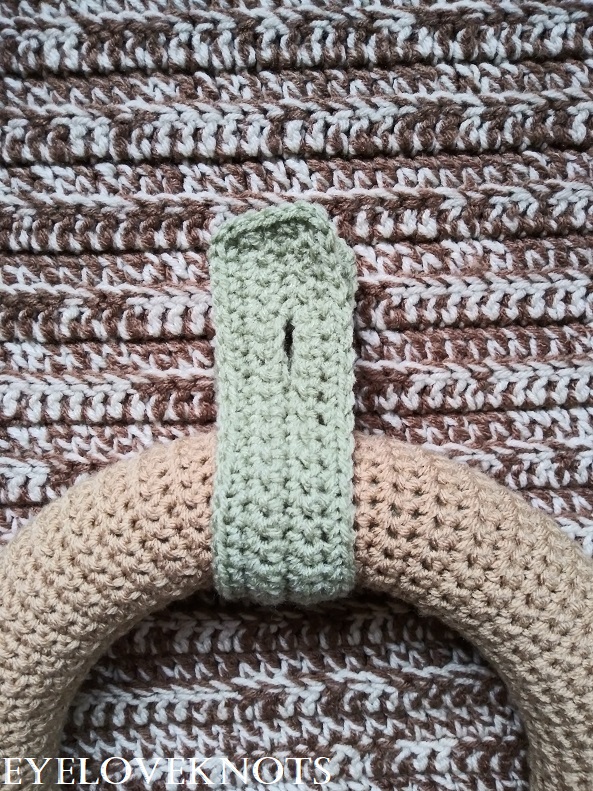
Firstly, you will need to gather your wreath base color (I used the Warm Brown), and styrofoam wreath form, and head over to my Basic 12″ Wreath Form Cover Free Crochet Pattern, found here on the EyeLoveKnots blog. Don’t forget the wreath hanger if you need one – I made mine with the same Sage Green yarn as the leaves.
Once finished, time to start your flowers and leaves! I used my Frilly Flowers Free Crochet Pattern to work up four flowers – two in Lemon, one in Light Blue and one in Orchid, then I completed five leaves using the Light Sage and my Basic Leaf Pattern 2 Ways withOUT the vein.
Weave in ends, and set aside. This wreath hanger is used to hang on a wreath hanger. The open ends will be at the top, and the slit is where the loop of the wreath hanger will be placed through.
Assembly:
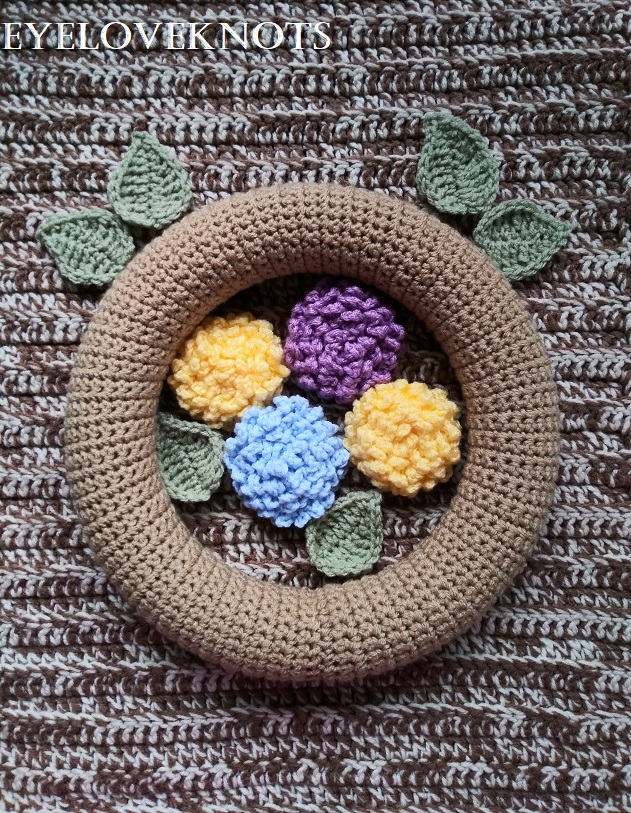
Your wreath base should already be sewn closed on the styrofoam base.
Decide where to place your flowers and leaves. Before hot gluing in place, just lay them down on top of the wreath base, and move around until you have found the perfect spots for them. I suggest using them to cover up the seam from sewing the two ends together of the wreath form cover (or you can use your wreath hanger to cover the seam up).
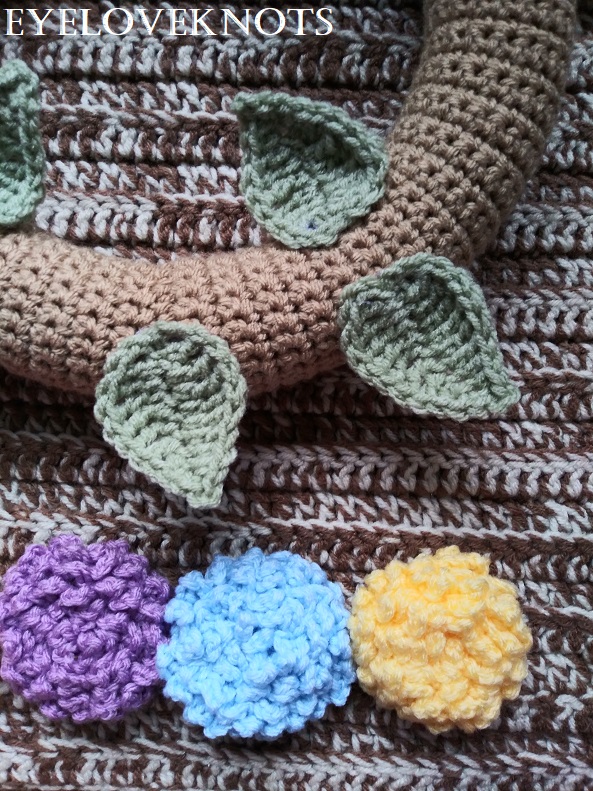
I find it easiest to glue my leaves down in place first. After settling on my design, I carefully remove one flower, tack the leaves in place with my hot glue, and work across, then I go back, and secure my leaves on better. If you want more security while you work, you can use some sewing pins to keep your leaves in place.
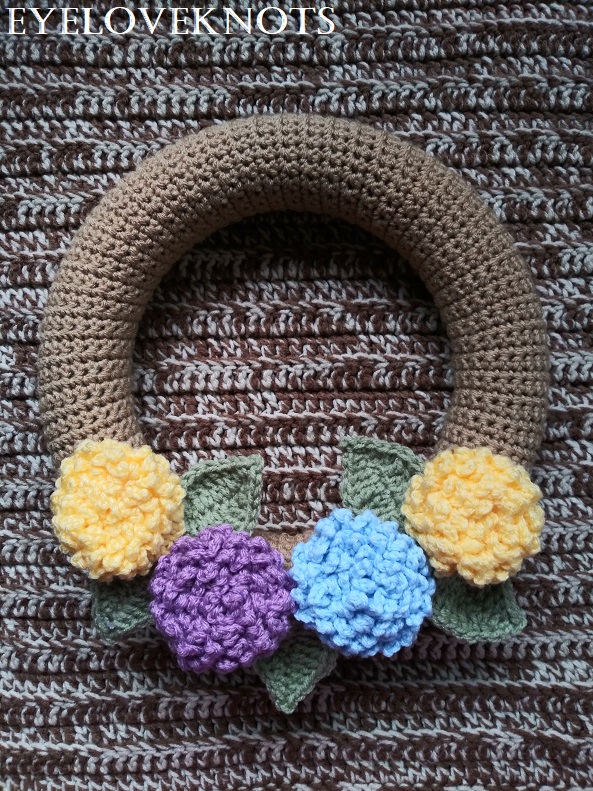
Add in the flowers, and you have a beautiful Pastel Hydrangea Wreath! Perfect for Spring and Easter porch decorating.
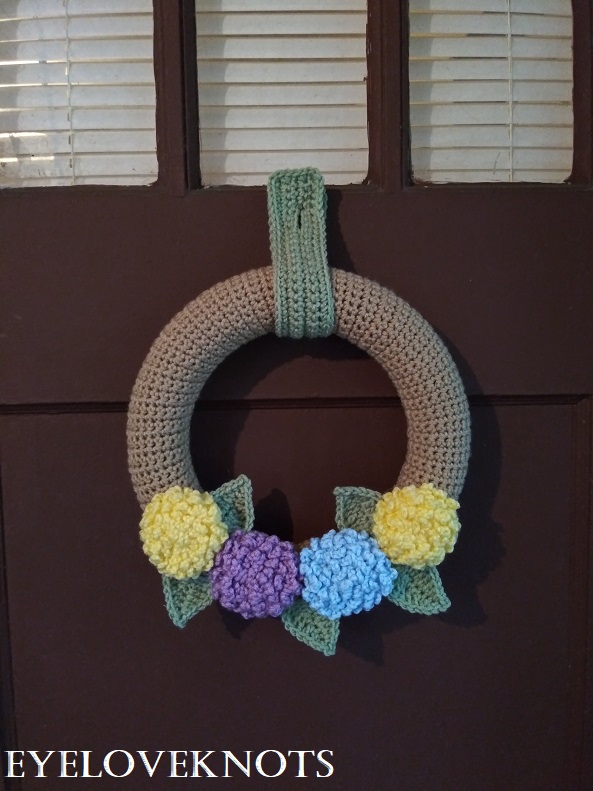
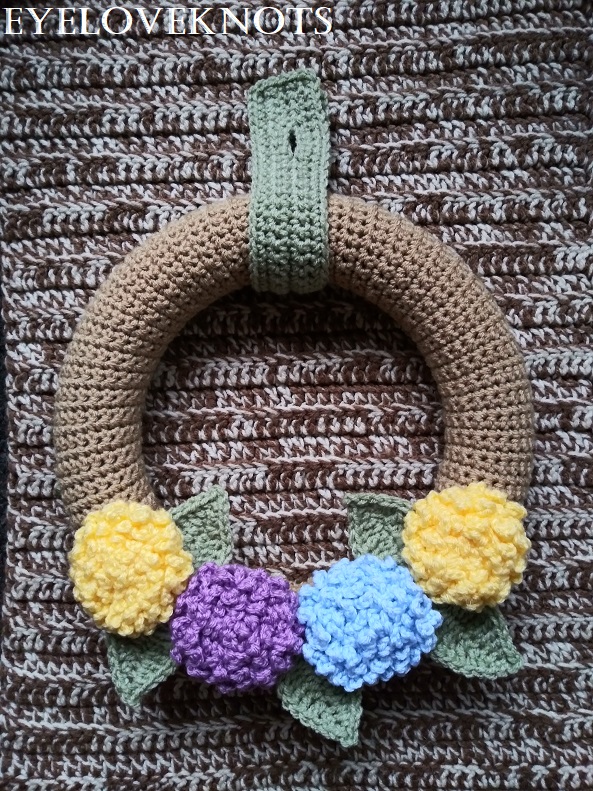
Please feel free to make and sell your own Endless Summer Wreath using this pattern, but please DO NOT claim this pattern as your own nor should you sell my pattern, and DO NOT re-publish my photos as your own. DO NOT copy and paste my pattern anywhere, link to it instead.
Join one of our awesome Facebook groups to share your creations, and see what others are up to!
– EyeLoveKnots Crochet & DIY Community
– DIY Home On Rockwood Lane
– Alexandra Lane Lifestyle
Linked Up To…
Ginx Woolly Linx Party April – Ginx Craft
Tutorials & Tips Link Party #389 – Home Stories A to Z (link up post deleted by host)
496th Inspire Me Tuesday – A Stroll Thru Life (link up post deleted by host)
Fabulous Party #263 – Lou Lou Girls (link up post deleted by host)
Sew It Cook It Craft It Link Party #100 – Sew Historically
The Linky Ladies Party #156 – The Purple Poncho
Funtastic Friday 224 – Olives n Okra (blog no longer exists)
Best of the Weekend – Calypso in the Country
Link Your Stuff – Annemarie’s Haakblog
Snickerdoodle Create Bake Make Link Party #280 – Across the Boulevard (link up post deleted by host)
In Stitches Party #34 – Nicki’s Homemade Crafts (link up post deleted by host)
Craftastic Monday Link Party – Sew Can Do
Creative Monday – i should be mopping the floor
The Really Crafty Link Party #166 – Keeping it Real
Merry Monday #247 – A Wonderful Thought
Creative Mondays Link Up – Claire Justine
{Wow Me} Wednesday #300 – Ginger Snap Crafts
Hookin’ on Hump Day #189 – Petals to Picots
Wall to Wall DIY Wednesday Link Up Party Week 44 – Dabbling and Decorating (link up post deleted by host)
Your Whims Wednesday #404 – My Girlish Whims
To Grandma’s House We Go Link Party #136 – Chas’ Crazy Creations (link up post deleted by host)
Scrappy Stitchers Link Party #51 – Stitches n Scraps
Crafty Love Link Party #44 – Jessie at Home
Thursday Favorite Things #386 – An Artful Mom
Crochet Patterns and Anything Crochet Link Party #12 – Joy of Motion (link up post deleted by host)

This post is part of the monthly link party I host called Inspire My Creativity. Each month, a group of bloggers all create a project based around a theme and this month the theme is PASTELS (the color/s). There are tons of great ideas and I know you’ll get inspired to create something fun and new!
Your Co-Hosts
Shani | Sunshine & Munchkins — Meg | See The Happy
Christine | Swordfights & Starry Nights — Candice | She’s Crafty
Julia | The Quiet Grove — Marie | The Inspiration Vault
Brooke | My Beautiful Mess — Heather | Glitter On A Dime
Rachel | Adventures of a DIY Mom — Jenny | Cookies, Coffee and Crafts
Anna | Practical and Pretty — Keala | Recipe For A Sweet Life
Carmen | Living Letter Home — Cathy | A Boy and His Mom
Sarah | The Strawberry Nest — Adree | The Keele Deal
Aimee | Things Small and Simple — Alexandra | EyeLoveKnots

Oh, this is SO cute! Seriously, I have a thing about wreaths and this is my favorite crocheted thing you’ve ever done! So original!!!
Carrie
curlycraftymom.com
Thank you!! I have a thing for wreaths too. My door is always covered in a crocheted one of some sort. I am hoping to work on several more, and specialize more on this for my shop.
I get my wreath forms from the Dollar Tree. It’s the same product as the bigger stores but costs just $1. The also sell clear acrylic wreath hangers around the holidays, again for just $1. Check your local stores. The larger stores carry a wider range of items.
Yep! That’s where I got my hanger from. The only thing with the styrofoam wreaths from here – my local Dollar Trees sell green colored. Some wreaths I make you can see the form base, so just depends which stitch pattern you are using. Lots of fantastic finds there for sure.
Holy cow – your crocheting is so impressive! This wreath is just awesome!
So kind of you. Thank you!!
$3ish projects are my favorite. These hydrangeas are adorable!
Oh yeah, love $3ish stuff, hehe 🙂
I love the wreath! I want to make some too! I have made a couple of crochet ones. They always make me happy to look at!
Me too! Good way to put you in a good mood as you walk through the door.
What a darling wreath! I love the way you made those flowers – they’re the perfect touch for this project. So cute!
Thanks so much, Christine!
Such a lovely wreath! Those Hydrangeas are so pretty! Thanks for sharing at the Snickerdoodle Create Bake Make Party!
Thanks, T’onna!
So pretty! Thanks so much for sharing your patterns!
Thanks, Aimee! Enjoy 🙂
It’s beautiful and I love the color combination. Thank you for sharing at The Really Crafty Link Party. Pinned.
Thanks, Teresa! Isn’t a color combo I would have picked, but thanks to this challenge, I am glad I did because it really did turn out well!
This wreath is so pretty! I pinned it! Thanks for sharing at Best of the Weekend!
Thanks so much! Love going to that party 🙂
I’m so impressed! I honestly never thought about crocheting a wreath.
Thanks, Shani! It’s one of my favorite ways to add a little something to my home. I love coming home to a fun, cheery wreath on the door.
Is it possible to include a video tutorial on how to sew the hydrangea together?
I don’t do videos at this time, but check out the pattern for it – I’ve included some photos there.
Hi. Yes, I did see your photos. I am just wondering I am stitching through the back but the top of the flower seems to separate and fall apart. Not sure what I am doing wrong. Thanks for your quick response.
It sounds like when you work across that you are not catching all of the layers as you move across. Without seeing I can’t say for sure, but it could be that the layers are too close producing a very tight flower. It’s easier to see and get to the layers when the flower is rolled loosely just laying the side you’re curling on top of the edge in your other hand. Another way to fix is afterwards, bring your yarn up from the back and tack down the loose parts from the top. Sometimes I have to do this to the very center of the flower because I miss it.
Thanks for the suggestions. I will definitely try them. Sorry I did not say this earlier but the wreath is really beautiful and thankn you for sgaring the pattern.