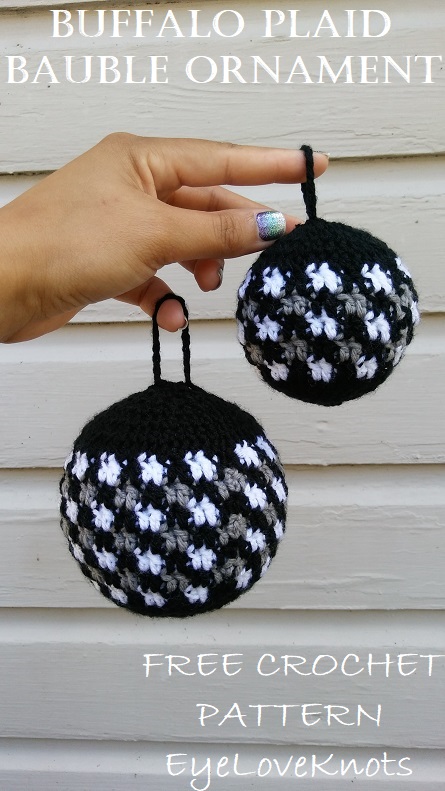
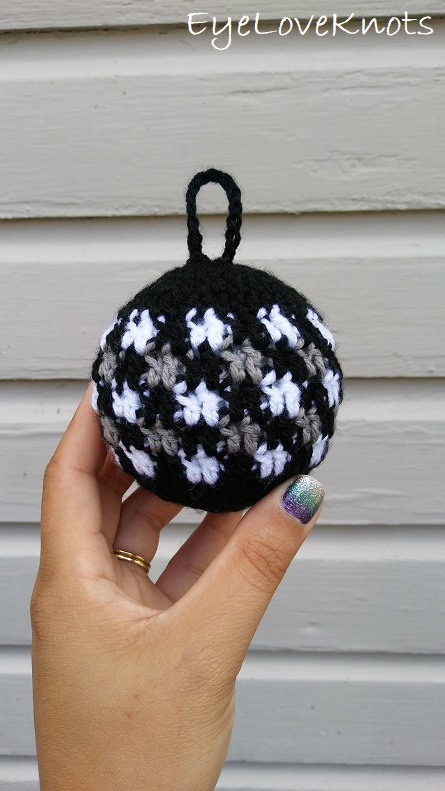
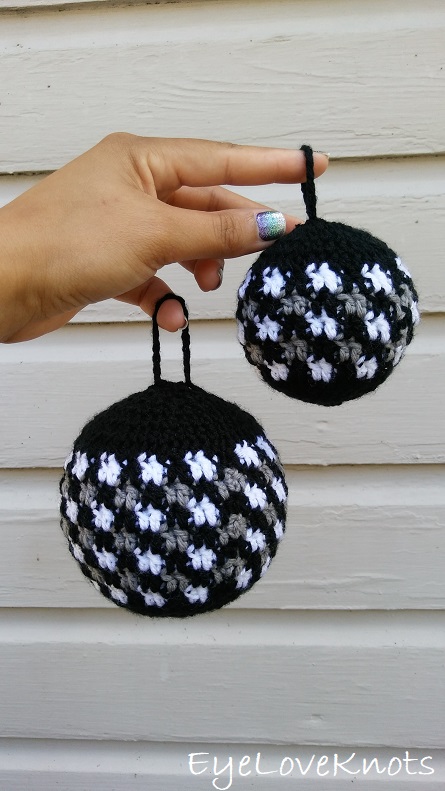
This is a free crochet pattern for how-to crochet my Buffalo Plaid Bauble Ornament.
This post contains affiliate links for LoveCrafts. If you make a purchase by clicking on them, I make a small commission at no extra cost to you. Thanks for your support!
Last year was my first year participating in this blogger ornament exchange, and I shared a Plaid Gift Box Ornament made from plastic canvas. When the opportunity came up this year, I was a little hesitant to join not because I didn’t want to, but because I wasn’t sure if I would have enough time to squeeze in designing a new pattern. This is a really busy time of year for us at work, and my days are long, but I was able to work up two sizes for this ornament, and I am so glad I did sign up because I have really enjoyed ornament exchanges over the years – my tree is full of handmade ornaments from exchanges.
This year, I got themed up with Shirley of Intelligent Domestications. She mentioned that she would like to add in some black buffalo plaid this year, so I thought I would try my hand at a bauble ornament. I am not 100% up on the trend (I don’t have any buffalo plaid at home), so the gray seems a little off to me… But I hope it works for her theme, and yours! I would like to try my hand at some other color combinations using this pattern, but probably won’t get to it this year.
This year, we have 38 talented bloggers sharing their Christmas ornament tutorials and helping to host the handmade ornament exchange link party! Make sure to stop by the 2019 Ornament Exchange Link Party to meet the hosts, see all the great ornament DIYs, and share your own at the link party! Also, thank you Erlene of My Pinterventures for putting this awesome blog hop together!
If you would like a PDF version of this post, you may get one through either my EyeLoveKnots Etsy Shop, Ravelry or LoveCrafts Shop for a small fee. This fee is to compensate for the views lost when you no longer need to return to the blog to for the information, as you will have your own copy. Plus! It helps fund supplies for new projects to share with you!
Shop EyeLoveKnots Etsy: Buffalo Plaid Bauble Ornament.
Shop EyeLoveKnots LoveCrafts: Buffalo Plaid Bauble Ornament.
Are you a Raveler? Share your version of this project on Ravelry – Buffalo Plaid Bauble Ornament.
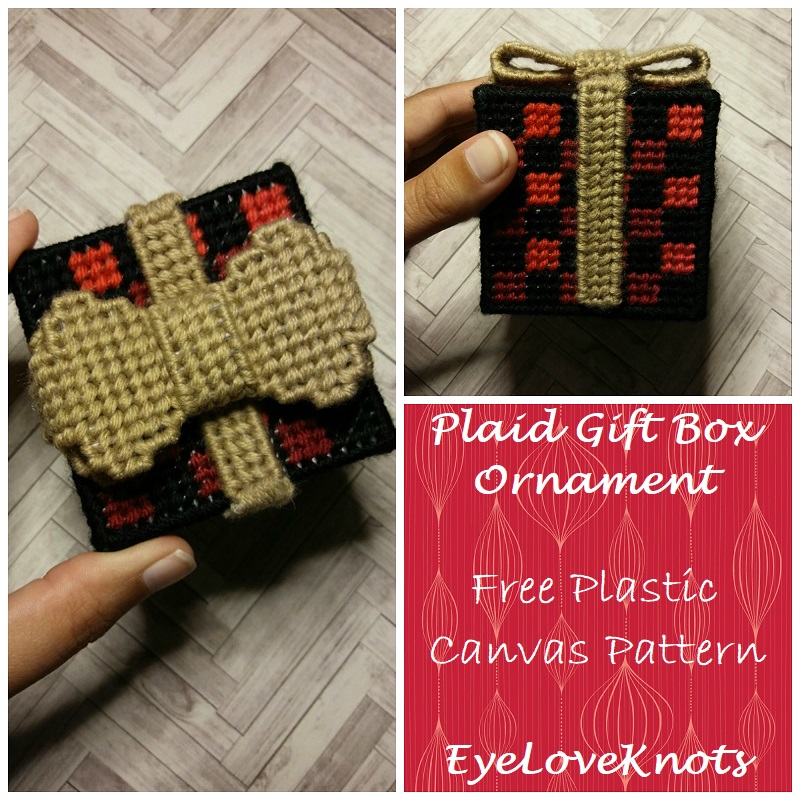
Check out my DIY for my Plaid Gift Box Ornament made from plastic canvas!
Materials:
- Small Amount of Lightweight #3 Yarn – I used Hobby Lobby’s I Love This Sportweight Yarn in Black and White, and Baby Bee’s Sweet Delight in Elephant [Gray]
- G6/4mm Crochet Hook
- Tapestry Needle for Weaving in Ends
- Styrofoam Balls – 2.8″ for Medium, and 3.8″ for Large (Got mine from Hobby Lobby)
Material Notes:
Yarn Alternatives: Vanna’s Glamour, Berroco’s Vintage DK.
In place of the styrofoam balls, you can stuff the ornaments, or you can use bauble ornaments in place of the styrofoam balls – that’s how I did my original set of Celtic Weave Bauble Ornaments (Free Crochet Pattern). I had bought a tube of 7 from my local Dollar Tree, and they measured 7 1/2″ around, and was able to follow the instructions for the Small size.
Time Spent:
I spent about an hour on the Medium size, and an hour and a half on the Large size.
Abbreviations (US Terms):
- HDC – Half Double Crochet
- DC – Double Crochet
- HDC2tog – Half Double Crochet Two Stitches Together to Decrease
Pattern Notes:
Beginning chain does not count as a stitch, and join to the first stitch, not the beginning chain.
If you need a larger diameter, I recommend first trying to go up a hook size, otherwise you will need a multiple of four to work this stitch pattern.
Carry up yarn along the inside of the ornament fastening off only at the end.
In the Plaid portion, I alternate rows of working the first stitch into the 2nd stitch, and the last stitch worked into the same stitch as the beginning chain; and then a row of the first stitch worked into the 1st stitch, and the last stitch worked into the actual last stitch. I do this to keep my seam straight.
For a photo tutorial of the Finishing/Closing, please visit my Celtic Weave Bauble Ornament, Free Crochet Pattern, and scroll to the bottom.
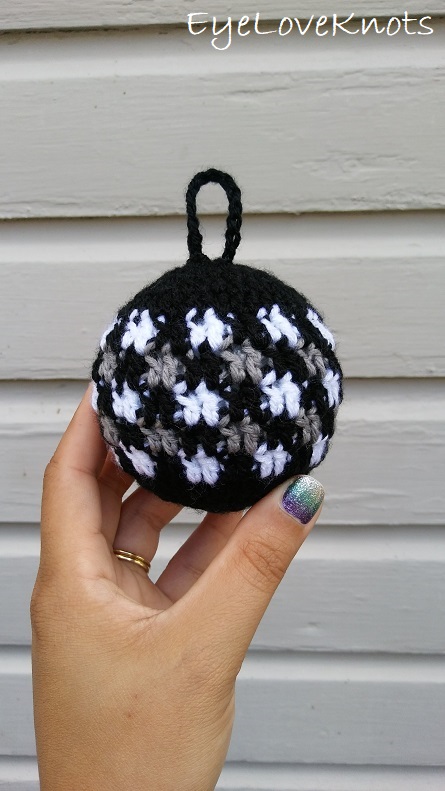
Medium – 2.8” Styrofoam Ball. Diameter at End of Round 4 is 2.75”:
In Black, chain 4. Join to form a ring, taking care not to twist chain. Chain 1. 10 hdc into the ring. Join. (10 hdc)
R2: Chain 1. 2 hdc into the 1st hdc, and into each hdc around. Join. (20 hdc)
R3: Chain 1. 2 hdc into the 1st hdc, 1 hdc into the next hdc, [2 hdc into the next hdc, 1 hdc into the next hdc] 9x. Join. (30 hdc)
R4: Chain 1. 2 hdc into the 1st hdc, 1 hdc into each of the next two hdc, [2 hdc into the next hdc, 1 hdc into each of the next two hdc] 9x. Join, and Weave in Beginning Tail. (40 hdc)
Rounds 5 – 9 are worked in double crochet evenly around the bauble.
R5: Chain 2. Black in the 2nd stitch, 2 White, (2 Black, 2 White) 9x, Black into the last stitch. (40 DC)
R6: Chain 2. Gray into the 1st stitch, (2 White, 2 Gray) 9x, Gray into the last stitch. (40 DC)
R7 – 9: Repeat Rows 5 + 6. Fasten off all but Black at the end of Round 9.
R10: Chain 1. hdc into the 1st stitch, and each stitch around. (40 hdc)
Flip piece inside out, place ball and pull piece around slightly stretching.
R11: Chain 1. Hdc2tog over the 1st two stitches, 1 hdc into each of the next two stitches, [hdc2tog over the next two stitches, 1 hdc in each of the next two stitches] 9x. Join. (30 hdc)
R12: Chain 1. Hdc2tog over the 1st two stitches, hdc into the next stitch, [hdc2tog over the next two stitches, hdc into the next stitch] 9x. Join. (20 hdc)
R13: Chain 1. Hdc2tog over the 1st two stitches, [hdc2tog over the next two stitches] 9x. Join, and Fasten Off with Long Tail approximately 20”. (10 hdc)
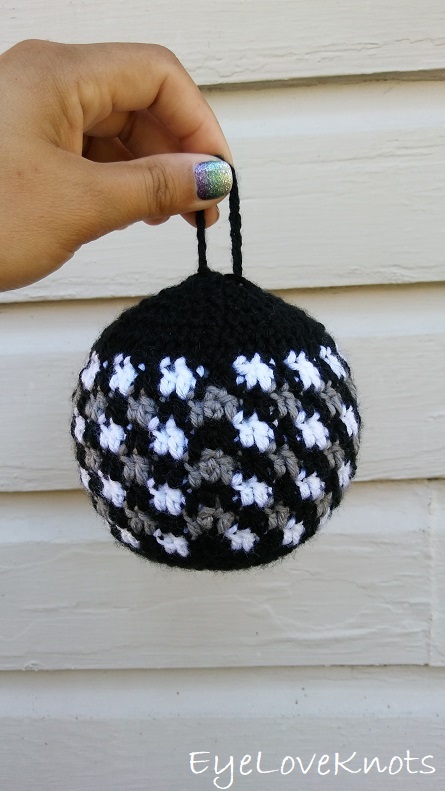
Large – 3.8” Styrofoam Ball. Diameter at End of Round 5 is 3.63”:
Chain 5. Join to form a ring, taking care not to twist chain. Chain 1. 12 hdc into the ring. Join. (12 hdc)
R2: Chain 1. 2 hdc into the 1st hdc, and into each hdc around. Join. (24 hdc)
R3: Chain 1. 2 hdc into the 1st hdc, 1 hdc into the next hdc, [2 hdc into the next hdc, 1 hdc into the next hdc] 11x. Join. (36 hdc)
R4: Chain 1. 2 hdc into the 1st hdc, 1 hdc into each of the next two hdc, [2 hdc into the next hdc, 1 hdc into each of the next two hdc] 11x. Join. (48 hdc)
R5: Chain 1. 2 hdc into the 1st hdc, 1 hdc into each of the next three hdc, [2 hdc into the next hdc, 1 hdc into each of the next three hdc] 11x. Join, and Weave in Beginning Tail. (60 hdc)
Rounds 6 – 12 are worked in double crochet evenly around the bauble.
R6: Chain 2. Black in the 2nd stitch, 2 White, (2 Black, 2 White) 14x, Black into the last stitch. (60 DC)
R7: Chain 2. Gray into the 1st stitch, (2 White, 2 Gray) 14x, Gray into the last stitch. (60 DC)
R8 – 12: Repeat Rows 6 + 7. Fasten off all but Black at the end of Round 12.
R13: Chain 1. hdc into the 1st stitch, and each stitch around. (60 hdc)
Flip piece inside out, place ball and pull piece around slightly stretching.
R14: Chain 1. Hdc2tog over the 1st two stitches, 1 hdc into each of the next three stitches, [hdc2tog over the next two stitches, 1 hdc in each of the next three stitches] 11x. Join. (48 hdc)
R15: Chain 1. Hdc2tog over the 1st two stitches, 1 hdc into each of the next two stitches, [hdc2tog over the next two stitches, 1 hdc in each of the next two stitches] 11x. Join. (36 hdc)
R16: Chain 1. Hdc2tog over the 1st two stitches, hdc into the next stitch, [hdc2tog over the next two stitches, hdc into the next stitch] 11x. Join. (24 hdc)
R17: Chain 1. Hdc2tog over the 1st two stitches, [hdc2tog over the next two stitches] 11x. Join. (12 hdc)
R18: Chain 1. (Hdc2tog) 6x. Join, and Fasten Off with Long Tail approximately 30″. (6 hdc)
Finishing:
Pull up on final loop so yarn comes out. Thread tail end into needle.
Begin weaving in and out of every other stitch around top. Once back to the beginning, tug on yarn to close top hole and then weave into the stitches to secure.
Keep tension on yarn end with left hand, and insert crochet hook underneath the center stitches with the other. Pull up a loop. Chain 10 for Medium, and 15 for Large – if you want a loop large enough to hang straight from tree, add 10 more chains. Fold chain in half with wrong sides facing each other, and weave in remaining yarn to secure the loop in place.
If you are using a bauble ornament as the base, follow the same first step, however, after weaving in and out around the top, tug on the yarn to close up around the ornament hanger, and secure here. Skip the next step to make the hanger as you already have one.
Please feel free to make and sell your own Buffalo Plaid Ornament using this pattern, but please DO NOT claim this pattern as your own nor should you sell my pattern, and DO NOT re-publish my photos as your own. DO NOT copy and paste my pattern anywhere, link to it instead.
Join the EyeLoveKnots Crafting Community on Facebook to share your creations, and see what others are up to!
Linked Up To…
Craft Schooling Sunday – Creative Jewish Mom
Weekly Link Up – Claire Justine
Handmade Moday #152 – Sum of their Stories
The Really Crafty Link Party #194 – Keeping it Real
Ginx Woolly Linx Party November – Ginx Craft
Craftastic Monday – Sew Can Do
Little Cottage Link Party #28 – Love my Little Cottage
All About Home Link Party #15 – Common Ground
Project Inspire{d} Link Party #350 – The How-to Home
525th Inspire Me Tuesday – A Stroll Thru Life
Fabulous Party #294 – Lou Lou Girls
The Linky Ladies Party #172 – The Purple Poncho
Talk of the Town #201 – My Repurposed Life
Tuesday Turn About #26 – My Wee Abode
{Wow Me} Wednesday #430 – Ginger Snap Crafts
Hookin on Hump Day #203 – Moogly Blog
Your Whims Wednesday #434 – My Girlish Whims
The Wednesday Link Party #322 – The Stitchin’ Mommy
To Grandma’s House We Go Link Party 167 – Chas’ Crazy Creations
Waste Not Wednesday 182 – Faeries and Fauna
Scrappy Stitchers Link Party #57 – Stitches n Scraps
Creatively Crafty Link Party #198 – Life Beyond the Kitchen
Farm Fresh Tuesdays Blog Hop – 15 Acre Homestead
Pin Party #343 – The Pin Junkie
Home Matters #260 – Modern on Monticello
Create, Bake, Grow & Gather Party #394 – Shabby Art Boutique
The Super Fabulous Friday Linky Party #9 – A Big Green House
Thursday Favorite Things #416 – An Artful Mom
Link Your Stuff – Annemarie’s Haakblog
Snickerdoodle Create Bake Make Link Party 311 – EyeLoveKnots
One More Row – Free Pattern Link Party #13 – Loops and Love Crochet
A cozy take on buffalo plaid! 🙂 Pinned.
If anyone can crochet buffalo checks it’s you, Alexandra! These ornaments are so adorable. I have to show my daughter who is an avid crocheter. Pinned 🙂
I love these! Pinning to give them a try!
They turned out great! You did a good job achieving the Buffalo Check look!
What a wonderful talent you have to be able to crochet. I can see this being made with so many different yarns and colors. Pinned.
so much fun! thanks for sharing on craft schooling Sunday!
What a great idea. I love handmade ornaments. Having “unbreakable ornaments” in the house is important even if you just have little ones visiting as they love to touch the tree. These are beautiful.
These are the cutest! You do such an amazing job.
So cute! What a fun idea! I’m sure the person you made it for will love it!
Michelle
https://bijoubeadboutique.com
Beautiful, I love them! Thank you for sharing at The Really Crafty Link Party. Pinned.
Such a pretty ornament, my friend! Love the nod to buffalo check!
Actually… I love this pattern so much, I’ll be featuring you on Tuesday Turn About this week!
Very cute! Thanks so much for sharing on Farm Fresh Tuesdays! I hope to see your posts again this week!
I love this set of ornaments you sent to me! They match my tree perfectly and I’m showing them off in my Plaid Decorated Christmas Tree post! I hung the larger one in the front so close to one of the bows it matches so well. You are super talented with Crochet! Thank you so much!