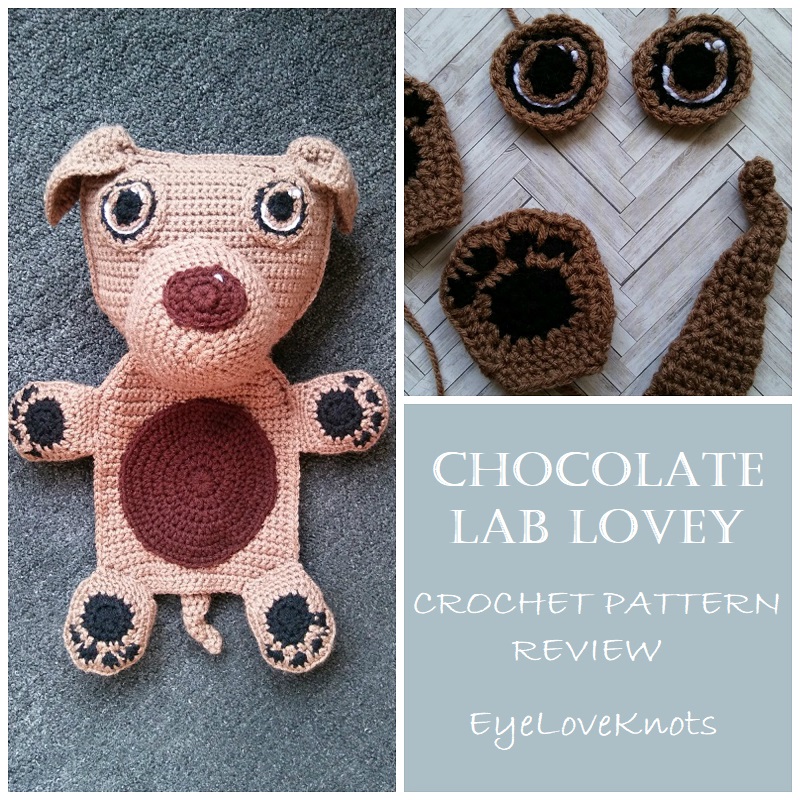
Crochet Pattern Review of the Retriever Puppies Blankie from Jenna Wingate Designs.
This post contains affiliate links for LoveCrafts and Amazon. If you make a purchase by clicking on them, I make a small commission at no extra cost to you. Thanks for your support!
It’s time again for the Inspire My Creativity Challenge! This is a monthly craft blog hop, and each month, there is a different theme, but sadly, it is coming to an end – this is the last blog hop. Shani has some plans in the works for “Inspire My Creativity”, so make sure to check out her Sunshine and Munchkins blog for the update! This month’s theme is DIY Gift Ideas. If you have a post that fits that theme, feel free to link up too!
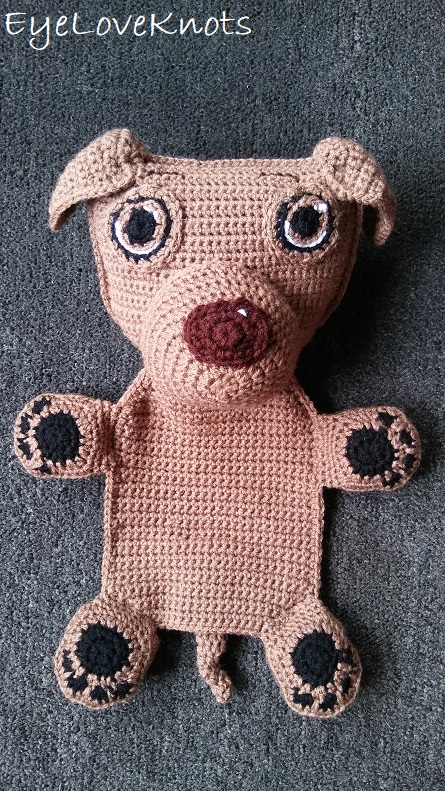
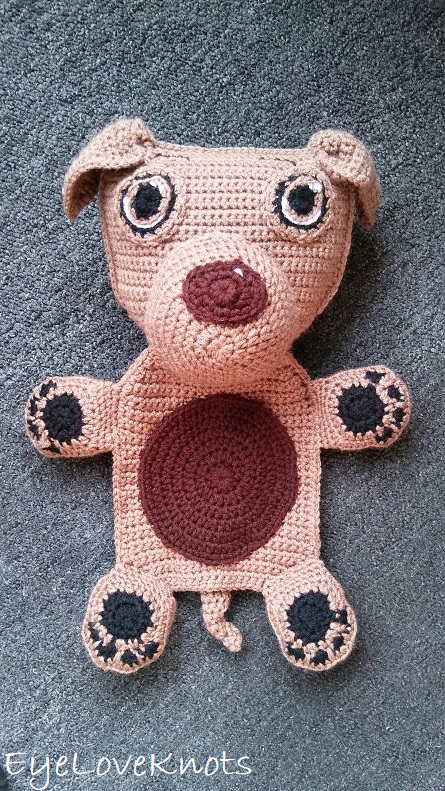
This month, I decided to share a sweet little chocolate lab lovey I made a couple months ago. I had received a custom order request from Paul for a lovey that looked just like his pup at home. The lovey would be for his own little baby. He sent me the link to the pattern that I used, as it was just was he was looking for, and I got to work.
I have really never made anything like this before, but I had sooooo much fun putting it together! And was proud of myself for pulling it all together.
Normally, if I did start something like this, all the pieces involved, and all the sewing would have made this project destined for the WIP bin, maybe never to be finished, so I enjoyed having the order to push me to it.
Don’t have a lab? Jenna Wingate Designs has many other crochet patterns for other dog breeds! They are all so adorable!
Materials:
- 400 Yards of Worsted Weight Yarn – I used Red Heart’s Super Saver in Cafe Latte [Brown], White and Black
- G6/4mm Crochet Hook (as recommended)
- I9/5.5mm Crochet Hook (as recommended)
- Tapestry Needle for Weaving in Ends
- Sewing Pins to help with Assembly
- Stuffing for Nose & Head
- Retriever Puppies 1 Blankie, Paid Crochet Pattern (Etsy) from Jenna Wingate Designs
Material Notes:
Yarn Alternatives: Caron’s One Pound, Bernat’s Super Value, Crafters Secret from Hobby Lobby
Time Spent:
This blankie took me about 9 hours to complete.
Measurements:
Approximately 10″ (Head) Wide by 14.5″ in Length
*I forgot to measure before shipping, but I remember it fitting perfectly into the little box that I shipped it in, so I took measurements of the box, and that’s what is given.
Gauge:
Not essential – so I did not take it, but it is listed in pattern.
Pattern Notes:
Before we begin, I recommend washing your yarn before beginning because once it’s stuffed, and embellished, I would only recommend spot cleaning as needed. To wash your yarn, remove the yarn label, then throw the yarn into a mesh lingerie bag, and machine wash and dry according to the label – Red Heart Super Saver washes well (cold water on the gentle cycle), and dries well (low heat). Keep in mind, the outside of the yarn will dry faster than the inside of the yarn.
This pattern is excellent!
It was so easy to follow with straight forward instructions, and even photos along the way. There were only a few things that I modified, and I will explain those!
Nose: In Round 3 of the nose, I worked the beginning as “single crochet 1st 3…”, and omitted the last single crochet.
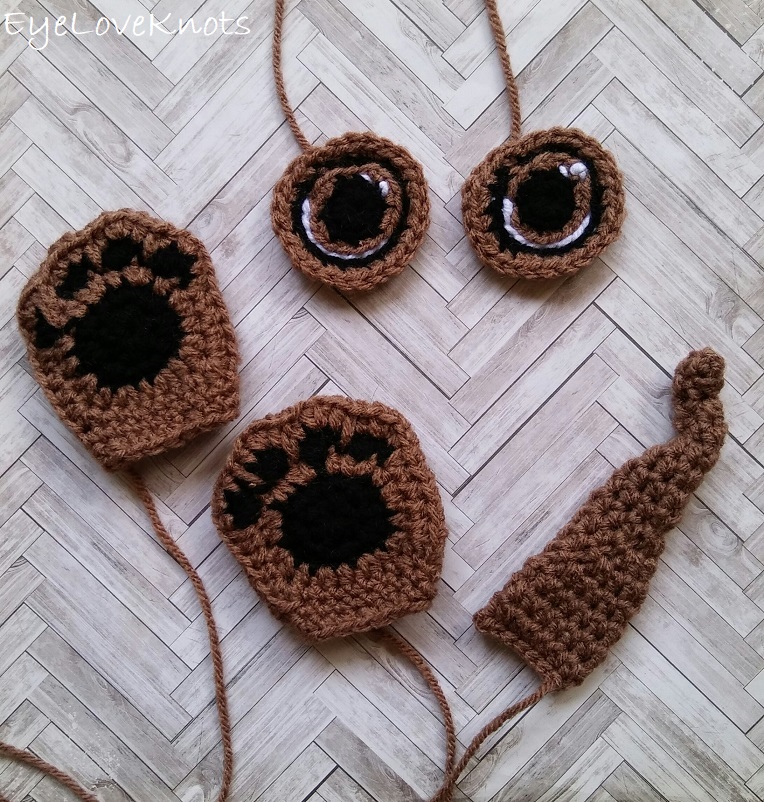
Feet: The feet had more fasten offs, and rejoins than I wanted to do (because of those ends), and I noticed the pads of the feet were coming out a little wonky as written (see left – wonky, and right – not wonky), so…
- To bridge the gap at the end of Round 2 (from not joining), I worked the last two single crochets as “single crochet next, slip stitch next/1st”.
- At the end of Round 3, I did not fasten off as written. Instead, I pulled up the brown loop, took out my hook, and left the loop to the side, then I reinserted my hook into the next appropriate stitch, and continued working. See how I picked it up in the next point. I DID fasten off the black at the end of Round 4 as written.
- For Round 4, I worked to the slip stitch just before the brown loop, then inserted my hook into the brown loop, yarned over in Black, and half double crocheted as normal through all the loops ending up with the brown as my working yarn. The brown loop was gently pulled over from where it laid waiting, and I just crocheted over the brown as I continued on.
- I recommend weaving the ends in at the end of Round 11.
- At the end of Round 11, the pattern states not to turn, but, but I did so that I could work the single crochet’s from Round 12 on the right side.
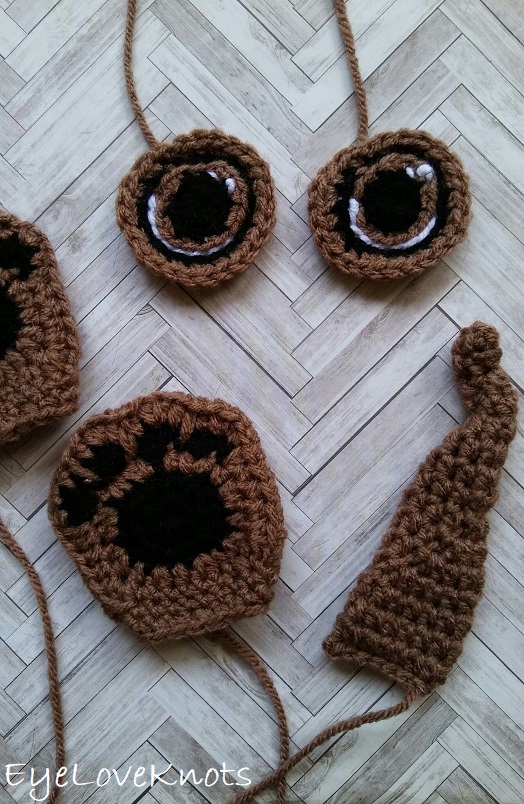
Eyes: I worked my eyes as a continuous round including Round 1 (even though it states to join), and I worked Round 5 as an increase round because there was some cupping – and I wanted my eyes to lay flat.
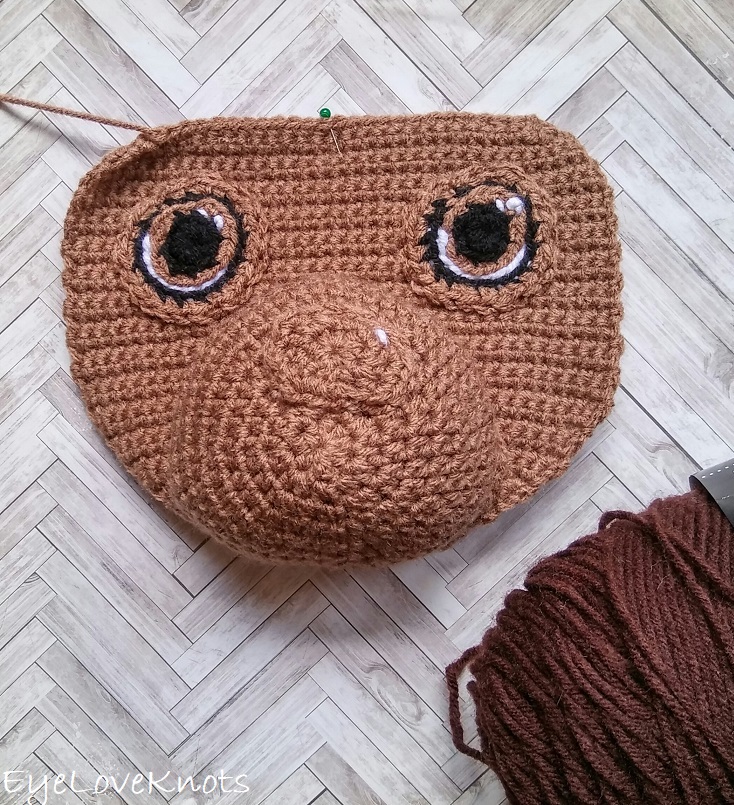
For face assembly, I used the sewing pins, as recommended in pattern, and it definitely helped!
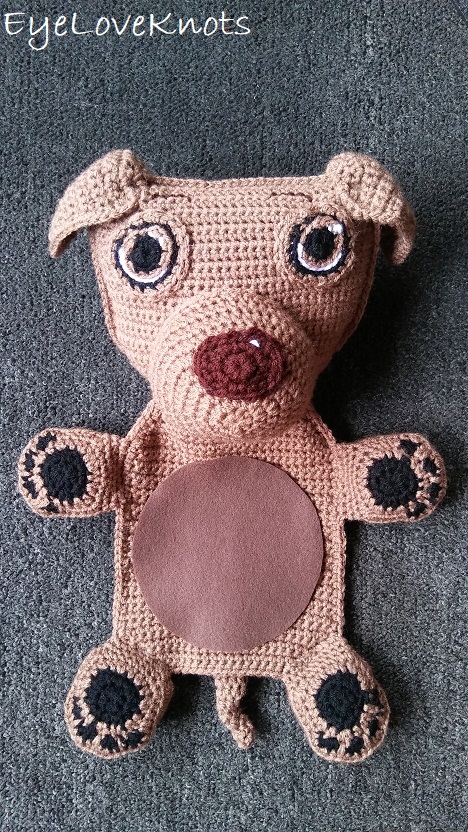
Belly: Originally, I did cut a piece of felt to sewing on as the belly, but when I reached out to my client, Paul, I asked if he would like the felt piece, or a crocheted piece in the same brown color, and he liked the idea of the crocheted piece instead.
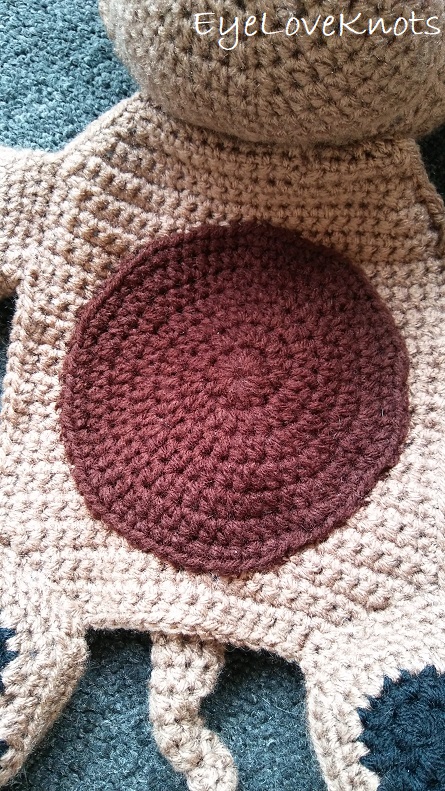
For my belly, I made a ring, then worked 10 double crochet into the ring, and then worked 6 increasing rounds in double crochet, followed by an increasing round in single crochet, ending with 70 stitches. The finished size was the same as the felt piece I had cut using a bowl as a guide.
When sewing the belly on, I was careful to go through only the top layer of the blanket part, and not the whole piece so it wouldn’t show through to the back side.
Join the EyeLoveKnots Crafting Community on Facebook to share your creations, and see what others are up to!
Linked Up To…
Craft Schooling Sunday – Creative Jewish Mom
Weekly Link Up – Claire Justine
Handmade Moday #152 – Sum of their Stories
The Really Crafty Link Party #194 – Keeping it Real
Ginx Woolly Linx Party November – Ginx Craft
Craftastic Monday – Sew Can Do
Little Cottage Link Party #28 – Love my Little Cottage
All About Home Link Party #15 – Common Ground
Project Inspire{d} Link Party #350 – The How-to Home
525th Inspire Me Tuesday – A Stroll Thru Life
Fabulous Party #294 – Lou Lou Girls
The Linky Ladies Party #172 – The Purple Poncho
Talk of the Town #201 – My Repurposed Life
Tuesday Turn About #26 – My Wee Abode
{Wow Me} Wednesday #430 – Ginger Snap Crafts
Hookin on Hump Day #203 – Moogly Blog
Your Whims Wednesday #434 – My Girlish Whims
The Wednesday Link Party #322 – The Stitchin’ Mommy
To Grandma’s House We Go Link Party 167 – Chas’ Crazy Creations
Waste Not Wednesday 182 – Faeries and Fauna
Scrappy Stitchers Link Party #57 – Stitches n Scraps
Creatively Crafty Link Party #198 – Life Beyond the Kitchen
Farm Fresh Tuesdays Blog Hop – 15 Acre Homestead
Pin Party #343 – The Pin Junkie
Home Matters #260 – Modern on Monticello
Create, Bake, Grow & Gather Party #394 – Shabby Art Boutique
The Super Fabulous Friday Linky Party #9 – A Big Green House
Thursday Favorite Things #416 – An Artful Mom
Link Your Stuff – Annemarie’s Haakblog
Snickerdoodle Create Bake Make Link Party 311 – EyeLoveKnots
This post is part of the monthly link party I host called Inspire My Creativity. Each month, a group of bloggers all create a project based around a theme and this month the theme is DIY GIFT IDEAS. There are tons of great ideas and I know you’ll get inspired to create something fun and new!
Your Co-Hosts
Shani | Sunshine & Munchkins
Christine | Swordfights & Starry Nights — Candice | She’s Crafty
Aimee | Things Small and Simple — Anna | Practical and Pretty
Alexandra | EyeLoveKnots — Ashley | A Day in the Life of Mom
If you have a post that fits, feel free to link up too! Link up will stay live for two weeks.
What an adorable blanket!!
Thanks! I thought it was a sweet gift idea to be requested. Even sent me a picture of his dog so I could better match the colors.
So cute! Thank you for sharing at The Really Crafty Link Party. Pinned!
And thank you for hosting, I’ve added one of my links to your party 🙂
Yay!
I love this! Thanks so much for sharing on Farm Fresh Tuesdays!
Thank you for sharing at the Fabulous Friday Linky Party! We hope you can join us again this week >> https://abiggreenhouse.com/the-super-fabulous-friday-linky-party-10/
So adorable and a great baby gift. Thanks for sharing at #HomeMattersParty Can’t wait to see what you do next.
This looks so great! Good job! It does take a little practice to learn how to crochet loosely enough to stop the cupping. Looks like you found a way to work around it. I do enjoy designing things that you can stuff the ends inside. 😉
The only improvement I would suggest is moving the eyes down to where they sit on top of the snout. People have eyes high on their face, but dog’s eyes are down low about nose level. It’s a tiny change that makes a huge difference!
Thanks for blogging your project!
Thank you for sharing it! I had a lot of fun working it up. Saving it for when my friend has a baby – her favorite dog is a chocolate lab, so I will be making it again, and will implement your note – thanks!