This post contains affiliate links for LoveCrochet. If you make a purchase by clicking on them, I make a small commission at no extra cost to you. Thanks for your support!
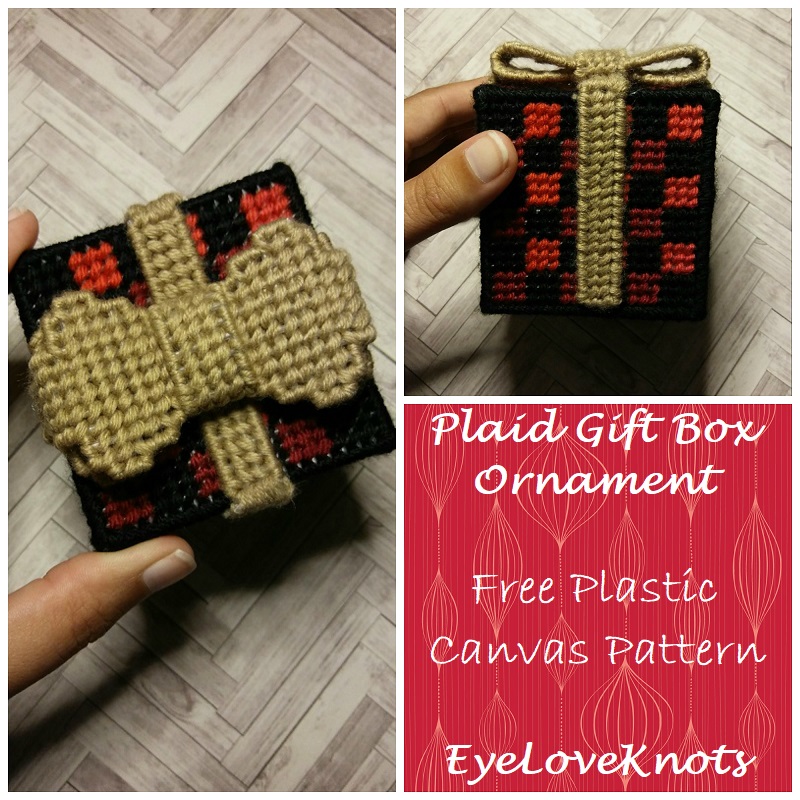
I was so excited to sign up for this blogger ornament exchange. When we signed up, we each had to put our likes and dislikes, and our theme if we had one. My partner’s request was for something Rustic/Woodland with darker reds & greens, natural & neutral tones as the likes, and very bright colors as the dislikes. I took a trip to Hobby Lobby, and looked at their ornaments to get a better idea of the Rustic/Woodland theme. While there, I saw a gift box that I thought would be so neat if worked in plaid, with a burlap inspired bow.
At first, I stressed a little trying to think of how I would crochet this to look how I wanted. Days passed before I remembered that this ornament just had to be handmade, not necessarily crocheted – phew! It was then I turned to my first love – plastic canvas.
This year, we have 50 talented bloggers sharing their Christmas ornament tutorials and helping to host the handmade ornament exchange link party! Make sure to stop by the 2018 Ornament Exchange Link Party to meet the hosts, see all the great ornament DIYs, and share your own at the link party! Also, thank you Erlene of My Pinterventures for putting this awesome blog hop together!
If you would like a PDF version of this post, you may get one through either my EyeLoveKnots Etsy Shop or EyeLoveKnots Craftsy Shop for a small fee. This fee is to compensate for the views lost when you no longer need to return to the blog to for the information, as you will have your own copy. Plus! It helps fund supplies for new projects to share with you!
Shop EyeLoveKnots Etsy: Plaid Gift Box Ornament.
Materials:
- Worsted Weight Yarn – I used Hobby Lobby’s I Love This Yarn in Black, Cranberry, and Fire Red, and two strands of Baby Bee’s Sweet Delight Yarn in the Teddy colorway
- Tapestry Needle
- 7 Mesh Stiff Plastic Canvas – Less than a sheet
- Hot Glue Gun, and Sticks
- Optional, Jewelry Pliers to help with weaving
Material Notes:
Yarn Alternatives: Red Heart’s Super Saver (my favorite for plastic canvas!), Caron’s One Pound, Bernat’s Super Value.
I used yarn out of my stash. For the burlap inspired color, I used two strands of a lightweight (#3) yarn held together to equal worsted weight.
The box adds a lot of extra time. Alternatively, you could use ribbon, and a store bought bow, or any embellishment/s.
Time Spent:
I worked my ornament up in a few days, for a total of about 16.5 hours – a labor of love.
Measurements:
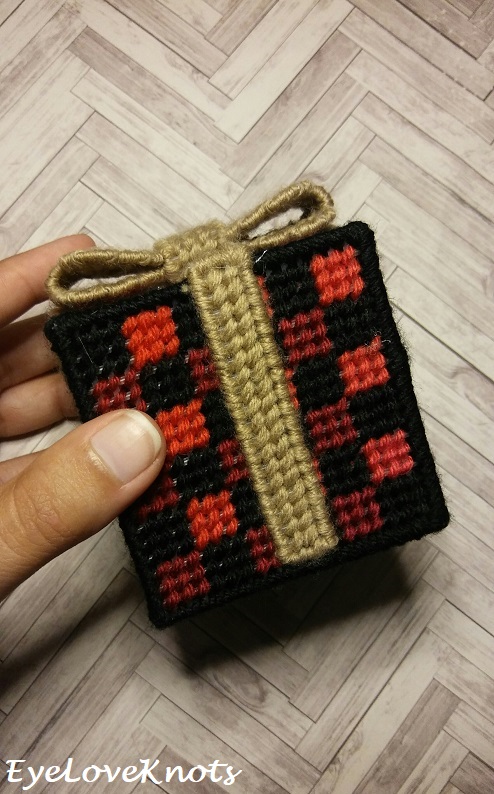
The finished cube is 3″ wide/tall. With the bow, it measures 3.25″ Wide by 3.5″ Tall.
Pattern Notes:
If you want to make a smaller/larger ornament, subtract/add three holes.
Patterns:
![]()
![]()

Tutorial:
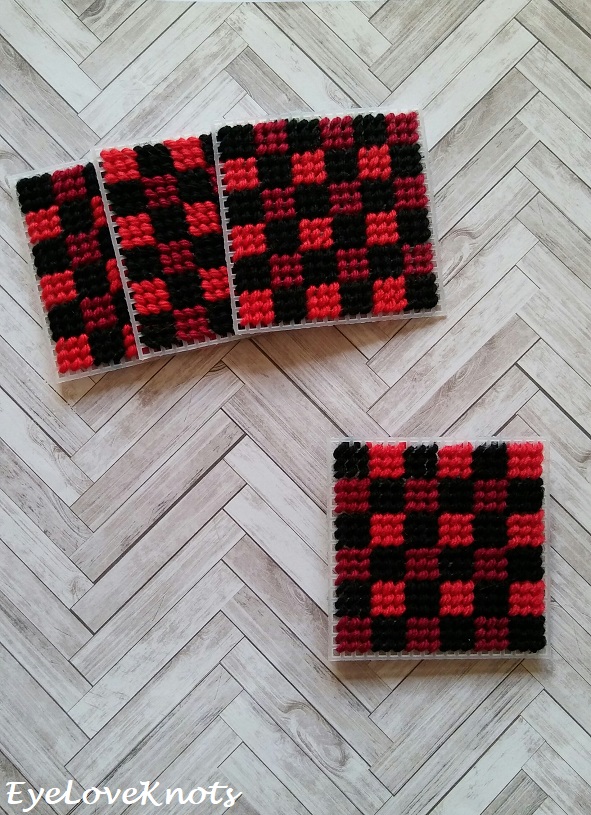
Plaid Box
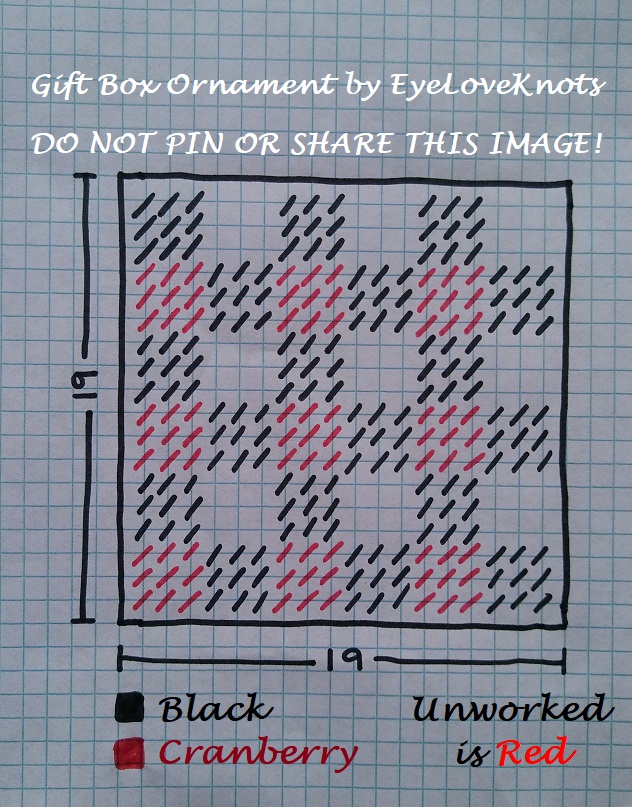
First things first, you’ll need to cut six squares out that are 19 holes.
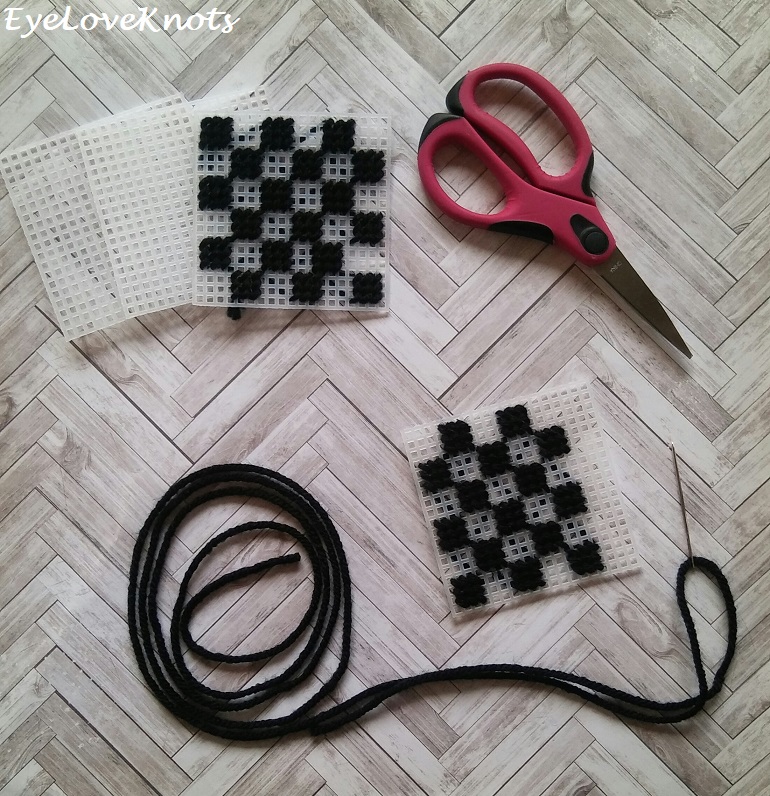
Begin stitching on the black.
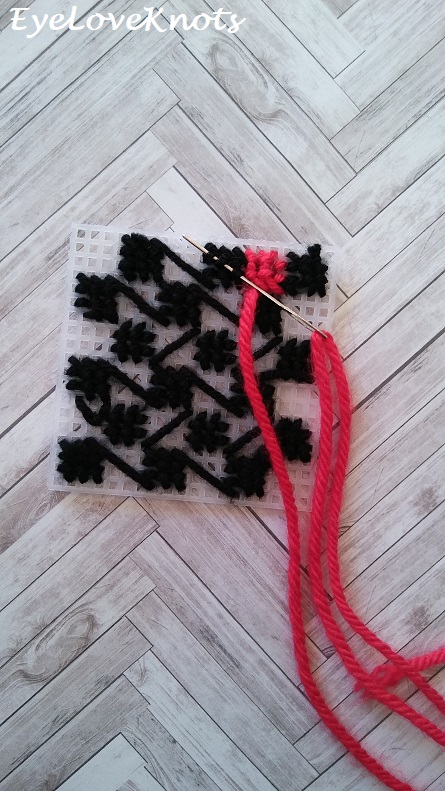
Add in the fire red. After completely each little square of the fire red, run the needle under the previous colors square to keep a nice clean back.
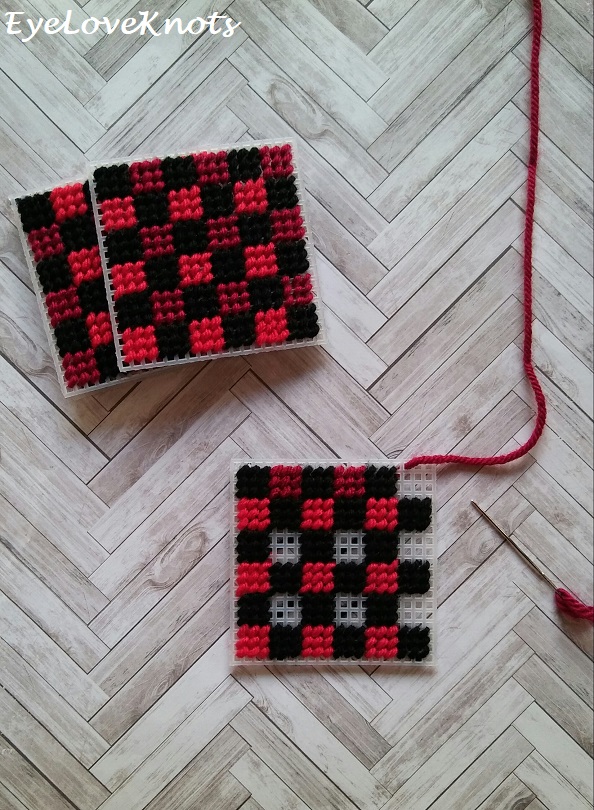
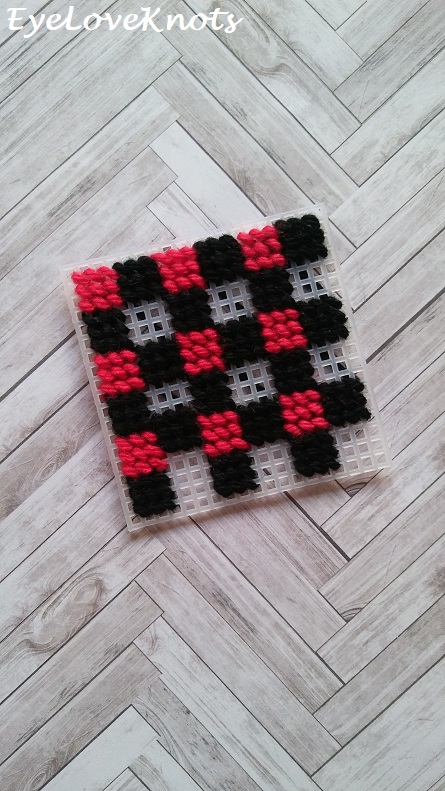
Lastly, add the cranberry, carry the yarn the same way as the fire red.
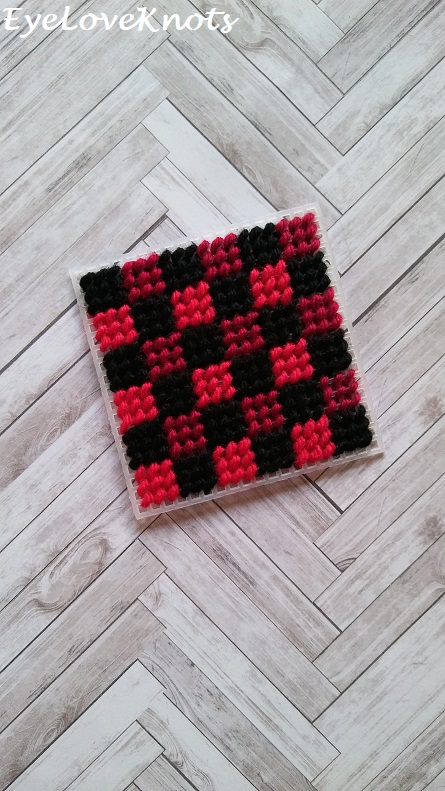
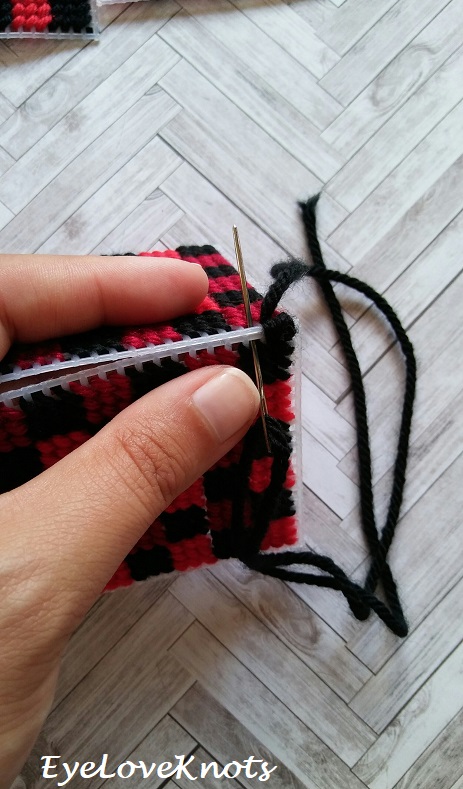
With some black, whipstitch the box together. First I started with the four sides, making sure to line up the plaid pattern. Then, I added the top, and bottom – these the plaid color pattern won’t line up, but no one will really see these much anyway.

To carry my yarn for the seams, I just pulled it across the back of the square – this will be on the inside, and not seen.
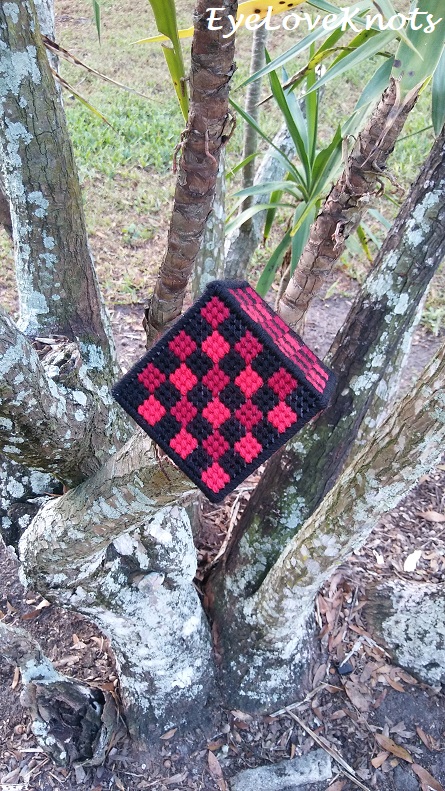
The basic cube is done! You could always stop here, and use as an ornament, or decor piece, or embellish with ribbon and a store bought bow… Or continue on!
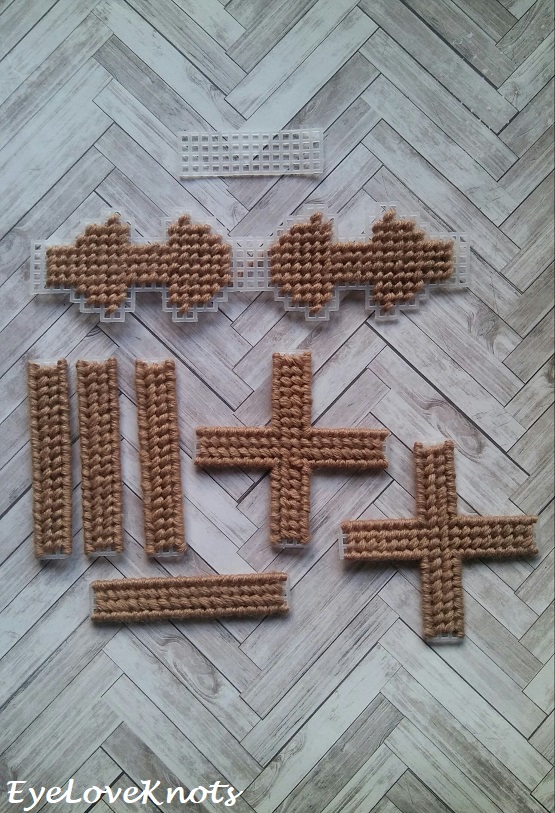
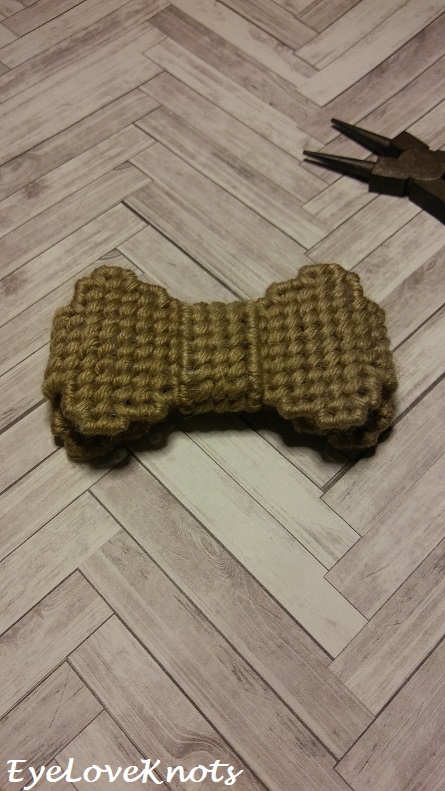
Bow
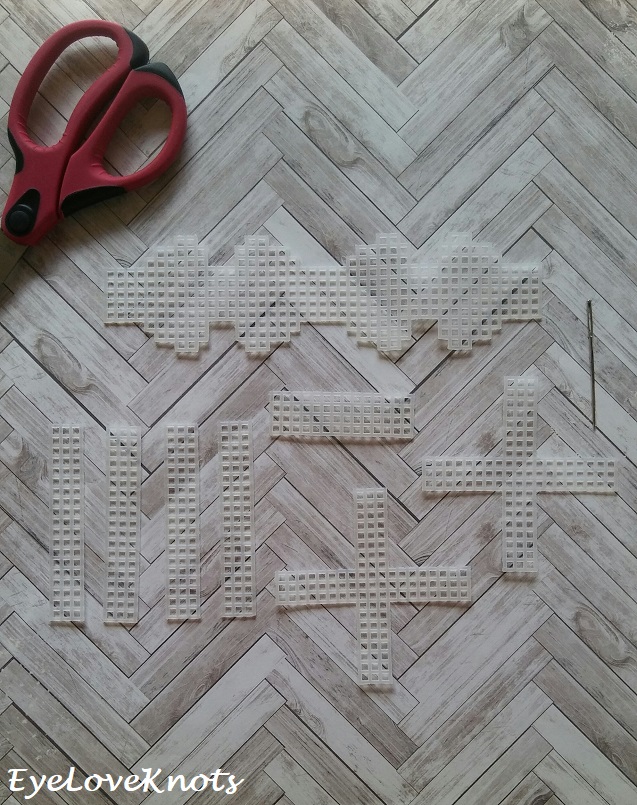
These are all the pieces for the bow – top is the main bow, under that is the center of the bow, bottom left are the side pieces, and the two crosses are for the top, and bottom. I did mess up originally though (as shown above). The bow center should have been cut one hole longer, and the side pieces should have been cut 2 – 3 holes longer. When I first cut them, I didn’t take into consideration the fact that the yarn would add bulk, but I did draw it out correctly on the patterns provided.
Was trying to get these photographed outside in the natural light before I ran out of it. Minus the top bow center, all the rest are stitched up as they should be – leaving the tops, and bottoms unworked, so they can be worked over later in the assembly of the bow. The bow has the center stitches missing to lessen the bulk, and the left and right sides are left unworked for now so they can be worked through later to secure the box closed in the back.
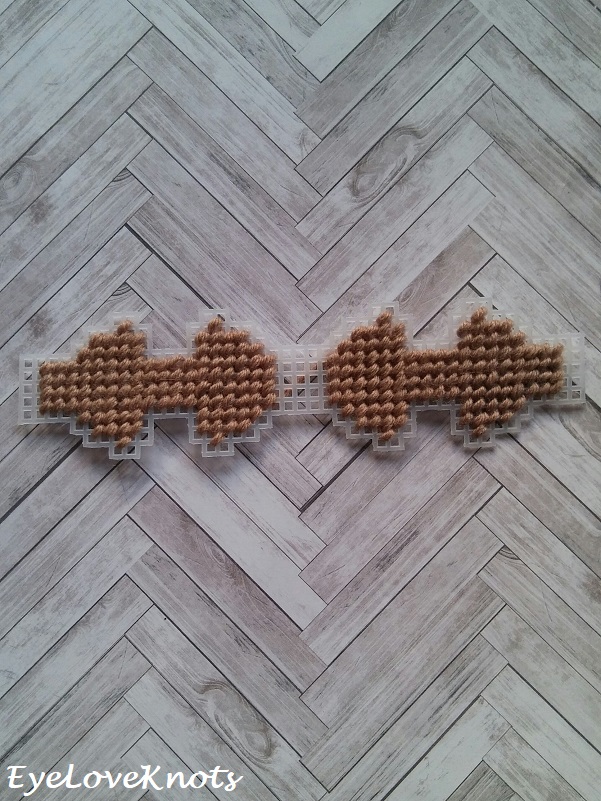
Here in a close up of the bow…
Here I have lost my natural lightening, and been forced inside with my desk lamp. Forgive the bad lightening in the next photos!
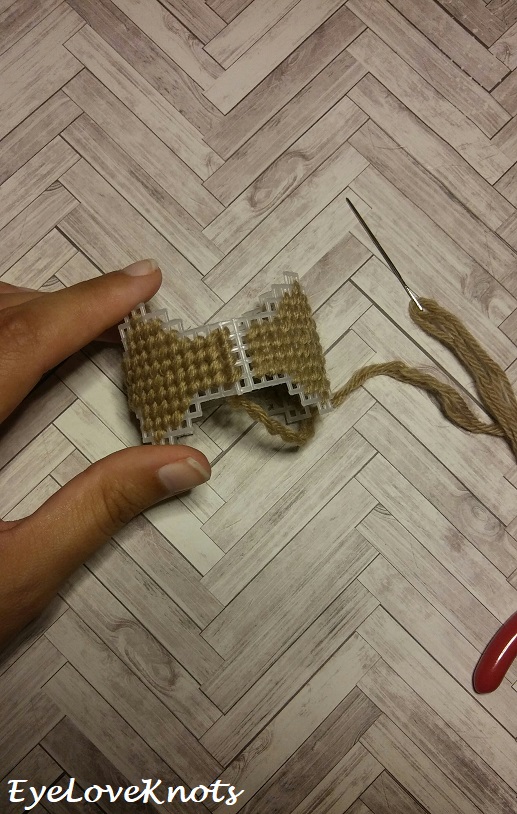
To finish stitching the main bow part, bring the left and right sides together, overlapping by one hole, and stitch normally through both layers, then complete the row to the right, as normal, and finish by whipstitching.
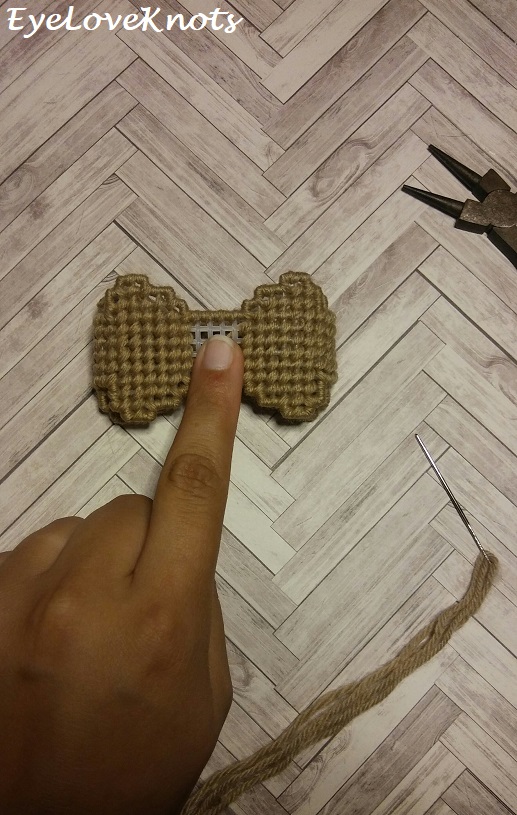
This is what the front will look like (before the center strip is added).

This is what the back will look like (before the center strip is added).
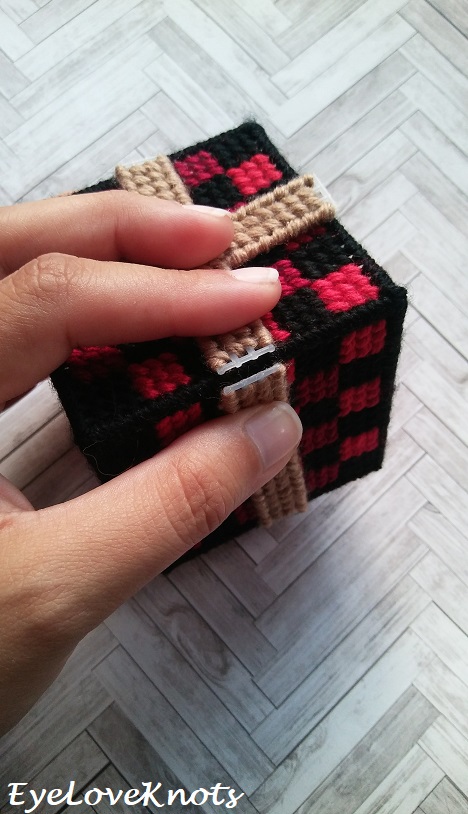
To add the center strip, work is similarly to the box sides – leaving the top, and bottom whipstitches unworked. Wrap this strip around the center of the bottom making sure the unworked top and bottom are on the wrong/back side of the bow, and then whipstitch closed.
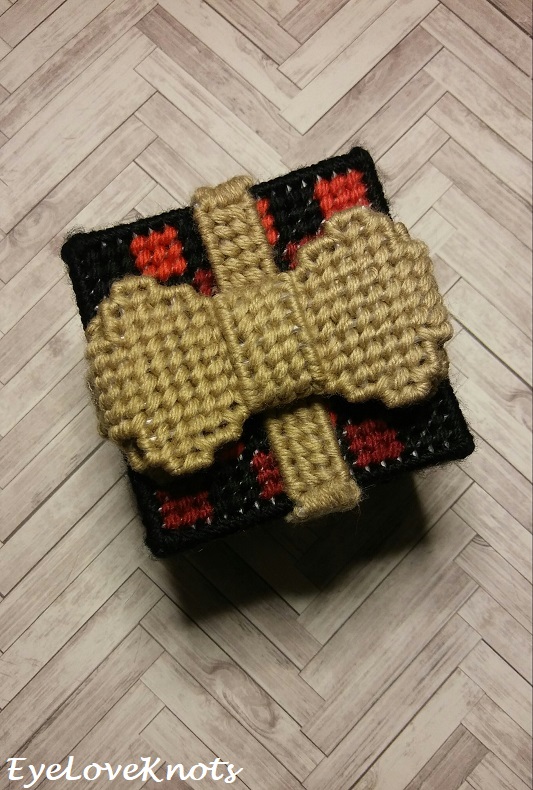
Assemble the Bow!
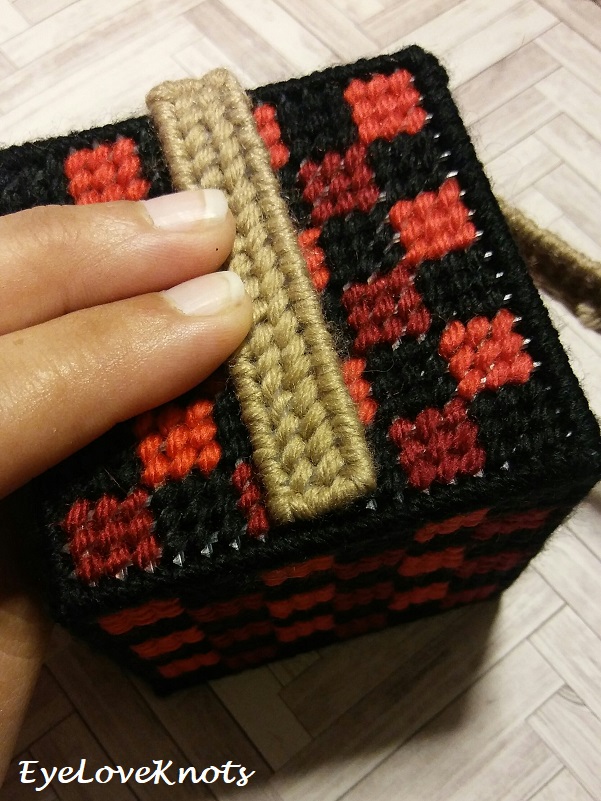
Lay one of the crosses on the top of the box. Line up the side pieces, and whipstitch closed.
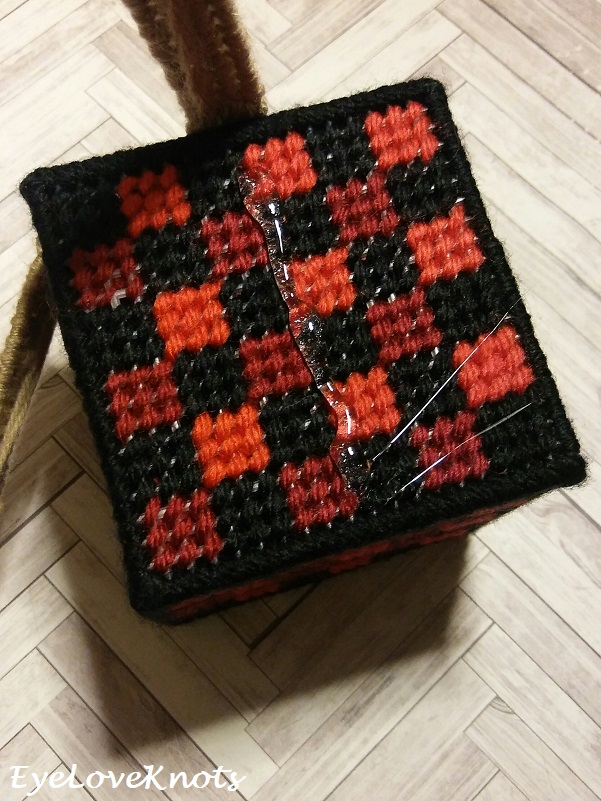
Since I didn’t have the bottom cross to whipstitch on to secure the bow pieces, I used hot glue to glue the side pieces, and top cross in place.
A few photos back, I mentioned that my pieces weren’t originally cut long enough – so here I was only able to whipstitch closed, and had to omit the bottom cross because the side pieces stopped at the bottom black whipstitch – can you see it in the picture above? If you cut the pieces longer like I mentioned, it will all work out perfectly to whipstitch all the way around.
Glue the bow in place, and voila!

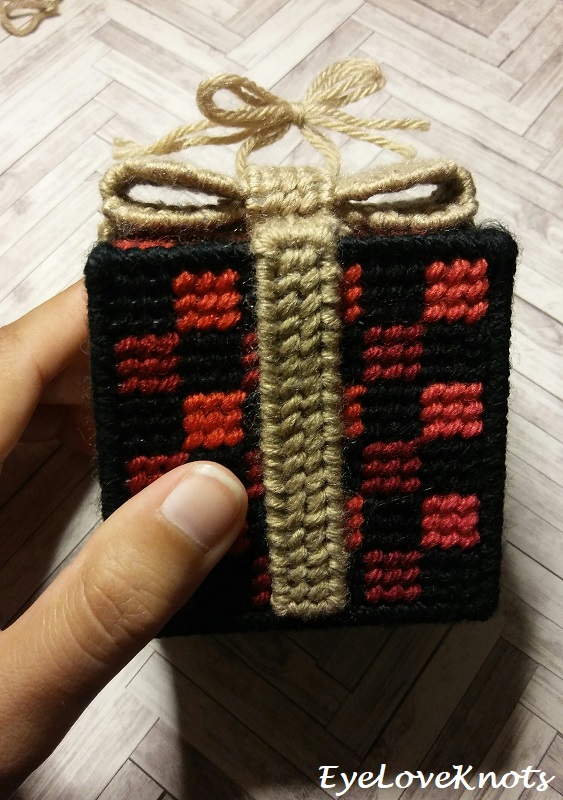
To hang, I threaded my needle with some yarn, ran it under the center of the bow, and tied a small bow, though I think the box could just be sat on a branch, or even a mantel or shelf.
Please feel free to make and sell your own Plaid Gift Box Ornaments using this pattern, but please DO NOT claim this pattern as your own nor should you sell my pattern, and DO NOT re-publish my photos as your own. DO NOT copy and paste my pattern anywhere, link to it instead.
Join the EyeLoveKnots Crafting Community on Facebook to share your creations, and see what others are up to!
Linked Up To…
Nifty Thrifty Sunday #361 – Meet Our Life
Craft Schooling Sunday – Creative Jewish Mom
Sundays at Home #231 – Celebrating Everyday Life
Happy Holidays Link Party – Across the Boulevard
Inspiration Monday – I Should Be Mopping the Floor
Creative Mondays Linkup – Claire Justine
Handmade Monday #102 – Sum of their Stories
The Really Crafty Link Party #144 – Keeping it Real
Craftastic Monday Link Party – Sew Can Do
Ginx Woolly Linx Party November – Ginx Craft
The Scoop Link Party #353 – Worthing Court Blog
478th Inspire Me Tuesday – A Stroll Thru Life
Fabulous Party #242 – Lou Lou Girls
Sew It Cook It Craft It Link Party #80 – Sew Historically
The Linky Ladies Party #146 – The Purple Poncho
Talk of the Town 150 – My Repurposed Life
{Wow Me} Wednesday #378 – Ginger Snap Crafts
Your Whims Wednesday #382 – My Girlish Whims
The Wednesday Link Party 272 – The Stitchin’ Mommy
Wall to Wall DIY Wednesday Week 24 – Dabbling and Decorating
Crafty Love Link Party #39 – Jessie at Home
Totally Terrific Tuesday #205 – Sweet Parrish Place
Scrappy Stitchers Link Party #47 – Stitches n Scraps
Hookin’ on Hump Day #179 – Petals to Picots
Friday Frenzy Link Party – 11/23/18 – Kelly Lynn’s Sweets and Treats
Link Your Stuff – Annemarie’s Haakblog
Snickerdoodle Create Bake Make Link Party #259 – Across the Boulevard
I hope she likes it!! It’s always a bit nerve wracking to work on something for someone you haven’t really met. What a cute idea. Pinned.
Yes, it is! But still fun. I probably wouldn’t have tried this gift box otherwise.
Thanks so much for sharing with us at the Happy Holidays Link party too! Pinned (again!)
This is so flipping cute! I see making a lidded box and ohhh the treasures it could hold! ?
Oh yes! That would be an excellent actual gift box, or box to hold I don’t know pine cones or ornaments on a side table, mantel or table center piece. After working this one up, I would like to work some up in different sizes – don’t think I’ll get to it this year though.
This is such a cute idea. I love the idea that you can make it into a gift box as well.
It would only take a little adjusting to make it into a gift box, and it really would be so lovely! I think I may work on it for next year – maybe I can get it up for Christmas in July? On the list.
What a great project, I would love to make a little box.
This is such a fun idea. I haven’t worked with plastic canvas for years, you’ve made me want to dig some out of my stash!
I hadn’t worked with it in a while before this either. Working on it makes me want to do it more.
That’s so cute! You could make small gift boxes like this too.
Thank you for sharing at The Really Crafty Link Party. Pinned.
Yes! I am thinking of rewriting the tutorial (probably for next year). I think it would make a really cute centerpiece or side table decor piece filled with candy, ornaments, pinecones, something!
How creative! I can see this being made in so many designs. Thanks for sharing your template with us. Pinned.
Yes, my friend said it would be cool done as a Rubix cube. Lots of pattern options. I plan on exploring some next year.
How cute! It’s been years since I’ve done any plastic canvas. I may just have to see if I’ve still got some in my craft supplies.
Me too! Forgot how much I enjoyed doing it.
This is the most special gift box I have ever seen! Thank you for sharing with us at Sweet Inspiration Link Party 134 🙂
So kind of you – thank you so much, Christina!
This is a little work of art Alexandra. Bravo to you for creating such a beautiful ornament.
Thank you so much, Mary! What an awesome comment to receive.
What a cute little box. Is it going to have something yummy in it? Thanks for joining in my Ginx Woolly Linx Party for November.
This one is empty – it’s sealed shut. I think I am going to adjust the pattern though for next year so it can be filled.