How to Crochet into a Foundation Chain Two Ways with Photo Tutorial – a very easy, beginner crochet tutorial. Also, what is working into the back humps, and when to do this?
This post contains affiliate links for LoveCrafts. If you make a purchase by clicking on them, I make a small commission at no extra cost to you. Thanks for your support!
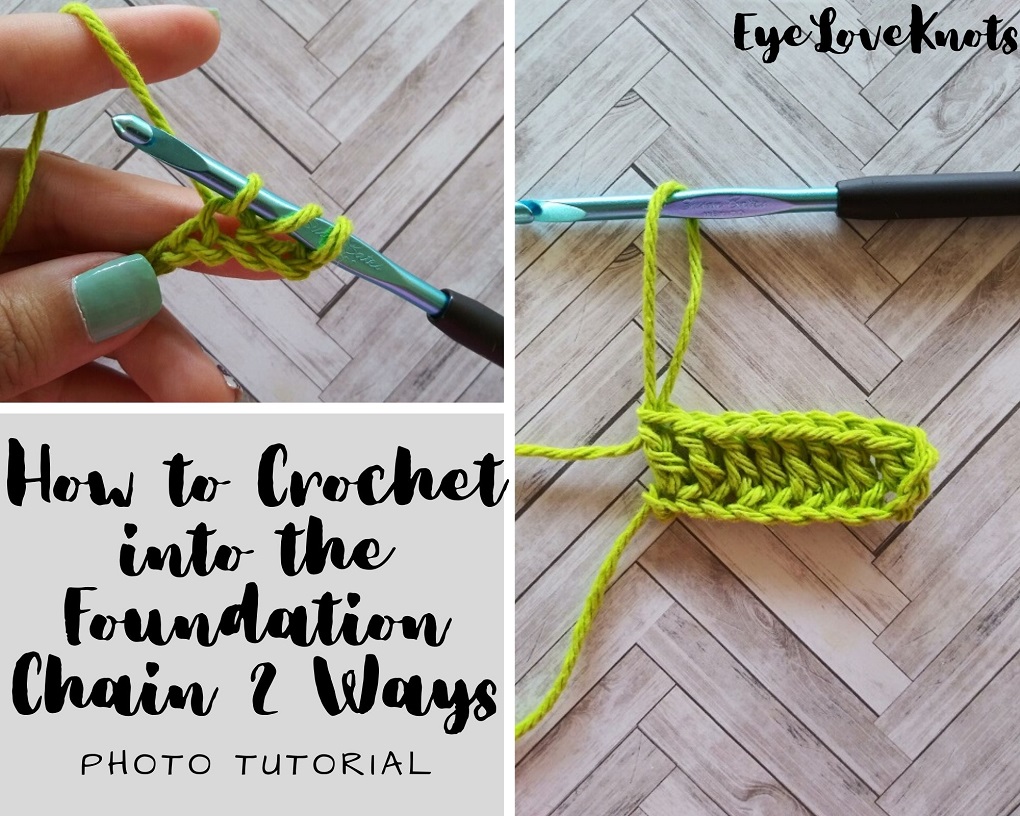
Alrighty, so we’ve made a slip knot, and crocheted our foundation chain – next, I’ll show you how to work into that foundation chain to build your very first row.
For this tutorial, I am using Lily Sugar n Cream in Hot Green, and an H8/5mm hook. My nails are Color Street Oslo and Steady.
I am not creating anything new here, but I did take the time to take the photos, edit them, and put this tutorial together, so please respect my work. Do not pin or share any of the tutorial images – just the main photo. Provide the link for others to find my page (help out me and my blog with the traffic). Do not copy and paste my work anywhere. Thank you!
There Are Two Ways to Work into the Foundation Chain?
Yes! You can work into the front, or back, and neither is the right or wrong way, though the back humps require a little more effort.
The majority of the time, you will work into the front loops of the foundation chain, and it won’t be specified in a pattern – it’s just more of a standard these days. Since working into the back humps is less common, designers will most likely specify this in the pattern, and it is recommended to follow as it probably has to do with the finished look (or look they have in mind for the project).
The Front of a Foundation Chain
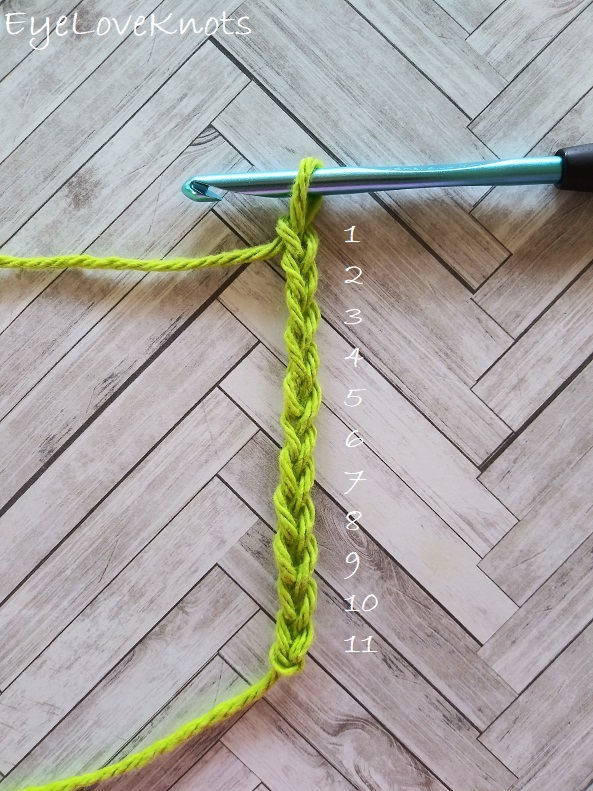
Here is what the front of a foundation chain looks like (we covered this in How to Crochet a Chain). Remember, we don’t count the slip knot or the loop currently on the hook.
My sample is being worked in double crochet. The only thing that changes about this process when switching stitch patterns is the first chain that is worked into, and I will explain.
Working into the foundation chain requires skipping some chains in the beginning to create leverage for turning, and to equal the height of the stitch pattern of choice. Here’s a standard breakdown:
- Working in Single Crochet? The first stitch goes into the second chain, and the skipped chain does not count as a stitch.
- Half Double Crochet? The first stitch goes into the third chain, and the skipped chain counts as your actual first half double crochet in the final count.
- Double Crochet? The first stitch goes into the fourth chain, and the skipped chain counts as your actual first double crochet in the final count.
- Treble/Triple Crochet? The first stitch goes into the fifth chain, and the skipped chain counts as your actual first treble crochet in the final count.
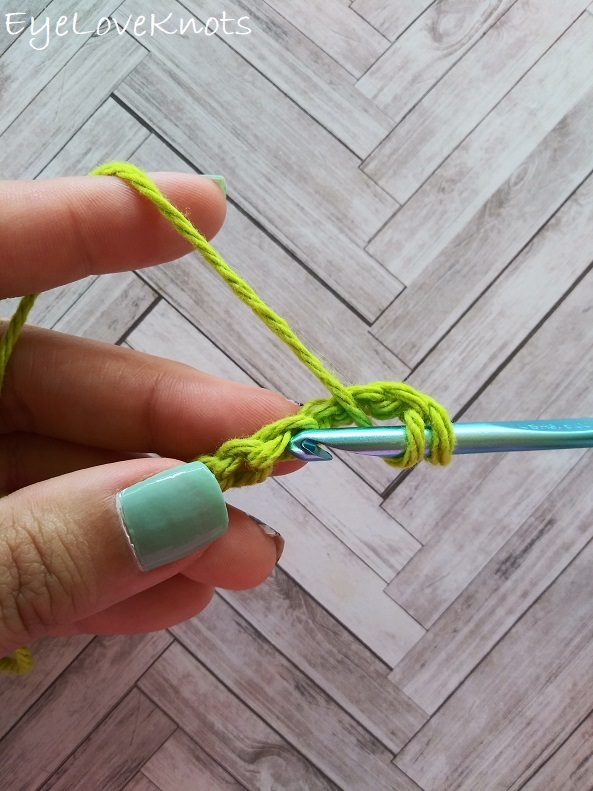
How Do I Crochet into a Foundation Chain?
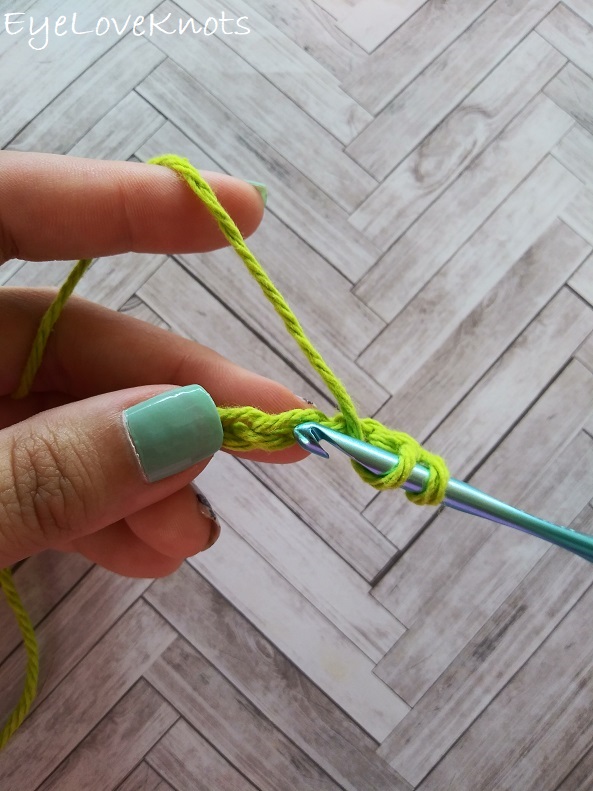
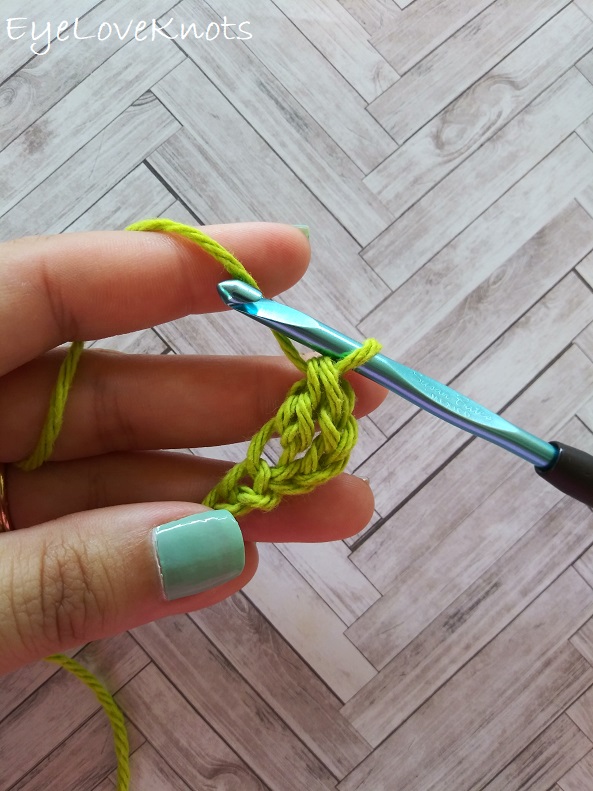
In working my double crochet, I yarned over, then simply inserted my hook right into the 4th chain (from the hook) picking up only that top loop on my hook.
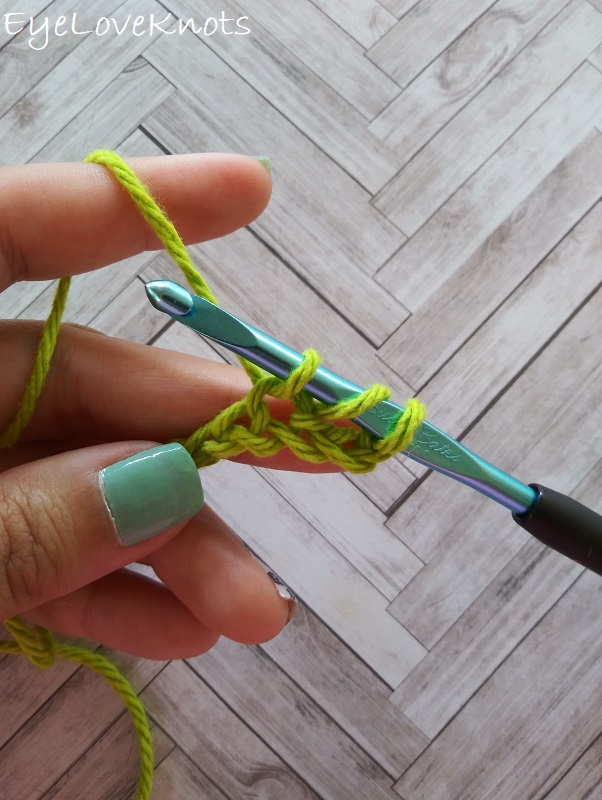
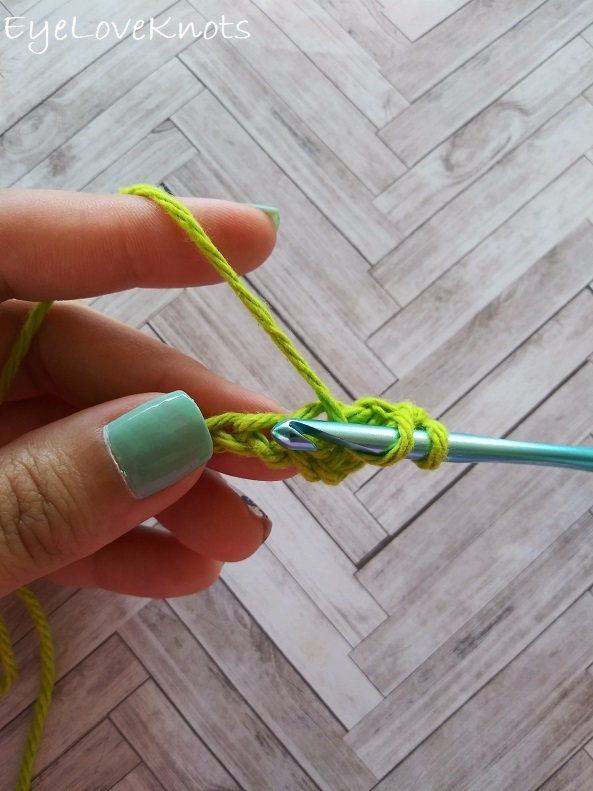
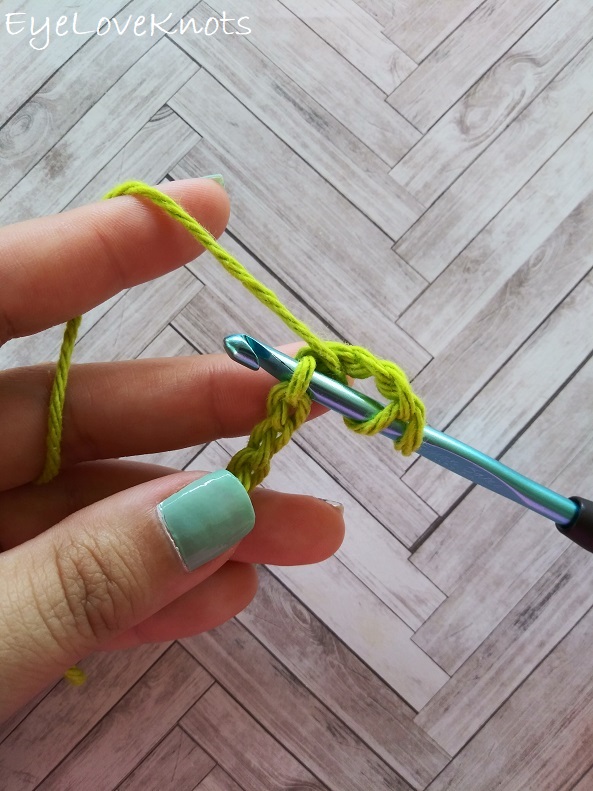
This is after yarning over, and pulling through.
This is after completing my double crochet stitch.
It may seem as if it’s really pulling that loop out of shape from the rest, but as you continue working down your chain, it will all even out.
To work into the next chain, simply insert your hook right into the next chain picking up the top loop only on your hook, just as before.
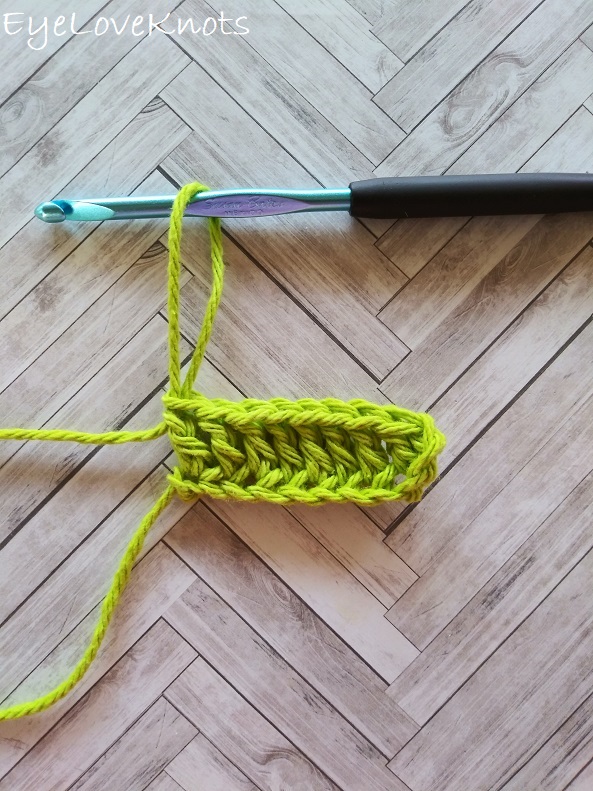
And here is a complete row of double crochet worked into the foundation chain!
On the right side, you will notice those chains you skipped in the beginning may be a little out of shape from the rest, but it will straighten out once you work the next row.
Why Crochet into the Back Humps or Back Bumps of a Foundation Chain?
Working into the back humps give a nice, finished look to the piece as it creates a more even edging. I suggest working into the back humps if you don’t plan on working a border or final edging around your piece – maybe a washcloth you don’t want a border on, or the bottom edge of a crocheted top.
Working into the back humps CAN be more difficult, and require more effort. As you work along the foundation chain, it will pull the slack from the remaining chains, so if you are a tight crocheter, you may find it quite difficult, and tight, trying to work into chains near the end. If this happens, try working your foundation chain in one hook size larger than what you are using, and then switch back to work into the actual chains.
The Back Humps or Back Bumps of a Foundation Chain
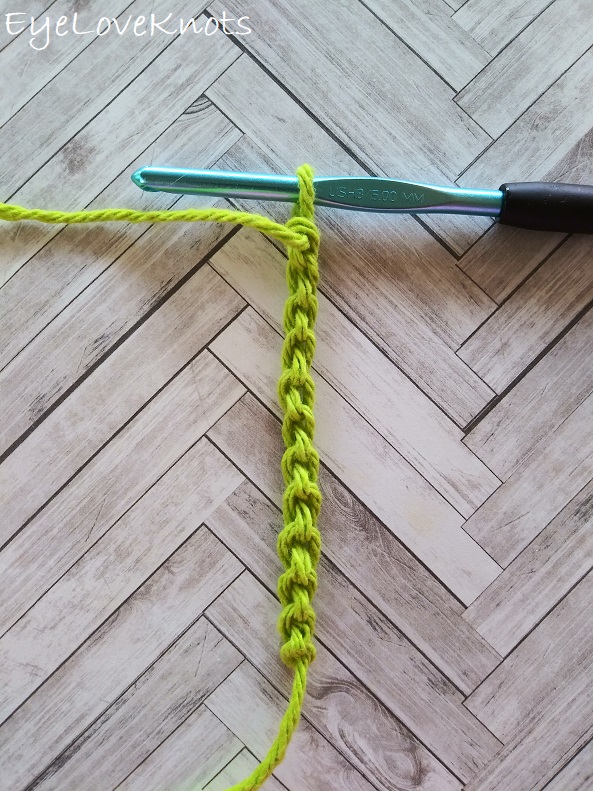
This is what the back of a foundation chain looks like – same as shown in the How to Crochet a Chain post. The back humps are those vertical lines you see.
How Do I Crochet into the Back Humps or Back Bumps of a Foundation Chain?
Very similar to working into the front, insert your hook into the chain…
… picking up only that top loop. Complete your stitch as normal.
Join one of our awesome Facebook groups to share your creations, and see what others are up to!
– Yarn Crafts & Coffee Community
– DIY Home On Rockwood Lane
– Alexandra Lane Lifestyle
Linked Up To…
Handmade Monday #176 – Sum of their Stories
The Really Crafty Link Party #218 – Keeping it Real
Ginx Woolly Linx Party May – Ginx Craft
Craftastic Monday – Sew Can Do
Little Cottage Link Party #52 – Love my Little Cottage
548th Inspire Me Tuesday – A Stroll Thru Life
Fabulous Party #320 – Lou Lou Girls
Craft Schooling Sunday – Creative Jewish Mom
Happiness is Homemade Link Party #323 – Design Morsels
All About Home #40 – Common Ground
Your Whims Wednesday #460 – My Girlish Whims
{Wow Me} Wednesday #455 – Ginger Snap Crafts
To Grandma’s House We Go Link Party 193 – Chas’ Crazy Creations
Waste Not Wednesday 207 – Faeries and Fauna
Tuesday Turn About #49 – My Wee Abode
Thursday Favorite Things #440 – An Artful Mom
Creatively Crafty Link Party #224 – Life Beyond the Kitchen
Creative Compulsions Linky Party #60 – My Bijou Life
Traffic Jam Linky Party #234 – My Bijou Life
May 2020 Best of the Month – Calypso in the Country
Pin Party #369 – The Pin Junkie
Create, Bake, Grow & Gather Party #420 – Shabby Art Boutique
Snickerdoodle Create Bake Make Link Party #336 – EyeLoveKnots
Unlimited Monthly Link Party 13 – Grammy’s Grid
Another great crochet 101 tutorial, Alexandra! I’ve been pinning them to my crochet board on Pinterest for those who want to learn the basics.
Thanks so much, Marie! I really appreciate you sharing!!
Great idea. Did not know that👍
Glad I could help!
Excellent! Pinning!
Thank you for linking up to Creative Compulsions!
Michelle
https://mybijoulifeonline.com
These are such clear instructions! I wish I had had this post when I was first learning. I never knew whether I should work into the front or the back, but now I see that either way is ok!
Thank you! Trying my best to help anyone learn, and answer little questions like that – the questions I also had when I was learning.
Thanks so much for linking up with me at my #UnlimitedMonthlyLinkParty 13, open June 1 to 26. All party entries shared if social media buttons installed.