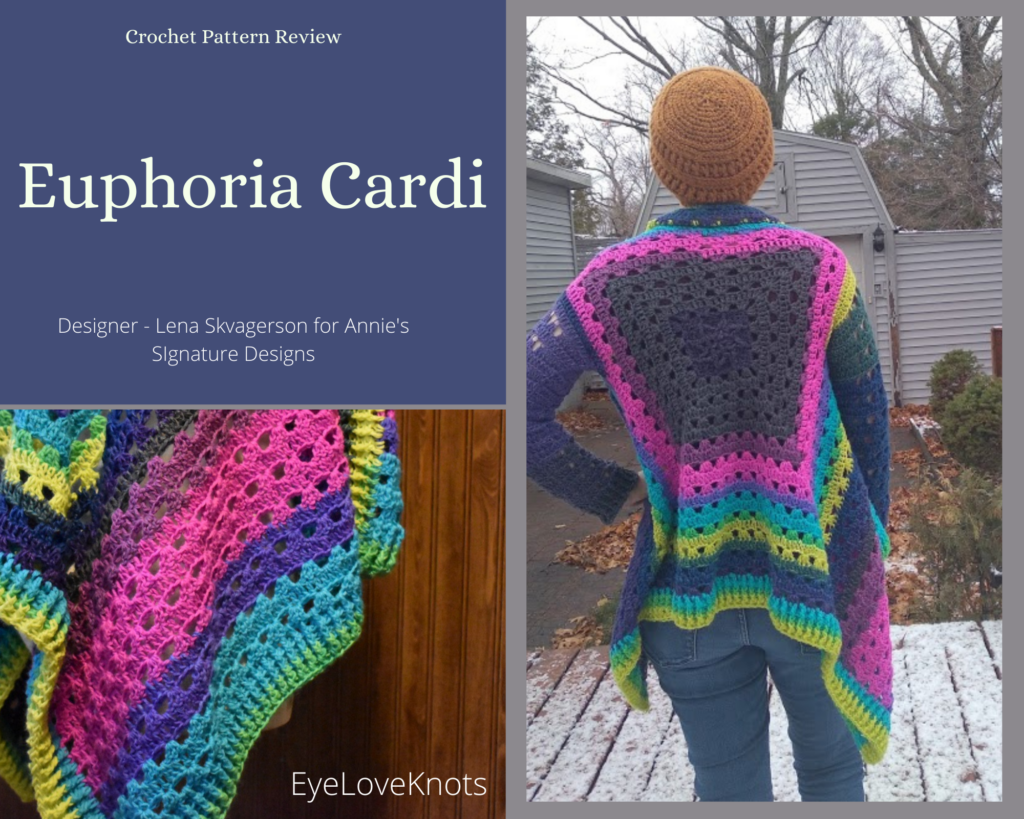
This is a crochet pattern review of the Euphoria Cardi pattern from designer Lena Skvagerson for Annie’s Signature Designs. Review done by A Stitch Shy of Normal for EyeLoveKnots.
This post contains affiliate links for Annie’s Catalog, WeCrochet, and Lion Brand Yarns. If you make a purchase by clicking on them, I make a small commission at no extra cost to you. Thanks for your support!
It’s me, Abigail with A Stitch Shy of Normal.
Visit with me on Instagram @astitchshyofnormal for all kinds of awesome crochet makes and inspiration.
I love color. I’ve said that many times. Now that I’ve been crocheting for several years, I’ve finally calmed down on my “all the colors all the time” technique, but I will still choose fun colorways over neutrals about 75% of the time! When I was perusing Annie’s Catalog to find a fun pattern (or a few) to buy during their Black Friday sale, a colorful drapey cardigan caught my eye. I looked further into the pattern and saw that it was a pattern that seemed to be intentionally written for variegated lightweight yarn like Mandala/Cupcake, some of my favorite choices for bright colors! Of course I clicked to buy it immediately!
This pattern was so much fun to make and so simple once I got started. It would be a great gift for someone special–a special, colorful, one-of-a-kind cardigan that they’re not going to find in stores!
Materials I Used:
- 2.75ish cakes of Lion Brand Mandala in “Sirens” (I have less than half of the third remaining)
- J10/6mm hook – I like Clover Amour Ergonomic Hooks
- Yarn needle for weaving in ends
- Euphoria Cardi, Paid Crochet Pattern from Annie’s Catalog
Material Notes:
The pattern itself does call for Mandala, which I was happy to see as it’s a favorite of mine for colors! The pattern actually calls for 4 cakes for the small size, and I bought 3 because I didn’t read the yardage properly… however, I got away with it! I did use almost all of my third and I could have gone a little longer on a few spots, so a fourth would have been a smart idea. It’s a nice affordable yarn for garments, my three cakes ended up being under 20 bucks with a Joann coupon (and even regular price, with a fourth cake, would have been about 30 which is still nice for a handmade sweater!)
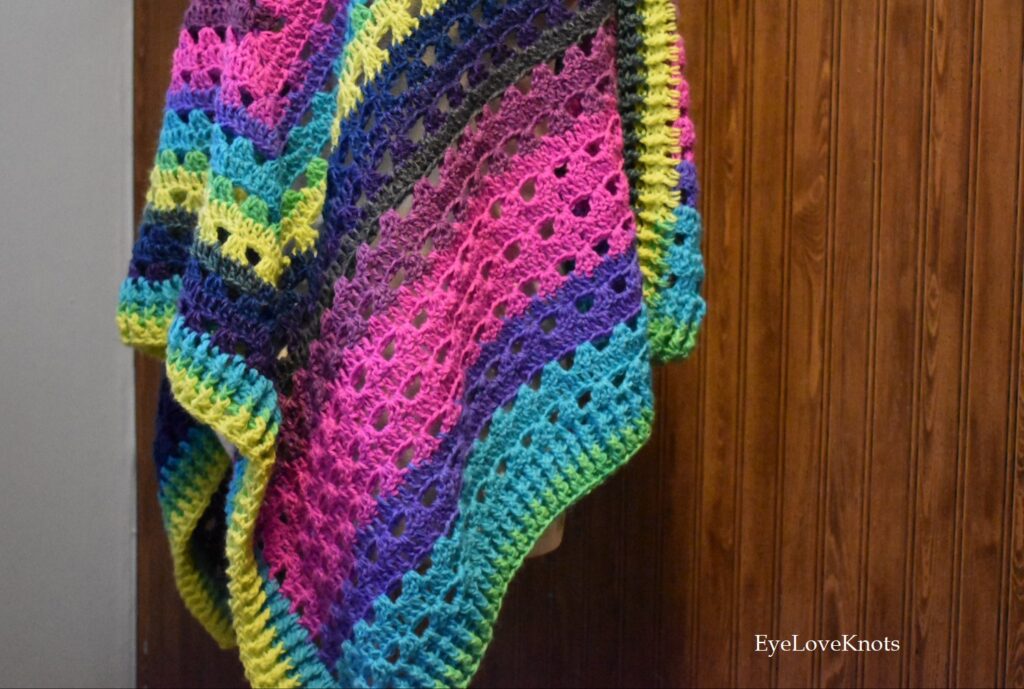
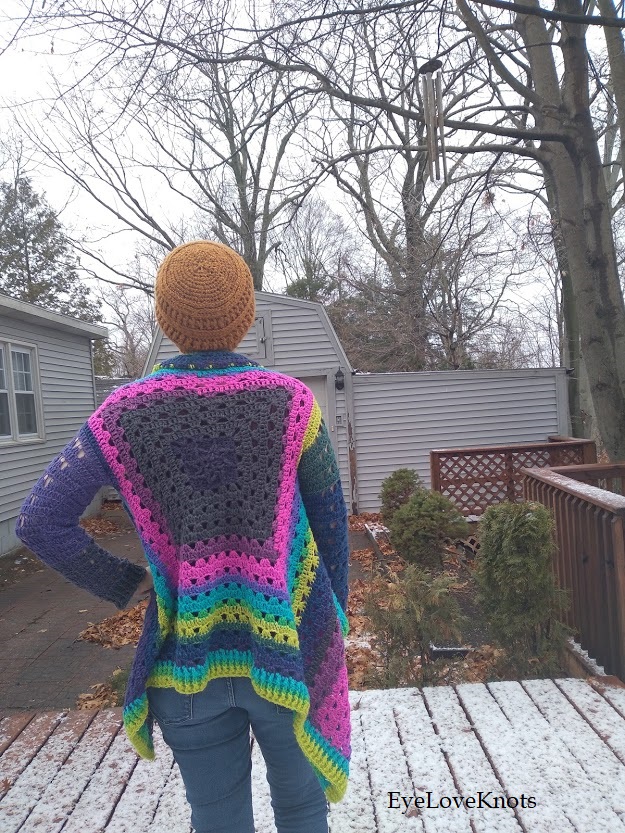
Why did I choose this colorway? Just look at how gorgeous these colors came out in this stitch pattern!
I have used Mandala for garments before and loved the results, so I knew I would be happy with this one as well. It’s sturdy, it’s washable, and even in a big cozy sweater it’s lightweight!
I am glad I chose the yarn I did, it was a wonderful option. I would buy it and do the same thing again in a heartbeat, just to use a different colorway and have even more bright beautiful sweaters! It’s not the warmest garment I’ve made, but the pattern is for DK yarn, so that was going to be the result regardless. This is more of a fall/spring sweater instead of a thick warm one to replace a coat in winter.
Time Spent:
This sweater takes some time. I would estimate roughly 12-14 hours, and that’s a ballpark. I would say give yourself a few weeks to make this if you have a deadline or a reason you want to wear it. Mine was done in about two weeks, but I chose to focus on this during most of my free time because I wanted to get this review out for you guys!
Measurements:
I made the size listed as Small which is written to be 14″ across the shoulders, and 21.5″ long (apparently measured from the top of the armholes to the bottom edging, stated in the pattern).
My measurements for these dimensions ended up being about 16″ across between the armholes, and 21″ long. This is after it has been worn a couple of times for pics, however, so that’s with a little bit of light stretching.
The pattern often tells you to work a certain section until it measures to a certain length/width, so it would be very simple to do this to your specific sizing!
Instructions for sizes Small through 3X included in the pattern.
Gauge Info:
The pattern gives gauge as 4″= 13 dc or 6 3/4 rows. I did not do a gauge swatch for this as I had looked ahead and saw how the pattern says “go until this measurement”, which in my experience makes a gauge swatch less important since your row or stitch count may vary anyway to get the right dimensions.
Mine (again, I’m measuring this after light wear) ended up being 15 stitches and 6 1/2 rows, so pretty close!
Pattern Notes:
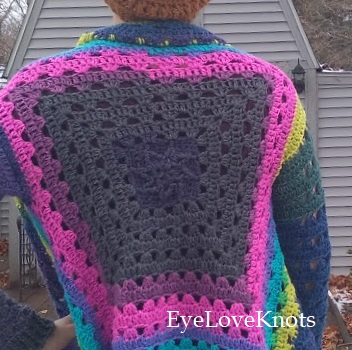
Many of the reviews for this pattern on the Ravelry page mention confusion during the first few rows, which is a post-stitch pattern in the middle of the back to add an accent. This was slightly challenging, I had to restart a couple of times. However, the site does provide a video that goes more in depth and does help with this section! I personally did not use the video but I saw others mentioning that it had helped. What I did was zoom in on the picture of their finished cardigan and looked at how the post stitches lined up with each other, then simply made sure mine worked out the same way. Either way, once you get past that section, the rest of the cardigan is a simple two-row repeat for the most part and is much simpler. And if you look below, you can see why this part is worth it–you get a cute little star!
The sizing, as I’ve mentioned, would be simple to modify. You would just need to know the measurement you want across your back (shoulder to shoulder) and make the beginning square to that size, then continue with the armholes and make the panels a proportional size (roughly the same width as the back piece, from what I can tell). The sleeves are similarly simple, it’s a basic decreasing repeat and then you continue for your desired length. After finishing my sleeves to the written length, I wish I had done just a couple more repeats to make it 2-3 inches longer, but that was my own fault for going based off the instructions and never trying it on.
I wish the top/bottom edging instructions were a little more in-depth as far as stitch count, but I was able to mostly figure it out by remembering my row counts at each section. The pattern leaves it open and just says to stitch evenly across the top, and I had to restart a couple of times as my stitches were either stretching out (too few) or bunching up (too many). I ended up counting through my stitches along the back square, then used trial and error to find a good count for the panels and added them together! I would recommend writing these counts down so you can repeat it on the bottom!
The sleeves were probably the only part I considered to be less than perfect in my finished garment, and they’re not even really a problem in general. The instructions are clear and the stitch pattern is easy! But the problem I did have is in the “shell” sort of rows. You do these rows entirely in the back loop, including these shells. In my finished sweater, this led to these rows sort of pulling, as three DC stitches are all anchored to one single loop from the previous row. This is further accentuated when worn, and gives the sleeves a more lightweight open look than the rest of the sweater. I see this happening in the modeled pattern pictures as well, so I know it’s not just me experiencing this. This is not an actual problem, just something in the pattern that I only 95% love. I might try another one where I do those rows in both loops and see if I prefer that more solid look. It’s not as though the sleeves are going to fall off, rather that the fabric is much more open and not as warm as the main panels of the sweater.
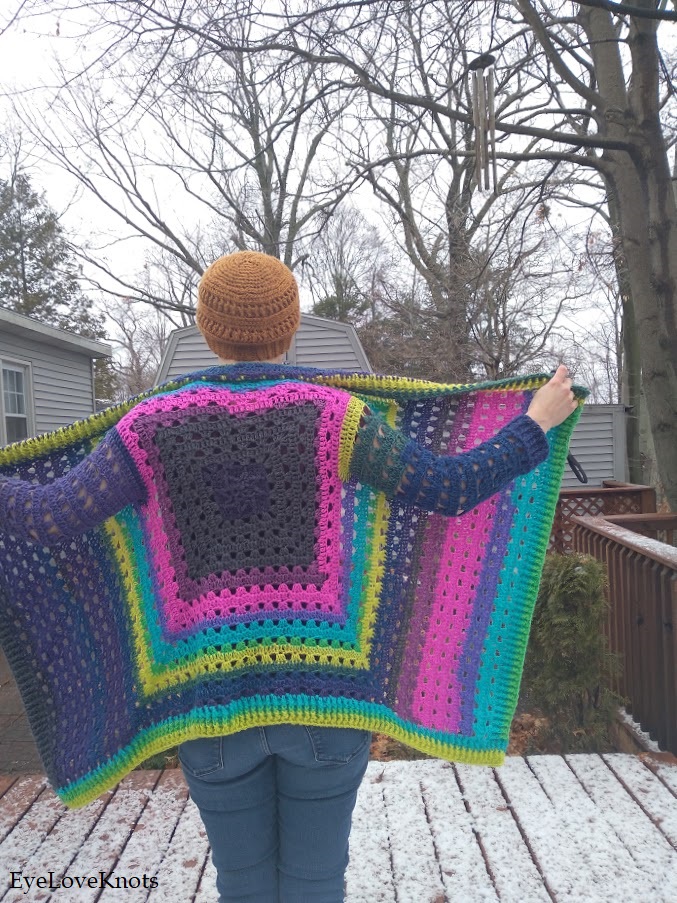
As I mentioned earlier, this is not a thick cozy winter sweater! It doesn’t pretend to be, either, I just happened to make it in mid-December and now I need to wait until spring to truly enjoy it! I also wonder if you could find a coordinating long-sleeve shirt that matches your yarn and wear it underneath for warmth. I may have to try that if I can find a color that works with the bright colorway I chose!
It will make an adorable sweater for the transition seasons, though. I can picture it looking gorgeous with some dark jeans and tall boots…I chose to model it with shorter booties for pictures and that was pretty cute too, but I would love to find my knee-high black boots that I know are in a box somewhere, and really glam up an outfit around this piece!
Don’t forget to visit with me on Instagram @astitchshyofnormal for all kinds of awesome crochet makes and inspiration.
If you love to DIY: Join the EyeLoveKnots Crochet & DIY Community on Facebook to share your creations, and see what others are up to!
If you love Fashion: Join the Alexandra Lane Lifestyle Facebook group to share, and see what others are up to!
Linked Up To…
Happiness is Homemade Link Party #354 – Decor Craft Design
Unlimited Monthly Link Party 19 – Grammy’s Grid
Over the Moon 256 – Marilyn’s Treats
Hearth and Soul Link Party – April, the 21st Century Housewife
Handmade Monday #207 – Sum of their Stories
Craftastic Monday Link Party – Sew Can Do
You’re the Star Blog Hop – Decor Craft Design
571st Inspire Me Tuesday – A Stroll Thru Life
{Wow Me} Wednesday #485 – Ginger Snap Crafts
Your Whims Wednesday #490 – My Girlish Whims
Creative Crafts Linky Party #21 – Bella Crafts Publishing
Artsy-Fartsy Party #324 – Artsy-Fartsy Mama
Create, Bake, Grow & Gather Party #451 – Shabby Art Boutique
A Morning Cup of Joe Linky Party – The Cottage Market
Scraptastic Saturday Party #318 – Scrapality
Weekday Wear Linkup – Away from the Blue
Ginx Woolly Linx Party December – Ginx Craft
Style with a Smile Link Up – Style Splash
Linky Ladies Party #200 – The Purple Poncho
Turning Heads Linkup – Elegantly Dressed and Stylish
Confident Twosday Linkup – I do deClaire
The Loop Scoop #4 – Moogly Blog
Style on the Daily Weekly Link Up – Straight A Style
Style Link Up – Lizzie in Lace
Fancy Friday Linkup – Nancy’s Fashion Style
Thursday Fashion Files Link Up #287 – Curly Crafty Mom
Chic and Stylish Link Up – Mummabstylish
Trendy Thursday LinkUP – Thirty Minus One
Fabulous Party #352 – Lou Lou Girls
The Wednesday Link Party 379 – The Stitchin’ Mommy
Thursday Favorite Things #470 – An Artful Mom
Creatively Crafty Link Party #256 – Life Beyond the Kitchen
Encouraging Hearts & Home Blog Hop – Apron Strings and Other Things
Traffic Jam Weekend Linky Party #263 – My Bijou Life
The Embracing Home and Family Link Party – The Everyday Farmhouse
Friday Favorites – Busy Being Jennifer
Link Your Stuff – Annemarie’s Haakblog
Craft Schooling Sunday – Creative Jewish Mom
The Really Crafty Link Party #248 – Keeping it Real
Party in Your PJs #340 – The Apple Street Cottage
Snickerdoodle Create Bake Make Link Party 367 – EyeLoveKnots
Songful Style Link Up – The Grey Brunette
This is the exact cardi i have been eyeballing for a while now. From Annies Catalog. but i have read a free pattern similar to this , looks very odd to me. Kinda like its written differently. Love this !
That’s interesting! There might be a similar construction out there, it’s a very flattering shape so I wouldn’t be surprised if others have come up with their own! I really enjoyed this pattern but I’ll have to keep an eye out for other variations!
It’s absolutely gorgeous, perfect for a yarn cake. And the kind of garment when you can look just as good walking away from someone as you do walking towards them.
I love thinking about it this way! I’ll have to figure out how to properly strut away when wearing this, lol.
What a beautiful cardigan! I really like all the different colours and while it does look a little too cold for snow I agree it would be perfect in spring! 🙂
Thanks so much for joining the #WeekdayWearLinkup! The last link up for the year is live on my blog now if you want to link up again.
Hope that you had a wonderful Christmas! 🙂
I think it’ll be great for the transition seasons, yeah! I’ll have to figure out layering in order to get some use out of it in January 🙂
Wow, that is some sweater, reminds me of the round backed sweaters, but this is so much easier! Definately wear it with a turtle neck and enjoy now, black would work or the dark brown color on the back. thanks for sharing on craft schooling sunday! great to reconnect!
Ooh that sounds lovely with a solid dark turtleneck underneath. I’ve been wanting to buy one because they’re trendy again apparently, this might be a good excuse!
What beautiful colors! Thank you for sharing at Party In Your PJ’s!
Thank YOU, Ann!
I just read your review after getting your link on FB in a crochet group. I am STUCK on that crazy star in the middle of the back. I’ve been working on it ALL day today. 🙁 Frogging it multiple times. *sigh* I wanted to get a lot done on this today, but it’s not happening. I don’t have the video because I have the magazine pattern which doesn’t include the video. Super frustrating. 🙁
Oh no! I actually looked through everyone’s discussions on the Ravelry page to figure it out myself, a lot of those users had tips on how to line it up. Mostly I stared at the finished picture of their example and kind of thought about it backwards to get mine to look like that. At least it’s only a few rows of that confusing bit, once you’re through that it’s mostly smooth sailing!
Is there anything specific you’re struggling with on it? I can look at my finished cardigan and try to help out!