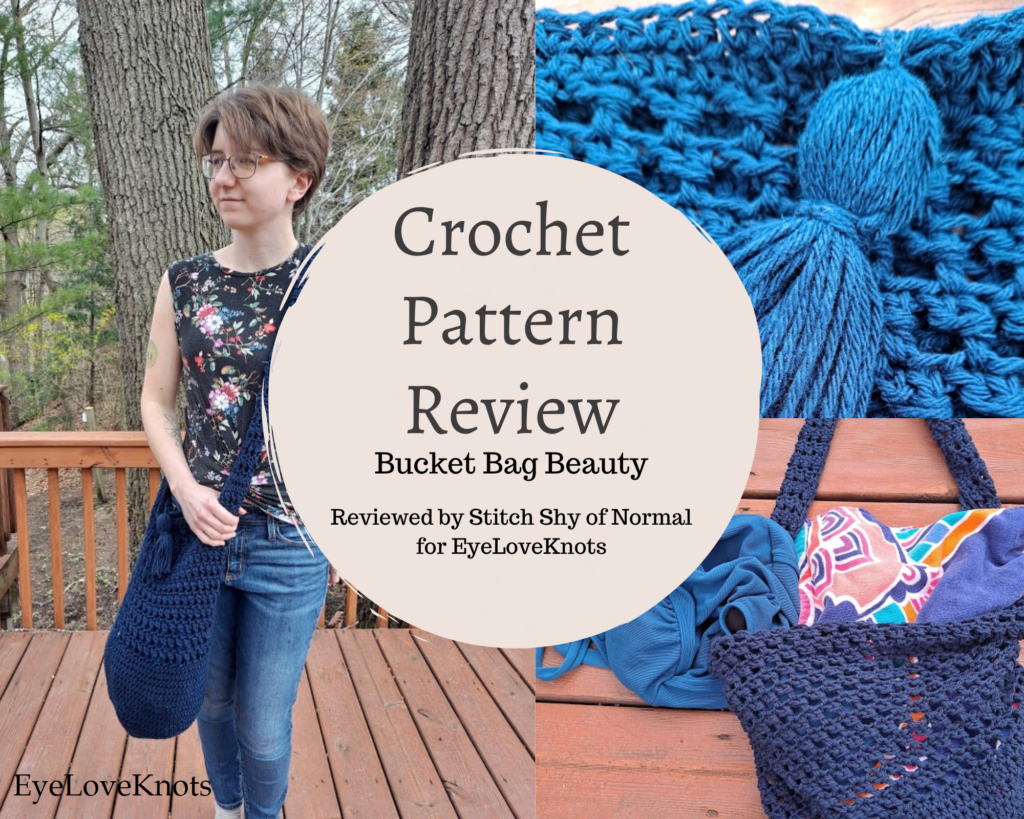
This is a crochet pattern review of the Bucket Bag Beauty pattern from Knot Yourself Out. This bag is perfect for all Summer adventures! Review done by A Stitch Shy of Normal.
This post contains affiliate links for LoveCrafts. If you make a purchase by clicking on them, I make a small commission at no extra cost to you. Thanks for your support!
Find the crochet pattern review below, or click here to buy the pattern on Ravelry!
It’s me, Abigail with A Stitch Shy of Normal.
Visit with me on Instagram @astitchshyofnormal for all kinds of awesome crochet makes and inspiration.
As we begin to see the warmer weather approaching, it’s time to stash-bust our cotton yarn and make something awesome at the same time!
The Bucket Bag Beauty pattern has been on my Ravelry favorites list for quite a while, and I’m sure I’m not alone here. It probably caught your eye at some point too! It looked so classic but interesting (I could never figure out from the designer’s picture how they did the texture on the top half), and most of all it looked like it would be really comfy to use. The strap looked thick and wide, meaning it would hang nicely and be able to hold quite a bit. And even from the picture with no objects around, I could tell this bag would be big. So I was hooked (get it?)
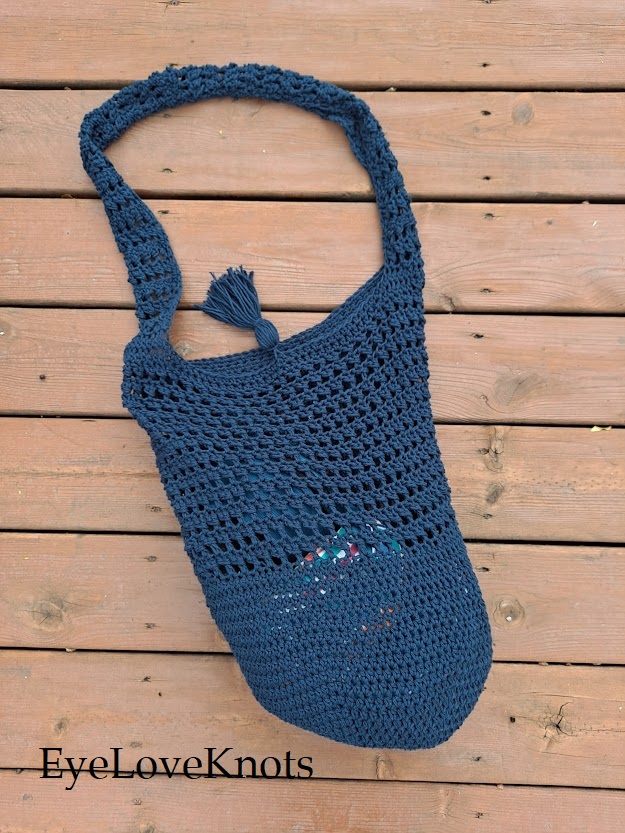
I’m a bag addict myself, but there’s something special about crochet bag patterns. They’re so fun and easy to customize with your own size or choice of yarn color. You feel like you’re getting something you’ll actually use in the end. And you can use up those stiff or rough cotton yarns that just chill in your stash otherwise because how many dishcloths can one household reasonably use? (The answer is a lot, but even that has limits.)
This pattern was fun, simple, interesting, and a joy from start to finish. I recommend it wholeheartedly and you should go check it out right away!
Materials I Used to Make my Bucket Bag Beauty:
- 4 skeins of Lily Sugar ‘n Cream cotton in “Bright Navy” (approximately 475 yards by my calculations, including the tassel)
- J10/6mm hook – I like Clover Amour Ergonomic Hooks
- Stitch markers
- Scissors
- Yarn needle
- A rectangle for making the tassel (I like to use a Switch game case myself, although many people cut one out of cardboard)
- The paid “Bucket Bag Beauty” pattern from designer Knot Yourself Out
Material Notes:
The only thing I really changed in this pattern was the hook size. The designer recommends size K or 6.5mm. This pattern does not list a gauge and simply advises to watch the look of your stitches, so I chose to work the first several rounds and just see what my fabric was looking like at the time. I chose to size my hook down as this is a bag that will likely stretch out, so I’d rather start a little smaller and have it stretch out with wear, versus start a little large and stretch even more. The designer does also mention that they crochet tight and others might have to do this.
As far as the yarn, I think this was a great fit. The pattern called for Bernat Handicrafter Cotton, a very common cotton yarn that’s great for everything–not particularly soft, no interesting texture, so it’s perfect for things like dishcloths and bags. I’ve found through previous experience that the Lily Sugar ‘n Cream Cotton is similar, not identical, but it’s close enough for me. I wouldn’t combine the two within the same project as the Lily is thicker in my opinion, but if you pay attention to sizing you can use either one with similar results. Would I make this again with this yarn? Definitely. I might leave out a few rounds to make it a little smaller, but that’s just a preference.
I did end up using more yardage than the original. The designer lists the Bernat cotton being 80yd each, and says to use 5 of them. This would be 400 yards max, and I found by weighing my finished bag that I apparently used 475 yards. This might be up to my own stitching, or the different yarn, or a mathematical error in my calculations…or a combination of all of these factors! Generally if gauge is pretty close, you wouldn’t fluctuate by quite this much, but in a bag like this it’s fine to be a little off in yardage and/or size. This might also explain why my bag is on the larger side.
Time Spent:
6-8 hours or so. It’s an easy one to pick up and put down, and it was my work project for probably about a week.
Measurements:
The pattern dimensions are 14.5″ across (laying flat) or 29″ around, and 16″ tall or 29″ with the strap factored in.
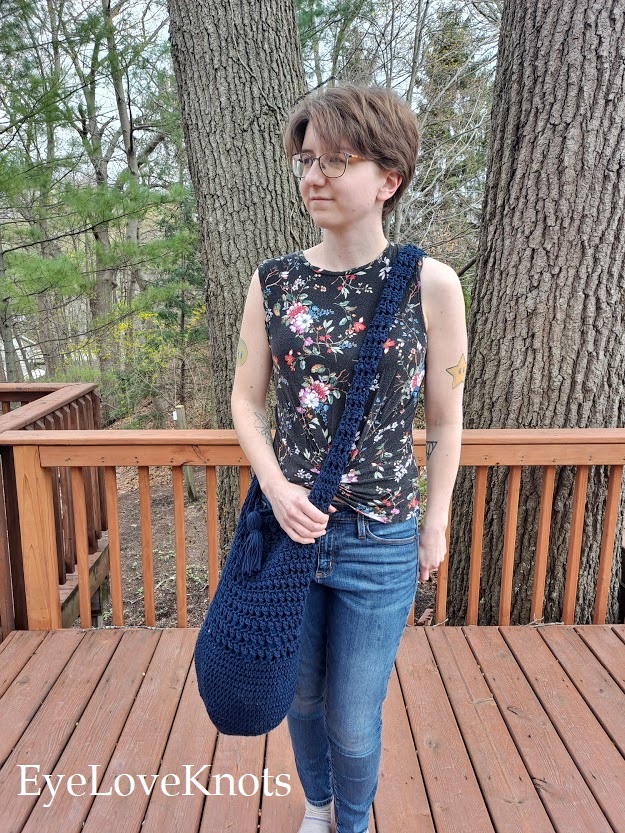
My bag is actually pretty spot-on in terms of width, which surprised me given that it seems so large! Laying mine flat, it measures between 14.5-15.5″ depending on how I stretch the yarn in either direction. So my width is actually just about right. My height, on the other hand, is where I really went rogue.
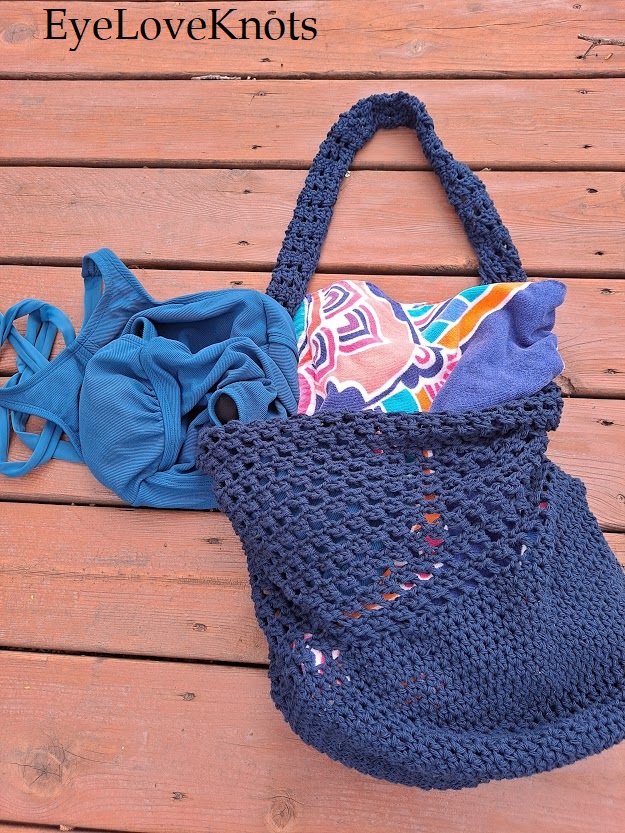
My main bag is already around 20″ tall without the strap, and then my strap measurement is another 15″ of height. My bag is taller than the designer’s by about 15-16″. I’m…impressed. I think that because (as she says) she crochets tighter, someone with a looser tension and the same amount of rows is going to have a taller bag. I accounted for her tension in width through sizing down a hook, but didn’t modify anything in height. I will try cutting out some rows on my next one to make it less crazy tall! You can see in the photo above that with a couple items in it (swim suit and a beach towel), it’s down to my knees. For context, I’m 5’4″. It will definitely stretch when full!
Pattern Notes:
Although the pattern does not list options for customization, it wouldn’t be overly hard to do. You spend the first 14 rounds increasing to create the bottom, then the next 8 to work the solid round base. So if you’re wanting to make it a little less wide, you could probably stop increasing earlier. The textured rounds require an even number of stitches, but every increase round has an even stitch count as far as I can tell looking back through it. If you’re wanting it a little shorter as well, you could modify the row count of 15-22 (the solid section) and/or 23-34 (the textured section). I think this pattern could work well as sort of a recipe to create a bag to your own specifications!
Speaking of that textured section…this pattern was the first time I legitimately misread a pattern and made a true mistake in quite a while! I worked the first round of this textured section entirely wrong. It’s only when I got to round two that I realized what I had done. I even carefully read the directions and the stitch notes, and looked at the pictures–it wasn’t the pattern’s fault! It specifies to work the second DC of each pair “around the body” of the first, and I read that thinking it was clarifying that you’re not working the second leg entirely in front, you’re doing them crossed but into the stitch. Nope, you actually work the second one only around the first stitch, and kind of into the space rather than a stitch! It gives a much more twisted and interesting look than regular crossed DC would. I’m personally a huge fan of crossed DC and use the “original” stitch in many of my designs. So I’ll need to remember this fun technique in the future!
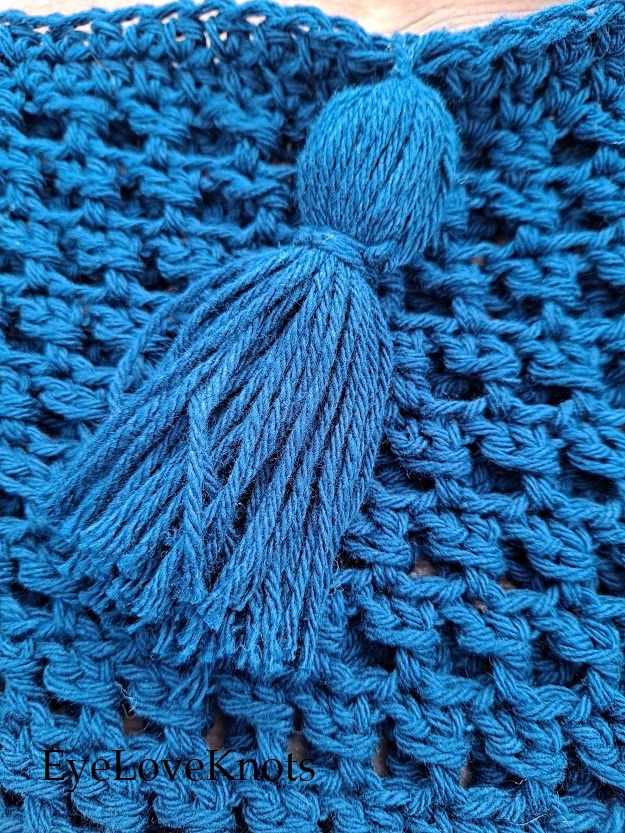
Interestingly enough, with all the creativity in this pattern, my favorite part is the tassel! I can’t even really explain why I love it so much. You don’t close this bag with a button or a drawstring, it’s only this heavy tassel folding over the top that keeps it closed. This obviously won’t hold anything in when you flip the bag upside down, but when carrying it around with items inside, I found it stays closed nicely! I love tassels so that’s one of the things about this pattern that caught my eye. Also just a tip, I really do recommend the use of a Nintendo Switch game case for a tassel template (as long as you’re wanting a larger tassel a few inches tall). It’s my favorite tool and I won’t use anything else for this size range anymore!
I can see this bag being wonderful for summer. It’s not so much an everyday purse sort of size, it’s more of a beach bag or a shopping bag. I can picture it being perfect for a day at an outdoor market, collecting all your goodies as you shop! It would also nicely hold a beach towel and a change of clothes, or at least my finished one would…and it would even have room for more! I plan to use this as a work bag for a little while to see how I like it as a durable tote for a project and some basic essentials (wallet, phone, lip balm).
This bag could be such a fun gift item, since it would look like you spent weeks on it but you can just whip it up over a few days! (Especially if you don’t want it super tall and you cut out some row repeats, as mentioned above.) It’s a very impressive pattern despite being so simple. I can’t think of a single negative thing to say, it’s probably going to go on my list for the future as a go-to summer bag (although as I said, I might play with the size!). I hope you all enjoy it just as much as I did!

What color are you thinking of making? There are so many fun cotton yarns out now for spring and summer, and some are even mixed with other fun fibers like hemp. Or there’s even cotton yarns that are made using recycled fibers! You have so many choices, and now I’m getting ahead of myself planning my next bag and the colors I might choose…
Don’t forget to visit with me on Instagram @astitchshyofnormal for all kinds of awesome crochet makes and inspiration.
Join one of our awesome Facebook groups to share your creations, and see what others are up to!
– EyeLoveKnots Crochet & DIY Community
– DIY Home On Rockwood Lane
– Alexandra Lane Lifestyle
Linked Up To…
Weekly Link Up #220 – Beauty by Miss L
Weekday Wear Link Up – Away from the Blue
Ageless Style Link Up – A Simple Lovely Life
Turning Heads Linkup – Elegantly Dressed and Stylish
Confident Twosday Linkup – I do deClaire
Style Six Linkup – The Queen in Between
Style on the Daily Linkup – Straight A Style
Thursday Fashion Files Link Up #302 – Curly Crafty Mom
Chic and Stylish Link Up – Mummbastylish
Style Link Up – Lizzie in Lace
Fancy Friday Linkup – Nancy’s Fashion Style
Neverending Style Link Up – The Grey Brunette
Ginx Woolly Linx Party April – Ginx Craft
Craftastic Monday Link Party – Sew Can Do
Linky Ladies Party #209 – The Purple Poncho
{Wow Me} Wednesday #501 – Ginger Snap Crafts
Loop Scoop #12 – Moogly Blog
The Wednesday Link Party 395 – Oombawka Design
Creative Crafts Linky Party #38 – Creatively Beth
Saturday Sparks Link Party 419 – Pieced Pastimes
Craft Schooling Sunday – Creative Jewish Mom
Unlimited Link Party 24 – Grammy’s Grid
Heart and Soul Link Party – April, the 21st Century Housewife
Handmade Monday #224 – Sum of their Stories
The Really Crafty Link Party #263 – Keeping it Real
You’re the Star Blog Hop – Decor Craft Design
Grace & Gratitude #14 Link Up – A Simple Lovely Life
587th Inspire Me Tuesday – A Stroll Thru Life
Fabulous Party 368 – Lou Lou Girls
Party in Your PJs #355 – The Apple Street Cottage
Your Whims Wednesday #508 – My Girlish Whims
Thursday Favorite Things #486 – An Artful Mom
Creatively Crafty Link Party #272 – Life Beyond the Kitchen
Artsy-Fartsy Party #341 – Artsy-Fartsy Mama
Encouraging Hearts & Home Blog Hop – Scratch Made Food
Traffic Jam Linky Party #278 – My Bijou Life
Friday Favorites – Busy Being Jennifer
Funtastic Friday Link Party #329 – Simply Beautiful by Angela
A Morning Cup of Joe – The Cottage Market
Create, Bake, Grow & Gather Party #466 – Shabby Art Boutique
Snickerdoodle Create Bake Make Link Party 381 – EyeLoveKnots
The bag is beautiful! Great job! Thanks for sharing!
xoxo
Lovely
http://www.mynameislovely.com
I would love to learn to crochet. But have made a promise to myself to finish up some other projects I have hanging fire before trying to learn a new hobby. This bag has so many options for summer. Picking up a few groceries, or books from the library, or for sunscreen and swim suit. Very versatile. Thanks for linking up with us for the #AgelessStyleLinkUp.
I understand the endless hobby addiction! I have a bag of supplies to play around with clay one day but I won’t let myself pick it up quite yet.
Wow, this turned out so beautifully! I love the color and how it sits nicely. Sometimes bags can be bulky but not this one. It would be amazing to make a yellow one!
Maureen | http://www.littlemisscasual.com
It does drape very well given the size! And yellow sounds lovely, it would be a sunshine bag!
I used to have a similar bag but not handmade. This is very pretty and I really like your choice of color.
http://www.chezmireillefashiontravelmom.com
That’s awesome, they definitely come in handy for so many uses!
What a great beach bag or library book bag! Must show this to my daughter, the crocheter in the family.
It would definitely make a good bag for both purposes! Excellent for summer, you could stash snacks and a good book in there for a walk to the beach!
That is such a fun bag and I love the tassel detail! If I could make my own handbags I think I’d have even more than I already have, I’d never stop making them, haha! This one is so good for summer 🙂
Thanks so much for joining the #WeekdayWearLinkup. Hope that you had a good weekend! It’s a nice relaxing long weekend for us.
That’s my “problem”, I have too many bags to choose from! I agree, this one will be perfect for the warmer weather months.
That looks like such a useful bag. Thanks for sharing. Thanks for joining in Ginx Woolly Linx Party for April.