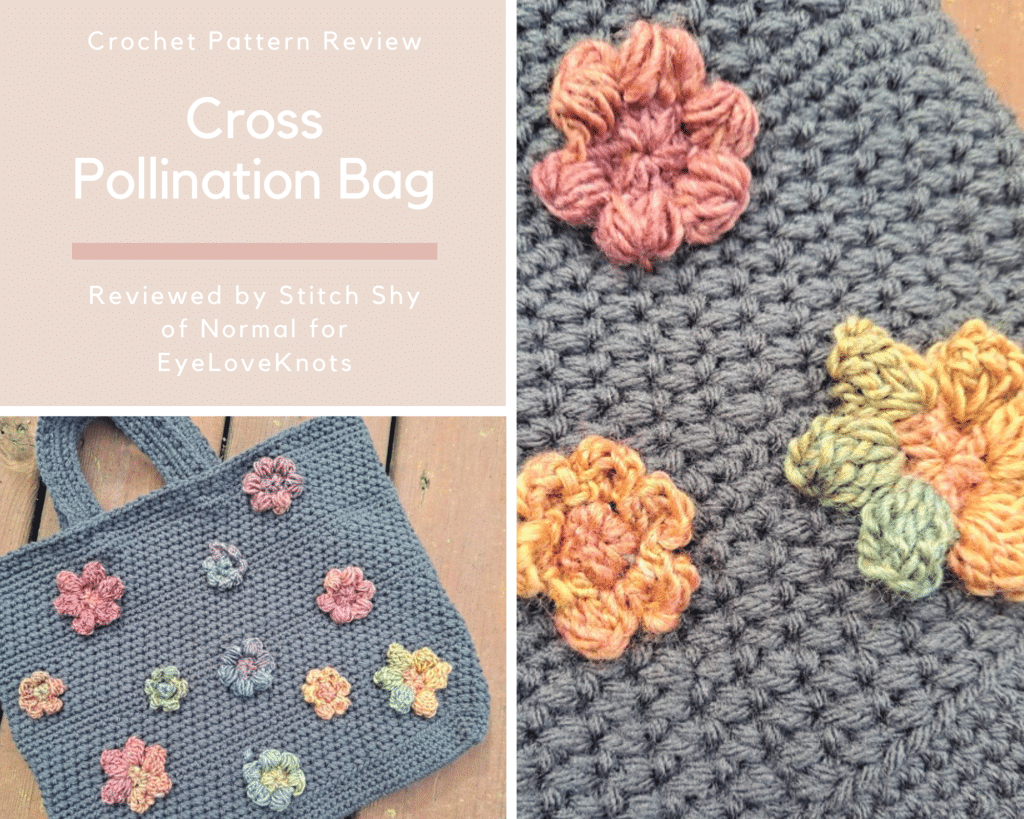
This is a crochet pattern review of the Cross Pollination Bag pattern by Bendy Carter for Annie’s Catalog. Review done by A Stitch Shy of Normal for EyeLoveKnots.
This post contains affiliate links for Annie’s Catalog and WeCrochet. If you make a purchase by clicking on them, I make a small commission at no extra cost to you. Thanks for your support!
It’s me, Abigail with A Stitch Shy of Normal.
Visit with me on Instagram @astitchshyofnormal for all kinds of awesome crochet makes and inspiration.
I was scrolling through the Annie’s Catalog website looking for something fun and bright to make for spring, when this bag caught my eye. It’s a medium-sized bag, and generally wouldn’t be anything all that exciting, but it was covered with these adorable little flowers! And the name is adorable, it’s called “Cross Pollination”. I was definitely interested, and snapped the pattern up immediately.
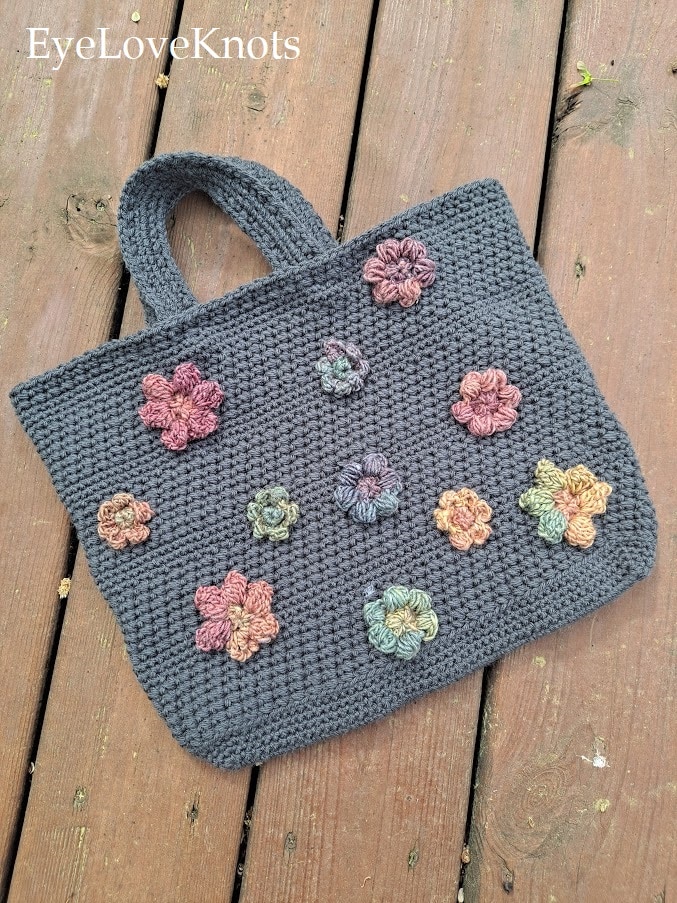
The bag itself surprised me in the stitching, it’s much sturdier than I expected and I don’t even think it would need a lining unless you were planning on putting in something particularly heavy. However, even after making it, I still feel that the best part of this is the flowers.
I mean, just look at these beauties!
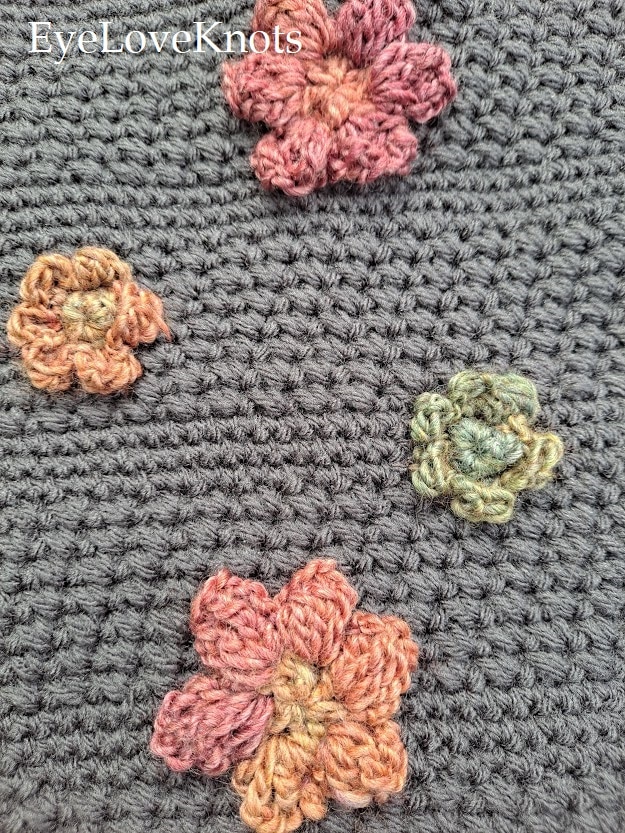
This pattern seems intimidating in how much time it will take to make the main bag, and it’s certainly a slower project. But that’s why I appreciate that the flowers are the last step, because throughout the slow rounds of the bag, you get to look forward at the gorgeous blossoms you’ll get to attach when you reach the finish line! You could even “reward” yourself by working on the flowers throughout, like doing a few of them as you finish each section of the bag. Is that dorky of me, that I would find that a good reward? Possibly, and I’m fine with that!
Materials I Used to Make my Bag:
- 1.5 Skeins of Red Heart Super Saver (Worsted Weight Yarn) in Charcoal
- Less than 1 Ball of Yarn Bee Chloe from Hobby Lobby (Worsted Weight Yarn) in Pick of the Bunch (I am only 90% certain this was the yarn I used, as it was in my stash with no label but I remember using this before)
- F5/3.75mm hook – I like Clover Amour Ergonomic Hooks
- Scissors, yarn needle for assembly
- Cross Pollination Bag, Paid Crochet Pattern from Annie’s Catalog
Material Notes:
I used Red Heart Super Saver for the main bag, and I found this to be a perfect choice. I always enjoy using Super Saver for projects like home items and bags, since it’s both affordable and decent quality without being particularly soft. When making something like a garment or cowl I would choose softness over durability, but in a bag I prefer it to be sturdy and durable. RHSS comes through every time, and I definitely recommend it. Was the gauge perfect? Not exactly, but for a bag that’s not super important. The pattern calls for Premier Everyday Anti-Pilling Everyday Worsted, and comparing the basic stats of this yarn they’re pretty close. The Premier yarn is 3.5oz/180yds per ball, versus RHSS which is 7oz/364yds or the equivalent of 182 yards in the same weight (or basically identical). Either one would be perfect and I would use them both happily.
The pattern suggests the same brand and line of yarn, but in a DK weight, for the flowers. When I bought the pattern, I planned to instead dive into my stash for all the different DK yarns I have, in order to stash-bust a little bit rather than spend money on 6 accent colors (which adds up even in an affordable yarn!). But once I finished my bag and went to my yarn shelves, I spotted the ball of multicolored Chloe yarn, and knew it would be a perfect match. Rather than using up a small portion of 4-6 skeins, I could use up a good portion of this one and possibly get it out of my stash!
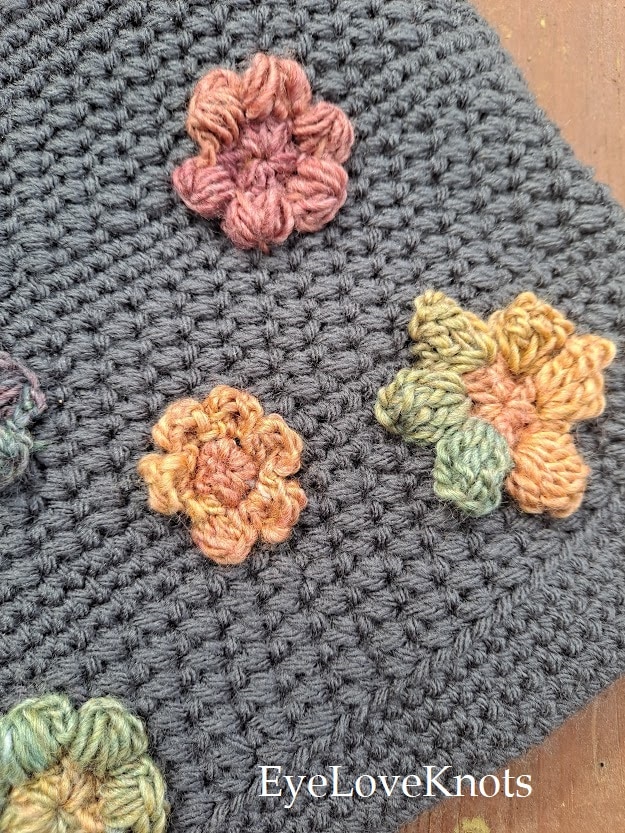
Would I use this variegated yarn again? In terms of actual yarn choice, yes. It was a good fit. I don’t often visit Hobby Lobby, but anything similar like Chroma or any lightweight short-striping yarn would be a good choice. Or even something like Mandala with longer stripes could work, you would just get solid-colored flowers rather than multicolored. I also would suggest doing it the way the pattern says, using a few different colors of yarn to intentionally stripe the flowers. Both strategies work great! I was just happy to be able to make this pattern entirely from my stash, and I’m sure I’m not the only one with two skeins of RHSS and a single skein of something color-changing on my shelves.
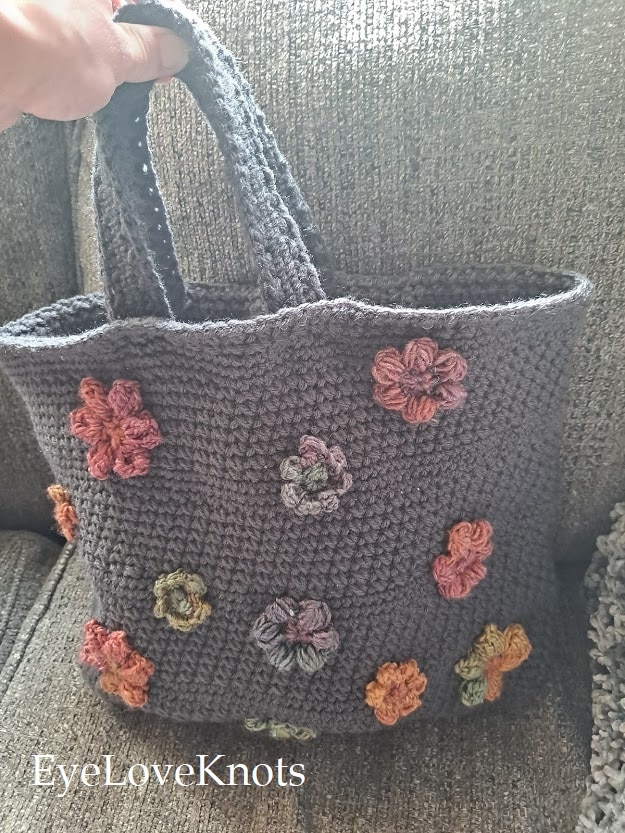
The hook is on the smaller side, for my preferences. I’ll admit I was a little worried when I opened up the pattern and saw I’d be using worsted weight yarn with a 3.75mm hook! That’s a combo I would usually do for a toy, not a purse. I knew this project would take a little while. But I have to admit that it’s for a good reason! Because the hook is smaller than recommended for this yarn, it creates a very dense fabric without many holes. I even loaded up the bag with things I expect it will often hold, like my tablet and some yarn, and as you can see below it still held up well and didn’t stretch out.
Time Spent:
7 hours or so. Most of this was spent on the bag itself, easily 6 hours of that time. The flowers were much quicker, but on the other hand I wasn’t changing colors on those and also I didn’t do nearly as many as the pattern calls for. This might take up to 8 hours if you’re following the pattern exactly.
Measurements:
The pattern dimensions list this bag as being 14.5″ wide and 10.5″ tall excluding the handles.
Mine is fairly close to this. I’m not sure exactly where they measured their bag because the pattern has you slowly increase throughout the bag, and mine measures about 13.5″ wide at the bottom up to 14.5″ wide at the top. I also have a height of about 11″, slightly taller than theirs. My handles add another 4″ or so of height.
Gauge:
The gauge given for this pattern is a few rounds into the bag. At round 5 (basically just having made the bottom of the bag), it’s supposed to be 2.25″ wide (across the base) and 12.5″ long.
When I measured mine at this stage, I was a little off. I had the right width but my length was slightly over 13″ instead. However, I liked the stitch tension I was getting and I thought ahead about what this might do to my finished project. If I was starting about half an inch too wide and it was going to increase two more inches in “length” (width of the finished bag), was I fine with a bag that might measure up to 15-16″ wide laying flat? I decided that I was, and I continued.
It seems like it evened itself out, and I ended up with the same finished width to my bag as they called for. I recommend this strategy when your gauge isn’t quite right, think about what that dimension represents in the finished item: if it’s a purse, you might be fine with it being wider but you may not want it too short/tall. If it’s a garment, you’re probably okay with altering the length but maybe not the width. It helps to put the gauge into perspective and consider what you’ll have to work with!
Pattern Notes:
I really enjoyed the textured single crochet portions of the main bag. This pattern did something that I like to do in my designs–if you want a different stitch or textured look to the finished item, it’s extra interesting if you alternate it with stripes or blocks of a “regular” stitch to make it stand out! This also adds some interest while stitching–rather than the pattern being something like “work this same pattern for 50 rows”, it breaks it up into sections that help you to feel like you’re making progress. I had never used this crossed SC stitch before, and I enjoyed it.
The biggest confusion I had throughout this pattern is the increases. Several times throughout the bag, it calls for increasing on what I assume is supposed to be the sides. I guess if you just work the bag straight the whole time, it might not open nicely to get items in and out. The increases allow for shaping and ease of use. However, I quickly found that my increases were in odd places. It wasn’t drastic enough to mess with the shape, but when the pattern seemed to be wanting it to happen on the sides, I was confused how that got out of sync about halfway through the bag for me.
What I did was alter where the increases happened. I can’t really list the specific stitch counts I used because you might get a completely different result. Or maybe you won’t be offset at all! But if you are, I found this worked fine. I broke down the round into what the result was supposed to be–often something like 48-50 stitches along the long edge, then an increase, 8 or so stitches along the short edge, another increase, and repeat that for the other side. So I would eyeball where my round began and try to line these increases up to be roughly evenly spaced along the short edges. It was not perfect, but it also wasn’t increasing randomly halfway along the long edge like it might have originally been! I’m not sure how this happened to me, but it was a simple fix.
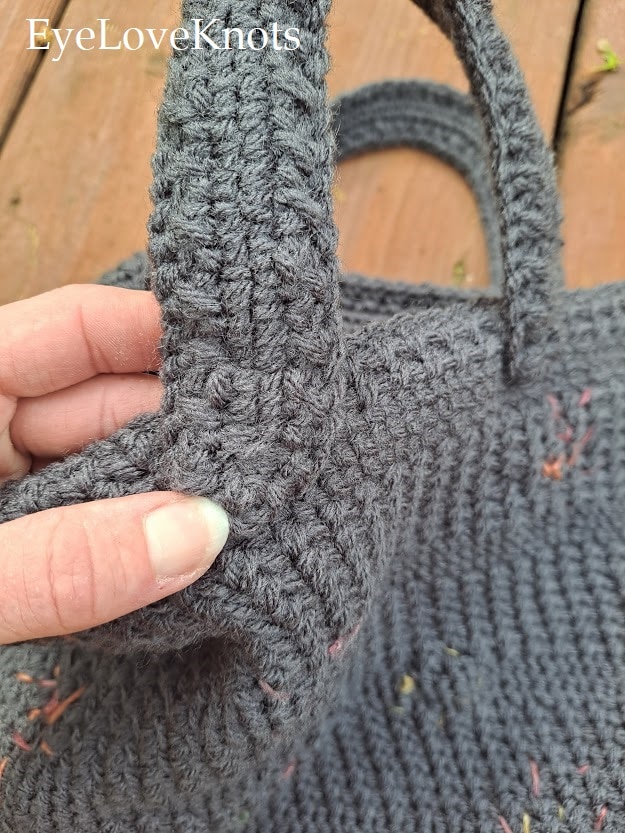
The handles were another technique I was not expecting. You make four short strips, then hold two of them together to add another round attaching them to each other. This ends up giving you two very thick and sturdy straps! I made sure to attach them as thoroughly as I could, tacking them down in several places inside the bag, because I wanted to see how strong they could be.
I really appreciated the customizability of the flowers. The pattern gives the best of both worlds in this aspect. They list the different size options, as well as how many of each size the sample used, and then there is even a chart with the different possible color combinations! This way if you feel pressured by having to mix-and-match on your own, you can follow their chart and still get your own look to it. On the other hand, people like me could take a single ball of variegated yarn and just bounce around between the flower patterns until I felt like I had enough! No two bags are going to be the same with this sort of technique because each person is going to do as many as they like and attach them in totally different places.
This bag is sturdy enough in my opinion that I don’t plan to line my bag, but you definitely could. It wouldn’t take too much effort, since the shape is fairly simple with just slight increasing. It would add even more durability for carrying heavier loads, and if you don’t like seeing the stitches used to attach the flowers it would cover that up nicely. I don’t mind seeing that, and it’s not really obvious unless you flip it inside out as you can see here:

All in all, this pattern was a joy to make and I will carry this bag proudly! It’s not really an everyday purse size for me, but it will make for a great project bag with some yarn and a small notebook! The short handles make it easy to toss over your arm, even with a little weight in it. The pattern was simple and easy to understand, and has a lot of wiggle room to make it your own even before the fun color combinations possible with the flowers! I absolutely recommend checking this one out to make yourself a gorgeous summer bag.

What color combinations would you choose? Jewel tones for fall, or bright neons for summer? All in one shade to showcase the shapes and textures instead?
Don’t forget to visit with me on Instagram @astitchshyofnormal for all kinds of awesome crochet makes and inspiration.
Join one of our awesome Facebook groups to share your creations, and see what others are up to!
– EyeLoveKnots Crochet & DIY Community
– DIY Home On Rockwood Lane
– Alexandra Lane Lifestyle
Linked Up To…
Craftastic Monday Link Party – Sew Can Do
Creative Crafts Linky Party #43 – Creatively Beth
Creatively Crafty Link Party #279 – Life Beyond the Kitchen
Linky Ladies Party #211 – The Purple Poncho
The Loop Scoop #14 – Moogly Blog
{Wow Me} Wednesday #506 – Ginger Snap Crafts
The Wednesday Link Party 400 – Oombawka Design Crochet
Saturday Sparks Link Party #426 – Pieced Pastimes
Ginx Woolly Linx Party May – Ginx Craft
Craft Schooling Sunday – Creative Jewish Mom
Happiness is Homemade #376 – Decor Craft Design
Handmade Monday #229 – Sum of their Stories
The Really Crafty Link Party #268 – Keeping it Real
You’re the Star Blog Hop – Decor Craft Design
Unlimited Link Party 26 – Grammy’s Grid
Heart and Soul Link Party – April, the 21st Century Housewife
591st Inspire Me Tuesday – A Stroll Thru Life
Fabulous Party 373 – Lou Lou Girls
Party in Your PJs #360 – The Apple Street Cottage
Your Whims Wednesday #513 – My Girlish Whims
Fabulous Party 375 – Lou Lou Girls
Thursday Favorite Things #493 – An Artful Mom
Artsy-Fartsy Party #348 – Artsy-Fartsy Mama
Encouraging Hearts and Home Blog Hop – Scratch Made Food for Hungry People
Traffic Jam Weekend Linky Party #285 – My Bijou Life
Friday Favorites – Busy Being Jennifer
Funtastic Friday Link Party #336 – Simply Beautiful by Jennifer
Create, Bake, Grow & Gather Party #472 – Shabby Art Boutique
This is so cute!
Life is a Shoe
Thank you! I love how simple it can be but still adorable.
What gorgeous flowers – and what a lovely bag! It’s perfect for summer. Thank you for sharing and for being a part of the Hearth and Soul Link Party. Have a wonderful weekend!
Thank you so much! I think this will be a perfect summer essentials bag.