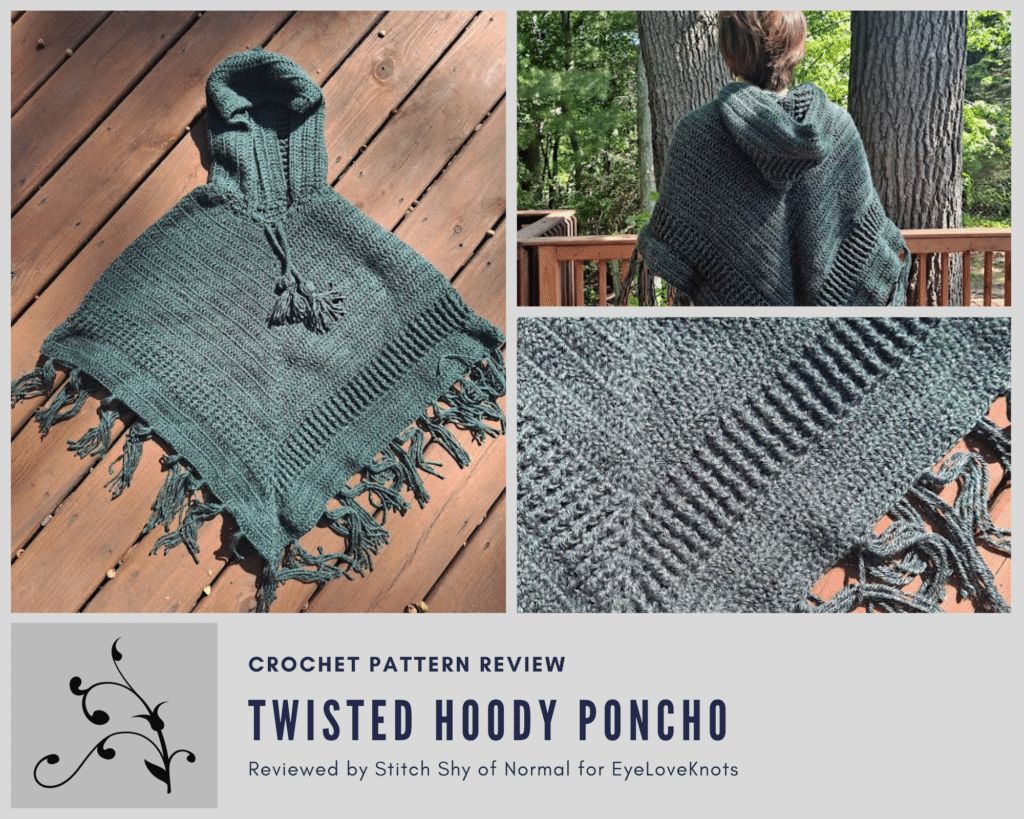
This is a crochet pattern review of the Twisted Hoody Poncho pattern by Annah Haakt. Review done by A Stitch Shy of Normal for EyeLoveKnots.
This post contains affiliate links for Lion Brand Yarn and WeCrochet. If you make a purchase by clicking on them, I make a small commission at no extra cost to you. Thanks for your support!
Find the crochet pattern review below, or purchase the pattern on Ravelry by clicking here.
It’s me, Abigail with A Stitch Shy of Normal.
Visit with me on Instagram @astitchshyofnormal for all kinds of awesome crochet makes and inspiration.
It may still be summer to some people, but I’m already diving deep into my favorite season, fall. I love scarves and sweaters. I love pulling out my stash of handmade hats. I absolutely adore the chilly mornings and evenings, especially with a steaming cup of coffee or tea in my hands. The meals tend to get more hearty and warm, I bring out my candles that smell like cloves and apples and home, and I pack away all my shorts and sandals for the next round of summer. If you can’t tell, I’m a huge fan of fall.
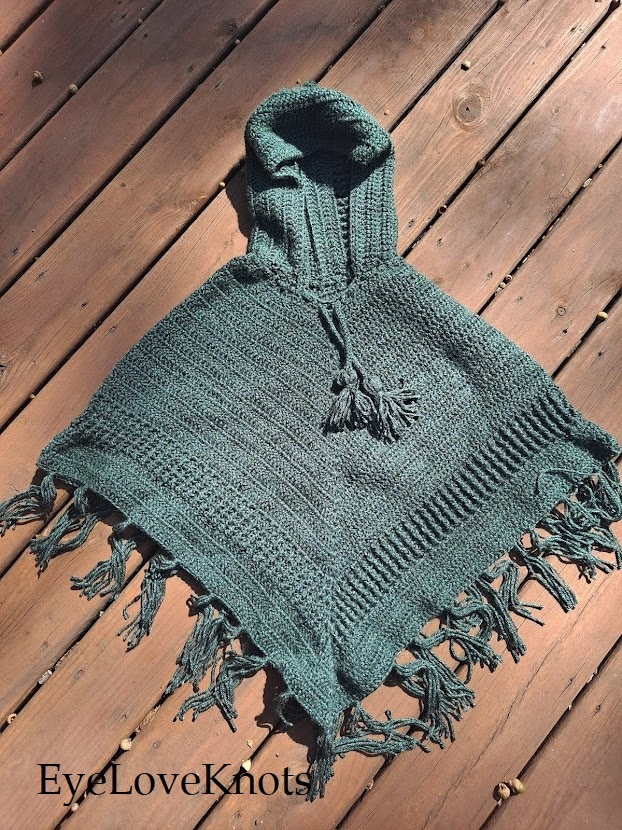
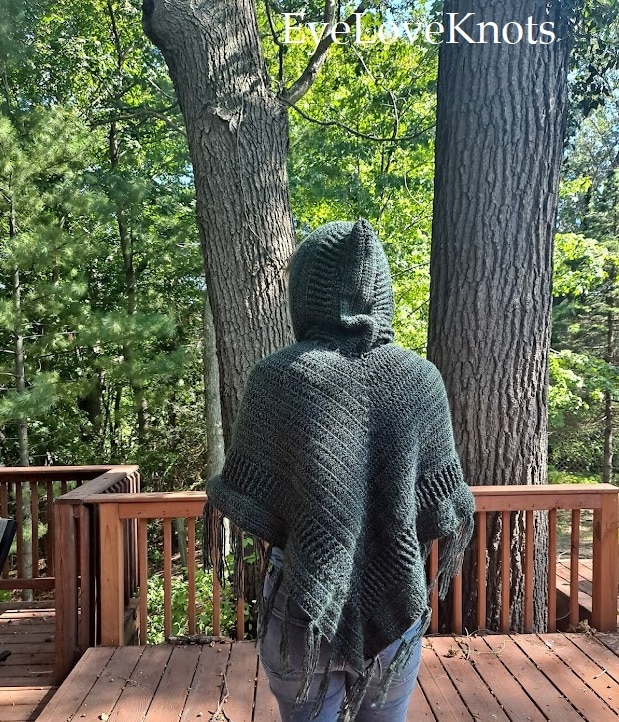
So while September might be a little early, my crafting has already shifted to cooler weather and I chose to make something a bit more suited for that season this round! I went back and forth for a while on my Ravelry favorites page because I have a lot of adorable ponchos, sweaters, etc. on there. Then I spotted one I’d saved a few months ago that looked simple but also totally unique. If you’ve been following my stuff for very long, you know that’s my favorite combination! It’s a basic poncho, but then has the cutest hood plus a really interesting textured section.

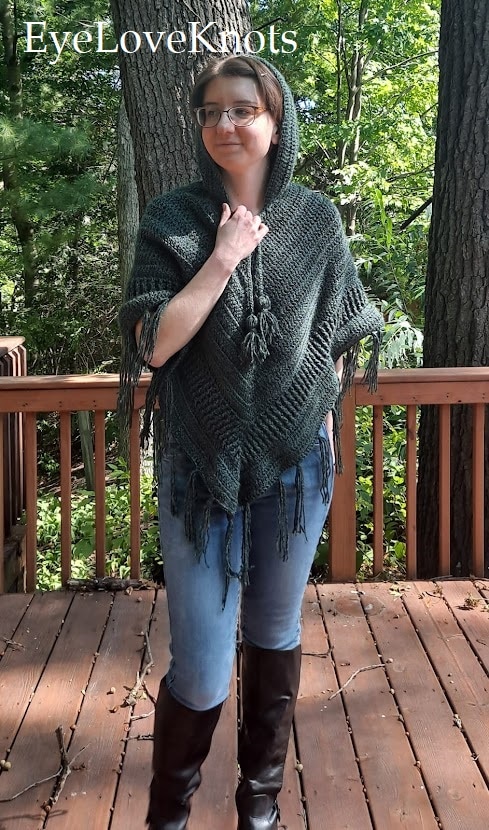
The result was something that will certainly become my favorite fall accessory. It’s warm, but not heavy. The hood is nice to block out a breeze but loose enough that it’s not constricting. And the little accents like fringe and tassels totally elevate this from a basic poncho to a stylish conversation starter. I think I’ll enjoy tossing this over a t-shirt during that transition time period where you need just a little something in the early mornings or the chilly late evenings.
Materials I Used to Make my Poncho:
- a little over 4 skeins (about 1100-1200 yards) of Lion Brand Heartland in “Rocky Mountains”
- H8/5mm hook – I like Clover Amour Ergonomic Hooks
- Twisted Hoody Poncho, Paid Crochet Pattern via Ravelry
- Assembly supplies like scissors, yarn needle, and something to wrap tassels around (the designer suggests a CD cover, I used a Switch game case, you get the idea)
Material Notes:
This yarn worked beautifully! I love the drape and the sheen, and the gauge worked out pretty well. If I were to start this over again, I might try increasing my hook size up to I9/5.5mm, just to see if it gives an even better drape and I might not have to add any length. It worked fine as-is, I would just want to try that and compare.
Heartland Yarn is one of my favorite yarns, you’ve probably seen me use it in just about anything wearable. I love how it feels on the skin, it holds heat nicely in warm garments, and it just looks…incredible. I can’t think of a better word. Anything I make in this yarn I can’t stop staring at. It shows off stitch texture, it has a slight sheen to it when the light shines, and the tonal shades just have so much personality! I’ve said it before, but if I had to pick only one yarn to use for the rest of my life, it would 100% be Heartland, no doubt about it.
The weirdest thing about my yarn ended up being the pattern weight suggestion. It calls for 500g of worsted weight yarn, and Heartland comes in 142 grams each. So I bought 4, which should have given me 568 grams. However, I used up all of this before I even added any rows. I guess this comes from the difference in gauge! I weighed my finished poncho and if I’m doing my conversions correctly it ended up weighing about 590 grams.
This yarn gave just the right touch to the poncho. It’s warm but doesn’t feel heavy or drag down on the body, which is nice in something large like a poncho. It was nice and toasty in the summer afternoon heat for pictures, so I look forward to being able to wear this in actual cool weather!
Time Spent:
In terms of actual hours, I probably spent about 14-16 hours on this. It’s hard to quantify this exactly as this was such a simple project once you get started, so I would leave it on the couch and just pick it up for mindless stitching while I watched something on TV. It was probably around 12 hours of actual stitching for the poncho itself before the hood (which was admittedly very quick to make), and the assembly took me a couple hours as well, so that’s where I got my estimate.
In the context of days, I did this over a couple of weeks. If you’re wanting to make one of these to enjoy on those chilly fall mornings, you probably want to get started pretty soon!
Gauge:
The pattern gauge given is 4″ being 11 stitches (DC) or 7.5 rows.
My gauge swatch came out as 7 rows and 12 stitches in 4 inches. However, I chose to continue on with this same yarn anyway as I really loved the color and texture.
I decided that the stitch count gauge being slightly off was ok, as it would just give me a slightly smaller poncho (I had more stitches in the same width, therefore following the written stitch count would give me less width) and the pattern is written as sort of a one-size-fits all with instructions to customize. As I wear XS or S in most sizes, I found this would probably give me more of a Small size range to my poncho and stuck with the written count. Just to note, the pattern does explain how to modify the size and it would be very simple. I just chose not to.
As for the row gauge, the fact that I had (slightly) fewer rows in the gauge meant that my rows were taller, and this would also work out just fine. The way this pattern is written includes a note in the final section to simply repeat until your desired length, so customizing that is easy as well.
Measurements:
The written pattern dimensions say this poncho should be 36.2″ wide (laying flat and measuring the outer corners) and 33.5″ long. However, it doesn’t explain if the length means from the shoulders or the top of the hood. The designer only says from the highest to the lowest point.
My poncho with slight modifications ended up just about 34″ wide, and 37″ tall with the hood. This is why I think it means to measure from the hood, as I added a couple of rows for more length. If it was intended to be measured from the shoulders down, even with my added rows I would be several inches short, and that doesn’t make a lot of sense considering my gauge was pretty close in height (although in a poncho you end up sort of measuring the stitch height diagonally, in a way). You can also see that my smaller width plan did end up coming true, as I have a couple inches less width in my flat lay. This worked out fine for me, it’s roomy enough to freely move my arms around!
Pattern Notes:
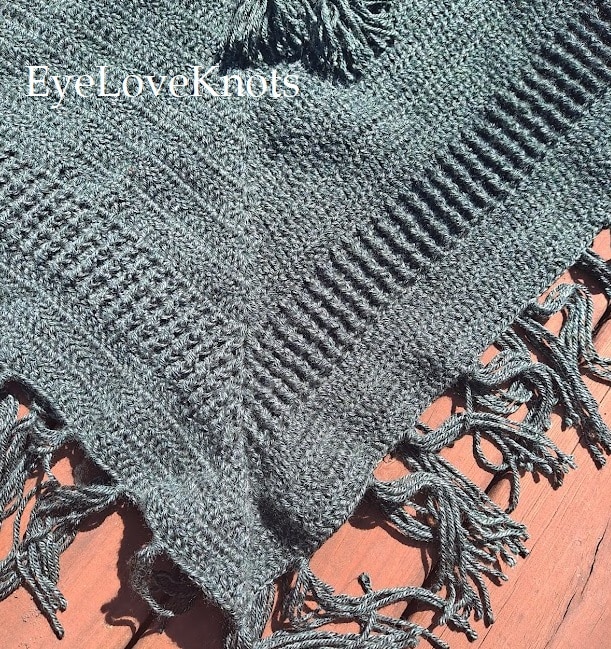
I loved this pattern, start to finish. It’s a lengthy one, but any garment tends to be that way. Especially in something like a poncho, you want the stitching to keep your attention so you’re not just endlessly stitching on and on and on…this pattern definitely comes through! Just when you start to get bored with the basic DC section, the designer throws in a textured bit. Then you do that for a while, and jump back into basic DC stitches again. This serves the dual purpose of adding interest to both the stitching process as well as the visual look of the finished garment.
The instructions are very clear and concise. I know, you might not think I would appreciate short and sweet instructions. I’m a very wordy person, I know I am. But when I’m following someone else’s instructions I’m the opposite, I like to just be told the basics and then left alone to my own devices. In this pattern the designer gets straight to the point and tells you only what you need to know, then throws you in. I really love that.
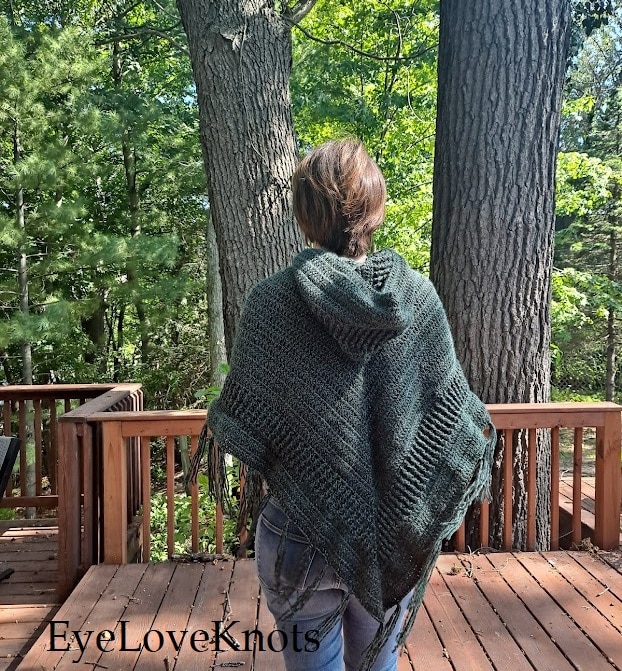
You actually turn after every row in this pattern, which I almost missed the first time so I’m making sure to point it out here! It’s clearly stated, I just get excited and forget instructions sometimes. If you were to miss this part, the post stitch section would likely get a little confusing. You always stitch this section so the stitches pop out (they call it the “relief”) on the same side, so in turned rows you always work FPDC into BPDC and vice-versa. This technique gives the textured bit a really impactful look, and I love how it jumps out at you!
As I mentioned earlier, I did end up adding a couple of rows for length to this poncho. I’m not sure why I needed to do this, as my rows in the gauge swatch ended up being taller than the written gauge. I guess it could be a size preference. The pattern does not include a picture of the poncho being worn but the Ravelry page does, and mine falls at about the same place on my body as it’s supposed to. I just found that interesting. I suppose my post stitches could have been shorter, the gauge is based on simple DC. It does recommend sizing up the hook for that section if your post stitches are tight but I did not, since I thought it looked fine. I only added a few rows, mostly because I had a little yarn left over (after purchasing an extra skein) and wanted it to cover me a little more. Since I had run out of yarn too early at first, when I had my 5th skein I made sure to finish the hood and cord first, then go back and add length only if I was able to do so.
In a pattern like this, accents like the fringe at the bottom or the tassels on the cord are of course fully optional, but I find that they add so much extra pizazz so I try to do them when possible. You know how I feel about fringe, and I rarely add it to my own designs because I get impatient while cutting it all up. But when it’s already in a pattern and I love how it looks on the designer’s sample, I end up considering it all worthwhile. I suppose if I had to come up with a criticism for this pattern, I would have appreciated a suggestion on how much fringe to cut. There are pictures included on how to put it on, but not a range of how many pieces would be needed. I guess it’s left up to preference. I simply looked at my poncho to decide about how far apart I wanted mine to be, counted about how many bundles I would need, and decided to do 3 strands per bundle for fringe that would be thick but still manageable. I think I ended up with about 35-36 bundles and spaced them out evenly around my poncho! It might not be perfect, but I think it gives a wonderful touch.
I would definitely revisit this pattern. I mentioned a few potential changes throughout this review that I want to try next time, such as a larger hook and alterations to the size. Now the hard part is going to be picking a yarn and color! I’ve always been in love with jewel tones (and love how they look on me), so I’m currently dreaming of this in a deep blue or purple for number two. I would also love to see it in something variegated or striped!
Is fall and the beginning of the chillier weather one of your favorite parts of the year, like me? Or do you prefer the bright sunny summer and you’re sad it’s coming to an end?
Don’t forget to visit with me on Instagram @astitchshyofnormal for all kinds of awesome crochet makes and inspiration.
Join one of our awesome Facebook groups to share your creations, and see what others are up to!
– EyeLoveKnots Crochet & DIY Community
– DIY Home On Rockwood Lane
– Alexandra Lane Lifestyle
Linked Up To…
Ginx Woolly Linx Party – Ginx Craft
Linky Ladies Party #216 – The Purple Poncho
The Loop Scoop #22 – Moogly Blog
Happiness is Homemade Link Party #393 – Decor Craft Design
Handmade Monday #246 – Sum of their Stories
The Really Crafty Link Party #282 – Keeping it Real
Craftastic Monday Link Party – Sew Can Do
Team Creative Crafts Linky Party #60 – Artsy-Fartsy Mama
Weekday Wear Linkup – Away from the Blue
Turning Heads Linkup – Elegantled Dressed and Stylish
Confident Twosday Linkup – I do deClaire
Style with a Smile Link Up – Style Splash
Style on the Daily Link Up – Straight A Style
Top of the World Linkup Party – High Latitude Style
Thursday Fashion Files Link Up #324 – Curly Crafty Mom
Chic an Stylish Link Up – Mummabstylish
Style Link Up – Lizzie in Lace
Fancy Friday Linkup – Nancy’s Fashion Style
Neverending Style Linkup – The Grey Brunette
Craft Schooling Sunday – Creative Jewish Mom
You’re the Star Blog Hop September – Decor Craft Design
Unlimited Link Party 34 – Grammy’s Grid
Hearth and Soul Link Party – April, the 21st Century Housewife
Link Up Potpourri #10 – My Bijou Life
Fabulous Party 390 – Lou Lou Girls
Spread the Kindness Link Up #241 – Shelbee on the Edge
606th Inspire Me Tuesday – A Stroll Thru Life
Party in Your PJs #377 – The Apple Street Cottage
{Wow Me} Wednesday #523 – Ginger Snap Crafts
The Wednesday Link Party 417 – Oombawka Design Crochet
Wonderful Wednesday – Oh My Heartsie Girl
Thursday Favorite Things #508 – An Artful Mom
Creatively Crafty Link Party #294 – Life Beyond the Kitchen
Encouraging Hearts and Home Blog Hop – Scratch Made Food
Grace at Home No. 439 – Imparting Grace
Traffic Jam Weekend Link Party #295 – My Bijou Life
Friday Favorites – Busy Being Jennifer
Create, Bake, Grow & Gather Party #487 – Shabby Art Boutique
Funtastic Friday Link Party #351 – Simply Beautiful by Angela
A Morning Cup of Joe – The Cottage Market
Saturday Sparks Link Party 441 – Pieced Pastimes
Link Your Stuff – Annemarie’s Haakblog
Love it, so cozy! thanks for sharing on craft schooling Sunday!
This is such a cosy piece for autumn! I love that it has the hood too and the tassels are fun! You did such a good job making it! 🙂
Thanks for joining the #WeekdayWearLinkup! Hope you have a good weekend ahead of you. Another busy but fun one here 🙂
Thank you! It will be *very* cozy once fall finally comes around.
Wow! What a cool poncho!. Pinning.
Michelle
https://mybijoulifeonline.com
Thanks! It definitely came out pretty cute.
That is beautiful! Thanks for sharing with us. Pinned.
Hi Abigail, Your Twisted Hoody Poncho turned out wonderfully! I love the yarn color you chose. Thank you for linking up at our weekly Link Party! You are being featured at our Wednesday Party #418 this week. Here’s the direct link to the post in case you’d like to share your feature:
https://oombawkadesigncrochet.com/2021/09/constellate-hat-hoody-poncho-hat-not-hate-hats-at-link-party-418.html
Hope to see you again next week! Rhondda
Thank you! That’s so cool.