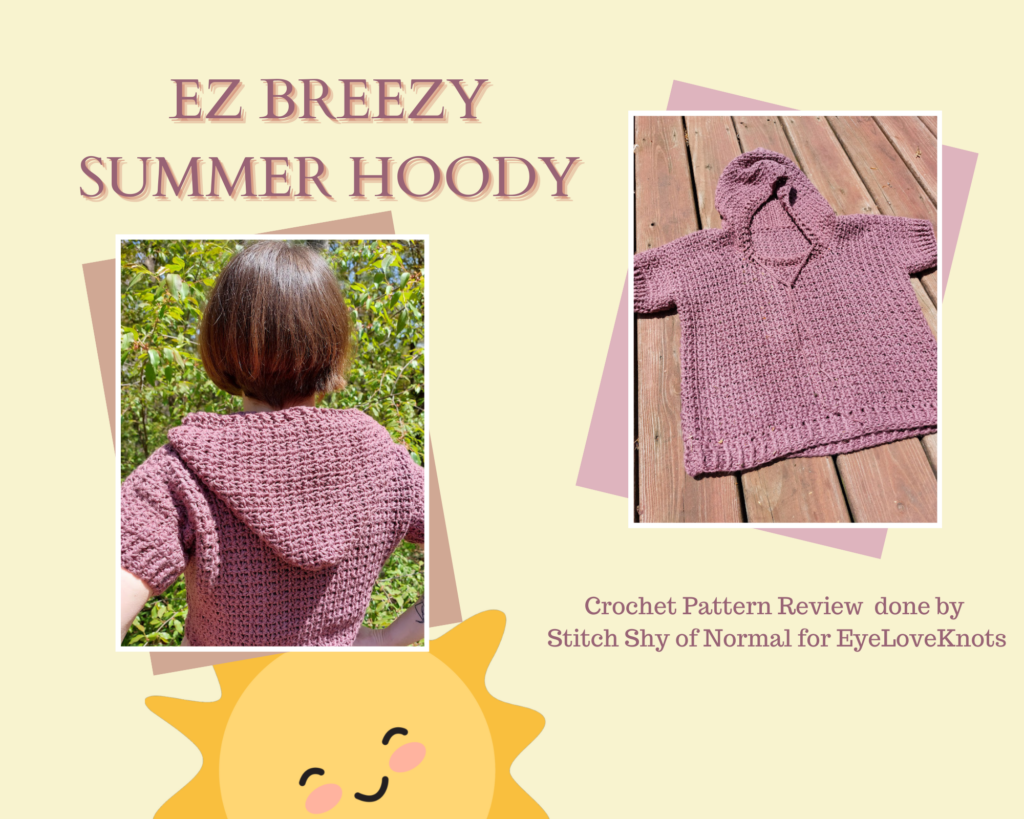
This is a crochet pattern review of the “EZ Breezy Summer Hoody” pattern by designer CroJennifer. Review done by A Stitch Shy of Normal for EyeLoveKnots.
This post contains affiliate links for WeCrochet and Lion Brand. If you make a purchase by clicking on them, I make a small commission at no extra cost to you. Thanks for your support!
Find the crochet pattern review below, or click here to purchase the crochet pattern on Ravelry!
In a hurry? Pin this for Later when you have more time.
It’s me, Abigail with A Stitch Shy of Normal.

As we come to a transitional season (finally), I’m starting to look through my wardrobe to find appropriate items of clothing that I can wear for the chilly Michigan mornings but also the sunny and warm afternoons. I’ve become a master of layering, and making sure the pieces I layer with are not overly heavy because I’ll end up carrying them in the afternoon on the way home from work!
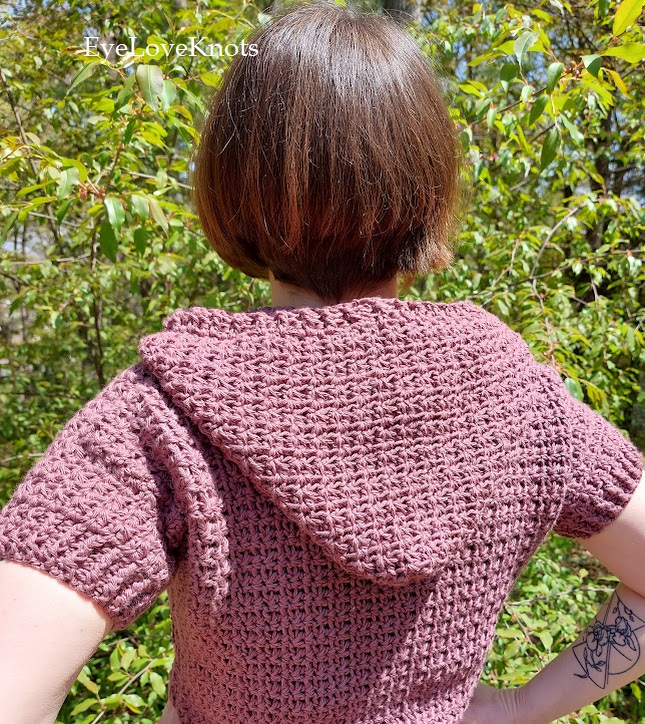
I’m always open to adding more suitable pieces to my closet that can help me fulfill this need. I love light and comfy items that look cute but can fold up and be shoved in my tote bag easily. When I spotted this “summer hoodie” pattern on Ravelry, I knew it would be a perfect addition! The concept of a short-sleeved hooded layer can come off a little weird if it’s not done well, but the silhouette of this one pulls it off perfectly. It looks casual and chic and comfortable, and I knew I had to have one.
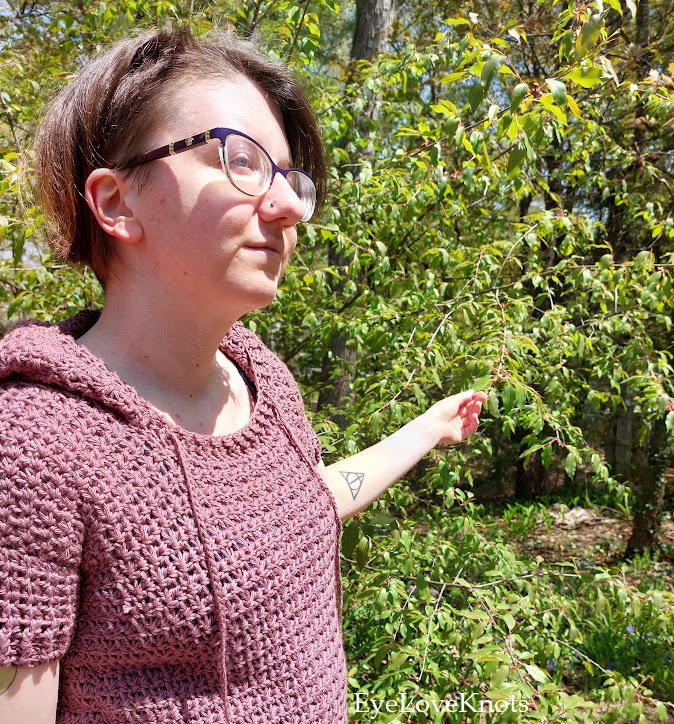
After having made it, I’m so glad I did! This hoodie is a very nice spring and summer piece that I plan to wear with jeans for now and will enjoy layering over summer dresses or tank tops in a couple of months. I also love that it’s a relatively unstructured shape so it can go with so many different things and fit comfortably!
Just a clarification–when I refer to the item I made, I personally like to spell the word as “hoodie” and the designer chose the spelling “hoody”. I know both are common spellings, I just didn’t want to keep correcting myself to their spelling so I spelled it the way I normally would. Either way, it’s the same thing and I apologize if that’s confusing at all!
Visit with me on Instagram @astitchshyofnormal for all kinds of awesome crochet makes and inspiration!

What Materials Do I Need to Crochet a Hoodie?
- About 5.5 skeins (or approximately 1000 yards) of Lion Brand Pima Cotton in “Rose Taupe”
- H8/5mm and G6/4mm Crochet Hooks – I like to use Clover Amour Ergonomic Hooks
- EZ Breezy Summer Hoody, Paid Crochet Pattern from CroJennifer via Ravelry
- Scissors/yarn needle for assembly
Material Notes:
I think this yarn worked out well. It does not match the gauge perfectly, and to be honest I should have paid closer attention to that when starting my initial length. I didn’t realize until I finished the first panel just how long mine came out. But that extra length ended up working out for me! I’m currently starting my second trimester of pregnancy and a little extra stretch or length in tops is appreciated. Plus it’s still cropped! I just wanted to let you guys know how it worked for me in order to point out that due to the construction, a slight difference in yarn that ends up stretching more or less than intended can very much change the overall size of this piece.
Would I use it again? Yes. Knowing what I do now, I would use this Pima Cotton to make another one of these. I like the texture it gave the piece, I like the drape, and I love the softness. It’s also light and breezy enough for spring and summer but does add a little bit of a coverage layer, so I think it’s a good balance. I would just probably pick one or the other, start with fewer stitches to get the intended crop or add more to make it go all the way to my hips. Mine ended up sort of in the middle, like I couldn’t decide whether or not I wanted it cropped.
How Long Does it Take to Crochet a Hoodie?
I was surprised how quickly this project flew by! Because it’s largely worked in panels with minimal sewing, you’re done before you know it.
I’d estimate I put in roughly 14 hours or so into this one. That’s not much at all for a garment in my opinion! It took me longer in between being able to work on it because I needed more yarn than I thought, and this yarn is apparently not going to be at Joann anymore so I had to find the right color still available at the locations near me!

Gauge & Measurements:
The given pattern gauge is 4″ being 18 stitches or 20 rows (and remember this is worked sideways so the stitches decide your width and the rows your length!)
My gauge came out as 4″ being about 13-14 stitches and 11 rows. I didn’t think I was that far off in my initial swatch, and I didn’t need to leave out that many rows to get the desired width. That’s interesting that our numbers are so far off.
When I initially swatched this pattern, I remember my gauge swatch being close-ish. I wonder if this cotton yarn stretches out from its own weight, and I’m sure it slightly does. I believe I was at about 16 or so stitches by 15-16 rows in my test, and I decided to continue and modify my size as needed.
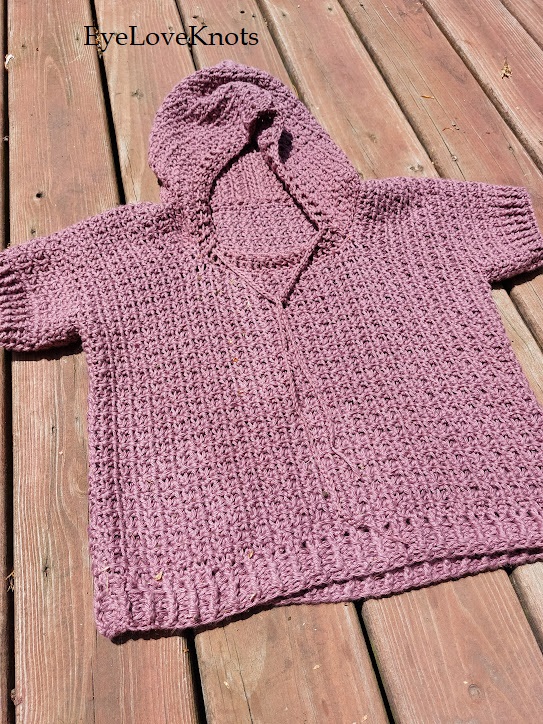
For measurement comparisons, I made the small. It’s supposed to be about 16.5″ long before the border trim, and mine measures a little over 18″. The width is meant to be 19.7″, and mine is right on target at 19.5″.
The reason I was able to match the width is because the pattern giving the panel measurements allowed me to work the back panel rows until I had the width I wanted, then I could just modify my front panel to match that total number. The designer suggests working up 57 rows for my size, and I ended up stopping at 50. I then did some number-crunching to find how to divide up my front panel equally to match those 50 rows. It wasn’t too bad, you could customize the size as needed without too much trouble!

Pattern Notes:
This piece has a very simple construction and I appreciate that. I love some good structure in a garment as well, but it’s a lot harder to stitch up yourself versus a simple rectangle! It’s also a comfy shape that works on so many different bodies. It even makes my mini baby belly look cute! (I say mini because I’m only barely starting to show.) This construction also lets you make it to fit your own size and shape, and allowing for customization in both length and width will let it fit so many different people. You could even make it more or less of a crop depending on your personal style!
I also enjoy that other yarns can work well. The pattern is originally written with Scheepjes ELIZA (a DK weight), which I have never tried although it looks very nice. But the designer suggests substitutions right in the pattern, such as Lion Brand Re-Spun which I have tried and love! Since it’s written for DK, I personally suggest sticking to that range of a category 3 or a lighter category 4, there’s some wiggle room in between those two ranges. My choice of Pima Cotton is on the thicker side but I was able to make it work! There are so many lovely lightweight cotton, bamboo, or other nice summery fibers to try out.
The pattern itself was fairly simple to work through. I was initially confused why the ribbing stitch is listed at the beginning of the pattern, I was thinking that maybe I was supposed to work my ribbing first to decide my length but I couldn’t figure out the size they wanted me to do! But it turns out the pattern is organized this way with the ribbing explanation first, then each panel listed. The ribbing is used for several of the pieces–the bottom of the body panels, the edge of the sleeves, and the front of the hood. So I would assume the designer chose to put it front and center so it was easy to refer back to that section each time you needed to work the ribbing, rather than having to write it out in each individual set of instructions.

The stitch pattern looks more complicated in the texture than it really is. You’re simply working HDC stitches in pairs, and then working your next row with another pair in the middle! It gives a V-stitch sort of look but with a tighter drape, in my opinion. It took some getting used to in the first few rows of the first panel, but I had it down pretty well by the end. Just double check that you’re not working an extra set in there or skipping anything! I would usually check my stitch count every 5 or so rows, and I recommend doing the same. That way if (when) I caught a mistake I only had a few rows to frog in order to fix it.
The one thing I wish was added in is an explanation of how you could modify the front to match the back. I realize the designer gives row counts, but they do also mention in the back panel if it’s not meeting the size you want, you can add or subtract rows to match. I would have liked a breakdown of how I then would divide up the front panel to get the same amount. Let me actually explain what I did here so you can get what I mean:
The back panel as written is 57 rows. The front panel has 17 rows of full-length, then 23 for the neck shaping, then another 17. This adds up to a total of 57 rows to match the back.
For my modified size, or others that had to add or subtract a few rows, you then need to do the math. If I were to work 17 full-length rows first, then 23 for the neckline, I would only have 10 rows on the other side and I’d be at the total row count. It took me some trial and error of splitting 50 rows up into equal-ish numbers to get in the right zone. If I worked too many rows before the neckline I would have a smaller hood in the end. If I leave too large of a neckline it will affect the drape and how it fits me.
I ended up splitting it into 15 rows, then 20 for the neckline, followed by another 15. This roughly fit the original plan, with just 2-3 rows cut out of each section. The only thing I then had to do was cut and reattach my yarn after the neckline, because I worked an even number instead of an odd number for this section. But this wasn’t too hard to do, and it led to a very customized fit that I enjoy.
Turns out I had more to say on this one than I thought! I hope you enjoyed reading through my ramblings, and hopefully it inspires you to make one of these yourself for the upcoming warmer weather. I can see this being very cute with some shorts for summer weather, or layered over a tank dress. It could even make a cute swim cover-up top, if you use something like cotton that can handle getting wet!
Thank you for reading, and have a wonderful spring!

Don’t forget to visit with me on Instagram @astitchshyofnormal for all kinds of awesome crochet makes and inspiration.
Join one of our awesome Facebook groups to share your creations, and see what others are up to!
– Yarn Crafts & Coffee Community
– DIY Home On Rockwood Lane
– Alexandra Lane Lifestyle
Linked Up To…
Style with a Smile Link Up – Style Splash
Turning Heads Tuesday – Elegantly Dressed and Stylish
Confident Twosday Linkup – I do deClaire
Loop Scoop #64 – Moogly Blog
Wow on Wednesday – Is This Mutton?
Chic and Stylish Link Up – Mummabstylish
Fancy Friday – Nancy’s Fashion Style
Craftastic Monday Link Party – Sew Can Do
Wednesday Link Party 508 – Oombawka Design Crochet
Team Creative Crafts Link Party #151 – Artsy-Fartsy Mama
Creatively Crafty Link Party #385 – Try It – Like It – Create It
Grace at Home No. 510 – Imparting Grace
Spread The Kindness Link Up On the Edge #657 – Shelbee on the Edge
Saturday Sparks Link Party 570 – Pieced Pastimes
Handmade Monday #332 – Sum of their Stories
The Really Crafty Link Party #370 – Keeping it Real
Happiness is Homemade – Decor Craft Design
You’re the Star Blog Hop – Decor Craft Design
Anything Goes Linky 381 – My Random Musings
686th Inspire Me Tuesday – A Stroll Thru Life
Fabulous Party 480 – Lou Lou Girls
The Happy Now Blog Link- Up #378 – JENerally Informed
Vintage Charm Party 394 – My Thrift Store Addiction
Wonderful Wednesday Blog Hop – My Life Abundant
Wednesday Link Party #353 – To Grandma’s House We Go
Thursday Favorite Things #614 – An Artful Mom
Encouraging Hearts and Home Blog Hop – Slices of Life
Crafty Creators Link Party #71 – Life as a LEO Wife
Create, Bake, Grow & Gather Party #577 – Shabby Art Boutique
Funtastic Friday Link Party #442 – Simply Beautiful by Angela
A Morning Cup of Joe – The Cottage Market
Pink Saturday – How Sweet the Sound
Craft Schooling Sunday – Creative Jewish Mom
Sundays on Silverado #151 – The House on Silverado
August Sunday Showcase – Chez Mireille
This is SO cute!!
Thank you so much! Glad you enjoyed it!
It turned out so well! I have never seen a crocheted hoodie before, it’s lovely! Thanks for linking up!
Emma xxx
http://www.style-splash.com
I’ve made a more traditional long-sleeve one before but this was my first time trying a light summery one myself! I’m glad you enjoyed it!