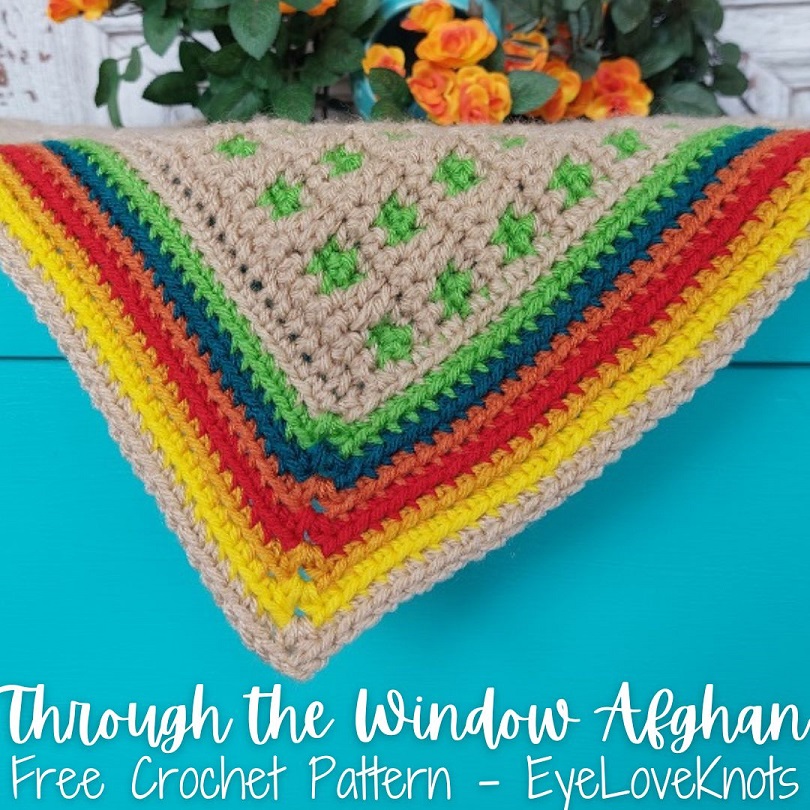
This is a free crochet pattern and video tutorial showing how to crochet the Through the Window Afghan – a fun afghan that uses the inset mosaic crochet technique. Don’t let it scare you! It’s comprised of simple single crochet stitches, chains and easy double crochets. 11 sizes included.
This post contains affiliate links for Etsy, WeCrochet & Lion Brand. If you make a purchase by clicking on them, I make a small commission at no extra cost to you. Thanks for your support!
Find the free crochet pattern instructions below, or purchase a printer-friendly, ad-free PDF on Ravelry by clicking here.
In a hurry? Pin this for later when you have more time.
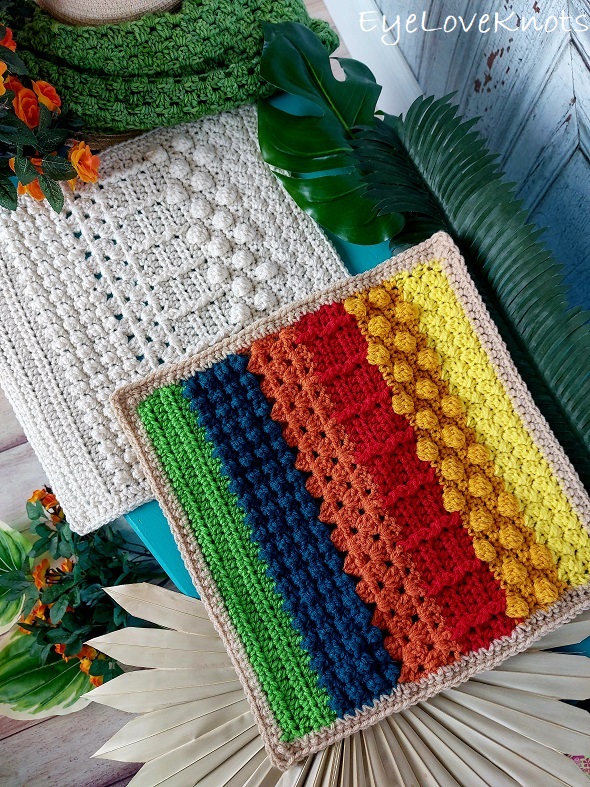
The colors in my Volume One Afghan Square inspired me to make this afghan.
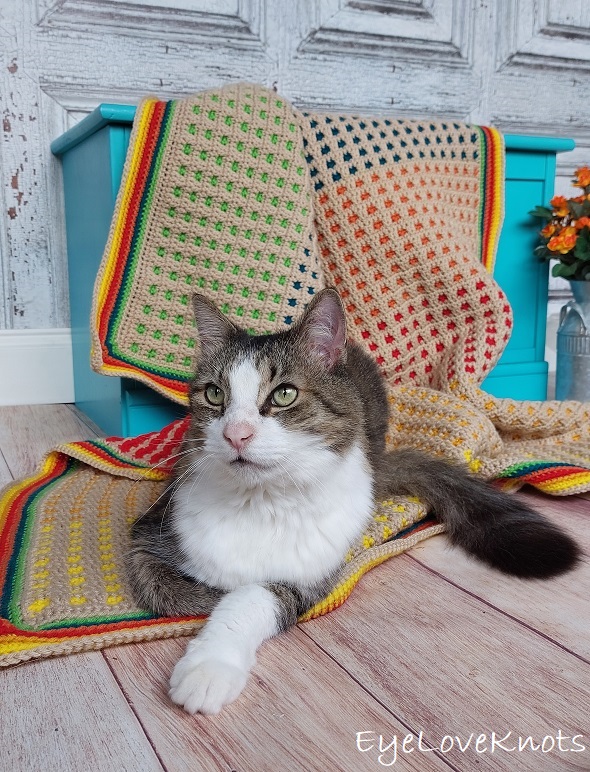
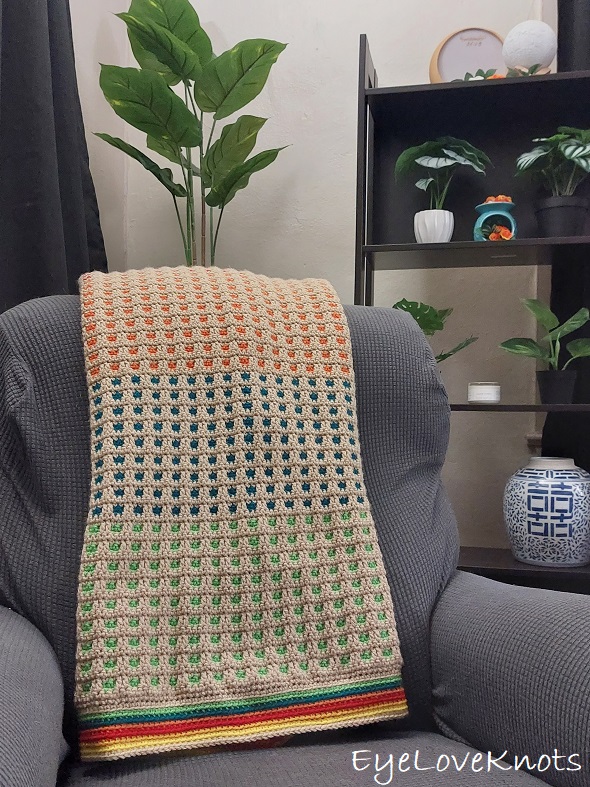
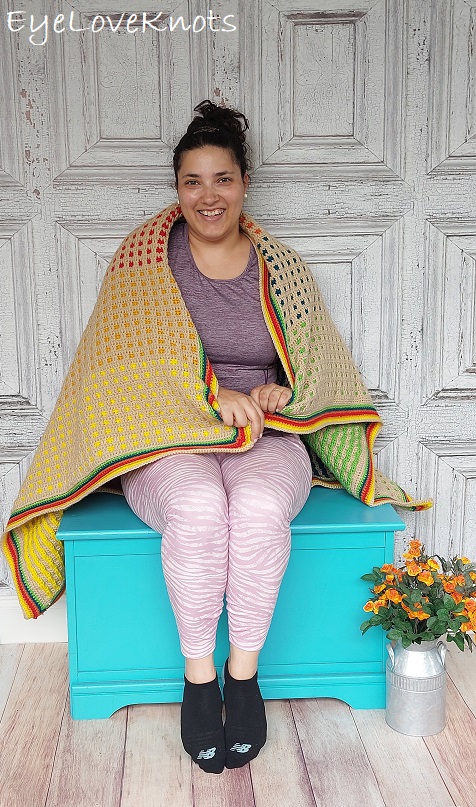
It’s funny how the vibes change a bit from the square to the afghan just by having the brown colorway, Buff, over top. It’s not what I expected when I set out to make this afghan, but I quite like how it turned out. I finished with a bold border, which gave me the punch I was looking for.
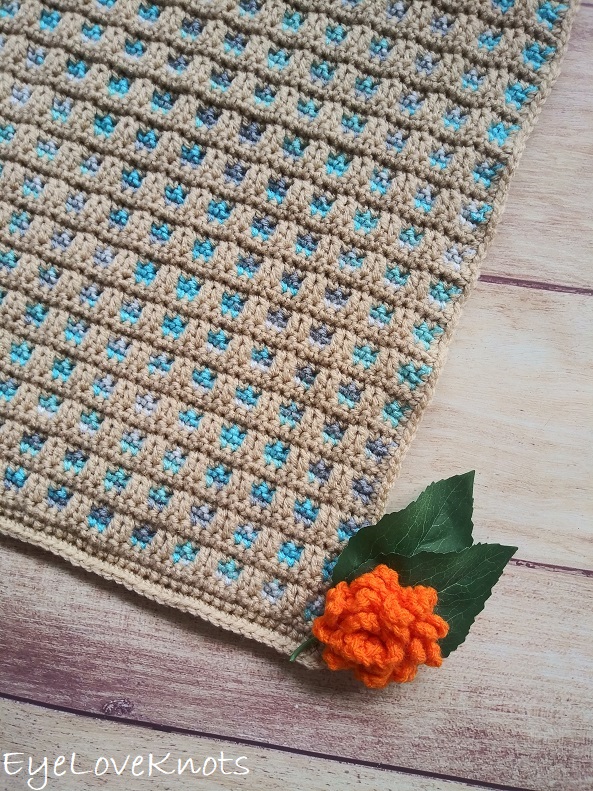
A blanket in my Through the Window series has also been one of the most requested patterns I’ve received since publishing my Through the Window Afghan Square, which also uses Red Heart Super Saver. Now, you can use that square, and make many and sew together for a blanket, or you can work up this afghan with the pattern worked in rows, OR…
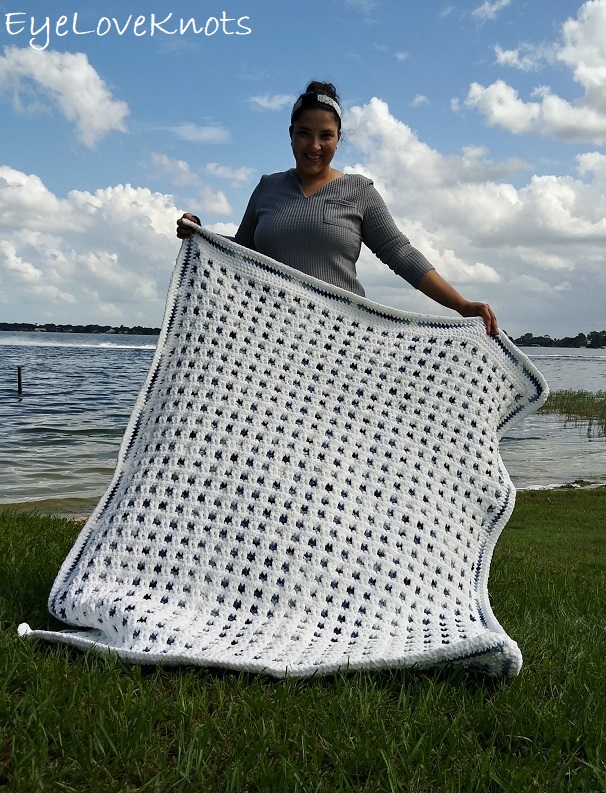
… you can pull out the Super Chunky yarn, and make this Super Chunky Through the Window Afghan, which also comes in the same 11 sizes.
The idea of mosaic crochet may intimidate you, but please don’t let it. This stitch pattern is comprised of single crochets and chains with some double crochets to create the overlap. I think a confident beginner could do this.
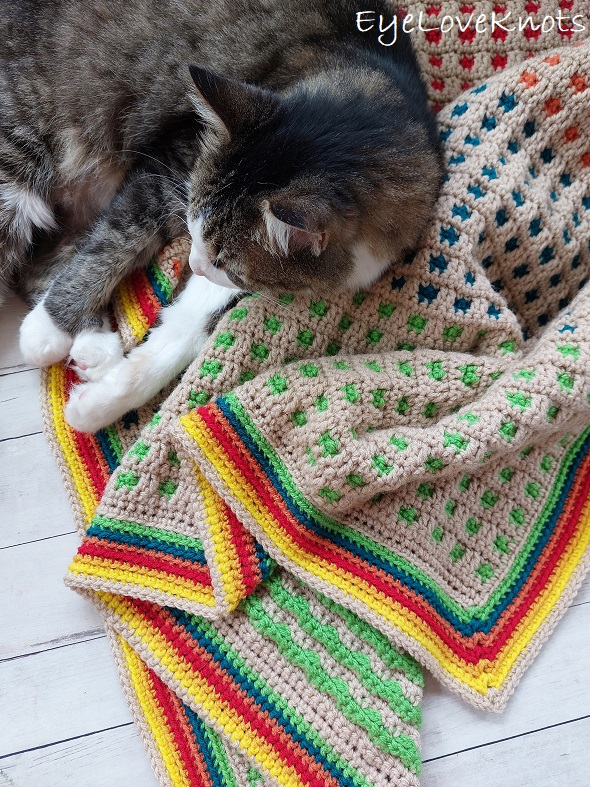
While my favorite way to work this technique is with a variegated color underneath, and a solid coordinating color on top, it also looks great with a two solids or even just one color.
What is the Difference Between a Blanket and an Afghan?
While Blankets and Afghans are both used to cover ourselves to keep warm, Blankets are typically made of sewn fabric, while Afghans are typically knit or crocheted.
What is the Best Yarn to Use for a Crocheted Afghan?
I’ve used Red Heart Super Saver for my afghan because I love the durability for wear and tear and machine washing and drying, plus the wide range of colors and how affordable it is, but you can use any worsted weight yarn from your stash – pick your favorite! If the finished size is essential to you, then check your gauge, but if not, then just start crocheting. Worked from the center out, and being that you can stop after any round, you can easily change up your yarn to any weight, and just work more or less rounds.
Another favorite worsted weight yarn of mine that would be perfect for an afghan is Lion Brand Wool Ease – it’s a soft, squishy wool and acrylic blend that also holds up well to wear and tear and machine washing and drying.
If you would like to grab a free copy of the PDF for this pattern, make sure to check out the Pattern Notes section below.
Ad-Free Printer Friendly PDF:
If you would like a PDF version of this post, you may get one through either my Etsy Shop, Ravelry Shop or LoveCrafts Shop for a small fee. This fee is to compensate for the views lost when you no longer need to return to the blog to for the information, as you will have your own copy. In a hurry? Pin this for later when you have more time!
Save this to Your Favorites On: AllFreeCrochet, FaveCrafts, Crochet Pattern Bonanza, Cheap Thrifty Living, DIYideaCenter, AllFreeHolidayCrafts
Materials:
- 105 (420, 925, 1465, 2110, 3255, 6300, 7720, 10065, 11385, 11830) Yards of Worsted Weight Yarn – I used Red Heart Super Saver Yarn in Buff, Spring Green, Real Teal, Carrot, Cherry Red, Gold, and Bright Yellow
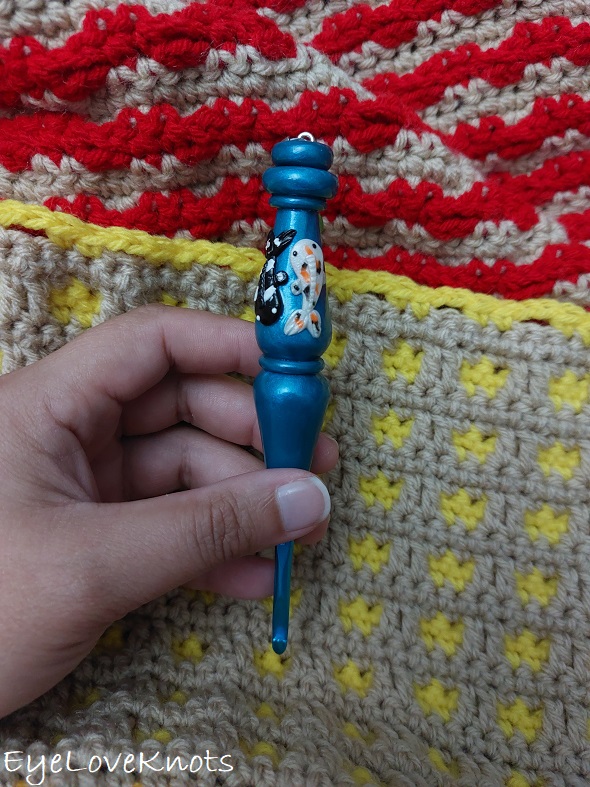
- Body: H8/5mm Crochet Hook – I love this Koi Fish Ergonomic Clay one from SiennasBowtique on Etsy
- Border: G6/4.25mm Crochet Hook
- Tapestry Needle
- Soft Tape Measure if Gauge is Essential
Material Notes:
Use your favorite worsted weight yarn for this afghan! Some great yarn alternatives I recommend are {wools} WeCrochet Swish, Lion Brand Wool Ease, {non-wool} WeCrochet Brava, Bernat Super Value.
My sample is the toddler/child size. The rest of the size yardages are estimated based on my sample and listed as Main Color (color that will be “on top”), Coordinating Color (colored square pattern), Border:
- Newborn Photography Layering Blanket: 45; 30; 30
- Newborn Photography Blanket: 215; 145; 60
- Newborn Blanket: 495; 340; 90
- Lapghan: 695; 485; 285
- Toddler/Child: 1035; 725; 350
- Throw: 1655; 1160; 440
- Twin: 3325; 2345; 630
- Full: 4685; 2305; 730
- Queen: 5445; 3840; 780
- King: 6190; 4365; 830
- CAL King: 6440; 4545; 845
Time Spent:
I worked on the toddler/child size afghan here and there over two months for a total of just under 26 hours.
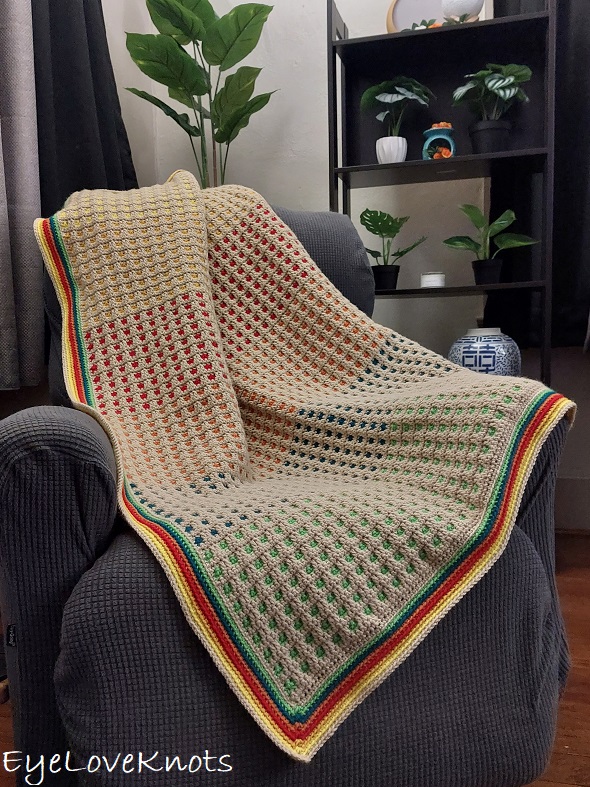
Measurements with Border Worked into the Back Loop Only:
Quick guide: 0.13″ = 1/8″, 0.25″ = 1/4″, 0.38″ = 3/8″ 0.5″ = 1/2″, 0.63″ = 5/8″, 0.75″ = 3/4″, 0.88″ = 7/8″
- Newborn Photography Layering Blanket: 10.38″ Wide by 10.5″ Tall
- Newborn Photography Blanket: 20.75″ by 20.38″
- Newborn Blanket: 30.13″ by 30.13″
- Lapghan: 35.25″ by 40.38″
- Toddler/Child: 40.5″ by 50.13″
- Throw: 50.88″ by 60.75″
- Twin: 65.5″ by 90″
- Full: 85.38″ by 95.38″
- Queen: 95.75″ by 98″
- King: 108.25″ by 98″
- CAL King: 112.5″ by 98″
The first two sizes are meant to be newborn photography photo props. Typically, the base is the blanket, and then the layering blanket is laid in a different direction on top, and then baby. Sometimes the newborn size is also used in photography.
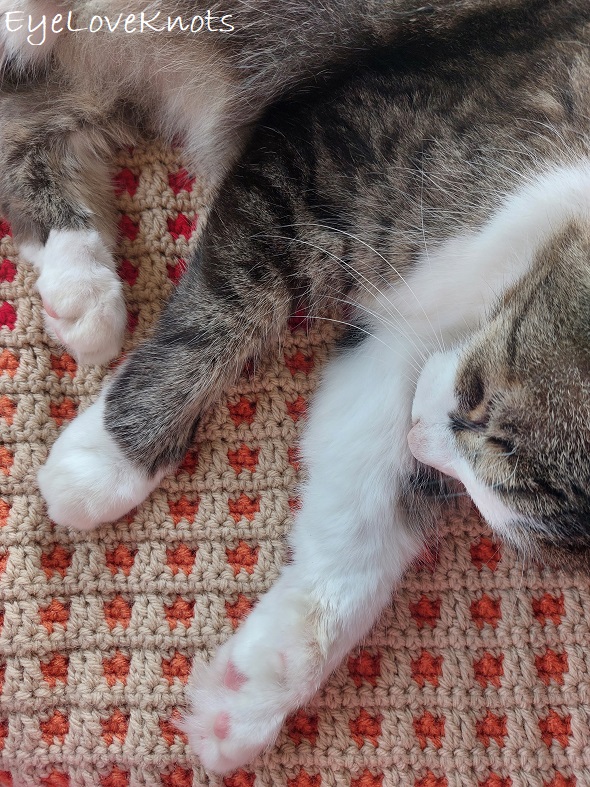
Gauge (Not Essential):
With H8/5mm Crochet Hook & In Pattern, 16 SC by 16 Rows = 4.13″ or 4 1/8″ Wide x 4″ Tall
Abbreviations (US Terms):
- SC – Single Crochet (Photo Tutorial)
- DC – Double Crochet (Photo Tutorial) – in this inset pattern it’s worked in front of the chains
- MC – Main Color
- CC – Coordinating Color
- BLO – Back Loop Only
- HDC – Half Double Crochet (Photo Tutorial)
Pattern Notes:
If you wanted to alter the width of the afghan, the chain multiple is 4 + 3. That means the final stitch count must be a multiple of 4, then add 3, and work in pattern.
If you want to alter the height of the afghan, add or subtract rows by 4 – this is the repeat.
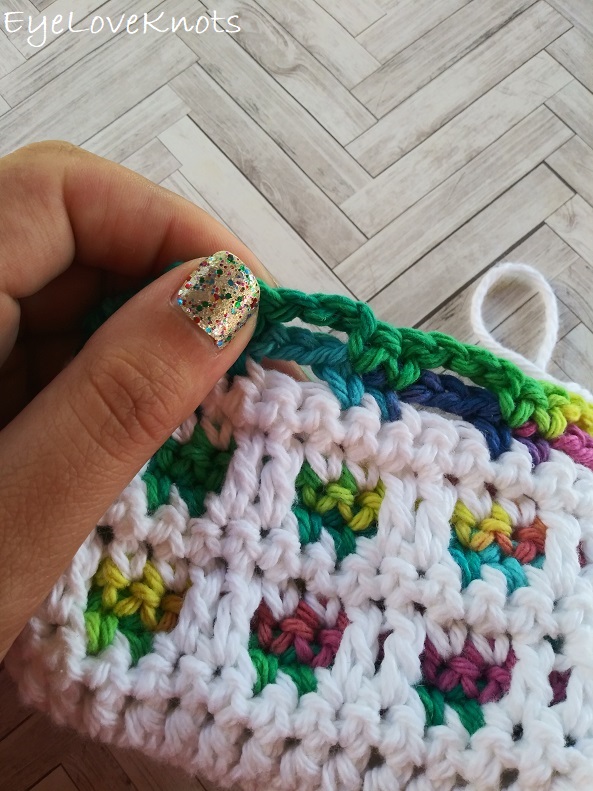
In the pattern, I will instruct for example, in Round 5 “DC into R3”. In the photo above, you can see how there is a skipped stitch in white, and two rows of chains above it. You will push those chains to the back, and work the double crochet just into that skipped stitch in white. Shown on my Through the Window Soap Cozy or Small Bag.
I used solid colors for my afghan, but I really love to use this stitch pattern with a variegated yarn as my coordinating color – it is my favorite way to use variegated yarns! It also looks very nice in one solid color with the added texture.
The MC, or Main Color, is going to be the color you start your afghan with, and the color that shows on top as it’s also the same one the double crochets are worked in. The CC, or Coordinating Color, is going to be the color that you add in at the second row, and shows underneath to create the colored squares.
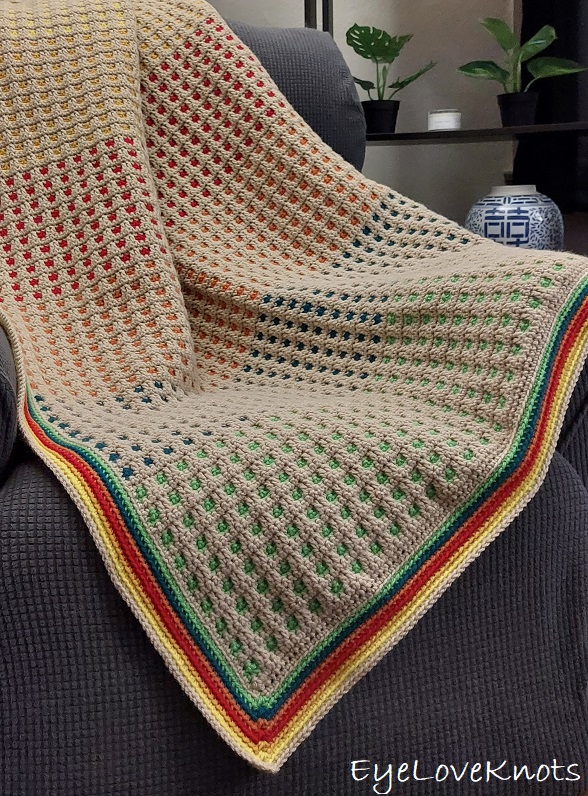
For my afghan, I used Buff as my Main Color. I wanted to incorporate 6 other colors to use as my Coordinating Colors, and to make it work evenly, I ended up working my afghan up to be 218 rows in total with 36 rows in each color section.
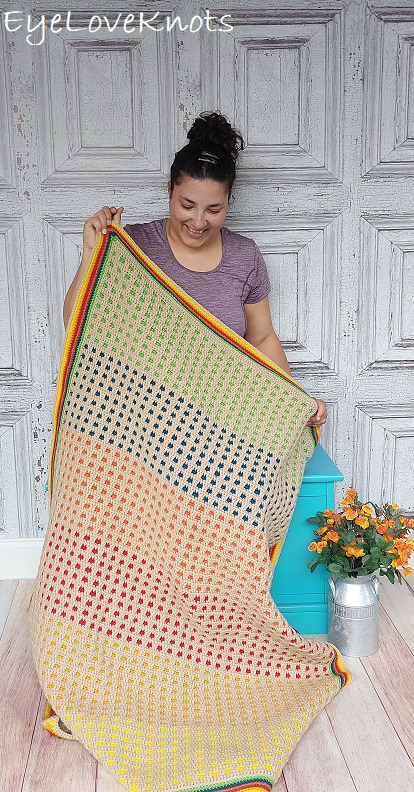
If you want to use more than one color as your coordinating color, as I’ve done, then to see how many rows you’ll need to have, you’ll take the total number of rows I’ve listed (using my afghan as an example, 198 for Toddler/Child size), subtract 2 (to take out the first two rows leaving just the repeat section; ie, 196 for Toddler/Child size) and then divide by the number of colors you want to use – I used 6 (ie 32.66… for Toddler/Child size). In this example, you’ll need to work 32.66… rows per repeat section in each of 6 colors. We round this to a number that is divisible by 4 (because that is the number of rows in the repeat) so I can stick with 32 or I can go up to 36. I went up to 36 so my afghan was a little bigger, rather than a little smaller.
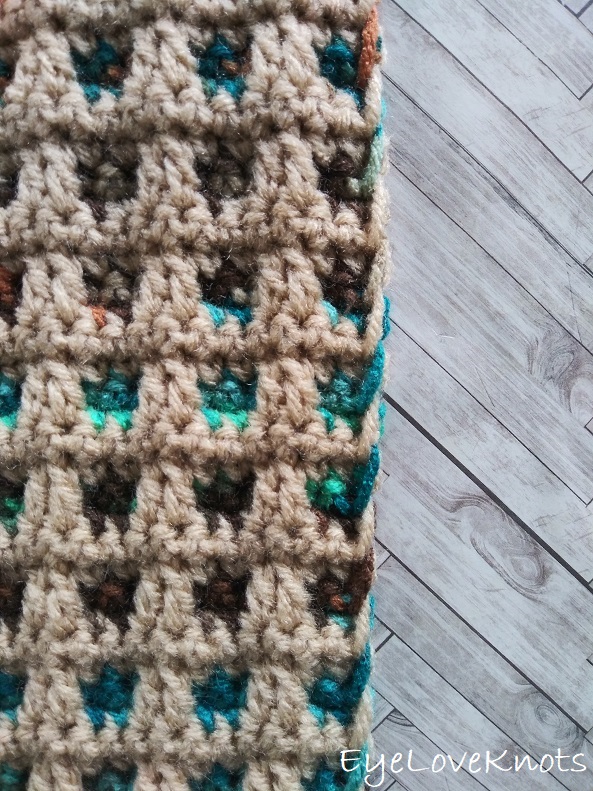
To change yarn colors, do so in the last yarn over of the previous row. If needed, see my How to Change Yarn Colors in Crochet tutorial. Drop old color to the back, and carry up the side. When you add your border, it will cover up the carried yarn. This is shown on my Through the Window Scarf.
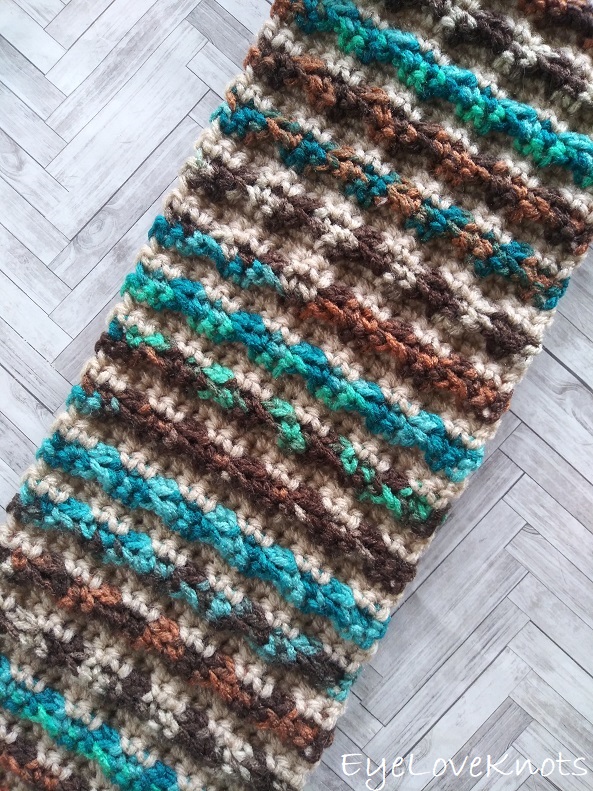
This is what the back looks like, also shown on my Through the Window Scarf.
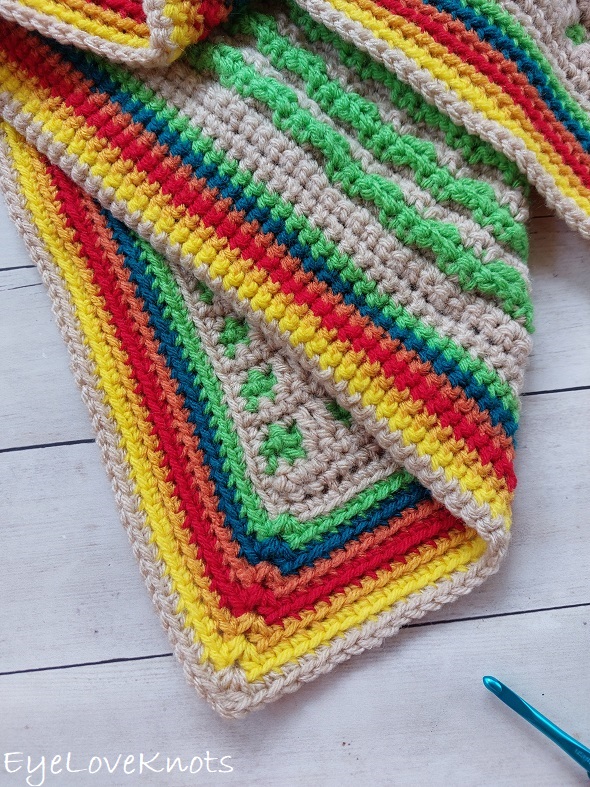
Border notes included in the Border section of the pattern.
Through 05/09/23 at 11:59pm EST, you can grab a free copy of the PDF for the Through the Window Afghan on Ravelry using code FREECROCHET202306. I earn my income from the number of pageviews my blog sees, so please do not share the code, but instead share the link to this post so others can find it. Thank you!
If you’re viewing this after 05/09/23, you can still get a copy of the PDF on sale 50% off on Ravelry or on Etsy using code NEWCROCHET202305 until 05/14/23 at 11:59pm EST.
Through the Window Afghan, Video Tutorial:
Through the Window Afghan, Written Pattern:
With H8/5mm Crochet Hook & in MC, chain 31 (71, 107, 119, 139, 179, 235, 311, 351, 399, 415). SC into the 2nd chain, and each across. [30 (70, 106, 118, 138, 178, 234, 310, 350, 398, 414) SC]
R2: Chain 1, turn. SC into the 1st SC, and each SC across. Switch to CC.
R3: In CC, chain 1, turn. SC into the 1st 2 SC, (chain 2, skip the next 2 SC, SC into each of the next 2 SC) 7x (17x, 26x, 29x, 34x, 44x, 58x, 77x, 87x, 99x, 103x).
R4: Chain 1, turn. SC into the 1st 2 SC, (chain 2, SC into each of the next 2 SC) 7x (17x, 26x, 29x, 34x, 44x, 58x, 77x, 87x, 99x, 103x). Switch to MC.
R5: In MC, chain 1, turn. SC into the 1st 2 SC, DC into each of the 2 open stitches from R3, (SC into each of the next 2 SC, DC into each of the next 2 stitches of R3) 7x (17x, 26x, 29x, 34x, 44x, 58x, 77x, 87x, 99x, 103x).
R6: Chain 1, turn. SC into the 1st SC, and each SC across. Switch to CC.
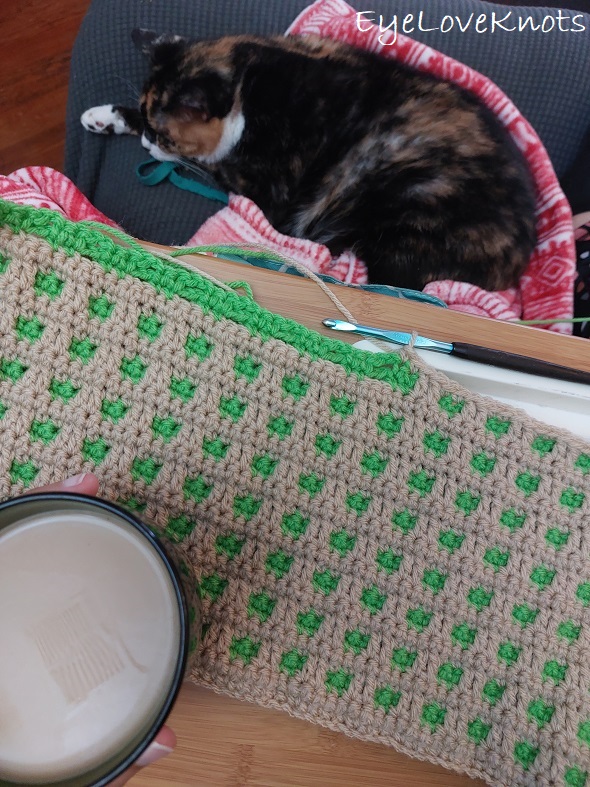
R7 – 34 (78, 122, 154, 198, 246, 378, 402, 414, 414, 414): Repeat Rows 3 – 6.
Border Notes:
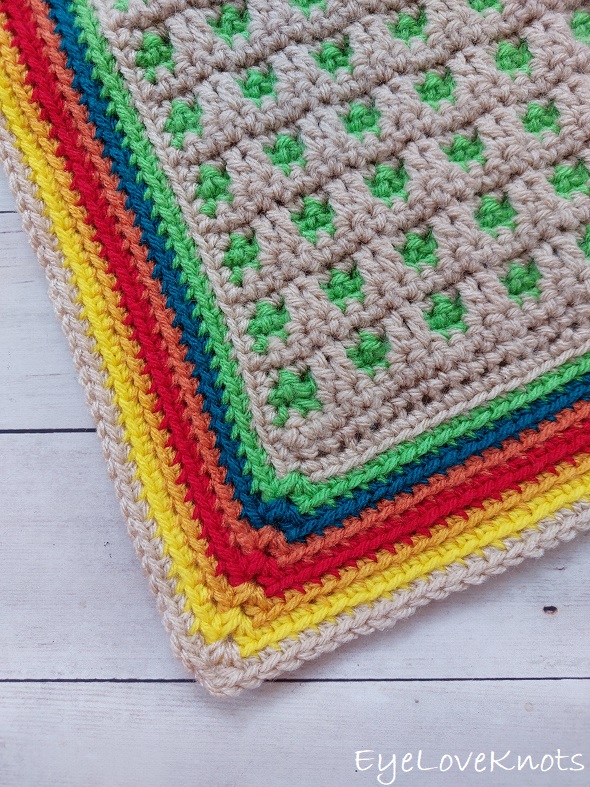
I wanted a bold border so I started with one round of the same color I finished with, my main color Buff, and then I worked one round in each of the 6 colors I used as my coordinating colors, and then finished with one more round in Buff. This equals 8 rounds in total. The pattern is written for 3 rounds for the first 3 sizes, and 8 rounds for the remaining sizes. Change colors as desired.
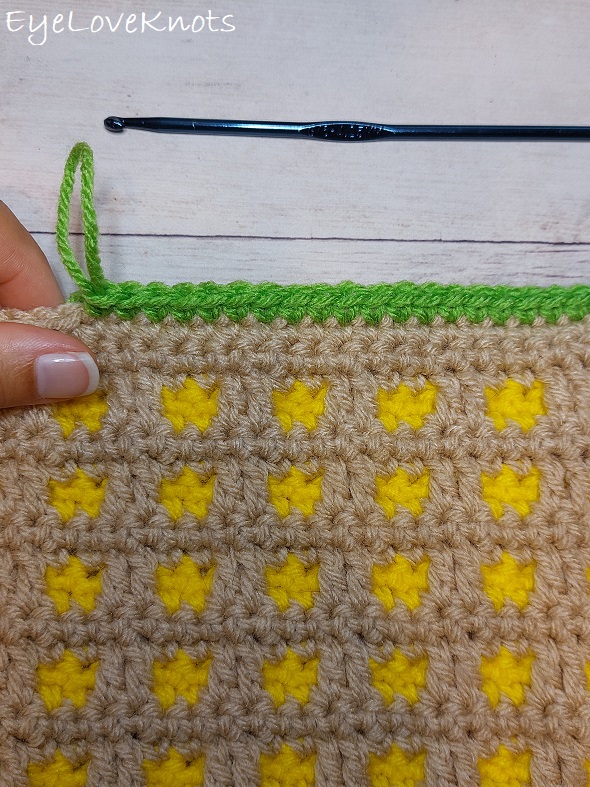
I started out thinking I wanted to do simple rounds of single crochet for my border. After working up a couple (as shown above), I decided I wanted to work into the back loop only, or BLO, for mine instead. I’ll include both instructions. For regular single crochet, the corners will be worked in single crochet, and you’ll join as normal, and for working in the back loop, the corners will be worked in half double crochet to achieve the same height, and you’ll join in the back loop as well to keep it consistent.
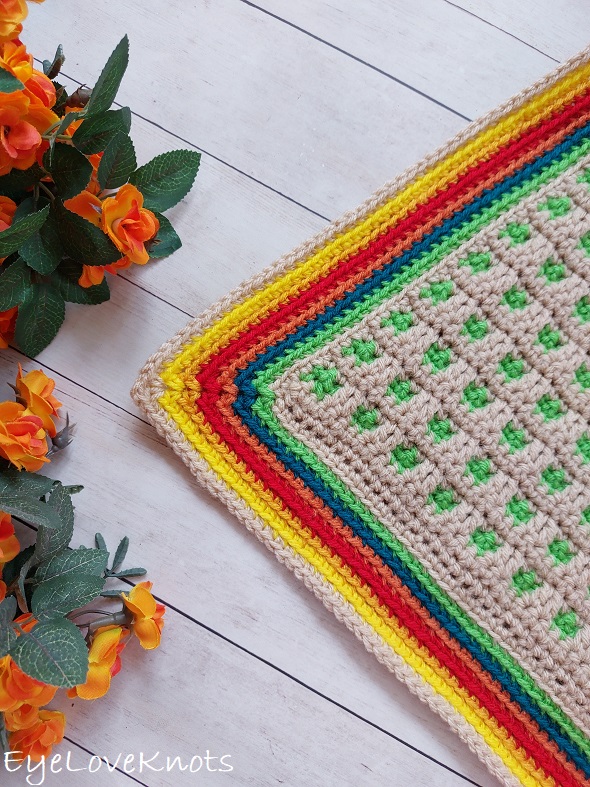
With switching colors each round, I’ve fastened off after each round’s join, and reattached in the next chain space. You can do so this way, or continue to switch colors as you have been for the afghan – in the last yarn over of the last stitch. The Border pattern is written to slip stitch over the chain space to begin the next round, but you can also chain 1, and work in pattern over to the chain space instead.
Why switch to a smaller crochet hook? In my experience, a change in tension causes ruffles in the border, especially seen on the sides. My quick fix is to simply go down a hook size. You can also continue with the same hook you’ve been working with, and just block the finished afghan.
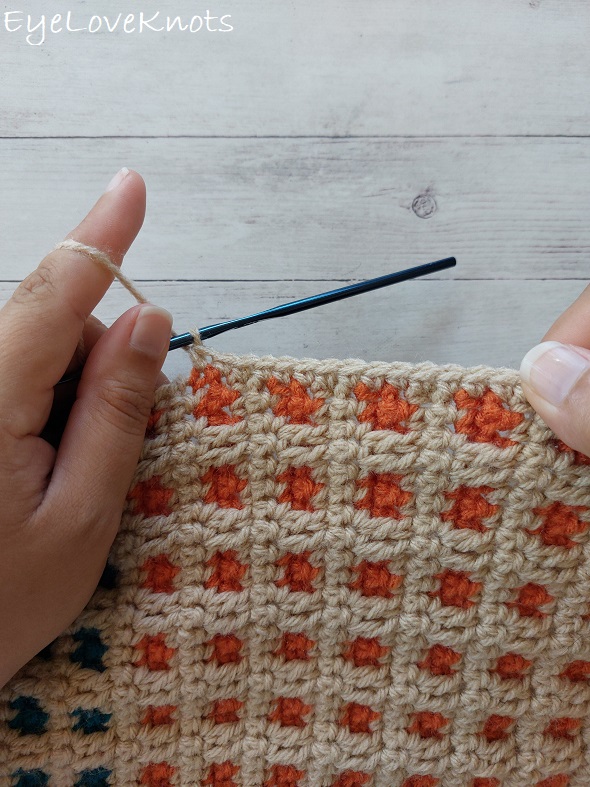
Row 1 of Border, Written Pattern – with G6/4.25mm Crochet Hook:
Chain 1, turn. (SC, chain 2, SC) into the 1st stitch to form a corner, SC into each remaining stitch across over to the last stitch, (SC, chain 2, SC) into the last stitch to form a corner, evenly SC (that’s 1 stitch per row) down the side of the blanket to the last stitch, (SC, chain 2, SC) into the last stitch to form a corner, SC across the opposite side of the foundation chain over to the last stitch, (SC, chain 2, SC) into the last stitch to form a corner, evenly SC (that’s 1 stitch per row) up the side of the blanket to the first stitch, then slip stitch join to the 1st SC.
Regular Single Crochet, Written Pattern:
Photo Blankets and Newborn: Slip stitch over to the chain space. Chain 1 without turning, and work in the same manner for 2 more rounds for a total of 3 rounds.
Lapghan, Toddler/Child, Throw, Twin, Full, Queen, King, and CAL King: Slip stitch over to the chain space. Chain 1 without turning, and work in the same manner for 7 more rounds for a total of 8 rounds.
Fasten off, and weave in ends.
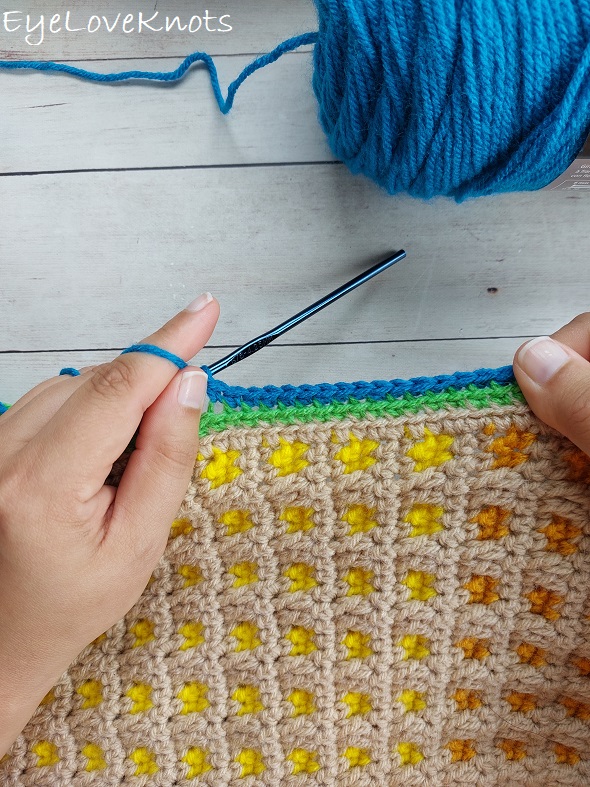
Single Crochet in Back Loop Only, Written Pattern:
R2: Slip stitch over to the chain 1 space. Chain 1. (HDC, chain 2, HDC) into the 1st chain space to form a corner, in the BLO SC into each remaining stitch across over to the last stitch, (HDC, chain 2, HDC) into the last stitch to form a corner, in the BLO SC into each stitch down the side of the blanket to the last stitch, (HDC, chain 2, HDC) into the last stitch to form a corner, in the BLO SC across the opposite side of the foundation chain over to the last stitch, (HDC, chain 2, HDC) into the last stitch to form a corner, in the BLO SC into each stitch up the side of the blanket to the first stitch, then slip stitch join in the BLO to the 1st stitch.
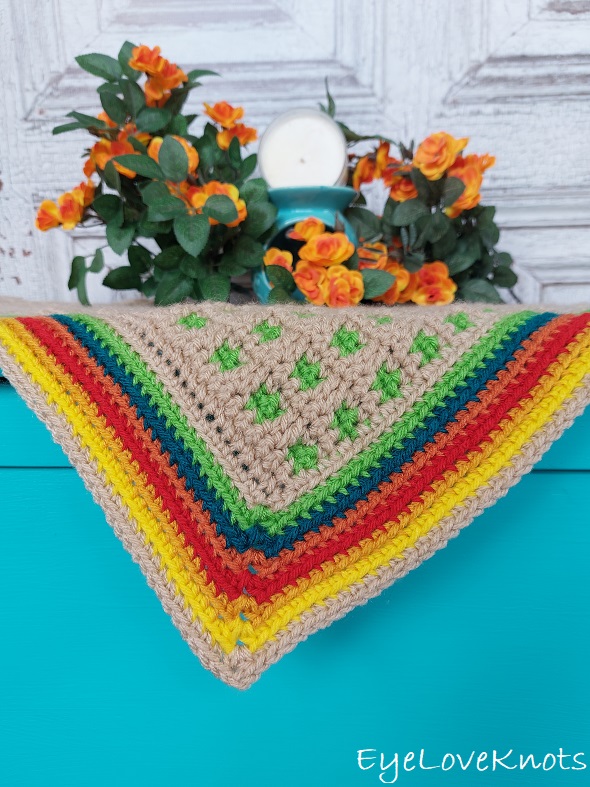
Photo Blankets and Newborn: Slip stitch over to the chain space. Chain 1 without turning, and work in the same manner for 1 more round for a total of 3 rounds.
Lapghan, Toddler/Child, Throw, Twin, Full, Queen, King, and CAL King: Slip stitch over to the chain space. Chain 1 without turning, and work in the same manner for 6 more rounds for a total of 8 rounds.
Fasten off, and weave in ends.
Please feel free to make and sell your own items made using this pattern, but keep in mind, this written pattern and my photos are protected by copyright. Please DO NOT claim this pattern as your own nor should you sell my pattern. DO NOT re-publish my photos as your own. DO NOT copy and paste my pattern anywhere, link to it instead so other’s can visit. Making videos providing instructions how to make my projects on any social media platform is also not permitted.
Join one of our awesome Facebook groups to share your creations, and see what others are up to!
– Yarn Crafts & Coffee Community
– DIY Home On Rockwood Lane
– Alexandra Lane Lifestyle
Linked Up To…
Craftastic Monday Link Party – Sew Can Do
Happiness is Homemade 478 – Decor Craft Design
Craft Schooling Sunday – Creative Jewish Mom
Sundays on Silverado #144 – The House on Silverado
Handmade Monday #326 – Sum of their Stories
You’re the Star Blog Hop – Decor Craft Design
Hello Monday – Pink Lady
Anything Goes Linky 377 – My Random Musings
682nd Inspire Me Tuesday – A Stroll Thru Life
Fabulous Party 475 – Lou Lou Girls
Talent Sharing Link Up – Scribbling Boomer
The Happy Now Blog Link- Up #372 – JENerally Informed
Linky Ladies Party #236 – The Purple Poncho
All About Home #195 – Common Ground
Loop Scoop 61 – Moogly Blog
The Wednesday Link Party 502 – Oombawka Design Crochet
Team Creative Crafts Link Party #145 – Artsy-Fartsy Mama
Creatively Crafty Link Party #379 – Try It – Like It – Create It
Saturday Sparks Link Party 564 – Pieced Pastimes
Turn About Tuesday #201 – My Wee Abode
Vintage Charm Party 388 – My Thrift Store Addiction
Home Matters Linky Party #429 – Modern on Monticello
Wonderful Wednesday Blog Hop – My Life Abundant
Wednesday Link Party #347 – To Grandma’s House We Go
260 Senior Salon Pit Stop – Esme Salon
Crafty Creators Link Party #66 – Life as a LEO Wife
Encouraging Hearts and Home Blog Hop – My Slices of Life
Create, Bake, Grow & Gather Party #571 – Shabby Art Boutique
Funtastic Friday Link Party #436 – Simply Beautiful by Angela
A Morning Cup of Joe – The Cottage Market
Pink Saturday – How Sweet the Sound


Love love love this blanket, so wonderful! thanks as always for sharing on craft schooling sunday!
WOW, this is so beautiful. This will be gorgeous on any bed or settee.
I visited you via The Happy Now Blog Link- Up #372
If you are not already part of SSPS, this is a personal invite to hop over and come and share your posts with us at Senior Salon Pit Stop, every Monday to Saturday, and share your awesome post/s with us as well.
See my entries:34+35 to the bottom of my page for the Senior Salon Pit Stop linkup, we hope to meet you there virtually.
Hi Alexandra, I’ve always loved your Through the Windows projects and this afghan is really pretty! The rainbow edging is bright and colorful too! Thank you for linking up at our weekly Link Party! You are being featured at our Wednesday Party #503 this week. Here’s the direct link to the post in case you’d like to share your feature: https://oombawkadesigncrochet.com/easy-crochet-washcloth-wrap-boots-through-the-window-afghan-link-party-503/
Hope to see you again next week! Rhondda
What gorgeous colors and a beautiful texture! This afghan would be so luxurious to curl up with. The kitty found the perfect spot. Thank you for sharing this post in the Talent-Sharing Tuesdays Link-Up 64.
Carol
http://www.scribblingboomer.com