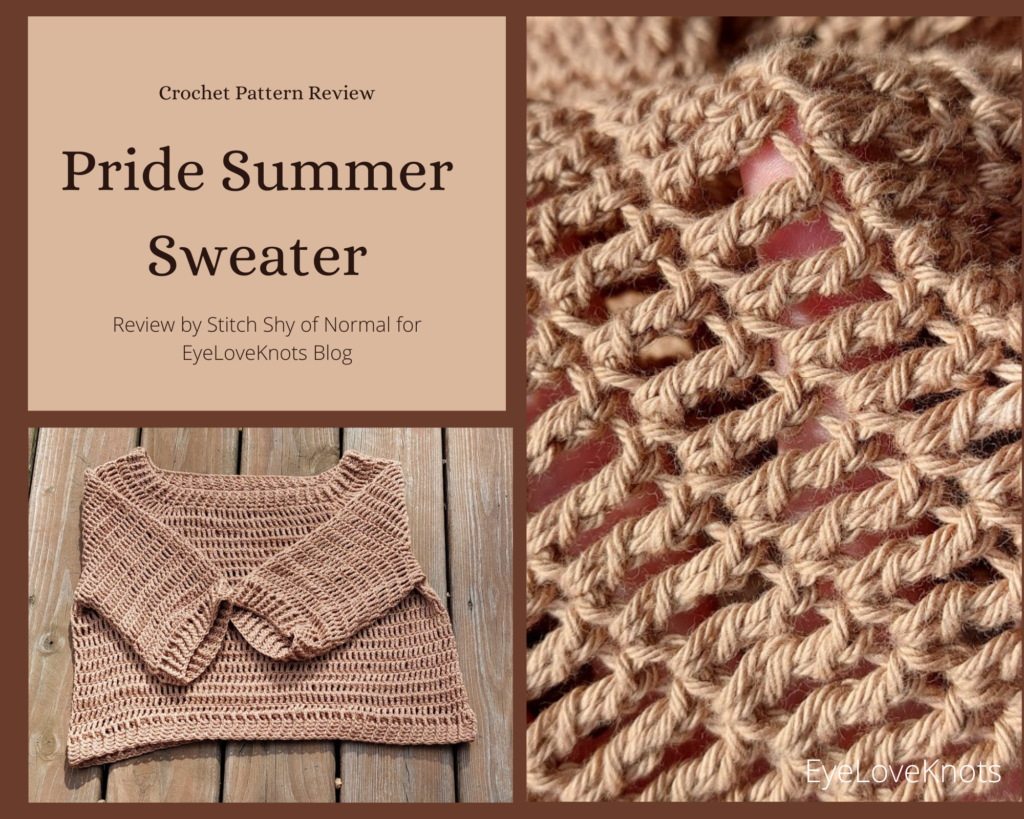
This is a crochet pattern review of the Pride Summer Sweater pattern by designer By Katerina Designs. Review done by A Stitch Shy of Normal for EyeLoveKnots.
This post contains affiliate links for WeCrochet and Lion Brand Yarn If you make a purchase by clicking on them, I make a small commission at no extra cost to you. Thanks for your support!
Find the crochet pattern review below or click here to find the free pattern with PDF purchase options linked!
It’s me, Abigail with A Stitch Shy of Normal.
Hey everyone! This past month has been an absolute roller coaster as I transitioned into the third trimester of my first pregnancy. I think I’ve mostly held things together, at least in terms of the more important things in life–I’ve been able to keep myself fed and I can mostly function at work in order to pay rent. Everything beyond that can be fixed if I struggle a little bit.
The reason I bring this up is because this pattern was actually going to be my August review originally. I started it in July, and was super pumped about it. I bought all the yarn and got pretty much finished with the main sweater body. I was so excited to finish it up and wear it while it still fit me and the weather was perfect for such a light and breezy top!
You might notice that as you’re reading this, it’s September. Yep, I put this away in a little spot on my couch where the arm opens up, the yarn and hooks and all. I think I did that sometime in the last week of July. Then I didn’t even see it again until mid-August! I opened up that little compartment one day and thought “this is super cute, what is it?” Pulled it out to admire the texture and still wasn’t quite sure what I was looking at. Checked my Ravelry projects page because I was starting to get a few sparks of memory…and it was this lovely summer top, with everything but sleeves and final ribbing! And a pattern from one of my favorite designers, at that!
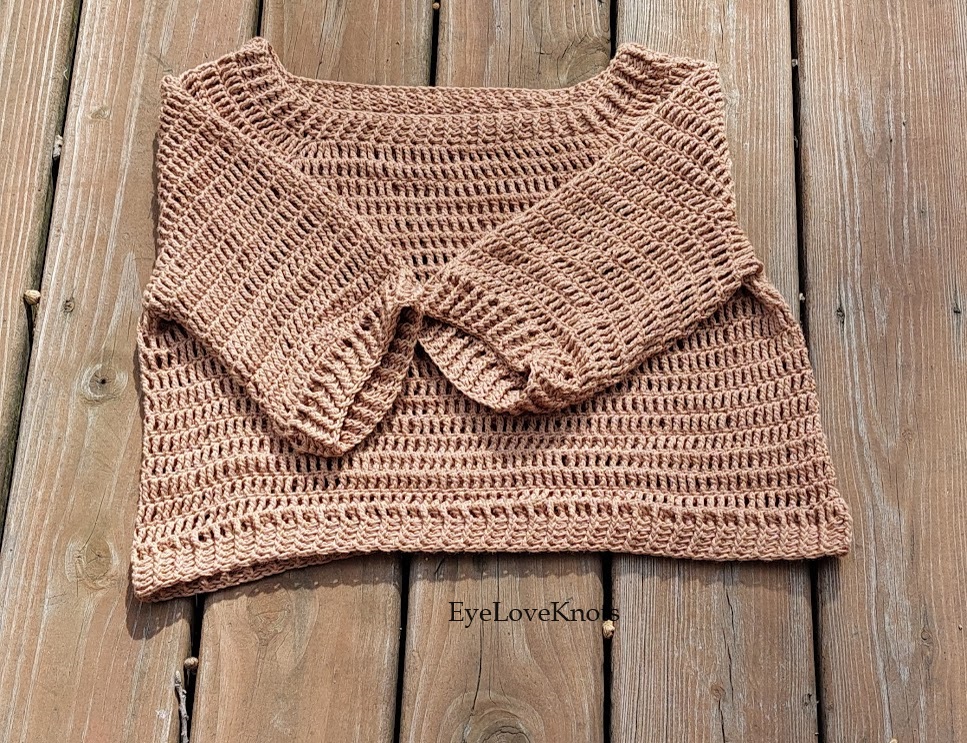
I still am a little impressed at just how far pregnancy brain wiped this one out for me. I was making a lovely project from a wonderful designer in a new-to-me yarn that felt so lovely. And it was even seasonally appropriate where I’d finish it with at least a month left to wear it. Nope, it disappeared into a black hole for about a month. So when I found it, of course I devoted my time to finishing it ASAP. I hoped to be able to talk about it for this review and maybe even wear it for a few weeks before the weather cools down. What I didn’t anticipate was not being able to fit in it anymore, but that’s my own fault. I wore it maybe twice and now it just doesn’t look right on me anymore. That’s okay though, loose and breezy texture works year-round so I’ll make good use of this top after little one shows up!
Visit with me on Instagram @astitchshyofnormal for all kinds of awesome crochet makes and inspiration!
What Materials Do I Need to Crochet a Sweater?
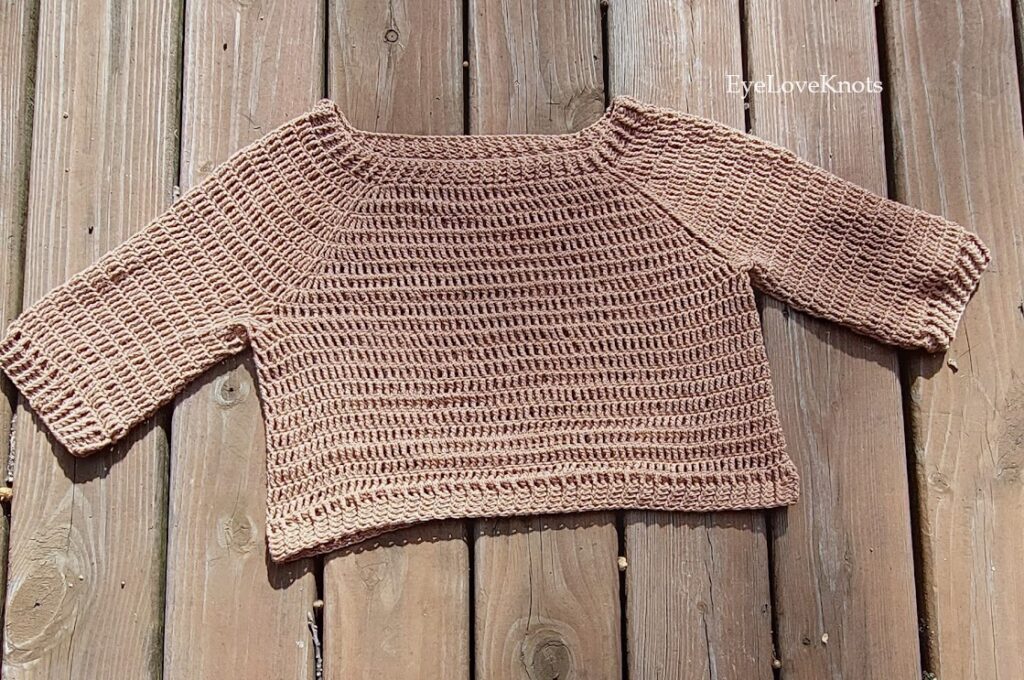
- 3-4 skeins of Lion Brand 24/7 Cotton DK potentially in the colorway “Cacao”. I lost my labels but that looks pretty close.
- F5/3.75mm hook and G6/4mm hook – I like to use Clover Amour
- Scissors and yarn needle for assembly
- Pride Summer Sweater, Free Crochet Pattern from By Katerina website (includes links to purchase different printable PDF options!)
Material Notes:
I have always been a fan of Lion Brand’s 24/7 Cotton and the first time I saw the DK-weight version I knew I had to give it a try! 24/7 Cotton has long been one of my go-to yarns for spring or summer projects. It’s durable and holds up for things like market bags or kitchen items, yet it’s soft to wear and feels like a luxury fiber in garments (at least in my personal opinion, I love the feel of it on my skin!) Plus it’s not too bad for affordability, one skein is often about 5 dollars and gets you a whole market bag with some extra, or only 3-5 skeins is enough for a lot of different garment options!
So I wasn’t exactly surprised when this version was just as soft, just as gorgeous, and has the same crisp stitch definition I’ve come to love from the worsted weight one. I have only washed this top once and did it on delicate then hung it to dry, but it held up well through that process and I’ll be comfortable doing it again!
Would I use this yarn for this pattern again? Definitely. I was not able to get access to the suggested yarn, something called “Pride” from WoolAddicts. But I saw it was a blend of linen, cotton, and viscose that mentioned having softness and sheen. I did some quick research on the Lion Brand website through their various lines of cotton and cotton-blend yarns, and found this one was relatively similar in the weight/yardage comparison (100g for both gives you 306yds in the Pride yarn and 273 in the Lion Brand one) so I decided to take the leap of faith and order this yarn. I worked up a gauge swatch and it came out actually perfect, so I knew this was meant to be!
How Long Does it Take to Crochet a Sweater?
Well, if you leave out the several weeks I forgot it existed, not too long at all. I think I spent somewhere in the range of 12 hours on this project. That seems quick for a garment, but it’s very light and uses tall stitches. So each row gives you a lot of height! I also chose to leave off some length on the sleeves. I could have spent 14 hours if I had done the full sleeve length, I think.
Gauge & Measurements:
The gauge is written for the larger 4mm hook and lists 10cm as being 13 stitches by 5 rows (in triple/treble crochet). Note: the designer lists all measurements in metric so that’s how I’ll be doing it here too, in order to avoid a miscalculation on my part and/or confusion if I forget to translate something.
My original swatch was spot-on, and now that my finished top has been worn and washed once, it measures up as 13 stitches by about 6 rows. This means the rows in my top ended up shrinking up a little bit or it’s just laying a little different today. It’s also possible that the drape is going to be a little different in a full garment versus a small swatch.
For the full measurements of the top, I did customize my own fit a little bit. I made the Medium size, although I usually choose Small. I wanted it to have extra room as my little one and I grow (but then I added an extra month of growth unintentionally…) so I chose one size up from my usual.
I’ll try to just give the relevant fit information here as this designer is so thorough (which I love!) that they give a ton of information on sizing. The Medium is meant to measure about 26cm at the neckline (across the opening) and mine is 24cm. The bust circumference given is 109 cm and laying flat mine is 48cm which would work out to about 96cm circumference. And the full length shoulder to the bottom ribbing edge is listed as 46cm while mine measures about 43.
All of these being within just a few centimeters of the intended measurements means I was right on track. Such a small variation can be up to laying flat versus hanging up, or if I lightly tugged on it in one direction as I measured. If I were off by a lot I would look into it, but even the larger difference in my bust size could be due to the fact that I washed/dried it and haven’t worn it again afterwards (which would relax the stitching a little bit).
Pattern Notes:
There’s so much to say about this pattern and all of it is glowing praise. I’ll try my best to keep it as non-rambling as I can but I make no promises.
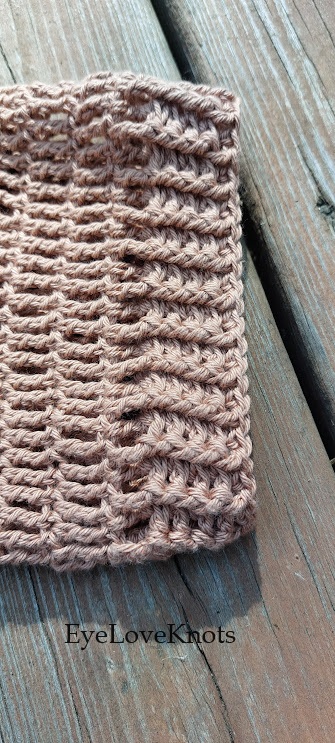
First of all, this is a very simple pattern to follow and to stitch up. Note that I said “simple”, not that it’s super easy or perfect for a Day-1 beginner. But if you’re comfortable with working up stitches in a yoke and you can count (and count and count again to make sure), the stitch itself is very basic and it’s written in a straightforward manner. There’s not any complicated shaping or fancy textures on this, the designer lets the simple stitch provide a gorgeous comfy fit and gives the yarn the chance to show off.
As I mentioned before, there’s a lot of information given which allows you to pick your perfect fit! And with a relatively simple construction, I feel this pattern allows for a good level of customization. You can work extra rows for a longer top, or leave some off for a crop fit. I chose to work up half-sleeves that ended about at my elbows, because while I adored how the full-length looked in the pictures I work with a lot of machinery and didn’t want to risk the gorgeous stitching getting caught on anything, or having to roll the sleeves up constantly and stretching them out. Shorter sleeves just solved all my problems in one go.
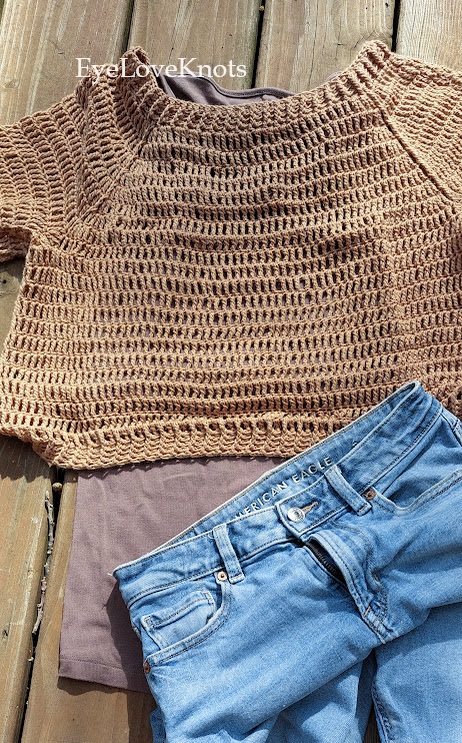
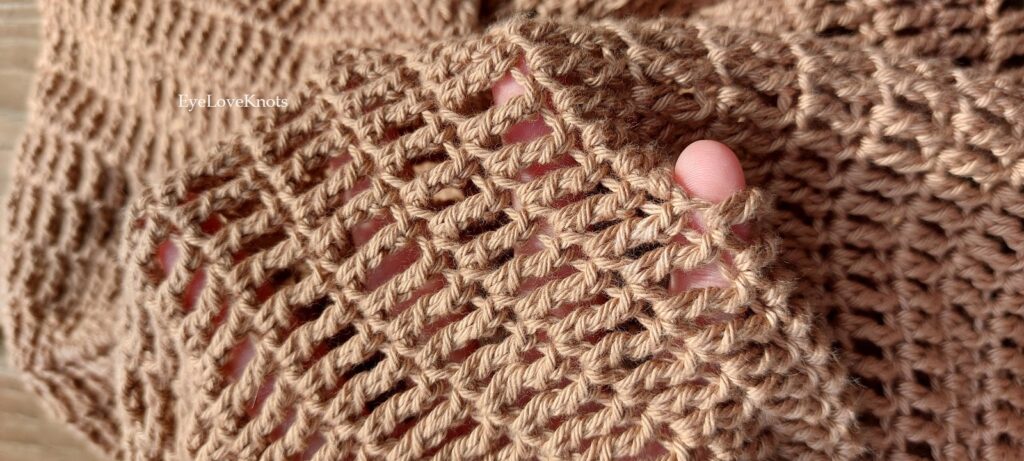
The open and tall stitching means you can layer this with so many beautiful options! You can see in my flat lay that I found a coordinating tank top to wear underneath this one. I couldn’t find an exact match but I think it looks really cute with a related-but-different color underneath. If you have a few basic tanks in shades like white, black, and maybe one neutral then you should be all set with any color of yarn you want for this piece! Or you could use the base layer to add extra color and reverse things–a hot pink tank under a white or black top! Of course there’s a hundred other options and I want to try them all.
Just in case anything is phrased poorly in my review here, I do not at all blame the pattern for it not fitting me anymore by the time I wrote this review. It’s absolutely my fault as this is not meant to be a maternity top. It’s loose and flowy, yes, but it’s not supposed to stretch an extra ten inches around your stomach area and I did not expect it to! Because it’s not a super long top, I just feel it looks a little silly on me right now as it sort of sits on top of my belly. But a few weeks ago when I wore it (in the outfit you see in these pics but with maternity jeans instead), it was adorable and got a lot of compliments. People asked where I had bought it, and were surprised it was handmade!
This top is also very comfortable. It’s so lightweight in the cotton yarn, and any cotton blend would be comfortable as well. The open stitching lets you feel the breeze while it does still act as a slight layer for coverage. The ribbing makes a cute visual pop at each edge and also holds the shape of the sweater, keeping it from stretching out at the sleeves or the neckline. And this stitch has a fun sensory texture that I enjoyed running my fingers across while wearing the top (that’s not too weird to do at your desk at work, right?)
I wholeheartedly recommend this pattern. Yes, it’s called a “summer” sweater but if you live in a warmer area this would still be perfect in fall! And if you start on one (or three) of them now you can have a beautiful wardrobe of light sweaters by the time next spring comes around. I love that I made my first one in this beautiful neutral but I think I’m going to go for a brighter shade next time. Something in the red or berry category sounds nice.
I hope you enjoyed my thoughts on this pattern and I would love to know your thoughts! Have you made anything like this, and do you enjoy loose open stitches like this sort of project? Do you prefer your garments snug or loose and flowy? Anything you want to share!
Don’t forget to visit with me on Instagram @astitchshyofnormal for all kinds of awesome crochet makes and inspiration.
Join one of our awesome Facebook groups to share your creations, and see what others are up to!
– Yarn Crafts & Coffee Community
– DIY Home On Rockwood Lane
– Alexandra Lane Lifestyle
Linked Up To…
So cute, and very versatile!