This is a free crochet pattern for how to crochet a Basic 12″ Wreath Form Cover that is beginner friendly, and so easy to customize!
This post contains affiliate links. If you make a purchase by clicking on them, I make a small commission at no extra cost to you. I only recommend products I love and hope you’ll love them too! Click here to find out about the different affiliate programs I am apart of. This post also contains shop links to my yarn shop and craft store, Yarn Crafts & Coffee. You can shop online or in person in Melbourne, Florida.
Find the free crochet pattern instructions below, or purchase a printer-friendly, ad-free PDF on Ravelry by clicking here.
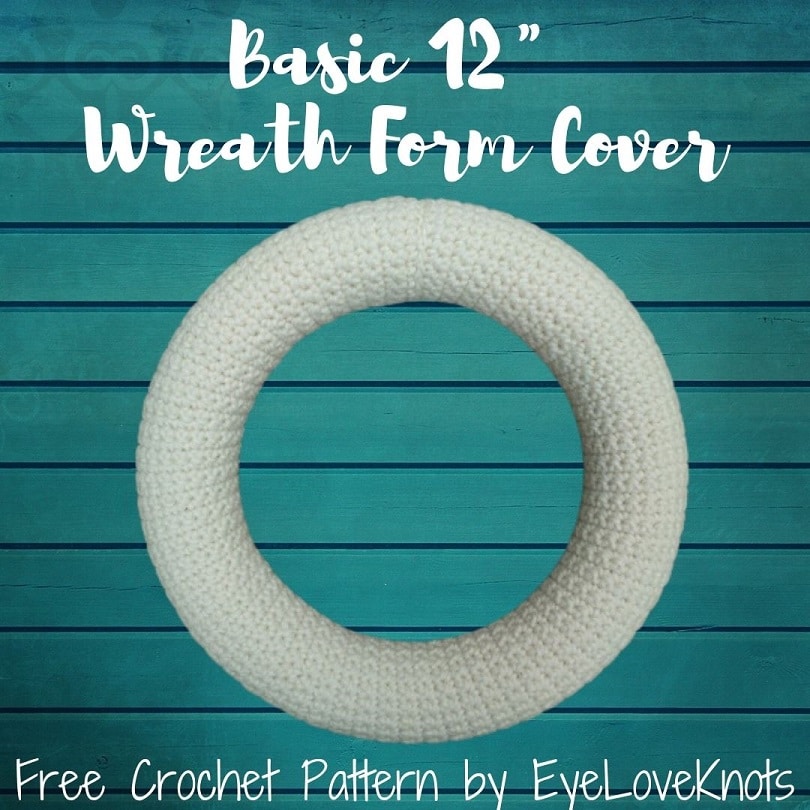
My mom goes to a friend’s house for Halloween every year, and each year, I make her a different home decor piece to take over as a gift. This year, she asked for a Halloween themed wreath, but because it was on Halloween, we went with a Fall Wreath instead. Here is the base so you can make your own wreath for whichever holiday or season.
Behind the Scenes… Working away at one of my offices – my local Wawa. Hehe. In case you were wondering what the background is in the photos below.
AD-FREE, PRINTER FRIENDLY PDF:
If you would like a PDF version of this post, you may get one through either my EyeLoveKnots Etsy, LoveCrafts or Ravelry Shops for a small fee. This fee is to compensate for the views lost when you no longer need to return to the blog to for the information, as you will have your own copy. Plus! It helps fund supplies for new projects to share with you!
Shop EyeLoveKnots Etsy: Basic 12″ Wreath Form Cover.
Shop EyeLoveKnots LoveCrochet: Basic 12″ Wreath Form Cover.
Share your version of this project on Ravelry – Basic 12″ Wreath Form Cover.
Save this to Your Favorites on AllFreeCrochet – submitted 03.26.20
See How to Make This Cover on YouTube!
Materials:
- 203 Yards Total of Worsted Weight Yarn
- H8/5mm Crochet Hook
- Tapestry Needle
- Tape Measure (Gauge is essential)
- Scissors
- Optional, Stitch Markers
- Optional, Jewelry Pliers
- 12″ Foam Wreath Base
Yarn Talk:
I used Red Heart’s Super Saver in Aran 192 Yards for the cover and 11 Yards for the hanger.
My favorite yarns for crocheting a wreath are going to be 100% acrylic yarns, but specifically, I like Premier Yarns Basix Worsted, Lion Brand Pound of Love and Red Heart Super Saver. These yarns hold up well to wear and tear, and while they will fade over time, I feel that these yarns hold their color the best over other yarns I’ve tried, as well as the shaping of embellishments. If the wreath will be inside only, you could go with cotton blends and embellishments, but for outdoor wreaths, cottons fade quickly and begin to fall apart.
Premier Yarns Basix is a sturdy worsted weight acrylic yarn that is perfect for practically any yarn project you could dream of! It’s similar to Red Heart Super Saver and Bernat Super Value, but a little softer. It’s also machine washable and dryable making projects easy to care for. As of July 4th, 2026, it is available in an amazing number of colors – 93 solid colors – as well as 10 tweed colorways and 14 ombre colorways and in Lightweight, Chunky Weight and Super Bulky Weight.
Lion Brand Pound of Love Yarn is a soft, acrylic yarn that comes in a one pound ball. One pound means you won’t need many skeins to get projects done and even after big projects, like baby blankets, you’ll usually have some yarn leftover for smaller projects. It’s machine washable and dryable making projects easy to care for. As of June 5th, it is available in a 35 colors.
Tools & Notions:
We have lots of great crochet hooks in our Yarn Crafts and Coffee Yarn Shop. The most popular, and preferred by Candace and Emily, are the Clover Amour Crochet Hooks with the soft handles and smooth metal hook. Alexandra prefers metal crochet hooks with large, ergonomic clay handles and just loves the fun designs from SiennasBowtique and BronzeShepherdStudio! If your preference is wood, the LYKKE brand are lovely, smooth and sturdy.
Tapestry Needles with the blunt, round end are essential for sewing and finishing on a number of yarn crafts, including crocheting, knitting as well as needlepointing on fabric and plastic canvas. The blunt, rounded end allows the needle to pass easily through the fabric created by yarn and holes on canvas without snagging (or getting your fingers) in the process. More specifically for crocheting and knitting, a Bent Tip Tapestry Needle makes weaving, grafting and sewing so much easier on the hands. The long oval eye makes threading strands of yarn easier, though you may still want to use a needle threader.
A tape measure is an essential tool in a multitude of crafts, including crocheting, knitting and needlepoint to name a few, especially if you are cutting material to finish a project or trying to meet gauge.
Scissors are an essential tool. When I’m working on the go, I like to carry a pair of folding scissors as they fit perfectly in even the tiniest of bags. When I am working at home or have more space in my bag for a larger notions pouch, I like to use a pair of lightweight, all-purpose scissors as they are so versatile and great for a variety of things from cutting plastic canvas mesh to trimming yarn ends after weaving in to cutting out a care card to include with a handmade gift.
Stitch Markers are really helpful to use when it comes to marking the first stitch of the round so you can easily find it when it comes time to join, especially when working in a continuous round, as well as marking where to add increases in making top down garments or where change the stitch pattern within a pattern, which is more common in knitting, but they’re also really helpful when it comes to holding the layers of your fabric together, such as what you would use sewing pins for with fabric, so you can try garments and accessories on as you go or to keep all the rows and stitches lined up when you are ready to seam. You’ll find there are a variety of Stitch Markers available depending on what you’ll use them for, but plastic Locking Stitch Markers are among the most popular as they come in kits and are the cheaper option to grab off the shelf at the craft store, but my favorite are Lever Back Stitch Markers. Scrap yarn, paper clips and safety pins work too!
Jewelry Pliers are an excellent tool to use to help weave in the ends of tough yarns, such as cotton yarns and chunkier yarns, that can be quite tough on the fingers when weaving in with just fingers and a tapestry needle. Sore thumbs and frustration can be a thing of the past by simply using jewelry pliers to help pull the tapestry needle through the work. Make sure the eye of the needle is facing up so you can see directly down it and carefully pull, wiggling as needed. If it gets caught and you tug too hard, it will break the eye of your needle.
Foam wreath form bases come in green and white. It does not particularly matter which color you use for a crocheted wreath that is made of a solid fabric. Even as it stretches, the fabric is typically still solid enough that you don’t see your stitches through, but this is not always true so you will definitely want to test it before whipstitching closed. Personally, I always try to match light colored yarns with a white base, and darker colored yarns with a green base just so I don’t have to worry about it.
If you don’t have a foam wreath base, you could use a straw wreath or a pool noodle with the two ends attached together with a strong tape. These tend to be thicker so you may need to add stitches to the beginning chain to get a wider fabric. While I have not tested wire wreath forms, I think they would work about the same, but may be thinner around and require less stitches.
Time Spent:
I had my form cover ready in just over two hours.
Measurements:
This cover will fit a 12″ foam wreath form.
Before seaming, your fabric should measure anywhere from 5 1/2″ wide to 6 1/8″ wide by about 30 7/8″ in length.
Gauge:
20 SC by 14 Rows = 6 1/8″ wide by 3 7/8″ tall
The most important thing is to measure the width of your fabric after at least 8 rows – this will be the finished width, and you’ll want that to be 5 1/2″ to 5 3/4″ wide, though it does work all the way up to 6 1/8″ with a little looser of a fit. Anything less or more, I recommend going up or down a hook size or adding or taking away stitches in any multiple.
Abbreviations (US Term):
- SC – Single Crochet (Photo Tutorial)
Pattern:
Chain 21. SC into the 2nd chain from the hook. (20 SC)
R2 – 130: Chain 1, turn. SC into the 1st SC, and each SC across. (20 SC)
Finishing: Cut a long tail (I cut 60″ worth) for sewing.
Weave in beginning tail, then re-thread needle with ending tail.
Optional Wreath Hanger:
Chain 43. SC into the 2nd chain, and each chain across. (42 SC)
R2: Chain 1, turn. SC into the 1st 4 SCs, chain 4, skip the next 4 SC, SC into the next 26 SC, chain 4, skip the next 4 SC, SC into the last 4 SC. (34 SC)
R3: Chain 1, turn. SC into the 1st 4 SCs, work 4 SC into the chain space, SC into the next 26 SC, work 4 SC into the next chain space, SC into the last 4 SC. (42 SC)
R4: Chain 1, turn. SC into the 1st SC, and each across. (42 SC)
Border: Chain 1, but don’t turn. SC into the side of Row 3 (this is the same stitch as the last), and into the side of Row 2, and then Row 1, work 3 SC into the next stitch – corner, working into the opposite side of the foundation chain, SC into the next 40 stitches, work 3 SC into the next stitch – corner, SC 3 into the next side, work 3 SC into the next stitch – corner, SC across into the next 40 stitches, work 3 SC into the next stitch – corner. Join to the first SC. (92 SC)
Assembly:
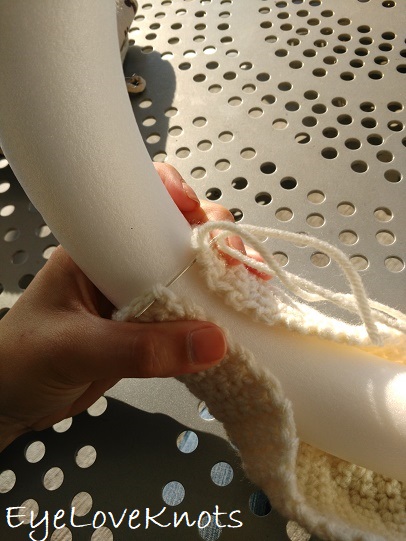
Wrap the piece around the form…
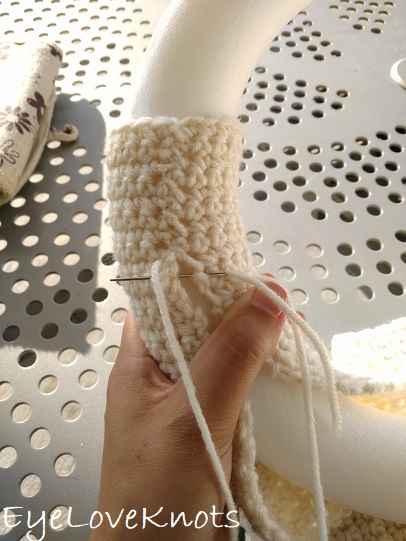
…line up the stitches, and sew the two layers together.
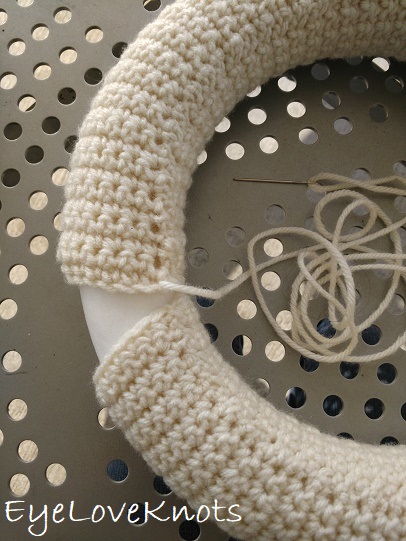
Once towards the end, it will look like it isn’t long enough to connect, but it will with a little stretching.
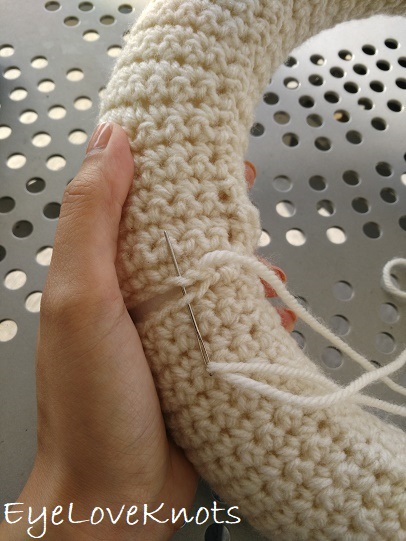
Finish sewing the sides together, then sew the beginning foundation chain stitches to the stitches from the final row.
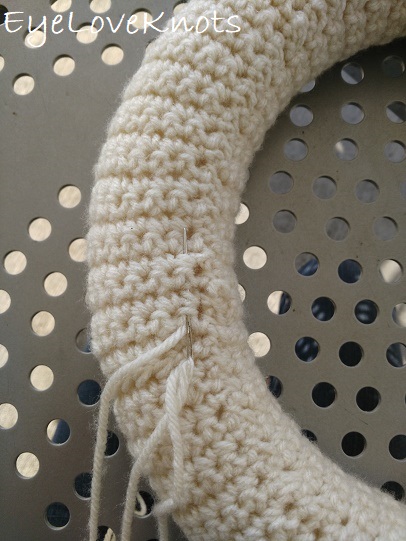
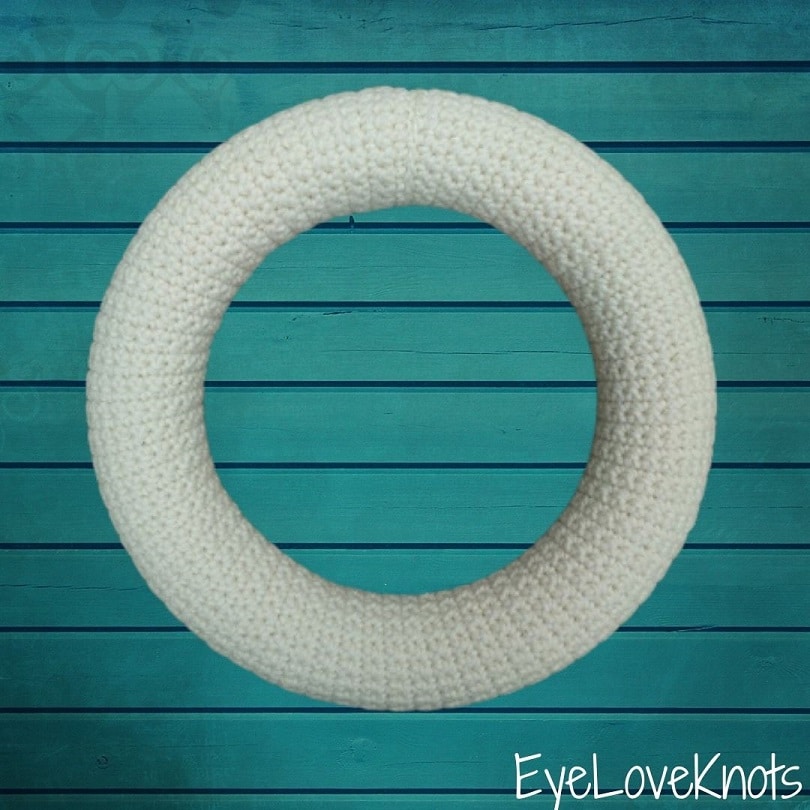
Weave in your tail, and your wreath form cover is complete!
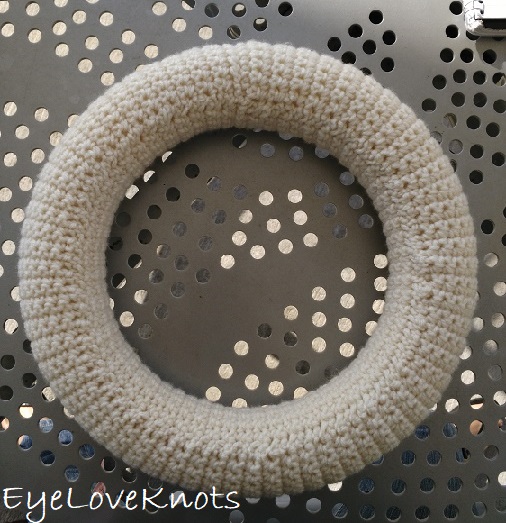
This is what the back of it looks like. You will see that the seam falls to the back. If it doesn’t, just twist your piece a little to make it so.
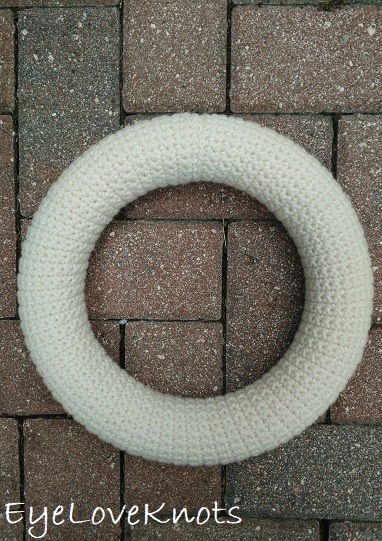
What kind of wreath will you make with yours?
Please feel free to make and sell your own Wreaths made using this Basic 12″ Wreath Form Cover, but please DO NOT claim this pattern as your own nor should you sell my pattern, and DO NOT re-publish my photos as your own. DO NOT copy and paste my pattern anywhere, link to it instead.
Join one of our awesome Facebook groups to share your creations, and see what others are up to!
– EyeLoveKnots Crochet & DIY Community
– DIY Home On Rockwood Lane
– Alexandra Lane Lifestyle
Ooh, that's pretty. I can't wait to see what you did for the fall wreath. This base wreath is really nice though. I can see all kinds of possibilities for it! Thanks for sharing 🙂
That is really great! I would never have thought of doing a wreath. thank you for the pattern!
Thanks! Enjoy 🙂
Ciao la ghirlanda è bellissima ma non so come mai mi sono rimaste 2/3 pieghe…potresti dirmi com’è possibile?grazie
Hi Lory, my translator did not work very well so I don’t fully understand the question, I apologize! It is translating “2/3 folds” and I’m not sure what that means.
How long in inches is the completed piece before it is stitched onto the wreath? I’m worried I’ll lose count of the rows so then I could just measure the length at the end.
I don’t have the measurements written down, but you could use the gauge as a guide. I might also suggest some stitch markers.
Thanks for the reply! I figured it out to be approx 37″, just in case anyone else has the same question.
Hi. I love this wreath. I made the optional wreath hanger. Once I loop it around the wreath does it only get sewn together at the ends, or along the sides as well? Thank you.
So glad you like it! I don’t seam the hanger. I just loop it around and pop it right onto my door hanger. I re-use the same color crocheted hangers for a few of my wreaths so I just change the wreath out.
I cannot find a 12″ wreath form. I can only find slightly larger or smaller. I assume I could still use the pattern but make less rows?
Yes, absolutely! The yarn has some stretch to it so I’d recommend making it around 1.5″ shorter than needed, and as you sew it closed over the wreath form, you will be able to stretch it to close up the tube.
Very easy directions. Thank you.
So happy to hear that! Very welcome 🙂
Thank you so much for the pattern, Alexandra. Seasons Greetings to you and yours from me and mine. See you sometime in 2023……xx
And to you! So glad you like this pattern ☺️