I have been drooling over plastic canvas patterns on e-Pattern’s Central and Annie’s Catalog for some time now. It has been a couple years since I last worked on any plastic canvas stuff, kind of sad being that it was my first love.
This past Thursday, I decided enough pinning of patterns on my wish list, it was high time I bought one (or three!)
*Side note: Please visit my pin boards! I have tons of crochet and plastic canvas patterns bookmarked throughout – mostly in my seasons and holiday boards (Summer Time, Fall, Halloween, Turkey Day, etc.)
If you have any recommendations as to which to start on, I would greatly appreciate a comment down below! I have some many pinned and bookmarked, sometimes it’s hard to pick one to start on!
If you are interested in purchasing any finished items, feel free to email me and I will send you over an estimate.
On to the review! P.S. This is my first plastic canvas post. I have done the best I can to describe the supplies chosen, adjustments and methods without giving a full tutorial being that this is not an original pattern of mine AND it is a paid pattern. Feel free to comment below if you have any questions.
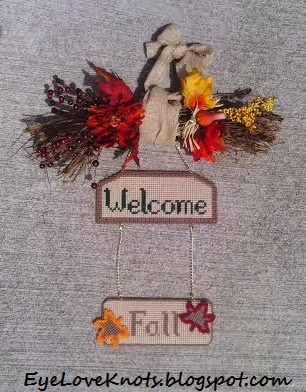
One of the patterns purchased from e-Pattern’s Central was the Seasonal Welcome Sign, designed by Terry Ricioli. I bought it because I was looking for fall items to make (since it’s about a month away!) but after downloading it, I
realized it has signs for all the seasons and is made to be interchangeable with the use of S hooks and jump rings. How awesome – especially since I was planning on giving the first made as a gift to the HR director at my job.
This review will only be for the welcome sign and fall part. I will update with links to posts on the other signs at a later date.
Supplies I Used – Find notes listed below, I just didn’t want to clutter the supplies list:
– #18 Tapestry Needle (Joann’s)
– Red Heart Super Saver Yarn in Cafe Latte, Burgundy, Hunter Green, Pumpkin, and a Beige color which could either be Linen or Buff (I lost the sleeve it came in so I’m not sure!)
– 1 Sheet of Plastic Canvas 7 Count 12″ x 18″ in Clear (Joann’s)
– 1 Sheet of Plastic Canvas 7 Count 10.5″ x 13.5″ in Yellow (Joann’s)
– Jump Rings: 7mm 19 Gauge Gold Tone Heavy (Etsy – by Canterbury Lanes)
– Chain: Blue Moon Beads Chain 72″ Metal Curb Gold (Joann’s)
– Clasps: 14mm Swivel Lobster Clasp, Gold (Joann’s)
– Round Nose Pliers
– Hot Glue Gun and Glue Sticks
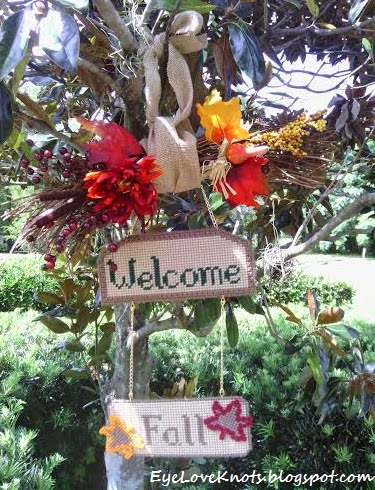
– Swag: Visit my Fall Grapevine Swag for the Fall Welcome Sign post.
Notes on Supplies:
Tapestry Needles: The ones I like to use are made by DMC, but I couldn’t find a link on Joann’s site. Something similar to what I buy is this 6 pack Tapestry Hand Needles Sizes 18-22 that Dritz has.
You will find that the #18 and #20 will work great for plastic canvas (and sewing in ends in crocheted pieces). The #22 is a little more pointed at the end so it is more likely to snag, and the hole is also smaller so threading it is more difficult. I find it’s better for cross stitching.
Red Heart Super Saver: I like to use Red Heart Super Saver yarn for plastic canvas projects because it is sturdier than softer yarns. Bernat Super Value and Caron One Pound yarns are also good to use.
Plastic Canvas: You also can probably get away with using the Stiff Plastic Canvas and some felt on the back if you didn’t want to use the colored plastic canvas. The softer plastic canvas sheets tend to curl without the support of for example the colored canvas.
Jump Rings: The pattern calls for a different size but these are what I had on hand. I like these because they are professional grade and are extra strong so I won’t have to worry about anything slipping through.
Chain: I went in to my local Joann store and looked at the different chains available. I picked this one up because it was lightweight (and pretty – hehe). Once I started separately my pieces for the assembly, I noticed that the links are nice and strong. I will be purchasing this one again!
Clasps: The pattern does not use any clasps. I decided I wanted all of my pieces to be removal so the seasonal sign and swag could be changed out.
Time Spent:
I spent about three and a half hours on the Welcome sign, three hours 15 minutes on the Fall sign and an hour and a half on two leaves (I left off the one on the Welcome Sign) plus 30 minutes to assemble everything including the swag.
Measurements:
My measurements include the grapevine swag, welcome sign, chain and fall sign. Altogether, it measures approximately 19.25″ long from the top of the swag down to the bottom of the fall sign. The swag is 18″ across, Welcome Sign is 9″ across and Fall Sign is about 8.5″ across.
Pattern Notes:
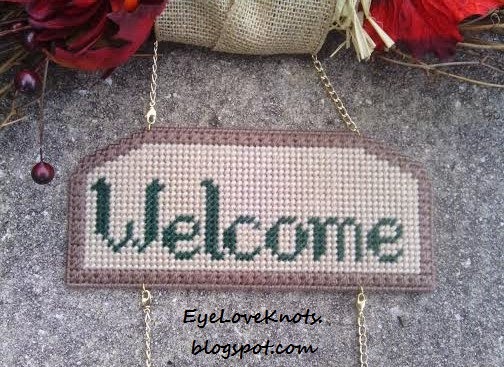
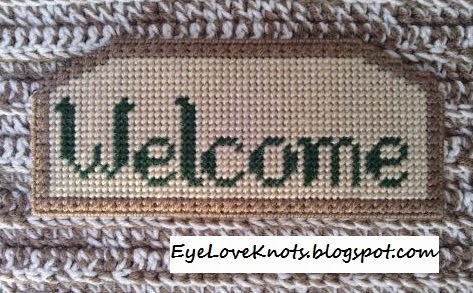 Welcome Sign: My notes for the welcome sign are limited to how I did the border. There are basic techniques when it comes to cross stitching, but I tend to do whatever works while I’m doing it. Find below pictures of my way of doing the border.
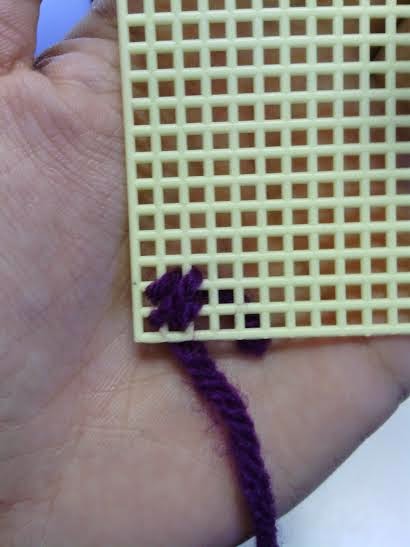 |
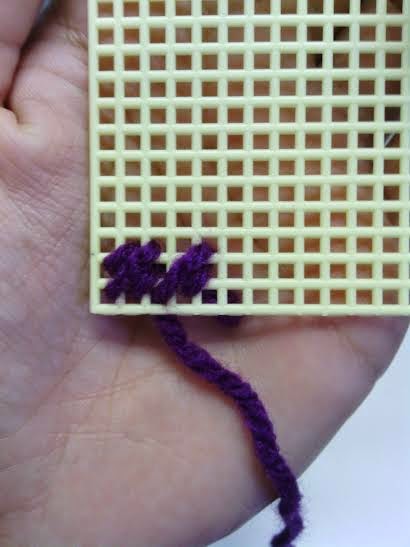
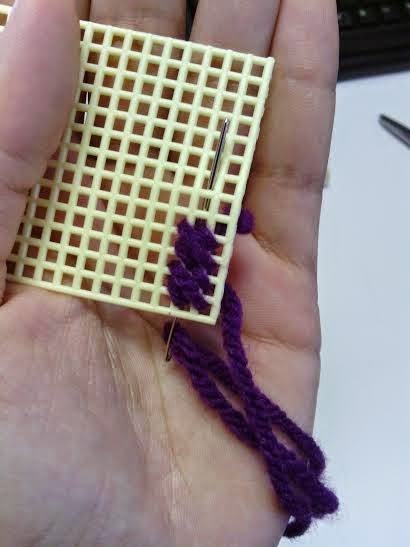
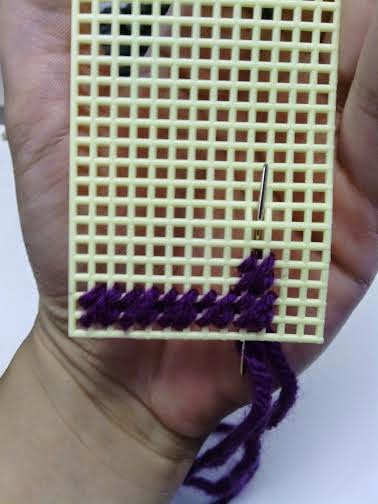
| Complete First Square. I did mine from top to bottom. |
 |
| You will end on the bottom hole of the bottom stitch, insert hook into top hole of next stitch. |
 |
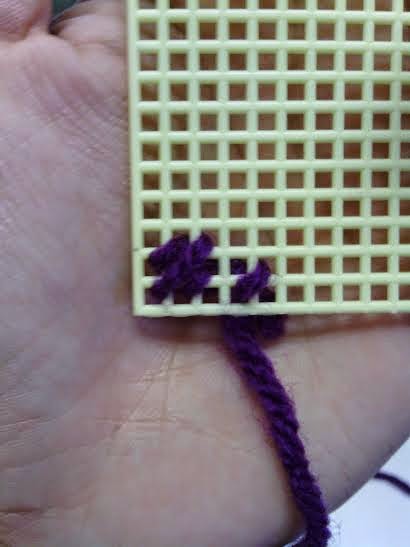
| Complete second, longer stitch of the second square. |
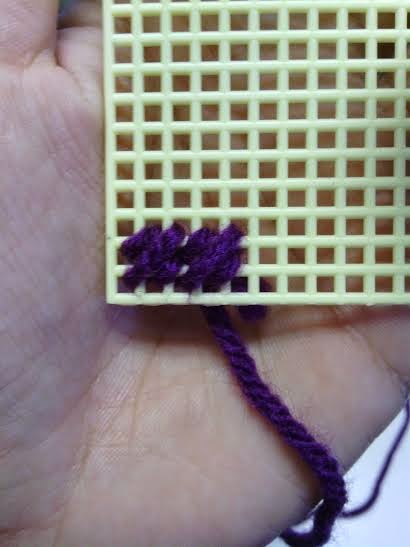 |
| Two completed squares. |
 |
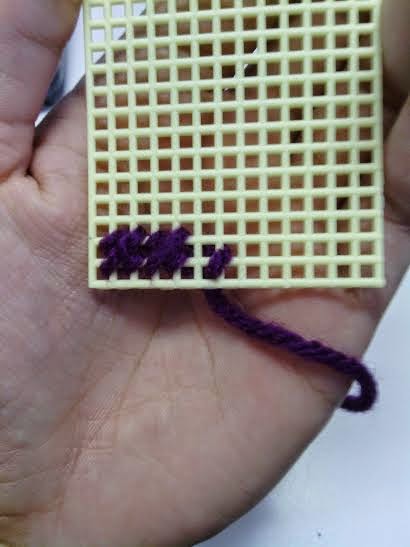
| Determine where the farthest left stitch for the next square will be. |
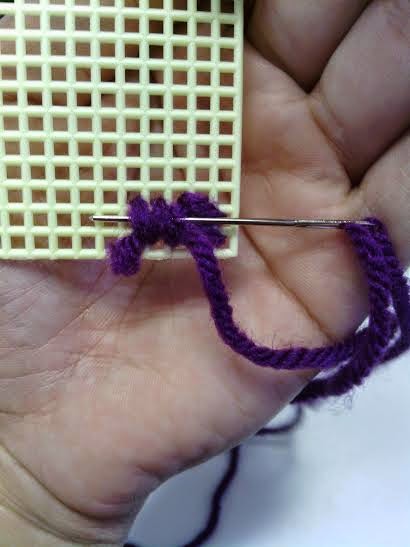 |
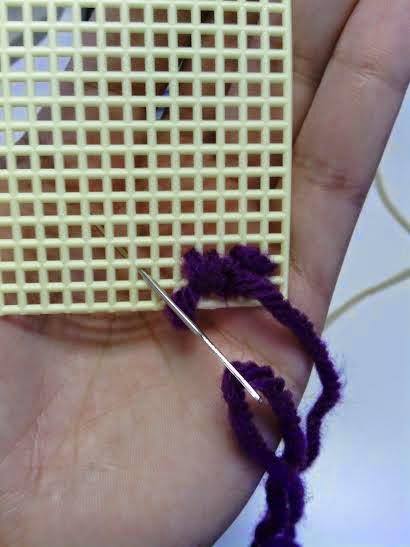
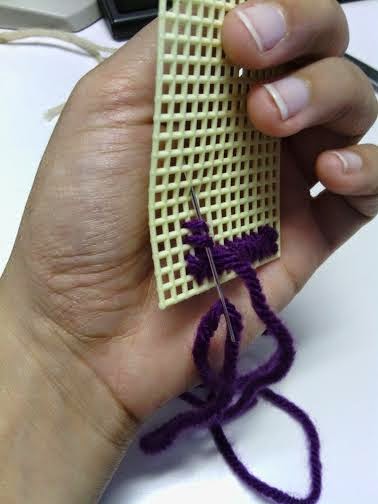
| With the wrong side facing you, insert your needle underneath both loops of the second square. |
 |
| You can then insert your needle from the wrong side into the necessary hole and pull through. |
 |
| Finish the first stitch of the third square, and all stitches through to the end. |
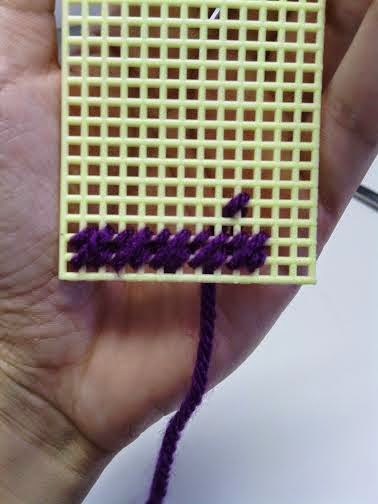 |
| From the corner, you will end on the top stitch so you won’t need to run your yarn underneath any loops. Just find where the top stitch will be placed and work it. |
 |
| Complete your second, longer stitch of this square. |
 |
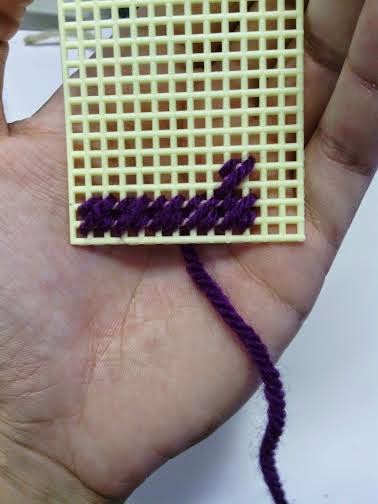
| Determine where you next stitch will need to be placed. |
 |
| Run your needle underneath both loops and through the necessary hole to complete your next stitch. Continue using this method around. |
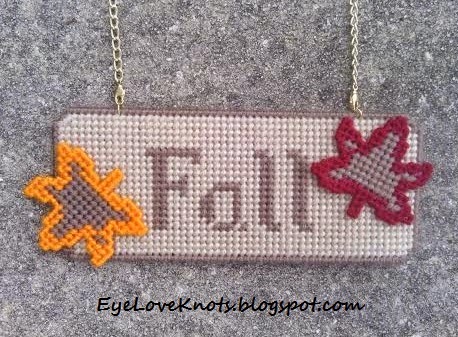
Fall Sign:
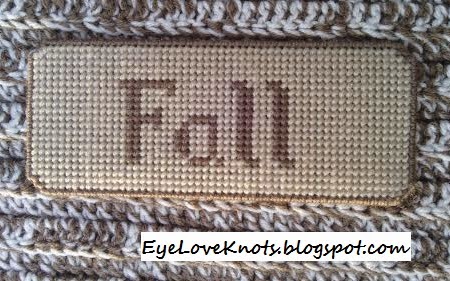
I added one hole to the width of my fall sign so it would be an even number – That way, it will hang evenly on both sides underneath the Welcome sign.
F – First, I worked the top left corner and left side, then I went to the right top side and worked over my tail down 5 stitches. Then I completed the middle piece top stitch, followed by the bottom stitch and up center line. I then finished the remaining stitches.
A – First, I did the 3 stitches on the farthest left side. Then, I went to the top right corner and worked over my tail all the way down, worked the farthest right corner piece and then up the right side.
L – I pulled my tail over and began the L at the farthest left top corner. Then I worked over my tail all the way down.

I ran out of beige yarn on the last row and forgot to go back and fill it in until I started whipstitching my two canvas sheets together. Make sure you do not leave any spaces unworked that should be worked! After you whipstitch both sheets together, you will no longer be able to go back and fix any mistakes – unless you take the whole thing apart!
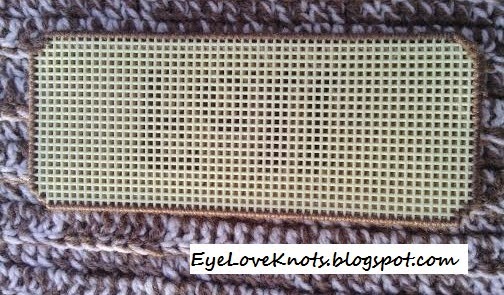 |
| Back of Fall Sign. |
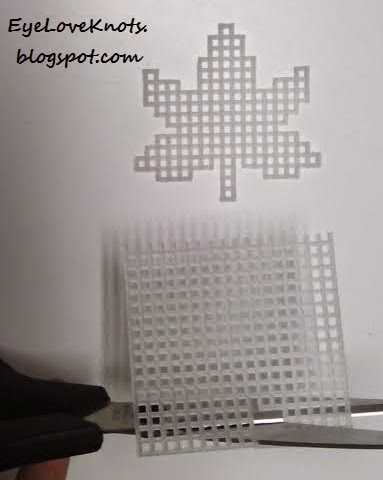
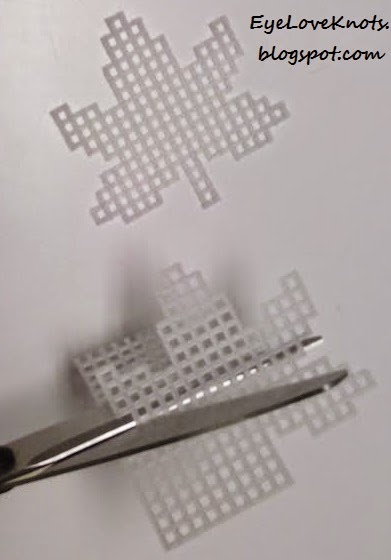
Leaves: I find the easiest way to cut the leaves out is to cut the first one using the pattern, then use the one you cut out to cut the rest. It’s much easier to turn it if you need to see if from a different angle or to use it as a template for beginning your cut.
Assembly:
I feel that the assembly is probably best described in photos. Find them below.
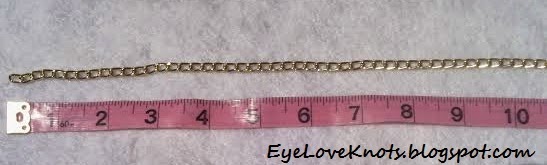 |
| First things first, you will need to measure out your chain. You should be cutting the length for the top of the Welcome Sign as well as two pieces for the connection between the Welcome Sign and Fall Sign (unless you choice to use the S hooks as suggested on the pattern). |
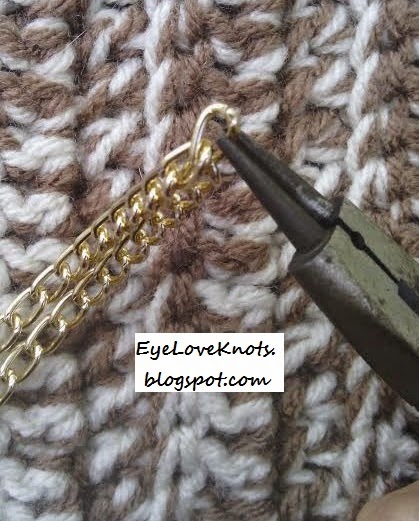 |
| Once you measure, grab your pliers and hold the link just to the right of your measurement. I like to grab another set of pliers to hold the other side of the link but sometimes you can make due with your finger. You will want to open the link and pull off your chain. You can also use wire cutters to cut the link but being that these chain links were so large, it made it very easy to just open the links as if they were jump rings. |
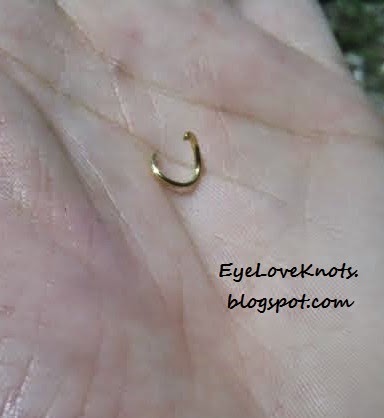 |
| Next, you will want to open your jump rings. Because they are going into holes on the plastic canvas where they will be surrounded by double thickness in canvas plus yarn, you will want to open them up MORE than usual – otherwise, they won’t fit. |
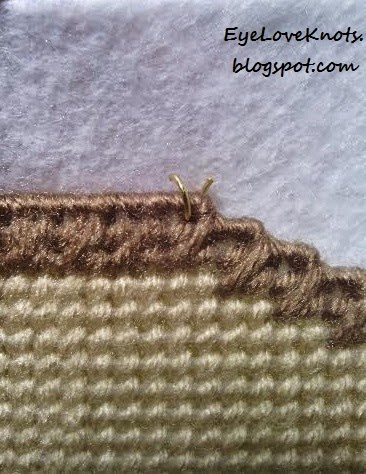 |
| I found that putting the jump ring into the hole was best done with my fingers, rather than the pliers. |
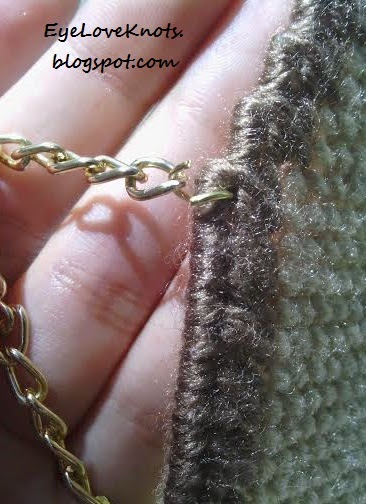 |
| Before closing up your jump ring, slip your chain link onto it. |
 |
| On the left side, I opened up the last chain link just like I would a jump ring and attached a lobster clasp to it so I can easily remove one side of the chain for sliding on or off different decorative top pieces. If you want to hang it as is, you can just attach the link to the jump ring as done on the right side. |
 |
| If you want to stop here, you will have a completed Welcome Sign that is sure to make any guest feel Welcome. It’s cute and little with a sweet, simple message. Or… |
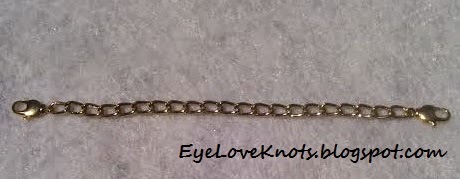 |
| For my center connection point, I opted not to use the S hooks. Instead, I cut two pieces of chain 4.5″ long. I then opened each end chain link as if it were a jump ring and attached two lobster clasps – to make it easy to remove and change out the Fall sign. Make sure your chain isn’t twisted when you attach the lobster clasps and that your clasps go on the same way each time – otherwise, your clasps will open up in different directions. |
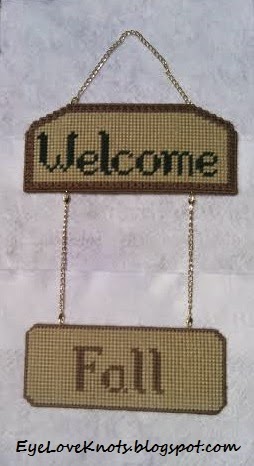 |
| Now you have the basis of your Welcome Fall sign! Don’t forget to add your complete leaves to your Fall sign (like I did – oops!) |
Linked Up To…
Wonderful Wednesday Blog Hop #5 – A Mother’s Shadow
10 Simple DIY Projects, I’m Lovin It – Tidy Mom
Kitchen Fun and Craft Friday #28 – Kitchen Fun with My 3 Sons
August Share Time Week 5 – Raising Memories
Creative Collection Link Party #14 – Blooming Homestead / The Cards We Drew
Best DIY Projects and Recipes #19 – The 36th Avenue
Serenity Saturday #148 – Serenity You
Craft Schooling Sunday – Creative Jewish Mom
Easy Weeknight Dinner Ideas, Inspiration Monday – Scattered Thoughts of a Crafty Mom
Grateful Heart Linky Party – It’s Overflowing
Think Pink Sunday No. 180 – Flamingo Toes
The Sunday Showcase No. 257 – By Stephanie Lynn
What a great cross stitch project! I love the addition of "Fall" and the leaves, so pretty. Thanks for sharing!
Thanks for taking the time to look and comment 🙂 Acknowledgment of the hard work is a wonderful feeling!
Very nice stitching and tutorial! I'm glad to see this pattern revived. It was always one of my favorites!
I am honored to have you stop by and leave such a nice comment. It was a fun project to work and I'm looking forward to working the other holiday signs and make matching swags. Thank you for stopping by!