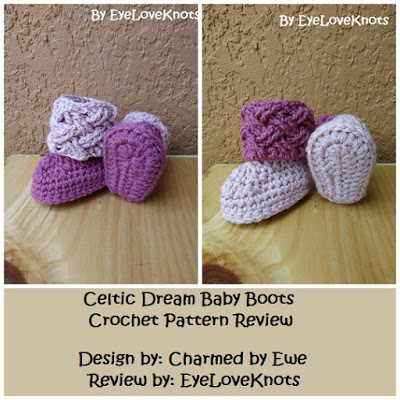
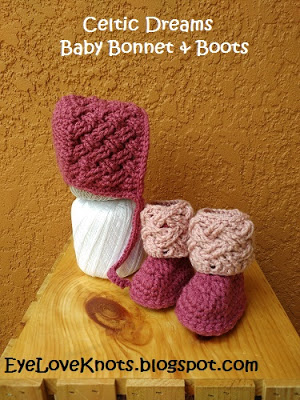
I only just started working again, and since I’ve been low on funds, I’ve decided to finish items in my WIPs bin, and pull out patterns I’ve purchased in the past and use up stash yarn. Last year, Charmed by Ewe had an eBook special on Ravelry that I purchased, and that’s where I found these little Celtic Dream Baby Boots so I worked up two pairs, and the matching Bonnets.
Materials:
– About half 7 oz skein of Worsted Weight Used – I used Hobby Lobby’s I Love This Yarn in Dark Raspberry and Rosy Cheeks
– 4.5mm Crochet Hook (for Boot – smaller than recommended)
– I9/5.5mm Crochet Hook (for Cuff)
– Tapestry Needle
– Celtic Dream Baby Boots – Was available for free on Charmed by Ewe blog, and for purchase through Ravelry but has since changed copyright and not available at this moment. Link here is to Ravelry page where update will be hopefully.
Material Notes:
Yarn Alternatives: Deborah Norville’s Everyday Soft, Lion Brand’s Vanna’s Choice, Red Heart’s With Love
Time Spent:
I had my pair of boot slippers ready in just under two hours.
Measurements:
Pattern contains instructions for 0-3 month, 3-6 month, 6-9 months and 6-12 month sizes. I worked up the 0-3 month size which measures 3.75″ in length.
Gauge:
With 7/4.5mm Hook: 12 SC by 14 Rows = 4″
Pattern Notes:
I cannot stress enough to make sure you check your gauge. I have met the gauge spot on with other Charmed by Ewe patterns and almost didn’t bother checking my gauge on this project and had I continued, I would have been sorry after putting in all the time because to meet the gauge I had to drop down two hook sizes.
Like other Charmed by Ewe patterns, this one is written very well with clear and easy to follow notes and instructions, and contains photos showing how to work an invisible join, how to join the layers of the soles, and how to attach the
Celtic Weave cuff overlay. It also includes a link for suggested non-slip product – a product I plan on ordering and testing out because I am curious.
In the process of joining my sole layers, at about half way, I pulled my beginning tail in between the two layers and weaved it in on the wrong side.
In the process of working the vamp, I weaved in my initial tail after working a few rounds, and when instructed to cut one strand, I weaved that one in immediately after working the next two stitches. Waiting til the end could result in a more difficult time trying to comfortably reach and work these.
Cuff is very pretty and adds a lot to finished boot, but boot alone is also a great option. It also leaves a lot of space for using different stitches to create a variety of cuff options.
To work my cuff, I used the recommended I9/5.5mm hook, and it came to measure about 3″ Wide by 2.5″ Tall. My cuff seemed pretty tight and was a little snug initially getting onto my boot so I can only imagine is worked two hook sizes down like I did the boot. Because it’s more just decoration, I am not worried about the hook change here.
I also omitted the bow around the cuff. It’s kind of hard to see the double crochet row, and is in a difficult spot to work around. I think once little foot is in the boot, the foot is secure enough.
**Take 2: In an attempt to have less weaves and work, I worked over my initial tail on the soles up until the 2nd set of 2 HDC in the next 5 stitches of the 2nd Round, making sure not to pull too much to prevent bunching. In the end, I only had to weave in 4 ends, instead of 8. Also, I located the stitch to start Round 1 of the Vamp, and attached my yarn here to work the slip stitch join of the soles. At the end, I joined to the first slip stitch, chained 1, turned, and then was on the right side and at the right spot for working Round 1 of the Vamp – Less work, less weaving, same result.
With so many size, yarn type and color options, I would love to see them! Please share your photos on my EyeLoveKnots Facebook page, or our latest Yarn Fanatic Party Link Up!
Don’t miss out on new crochet patterns, reviews, jewelry tutorials and more! Subscribe to EyeLoveKnots by using the box on the right side toolbar, or follow me via Bloglovin!
You May Also Like…


Leave a Reply